Як видалити програми в Windows 11: все, що вам потрібно знати

Як видалити програми в Windows 11: все, що вам потрібно знати

Windows 11 була загальнодоступна, і це нове оновлення для довготривалої ОС, здається, отримує чудові відгуки. Microsoft підвищила конфіденційність, безпеку додала новий інтерфейс користувача та можливість встановлювати програми Android у Windows 11. Але, як зазвичай, Windows поставляється з великою кількістю попередньо встановлених матеріалів, які не мають відношення майже до кожного користувача.

І якщо ви купили готову систему або ноутбук, то велика ймовірність, що у вашій системі встановлено додаткове рекламне програмне забезпечення, яке ви можете видалити. Ви можете легко видаляти та видаляти більшість програм у Windows простим клацанням миші, але все стає дещо складніше, коли ви потрапляєте до програм, програм Windows Store, оновлень Windows і системних програм. Не бійтеся, ви можете дотримуватись наших посібників нижче, щоб видалити всі види програм із системи Windows, незалежно від поточних налаштувань. Давайте розпочнемо.

Зміст

Як видалити програми на Windows 11 [8 способів]

Ось усі способи, якими ви можете видалити програму зі свого ПК з Windows 11. Щоб видалити системні програми , перегляньте відповідні розділи та спеціальні методи нижче після цього розділу.

Спосіб №01: Використання налаштувань

Дотримуйтесь інструкції, наведеної нижче, щоб видалити програму зі своєї системи через налаштування. Якщо ви намагаєтеся видалити програму за замовчуванням, ми рекомендуємо змінити її заздалегідь, щоб параметр видалення не був для вас сірим. Якщо ви не знаєте про зміну програми за замовчуванням у Windows 11, ви можете дотримуватись інструкції нижче. 

Крок 1. Спершу змінити програму за замовчуванням? [Необов'язково]

Примітка. Заздалегідь переконайтеся, що у вашій системі встановлено програму для заміни, щоб замінити програму за замовчуванням. Наприклад, якщо ви змінюєте свій браузер із Microsoft Edge, вам потрібно мати інший браузер, який ви хочете використовувати, уже встановлений у вашій системі, щоб ви могли замість цього вибрати його як браузер за замовчуванням. 

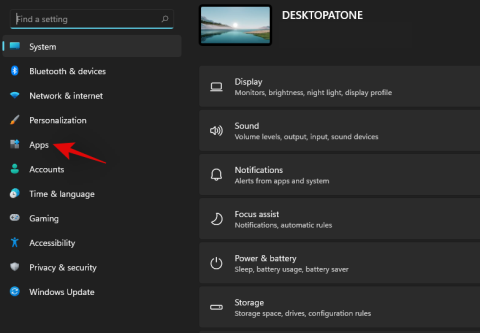
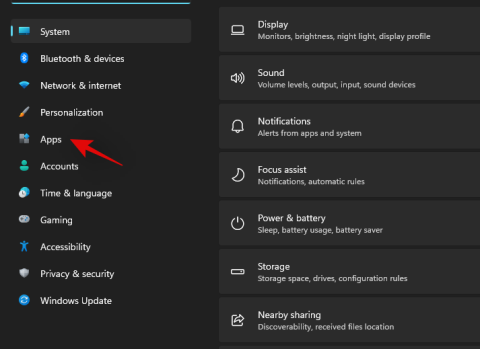
Натисніть Windows + iна клавіатурі, щоб відкрити програму Налаштування. Тепер натисніть «Програми» на лівій бічній панелі.

Як видалити програми в Windows 11: все, що вам потрібно знати 

Натисніть і виберіть "Програми за замовчуванням" праворуч. 

Тепер виберіть програму, яку ви хочете видалити, як програму за замовчуванням, і натисніть на неї. Якщо ви хочете змінити програму за замовчуванням за типом файлу, натисніть «Вибрати параметри за замовчуванням за типом файлу» внизу, як показано нижче. 

Як видалити програми в Windows 11: все, що вам потрібно знати

Тепер натисніть на потрібний тип файлу/розширення та виберіть програму на ваш вибір.

Як видалити програми в Windows 11: все, що вам потрібно знати

Повторіть крок вище для всіх необхідних типів файлів/розширень. 

Як видалити програми в Windows 11: все, що вам потрібно знати

Закрийте програму «Налаштування» та перезавантажте систему для повноцінного використання. 

І це все! Після перезавантаження системи програму за замовчуванням слід змінити. Тепер ви можете скористатися наведеним нижче посібником, щоб видалити необхідну програму через «Налаштування» у вашій системі. 

Крок 2. Видаліть програму з налаштувань

Натисніть Windows + iна клавіатурі та виберіть «Програми» зліва.

Як видалити програми в Windows 11: все, що вам потрібно знати

Тепер натисніть «Програми та функції» праворуч. 

Як видалити програми в Windows 11: все, що вам потрібно знати

Прокрутіть список і знайдіть програму, яку хочете видалити. Знайшовши, натисніть значок меню «3 крапки» праворуч. 

Як видалити програми в Windows 11: все, що вам потрібно знати

Натисніть і виберіть «Видалити».

Тепер дотримуйтесь інструкцій на екрані, щоб видалити програму. Якщо ви видаляєте попередньо встановлену програму або програму Windows Store, вона буде автоматично видалена у фоновому режимі. Однак, якщо це програма, виявлена ​​Windows, то залежно від програми Windows спробує видалити її у фоновому режимі або запустить «uninstall.exe» або «setup.msi», щоб ви могли видалити її самостійно. з потрібними налаштуваннями. Ви можете зберегти/зберегти деякі дані, коли зіткнулися з такими налаштуваннями, включаючи такі речі, як файли журналів, дані користувача, дані збереження, зображення тощо.

Як видалити програми в Windows 11: все, що вам потрібно знати

Крім того, у вас також буде можливість повністю видалити все, що стосується програми, зі своєї системи. 

І це все! Тепер вибрану програму потрібно видалити з системи. Якщо ви видалили важку програму, ми рекомендуємо очистити кеш за допомогою цього посібника, особливо якщо розмір програми перевищує 30+ ГБ.

Спосіб №02: Використання меню «Пуск».

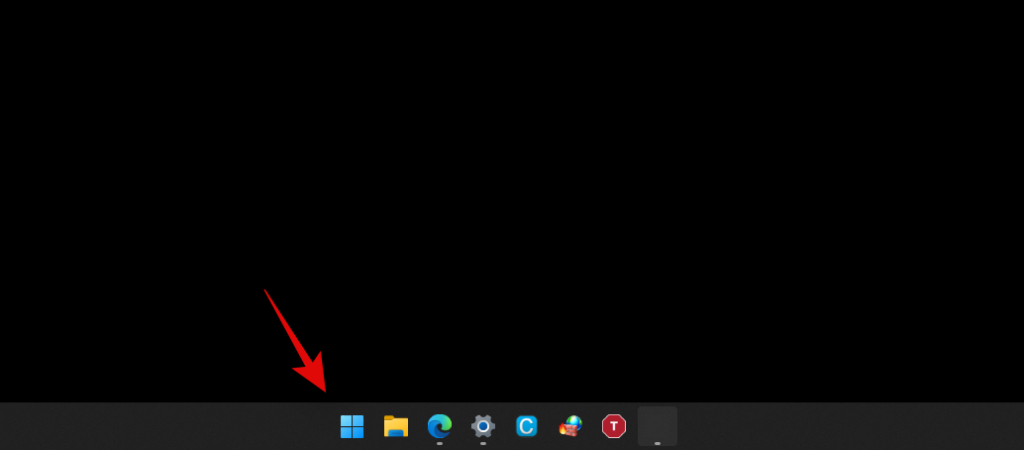
Натисніть кнопку «Windows» на клавіатурі, щоб відкрити меню «Пуск». Крім того, ви також можете натиснути піктограму на «Панелі завдань».

Як видалити програми в Windows 11: все, що вам потрібно знати

Знайдіть програму, яку хочете видалити, і клацніть її правою кнопкою миші.

Як видалити програми в Windows 11: все, що вам потрібно знати

Тепер натисніть «Видалити». За потреби дотримуйтесь інструкцій на екрані, щоб завершити процес видалення. 

Як видалити програми в Windows 11: все, що вам потрібно знати

І це все! Тепер ви видалите програму зі своєї системи через меню «Пуск».  

Спосіб №03: Використання файлу .exe для видалення

В ідеалі вам не потрібно вручну запускати виконуваний файл видалення для програми, але в деяких випадках, як-от старіші програми, у вашій системі може бути встановлена ​​програма, параметр видалення якої ніде не відображається у ваших налаштуваннях. У таких випадках ви можете самостійно запустити файл видалення, скориставшись наведеним нижче посібником. 

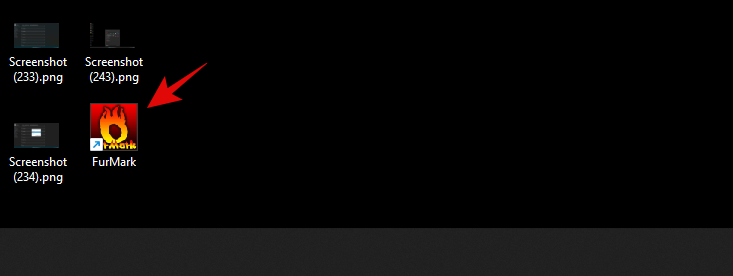
Знайдіть файл .exe програми або ярлик, який ви зазвичай використовуєте для запуску програми, і клацніть його правою кнопкою миші. 

Як видалити програми в Windows 11: все, що вам потрібно знати

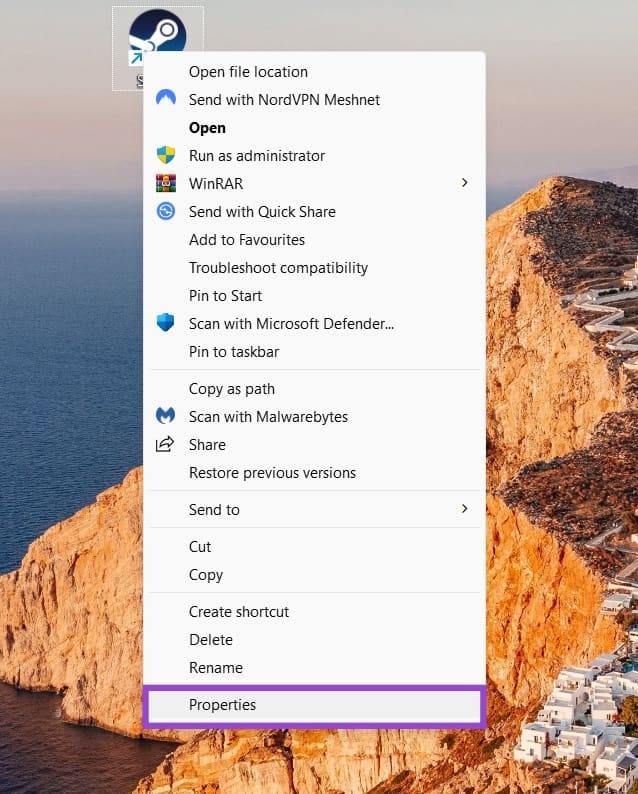
Виберіть «Відкрити розташування файлу». Якщо ви не бачите цієї опції, виберіть властивості. Тепер ви знайдете опцію «Відкрити розташування файлу» на вкладці «Загальні», як показано нижче. 

Як видалити програми в Windows 11: все, що вам потрібно знати

Тепер ви потрапите в каталог встановлення програми. Знайдіть файл .exe з будь-яким із наступних імен або схожим ім’ям. 

Як видалити програми в Windows 11: все, що вам потрібно знати

  • uninst.exe
  • uninstall.exe
  • setup.exe
  • setup.msi
  • (ім’я програми)setup.exe/.msi
  • (назва програми) uninstall.exe/uninst.exe

і більше. Програма/налаштування видалення буде називатися аналогічно. Після запуску ви можете дотримуватись інструкцій на екрані, щоб видалити його зі своєї системи.

Як видалити програми в Windows 11: все, що вам потрібно знати

У деяких випадках ви також можете отримати можливість відновити, перевстановити або змінити програму разом із видаленням. Ви можете вибрати потрібну опцію та продовжити налаштування, як задумали. 

Спосіб №04: Використання панелі керування

Ви також можете легко видалити програми та програми з панелі керування. В ідеалі рекомендується видаляти лише застарілі та сучасні програми за допомогою панелі керування, оскільки тут відображатимуться не всі встановлені програми. Дотримуйтесь інструкції нижче, щоб видалити програми за допомогою панелі керування. 

Натисніть Windows + sна клавіатурі та введіть «Панель управління». Натисніть і запустіть програму, коли вона з’явиться в результатах пошуку. 

Як видалити програми в Windows 11: все, що вам потрібно знати

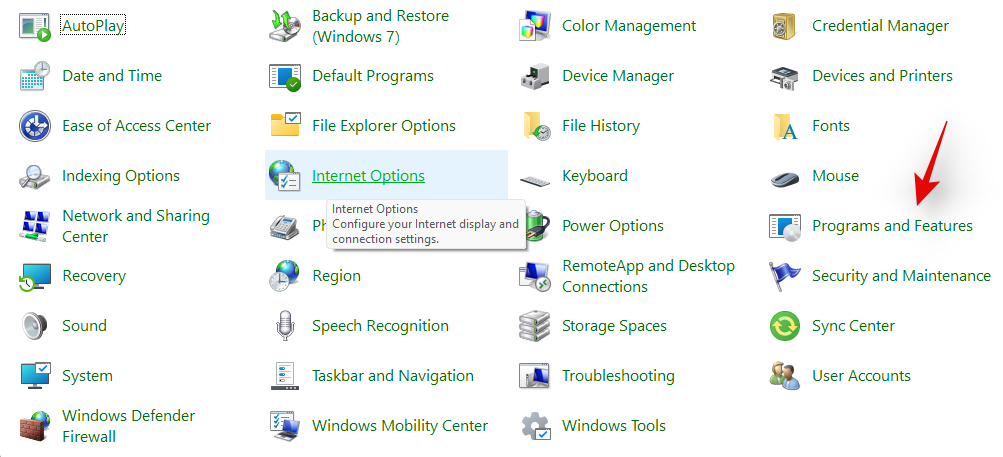
Тепер натисніть «Програми та функції». 

Як видалити програми в Windows 11: все, що вам потрібно знати

Тепер ви отримаєте список усіх програм, встановлених на даний момент у вашій системі. Знайдіть програму, яку ви хочете видалити, і натисніть на неї. 

Як видалити програми в Windows 11: все, що вам потрібно знати

Тепер виберіть «Видалити» вгорі. 

Як видалити програми в Windows 11: все, що вам потрібно знати

Дотримуйтесь інструкцій на екрані, щоб завершити процес встановлення. У деяких випадках це буде автоматизований процес, а в інших ви можете отримати можливість відновити існуючу інсталяцію або вибрати, які дані ви бажаєте зберегти, а які — видалити.

Як видалити програми в Windows 11: все, що вам потрібно знати

Після того, як ви зробите свій вибір, відбудеться процес видалення, і програму слід видалити з вашої системи після завершення процесу.  

Спосіб №05: Використання PowerShell

Ви також можете видалити програми за допомогою підвищеної оболонки PowerShell у Windows 11. Хоча команда видалення досить проста, отримати назву пакета для відповідної програми чи програми — ні. Отже, у посібнику нижче ви знайдете, як видалити програми за допомогою PowerShell, якщо у вас є назва пакета.

Однак, якщо ви не знаєте, як отримати повне ім’я пакета, ми рекомендуємо вам слідувати наведеному нижче посібнику з системних програм, який більш детально описує той самий метод. Давайте розпочнемо.

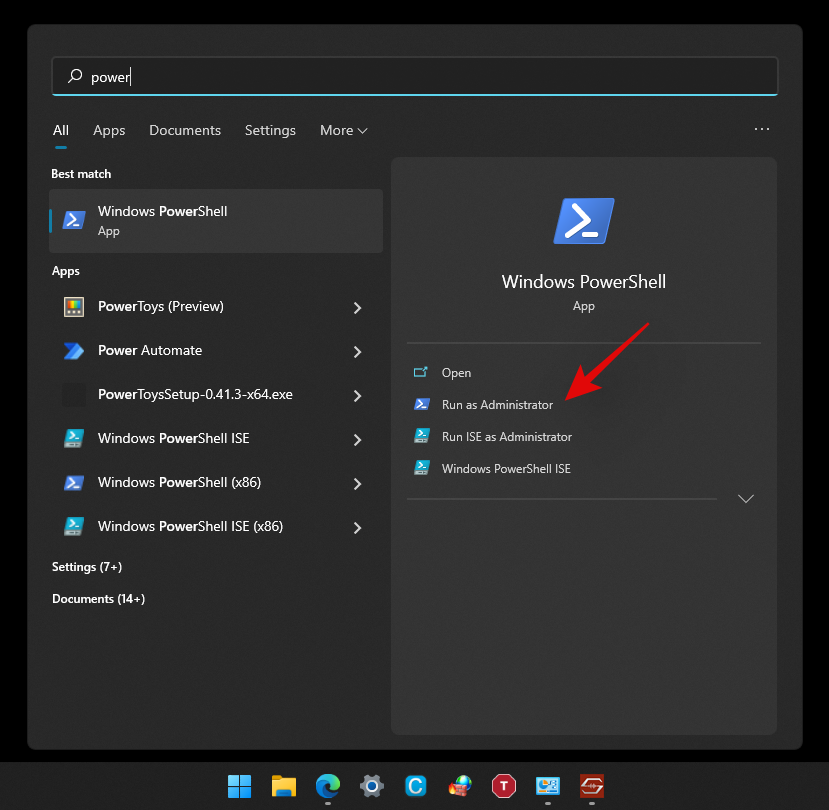
Натисніть Windows + sна клавіатурі та введіть «PowerShell». Тепер натисніть «Запустити від імені адміністратора», коли він з’явиться у ваших результатах пошуку. 

Як видалити програми в Windows 11: все, що вам потрібно знати

Коли на робочому столі з’явиться вікно PowerShell, введіть таку команду та натисніть «Enter» на клавіатурі. Переконайтеся, що ви замінили "[Name]" повною назвою пакета відповідної програми. 

Remove-AppxPackage [Name]

Як видалити програми в Windows 11: все, що вам потрібно знати

І це все! Тепер Powershell зробить свою магію і видалить відповідну програму з вашої системи. 

Метод №06: Використання CMD

Ви також можете використовувати командний рядок у Windows 11, щоб видалити програми зі своєї системи. Дотримуйтесь інструкції нижче, щоб почати. 

Натисніть Windows + sна клавіатурі та знайдіть «CMD». Натисніть «Запустити від імені адміністратора», коли він з’явиться у ваших результатах пошуку.

Як видалити програми в Windows 11: все, що вам потрібно знати 

Після запуску CMD введіть таку команду та натисніть «Enter» на клавіатурі. 

wmic

Як видалити програми в Windows 11: все, що вам потрібно знати

Тепер введіть таку команду, щоб отримати список усіх програм і програм, встановлених у вашій системі. 

product get name

Як видалити програми в Windows 11: все, що вам потрібно знати

Коли ви отримаєте список усіх програм, знайдіть у цьому списку ту, яку ви хочете видалити. Знайшовши, запишіть всю його назву в зручному місці.

Як видалити програми в Windows 11: все, що вам потрібно знати 

Тепер введіть таку команду та замініть AppName на назву програми, яку ви записали раніше. 

product where name="AppName" call uninstall/nointeractive

Як видалити програми в Windows 11: все, що вам потрібно знати

Примітка: не видаляйте лапки з команди, оскільки вони необхідні для цього синтаксису.  

Натисніть «Enter» на клавіатурі, щоб виконати команду. 

Командний рядок тепер виконуватиме необхідні процеси у фоновому режимі, і після завершення процесу ви отримаєте підтвердження, як показано нижче. 

І це все! Тепер ви видалите програму зі своєї системи за допомогою командного рядка. 

Спосіб №07: Використання setup.msi

Якщо ваша програма постачається з інсталяційним файлом із розширенням .msi замість .exe, ви можете використовувати той самий файл для видалення програми. Давайте дізнаємося трохи більше про файли .msi, щоб було легше зрозуміти їх функції. 

Що таке файл .msi?

Traditionally your installers come with a .exe extension. These are programs designed to install programs on your system with the setup files bundled with them. MSI files take this a step further by allowing you to bundle multiple installers together in the same file.

This allows the MSI file to perform various functions thanks to the bundled installers. This includes things like Update installers, software installers, program repairer, program modifier, and uninstaller. Hence, if your program came with a .msi setup file then you can use the guide below to use the same file to uninstall the program from your system. 

Note: Older .msi files rarely work with newer installations of the same software. Keep this in mind in case you are trying to downgrade your program to a previous version. 

Uninstall via .msi file

Locate the .msi setup file on your local storage and double click and launch the app. 

Як видалити програми в Windows 11: все, що вам потрібно знати

Follow the on-screen instructions until you are prompted to select one of the courses of action. 

  • Repair
  • Modify 
  • Uninstall
  • Install Updates
  • Remove Updates

Як видалити програми в Windows 11: все, що вам потрібно знати

Select the desired option and continue with the on-screen instructions to complete the uninstallation process. 

And that’s it! The selected program should now be removed from your system via its .msi setup file. 

Method #08: Use a third-party uninstaller

There are various third-party uninstallers available on the market as well. These apps help identify all the system and third-party apps on your system which can then be uninstalled from your PC with a simple click. Most of these programs allow you to remove system apps after opting for the premium model of the software.

In case you decide to use the free version, you will be limited to a certain number of uninstalls in most cases. While this might sound redundant, these utilities are extremely useful for professionals and technicians that need to uninstall multiple programs with a single click. Most of these uninstallers support bulk uninstallations which is quite useful when setting up multiple systems for an office environment. We have linked the two most popular third-party uninstallers below. We hope you find them useful in your quest to uninstall programs from Windows 11. 

How to uninstall system apps on Windows 11 [2 Ways]

You can uninstall system apps on Windows 11 either via an elevated PowerShell or by using a third-party PowerShell script. I would recommend that you use the PowerShell method, although it might seem more complicated, you won’t have to run third-party scripts with elevated privileges on your system.

However, if you still decide to use an automated script, ensure that you change your execution policy back to normal once the script has been executed. This will be paramount to your system’s security as leaving the execution policy unchanged might allow malicious users to run PowerShell scripts on your system easily. Use one of the methods below that best suits your current needs and requirements to get started. 

Method #01: Using Powershell

The PowerShell uninstallation process for any program has two processes. First, sourcing the full package name of the concerned app and then using PowerShell to uninstall the concerned app. If your app does not show up in the PowerShell list, then you might have to use the third-party script below to remove the concerned app from your system. Let’s get started. 

Step 1: Source full package name

Press Windows + s on your keyboard and search for ‘PowerShell’. Click on ‘Run as administrator’ once it shows up in your search results. 

Як видалити програми в Windows 11: все, що вам потрібно знати

Once PowerShell launches, type in the command below and press ‘Enter’ on your screen. 

get-appxpackage

PowerShell will now generate and show a list of all the apps installed on your system including built-in OEM apps and Windows app. Scroll the list to find your app, however, if this seems too tedious, start by right-clicking on the title bar at the top. 

Як видалити програми в Windows 11: все, що вам потрібно знати

Now select ‘Edit’. 

Як видалити програми в Windows 11: все, що вам потрібно знати

Click on ‘Find’. 

Як видалити програми в Windows 11: все, що вам потрібно знати

Now search for the general name of the app and the ‘Find’ feature should automatically take you to the app in the list. 

Як видалити програми в Windows 11: все, що вам потрібно знати

Note down the ‘FullPackageName’ of the concerned app as shown below. 

Як видалити програми в Windows 11: все, що вам потрібно знати

And that’s it! You will now have sourced the full package name for the concerned app on your system. You can now use the guide below to uninstall it from your system. 

Step 2: Uninstall app via PowerShell

Open an elevated PowerShell using the guide above. If you already have one open on your screen, then start by typing in the following command. Ensure that you replace ‘[PackageName]’ with the full package name of the app we sourced above. 

Remove-Appxpackage [PackageName]

Як видалити програми в Windows 11: все, що вам потрібно знати

Hit ‘Enter’ on your keyboard once you are done. PowerShell will now do its thing and the app should be installed from your system in no time.

Can’t remove an app using PowerShell? How to fix

If you are unable to remove the app via PowerShell then we recommend you do the following checks to solve the issue. 

  • Ensure that you are using an elevated PowerShell window.
  • Ensure that the Full Package Name has been sourced correctly. 
  • Verify your ‘uninstall’ codes and try to keep everything lowercase. 
  • Repeat the same guide in Safe mode. 
  • Verify if the app hasn’t been already removed from your system and only leftover registry files are showing up in PowerShell. 

You should be able to solve your issue by crosschecking the above-stated checks. However, if you are still unable to uninstall the concerned app, then you can use the third-party script below.

Method #02: Using a third party script

You can also use a third-party script to remove system apps from your Windows 11 system. These scripts have been quite popular lately and have been the go-to choice for many users when setting up fresh installations of Windows. Use the guide below to get started. 

  •  Windows10debloater by Sycnex | Download Link

Note: While this is a Windows 10 script, it has been verified to remove system apps on Windows 11 as well. However, we recommend you keep checking the download page for updates that should be better compatible with Windows 11. We recommend using the script to only remove system apps and nothing else offered by the script. Other features could potentially break Windows 11 until a compatible script for the same is released in the future.

Visit the link above and you will be taken to the GitHub page for the script. Click on ‘Code’ in the top right corner. 

Як видалити програми в Windows 11: все, що вам потрібно знати

Now click and select ‘Download ZIP’.

Як видалити програми в Windows 11: все, що вам потрібно знати

A Zip file will now be downloaded to your local storage. Extract the files to a convenient location.

Як видалити програми в Windows 11: все, що вам потрібно знати

Once extracted, open the folder and click on ”File’ in the top left corner.

Як видалити програми в Windows 11: все, що вам потрібно знати

Hover over ‘Open Windows PowerShell’ and select ‘Open Windows PowerShell as administrator’. 

Як видалити програми в Windows 11: все, що вам потрібно знати

An elevated PowerShell window will now launch on your system. Start by executing the following command given below. 

Set-ExecutionPolicy Unrestricted -Force

Як видалити програми в Windows 11: все, що вам потрібно знати

This will set your script execution policy as unrestricted which will allow us to use the script on your system. Once executed, enter the following command in the window and press ‘Enter’ on your keyboard once you are done. 

.\Windows10DebloaterGUI.ps1

Як видалити програми в Windows 11: все, що вам потрібно знати

This will execute the debloat script and you should now get a graphical interface for it on your screen. Click on ‘Customize Blacklist’ at the top. 

Як видалити програми в Windows 11: все, що вам потрібно знати

You will now get a list of all the apps installed on your system. Check the box for the apps you wish to uninstall and uncheck the box for the apps you wish to keep on your device. Ensure that you go through the entire list to remove any default selections made by the script for the programs that you wish to keep on your device.

Як видалити програми в Windows 11: все, що вам потрібно знати

Once you have edited your list, simply click on ‘Save custom Whitelist and Blacklist to custom-lists.ps1’ at the top. You can now close this app selection window. 

Як видалити програми в Windows 11: все, що вам потрібно знати

Now click on ‘Remove Bloatware with Customized Blacklist’. Keep an eye on the PowerShell window on the background once the command executes.

Як видалити програми в Windows 11: все, що вам потрібно знати

Once all programs have been removed, you will get a confirmation for the same in the PowerShell window in the background. Close the graphical interface by clicking on the ‘X’ in the top right corner. 

Now go back to your PowerShell window and execute the following command. 

Set-ExecutionPolicy Restricted -Force

Як видалити програми в Windows 11: все, що вам потрібно знати

This will revert changes to your execution policy and revert the changes we made earlier. Doing this is quite important to maintain proper security on your Windows system. 

And that’s it! You will now have uninstalled system apps from your system via a third-party PowerShell script. 

Can’t uninstall apps on Windows 11? How to fix

There could be a few reasons why you are unable to uninstall apps on your system. Here are a few workarounds that should help you uninstall persistent apps from your system easily. 

Method #01: Close instance in task manager and try again

Chances are that the app has an instance or a process open in the background which is preventing it from being uninstalled. In such cases, you can try finding processes related to the app and kill them on your own. Once the processes have been killed, you can then try to uninstall the app again. Follow the guide below to find and kill the process. 

Press Ctrl + Shift + Esc on your keyboard to open the ‘Task Manager’. Switch to the ‘Details’ tab by clicking on it. 

Як видалити програми в Windows 11: все, що вам потрібно знати

Now look for a process in the list for the concerned app. In our case, we are looking to uninstall ‘AsusOptimization’, hence we will look for a PowerToys process. Once found, click and select the process. 

Як видалити програми в Windows 11: все, що вам потрібно знати

Hit delete on your keyboard or click on ‘End Task’. 

Як видалити програми в Windows 11: все, що вам потрібно знати

Confirm your choice by selecting ‘End Process’. 

Як видалити програми в Windows 11: все, що вам потрібно знати

And that’s it! the process should now be killed and you can now try uninstalling the concerned app again.  

Method #02: Uninstall in Safe mode

Another way to ensure that no third-party apps are launched or used in the background is to launch your system in safe mode and then try to uninstall your concerned app. You can use this comprehensive guide by us to enter safe mode on Windows 11.

Once in safe mode, follow the guide below to get the installer service back up and running on your system. Once the service is running in the background, you can use either of the methods above to uninstall the concerned app from your system. 

Press Windows key + S key to open Windows Search and type in ‘cmd’. Click on ‘Run as administrator’ when the command prompt shows in your search results. 

Як видалити програми в Windows 11: все, що вам потрібно знати

Enter the following commands in the command prompt one by one and hit Enter on your keyboard to execute each one of them.

REG ADD "HKLM\SYSTEM\CurrentControlSet\Control\SafeBoot\Minimal\MSIServer" /VE /T REG_SZ /F /D "Service"

REG ADD "HKLM\SYSTEM\CurrentControlSet\Control\SafeBoot\Network\MSIServer" /VE /T REG_SZ /F /D "Service"

net start msiserver

Як видалити програми в Windows 11: все, що вам потрібно знати

And that’s it! The installer service should now be running on your system and you should now be able to uninstall the concerned app using either one of the methods above. 

Method #03: Run the Microsoft Uninstaller troubleshooter

You can also run a Microsoft Troubleshooter to try and fix uninstaller issues. Microsoft troubleshooters have come a long way since they were first introduced and can now fix most software and driver incompatibility issues without any user intervention.

Microsoft has also made it much easier for you to now launch any troubleshooter to try and solve your current issue. Use the guide below to launch an uninstaller troubleshooter on your Windows 11 system. 

Required

Guide

Download the troubleshooter using the link above to your PC. Once downloaded, extract the .zip file to a convenient location. If you have trouble extracting the .zip file or it seems to be blocked, use the guide below to unblock it, else you can skip the guide and jump to the next guide.

Unblock the .zip file

Right-click on the .zip file and select ‘Properties’. 

Check the box for ‘Unblock’ at the bottom of the Window. 

Click on ‘Ok’. 

Provide administrator permission to make the necessary change. 

The file should now be unblocked on your system and you should now be able to extract it like any other .zip file on your system. 

Run the troubleshooter

Navigate to the extracted files on your local storage. Cut the file named ‘MicrosoftProgram_Install_and_Uninstall.meta.diagcab’ and paste it on your desktop. Double click and run the file from your desktop. Click on ‘Advanced’ at the bottom once the troubleshooter is launched. 

Як видалити програми в Windows 11: все, що вам потрібно знати

Check the box for ‘Apply repairs automatically’. Click on ‘Next’ once you are done. 

Як видалити програми в Windows 11: все, що вам потрібно знати

Select ‘Uninstallting’ on the next step.

Як видалити програми в Windows 11: все, що вам потрібно знати

Select the concerned program from the list provided on your screen. If your program does not appear in the list, click on ‘Not Listed’. 

Now follow the on-screen instructions depending on your choice to complete the troubleshooting process. 

Як видалити програми в Windows 11: все, що вам потрібно знати

And that’s it! In most cases, the troubleshooter will detect your issue and solve it automatically. A report for the same will be presented to you at the end of the process with all the details. 

Method #04: Use a restore point

If you are still having issues uninstalling the software from your system then it is time for some drastic steps as this could be malicious in nature. Let’s restore your PC to a restore point before the concerned app or program was installed on your system.

However, if you do not have a restore point then you can jump to one of the other methods listed below. Here’s how you can use a restore point to restore your PC to its previous state. 

Press Windows + S on your keyboard and search for ‘Recovery’. Click and launch the app link once it shows up in your search results. 

Як видалити програми в Windows 11: все, що вам потрібно знати

Click on ‘Open System Restore’. 

Як видалити програми в Windows 11: все, що вам потрібно знати

You will now be suggested a recent system restore point if you have one. Select that if needed, or click on ‘Choose a different restore point’ if you wish to choose an older one. 

Як видалити програми в Windows 11: все, що вам потрібно знати

Select ‘Next’ or hit ‘Enter’ on your keyboard. 

Як видалити програми в Windows 11: все, що вам потрібно знати

You can now select the desired Restore Point from the list at the top. You can check the box for ‘Show more restore points’ if you wish to look at more restore points. 

Як видалити програми в Windows 11: все, що вам потрібно знати

Once selected, click on ‘Next’. 

Як видалити програми в Windows 11: все, що вам потрібно знати

Finally, click on ‘Finish’. 

Як видалити програми в Windows 11: все, що вам потрібно знати

Windows 11 will now restore your system to the selected restore point and the concerned app should no longer be on your system once the process is completed.  

Method #05: Contact Windows Support

If you are still unable to get the app uninstalled from your system then it might be time to contact Microsoft Support. Microsoft Support executives are trained to solve such issues with more expertise and can even remotely takeover your system if needed. It might be time to get in touch with the support team to solve your issue. Additionally, if you purchased a pre-built system, you can use your OEM support for some help as well. Use the link below to get in touch with Microsoft Support. 

► Microsoft Support

Uninstall programs on Windows 11: FAQs

Can you uninstall pre-installed apps?

Well, officially, you can not and it is not recommended by Microsoft. But still, if you wish to remove preinstalled apps, you can easily do so depending on the type of the app. If you wish to remove a system app then the process is a bit complicated. Else, if you wish to remove third-party pre-installed apps then you can simply do so by uninstalling them like any other app from your Windows 11 Pc using the guide below. 

Can you uninstall system apps?

Yes, you can uninstall system apps but not officially. Officially Windows 11 or any Windows for that matter, doesn’t allow you to remove system apps from the OS. However, there are many workarounds to circumvent this restriction and uninstall preinstalled system apps from your system.

This includes using command prompt/PowerShell or a third-party software. Using these methods you should be able to easily uninstall system apps from your system. Follow our guides below for each of the methods depending on your current needs and requirements. 

Can you uninstall apps downloaded from the Microsoft Store?

Yes, apps downloaded from the Microsoft Store can be uninstalled easily using either of the methods listed below. This includes Android apps that you may have downloaded on your system but did not find appealing enough. We recommend uninstalling Windows Store apps either via Settings or Start.

Chances are that the Store app will now show up in the Control Panel and if uninstalled via CMD or PowerShell, you could end up with leftover files including empty Start menu folders. Hence, use Powershell or CMD for Windows Store apps only if you are facing an issue uninstalling them via the Settings or the Start menu. 

What happens when you uninstall a program?

Uninstallation is the process of removing a program or an app from your system. While apps are installed singularly with all dependencies available to them in a sandbox, programs operate differently. Programs usually have scheduled tasks, customized registry values to execute them, and dependencies for various Windows features and extensions that they need for their own installation process to create and place every file and task correctly.

Hence the removal process for all these things created by a program when it is first installed on your system is called uninstallation. All scheduled tasks, registered services, registry keys, executables, temporary files, log files, and more are removed once you uninstall a program from your system. In some cases, you will be leftover with settings and save files so that you don’t have to set up the program entirely when installing it in the future.

These files can be cleared by clearing your Windows Cache and temporary files in most cases. However, if you still suspect leftover files from a program on your system, then we recommend checking the following places for any leftover files. If found, you can simply delete them like any other file on your system. 

  • /Documents
  • C:\Program Files (x86)\Common Files
  • C:\Program Files\Common Files
  • C:\ProgramData
  • C:\Users\USER\AppData\Local
  • C:\Users\USER\AppData\LocalLow
  • C:\Users\USER\AppData\Roaming
  • C:\Users\USER

How to remove data of uninstalled programs

If you still see the remaining files and folders or context menu options for a removed program or app, then you can try the fixes below to solve your issue. 

Method #01: Clear cache and temporary files from Windows

You should first try clearing cache and temporary files from your Windows 11 system. In most cases, this will help the overall File Explorer UI to refresh itself which should automatically remove leftover files and context menu items for removed programs from your system.

You can use this comprehensive guide by us to easily clear your Windows 11 cache and storage. You can also use the same guide to free up storage space on your system as well by deleting other large files and installations that show up in the list. 

Method #02: Check for leftover files manually

You can also check and delete all leftover files manually for the removed program or app. You should start by using Windows Search to look for any files or folders associated with the uninstalled program. You can then delete these manually from your local storage.

Once you have deleted all the files and folders that show up in the search, you can proceed to manually check the locations listed below. If they contain any leftover files or folders from the removed program, then you can simply select them and delete them from your system. 

  • /Documents
  • C:\Program Files (x86)\Common Files
  • C:\Program Files\Common Files
  • C:\ProgramData
  • C:\Users\USER\AppData\Local
  • C:\Users\USER\AppData\LocalLow
  • C:\Users\USER\AppData\Roaming
  • C:\Users\USER

Method #03: Run a third-party uninstaller/cleaner

If you are still left with the remaining files and context menus for the program then it is time to use a third-party uninstaller or cleaner. These programs are specifically designed to identify and remove leftover files from previously uninstalled programs on your system. We recommend you give Revo uninstaller a try as even the free model for the app will help you identify the location of leftover files which can then be deleted by you manually. You can also use something like CCleaner that is designed to remove leftover files and free up storage and processing space on your system.  

Method #04: Try to remove the app via PowerShell

If nothing works, then chances are that the concerned app was installed on your system using elevated privileges which prevents some files and folders from being removed from your system.

In such cases, we recommend you try to remove the app via PowerShell. You can use our guide above to remove system apps from Windows 11 via PowerShell. You will first need to source the full package name for your app or program, which can then be used to force uninstall it from your system. 

Can you uninstall Windows Updates?

Yes you can easily uninstall Windows Update from your system. New updates can often introduce compatibility issues on older hardware and having the option to uninstall updates can always help. You can use the guide below to uninstall recently installed updates from your system. 

How to uninstall Windows Updates

Follow the guide below to uninstall recently installed Windows Updates from your Windows 11 system. 

Press Windows + i on your keyboard to open the Settings app. Click on ‘Windows Update’ on your left. 

Як видалити програми в Windows 11: все, що вам потрібно знати

Now click on ‘Update history’.

Як видалити програми в Windows 11: все, що вам потрібно знати

Scroll to the bottom on your right and click on ‘Uninstall Updates’. 

Як видалити програми в Windows 11: все, що вам потрібно знати

You will now get a list of all the recent updates installed on your system. Click and select the update you wish to uninstall.

Як видалити програми в Windows 11: все, що вам потрібно знати 

Click on ‘Uninstall’ at the top now.

Як видалити програми в Windows 11: все, що вам потрібно знати

Follow the on-screen instructions to complete the process. 

Як видалити програми в Windows 11: все, що вам потрібно знати

And that’s it! Your selected Windows update should now be uninstalled from your system. 

We hope this guide helped you uninstall the concerned apps or programs from your system. If you still face issues, feel free to reach out to us using the comments section below. 


Як зупинити спливаючі вікна в Windows 11

Як зупинити спливаючі вікна в Windows 11

Остання версія Windows — це все, чого бажали технічні ентузіасти. Від кращої сумісності додатків до чудового користувальницького інтерфейсу — є багато чого слини. Але є…

Як вимкнути пароль Windows 11 після сну: вимкнути пароль під час пробудження

Як вимкнути пароль Windows 11 після сну: вимкнути пароль під час пробудження

Комп’ютери стали більш інтегрованими в наше життя, ніж будь-коли, тому виробники шукають нові способи економії енергії на ваших мобільних пристроях. Проте випробуваний посібник Sleep w…

Як видалити оновлення в Windows 11: покроковий посібник і поради щодо усунення несправностей

Як видалити оновлення в Windows 11: покроковий посібник і поради щодо усунення несправностей

Оновлення Windows завжди були горезвісною неприємністю для багатьох користувачів з часів Windows XP. На щастя, доставка оновлень Windows різко покращилася за останні кілька років і...

Як видалити програми в Windows 11: все, що вам потрібно знати

Як видалити програми в Windows 11: все, що вам потрібно знати

Windows 11 була загальнодоступна, і це нове оновлення для довготривалої ОС, здається, отримує чудові відгуки. Microsoft підвищила конфіденційність, додала новий інтерфейс безпеки, а також можливість…

Як видалити Bing з Windows 11

Як видалити Bing з Windows 11

Коли ви шукаєте елемент у Пошуку, Windows відображатиме локальні результати для програм, файлів або налаштувань. Якщо нічого не з’являється, Windows також має вбудований пошук Bing, який відображатиме елементи в Інтернеті…

Як видалити чат Microsoft Teams з панелі завдань у Windows 11

Як видалити чат Microsoft Teams з панелі завдань у Windows 11

Незважаючи на всі спроби Microsoft залучити вас до використання Teams, якщо вам все одно це не подобається, ви можете видалити його з панелі завдань. Ну, ви можете легко це зробити і отримати більше місця…

Як видалити водяний знак Evaluation Copy у Windows 11

Як видалити водяний знак Evaluation Copy у Windows 11

Збірки Windows Insider і бета-версії — це чудовий спосіб ознайомитися з майбутнім оновленням. Через майбутній випуск Windows 11 багато користувачів у всьому світі приєдналися до програми інсайдерів, щоб…

Як приховати значки на значках панелі завдань у Windows 11

Як приховати значки на значках панелі завдань у Windows 11

Повідомлення стали невід'ємною частиною нашого життя. Вони тримають нас у курсі, допомагають нам підтримувати наш графік і, перш за все, допомагають нам отримувати найсвіжіші та найкращі новини. Однак, схоже, компанії…

Як відключити VBS в Windows 11 і чи допомагає це?

Як відключити VBS в Windows 11 і чи допомагає це?

Windows 11 щойно була випущена, і якщо ви спробували встановити останню ОС, можливо, ви зрозуміли необхідність безпечного завантаження та TPM. Ці налаштування можна легко знайти та ввімкнути у вас…

Як видалити McAfee в Windows 11 [5 способів]

Як видалити McAfee в Windows 11 [5 способів]

Майже всі інші виробники ПК, здається, люблять програмне забезпечення для захисту системи McAfee і категорично відмовляються поставляти свій ПК без нього. Але багато людей не особливо люблять McAfee…

Як відтворити .MOV у Windows

Як відтворити .MOV у Windows

Файли .MOV, тип відеоформату, розроблений Apple, високо цінуються за високу якість відео та аудіо. Це так добре, що професійно

Як зменшити панель завдань у Windows 11

Як зменшити панель завдань у Windows 11

Хоча Windows 11 має бути більш зручною операційною системою, ніж її попередники, вона має кілька дивовижних змін. Дуже помітно,

Як перевірити, які порти відкриті на ПК з Windows 10

Як перевірити, які порти відкриті на ПК з Windows 10

Можливо, ви вирішуєте проблему з підключенням до мережі для певної програми, і вам потрібно перевірити, чи відкритий доступ до її порту. Що робити, якщо вам потрібно

Як видалити Microsoft Edge у Windows 11

Як видалити Microsoft Edge у Windows 11

Хочете видалити Microsoft Edge зі свого ПК з Windows 11? І хочете запобігти його автоматичному перевстановленню? Дотримуйтеся цього посібника.

У Windows 10 є версія, яка задовольнить потреби кожного

У Windows 10 є версія, яка задовольнить потреби кожного

Корпорація Майкрософт завжди випускала Windows у кількох версіях, будь то студент і викладач, домашня або Windows 7 і Vistas Ultimate. Windows 10 – ні

Як вирішити проблему з підключенням або недійсний код MMI на пристрої Android

Як вирішити проблему з підключенням або недійсний код MMI на пристрої Android

Іноді з’являється повідомлення про проблему з підключенням або недійсний код MMI, і це може викликати розчарування у користувачів Android. При появі недійсного коду MMI

Чи є MIUI Android? Достатньо близько

Чи є MIUI Android? Достатньо близько

MIUI — це ПЗУ, а Android — це платформа. MIUI належить китайській компанії з виробництва електроніки, відомої як Xiaomi – компанії, що стоїть за популярним брендом

Як контролювати швидкість вентилятора на ПК з Windows

Як контролювати швидкість вентилятора на ПК з Windows

Ваш ПК працює повільніше, ніж зазвичай? Це може бути ознакою того, що він перегрівається. Це поширена проблема, яка зробить вас менш продуктивними, коли ви намагаєтеся зрозуміти

Як видалити тимчасові файли на ПК з Windows 10 або 11

Як видалити тимчасові файли на ПК з Windows 10 або 11

Коли ваш комп’ютер починає гальмувати, це означає, що вам потрібно звільнити місце. Зазвичай видалення тимчасових файлів є чудовим місцем для початку.

Як налаштувати масштабування дисплея в Windows 10

Як налаштувати масштабування дисплея в Windows 10

https://www.youtube.com/watch?v=rcJSELdL_PY Налаштування роздільної здатності у Windows 10 визначають, наскільки детально відображатимуться зображення та текст, але масштаб визначає, як це