Windows 11 agora foi lanzado ao público despois de que se filtrara polémica en xuño deste ano. Desde entón, o sistema operativo experimentou numerosos cambios, entre os que se atopan a moi benvida interface de usuario de vidro xeado, a capacidade de usar aplicacións de Android, os servizos en segundo plano mellorados, a nova aplicación Configuración e moito máis.
Windows 11 tamén trae un novo clic co botón dereito para que coincida coa nova IU que parece dividir a maioría dos usuarios. A moitos parece que lles gusta o novo enfoque minimalista, mentres que outros prefiren o antigo menú contextual do botón dereito do rato con todas as opcións nun só lugar. Se estás no mesmo barco e buscas obter o antigo menú contextual do botón dereito do rato en Windows 11, aquí tes como podes facelo.
Contidos
Método #01: Usando o editor de rexistro
Os trucos do Editor do Rexistro sempre existiron cando se cambiaban temas, estilos visuais e aparencias en Windows. Tamén pode usar un valor de rexistro para obter o menú contextual antigo en Windows 11. Podes usar un ficheiro de rexistro automático co código necesario ou realizar os cambios necesarios no teu rexistro manualmente, a elección depende completamente de ti.
Siga unha das seguintes guías que mellor se adapte ás súas necesidades e requisitos actuais. Pero antes de ver as dúas guías para iso, recomendámosche que fagas unha copia de seguridade dos teus ficheiros de rexistro.
Paso 1: Fai unha copia de seguranza do teu Rexistro primeiro
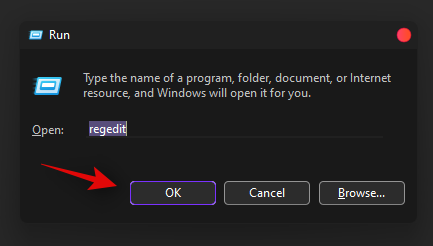
Preme Windows + Rno teu teclado, escribe o seguinte e preme Intro.
regedit
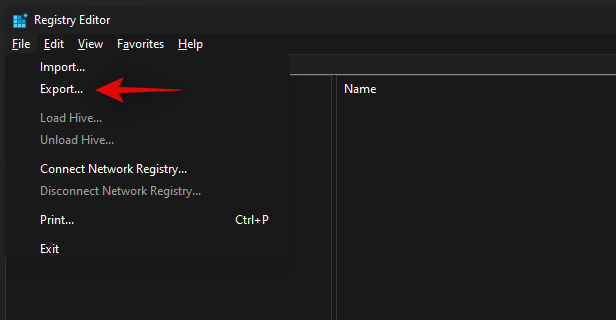
Agora fai clic en "Arquivo" na esquina superior esquerda.
Fai clic en 'Exportar'.
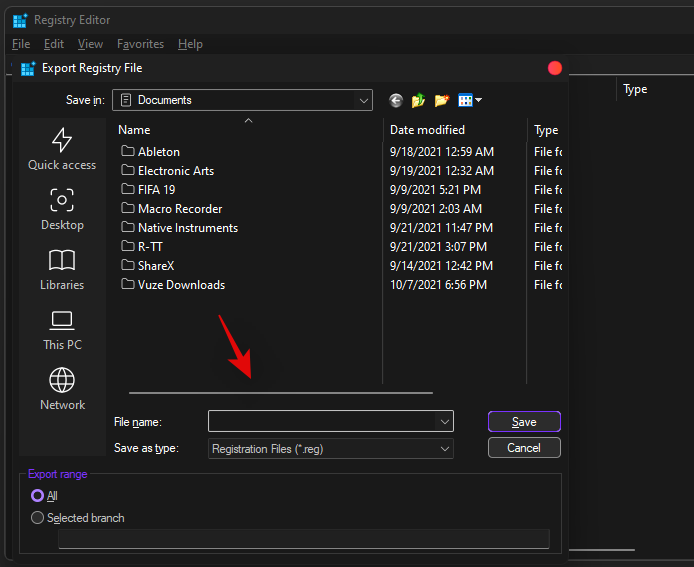
Navega ata o lugar desexado onde queres almacenar a túa copia de seguranza e introduce un nome para a mesma.
Unha vez que remates, fai clic en "Gardar".
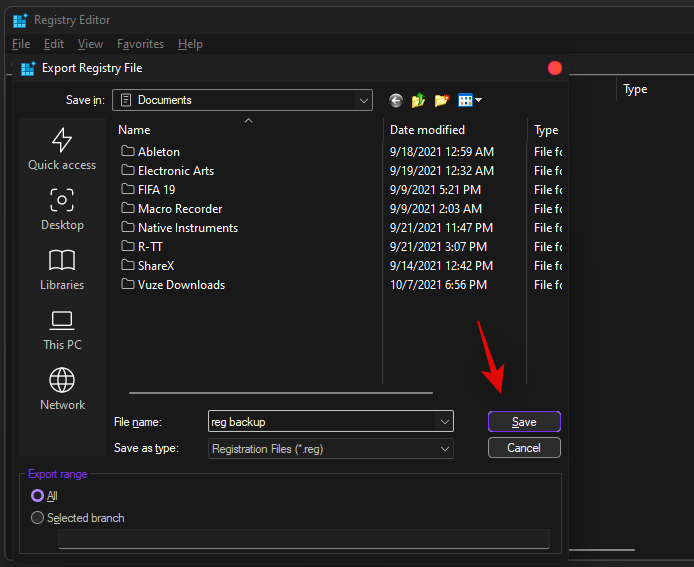
Agora farase unha copia de seguranza dos seus valores de rexistro na localización seleccionada. Podes restaurar a túa copia de seguranza usando o mesmo ficheiro no futuro sempre que o necesites.
Agora, siga o número de guía 2A ou 2B a continuación.
Paso 2: (Opción 1) Cambia automaticamente os ficheiros de rexistro cun script
Agora que fixo unha copia de seguranza da súa configuración e valores do rexistro, agora pode executar o corte incluído a continuación. Só ten que descargar o ficheiro .zip que aparece a continuación e extraeo nun lugar conveniente.
- Obter o menú contextual do botón dereito do rato (Win11) v0.0.1.zip | Link de descarga
Atoparás dous ficheiros chamados "Activar" e "Desactivar" respectivamente.
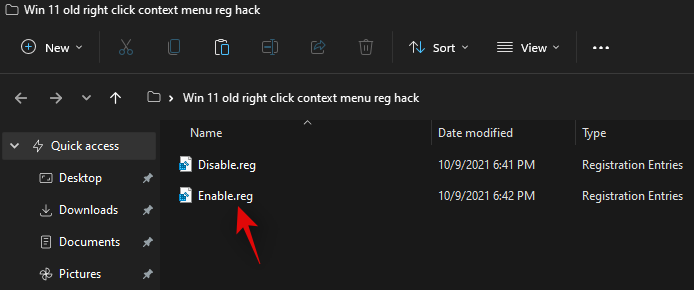
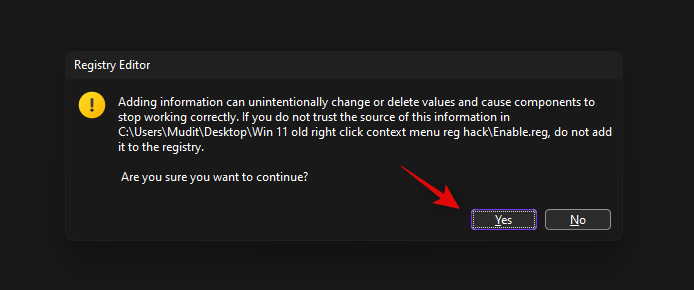
Fai dobre clic no ficheiro desexado para activar ou desactivar o antigo menú contextual do botón dereito do rato. Fai clic en "Si" para confirmar os cambios no rexistro e reinicia o teu PC para boa medida.
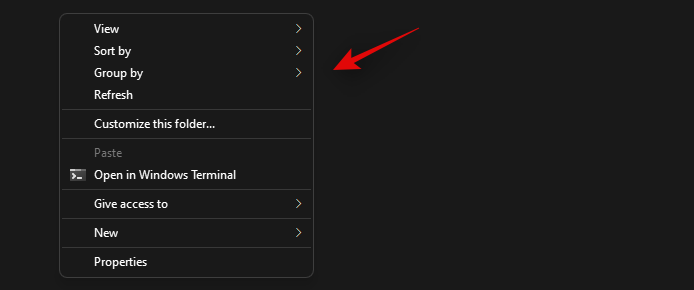
Unha vez reiniciado, deberías ter o antigo menú contextual do botón dereito do rato no teu sistema.
Paso 2: (Opción 2) Cambie manualmente o ficheiro de rexistro
Se queres facer as mesmas edicións manualmente no teu rexistro, podes utilizar a seguinte guía. Recoméndase encarecidamente que cree unha copia de seguridade das súas claves e valores de rexistro antes de continuar con esta guía.
Preme Windows + R, escribe o seguinte e preme Intro no teu teclado.
regedit
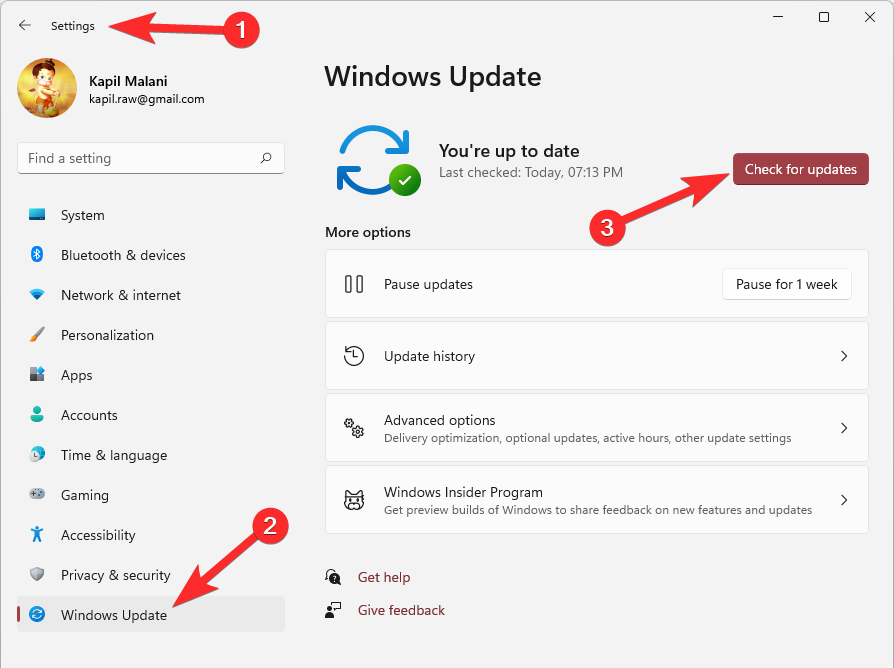
Navega ata o seguinte camiño.
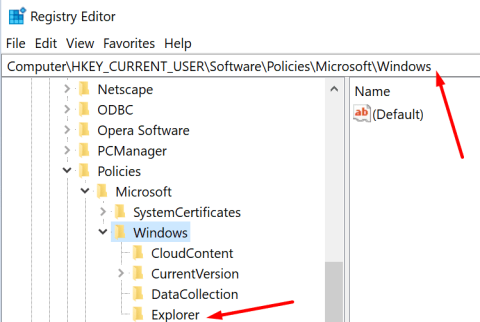
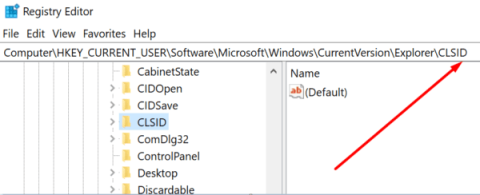
HKEY_CURRENT_USER\SOFTWARE\CLASSES\CLSID
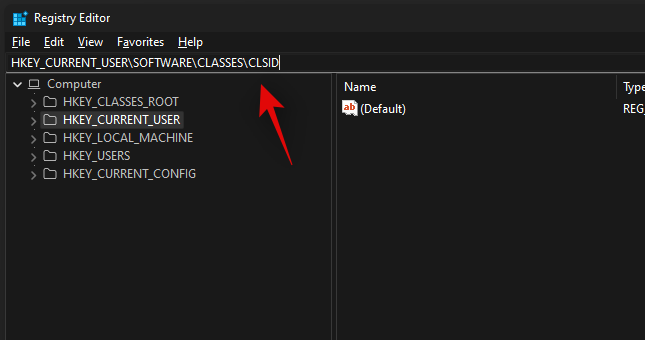
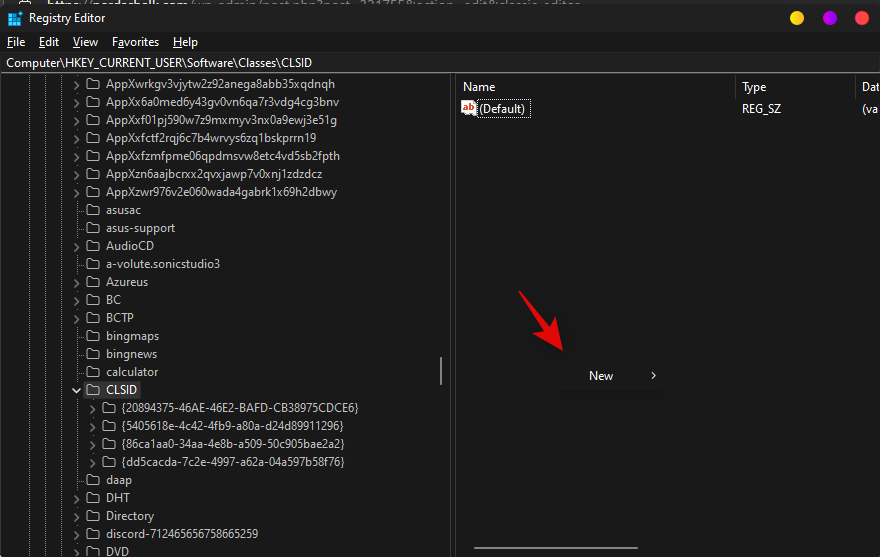
Co CLSID seleccionado á túa esquerda, fai clic co botón dereito nunha área baleira á túa dereita e selecciona "Novo".
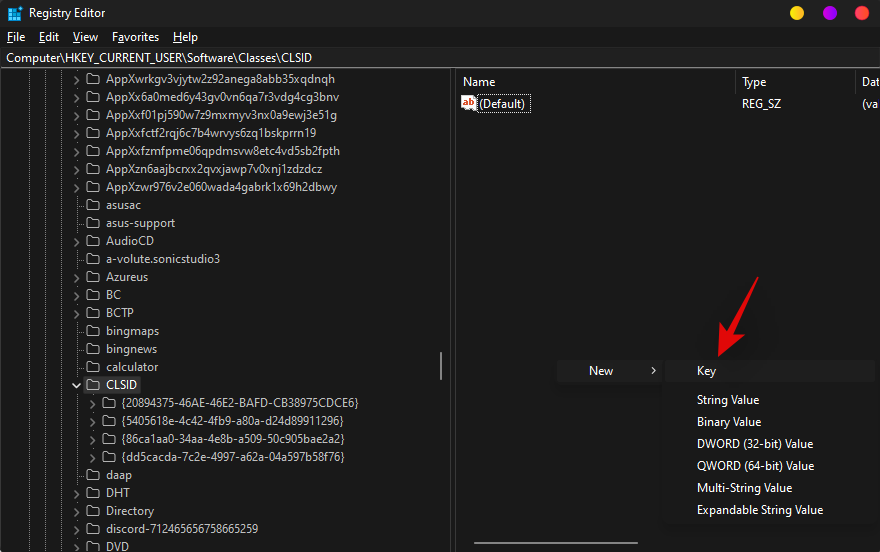
Agora fai clic en 'Chave'.
Introduce o seguinte nome para a túa nova chave.
InprocServer32
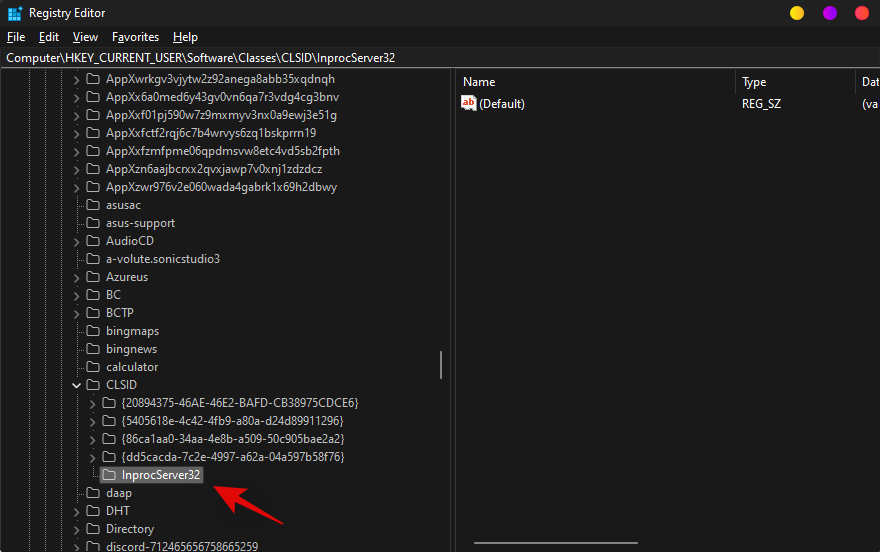
Fai dobre clic no valor "Predeterminado" á túa dereita.
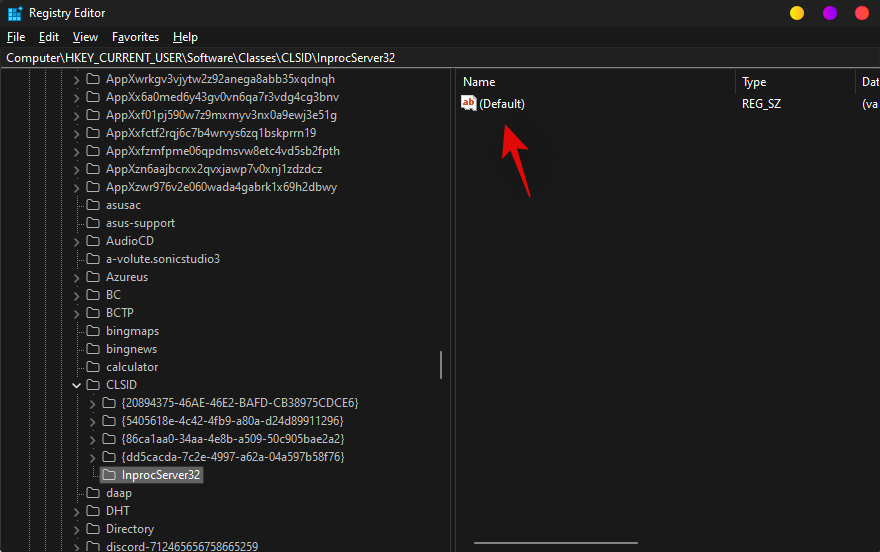
Fai clic en "Aceptar" sen facer ningún cambio. Isto axudará a configurar os teus "Datos de valor" en branco.
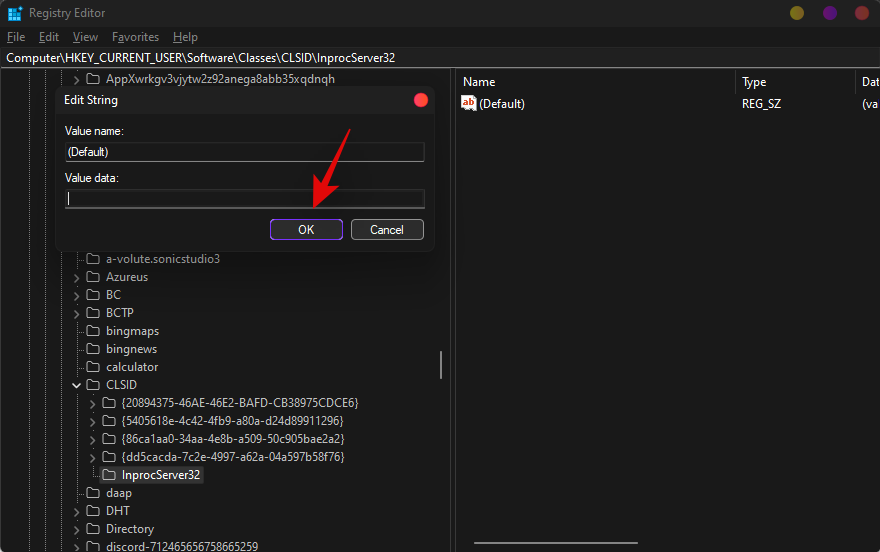
Pecha o Editor do Rexistro e reinicia o teu PC. Unha vez reiniciado, o menú contextual do botón dereito do rato debería cambiarse.
Método #02: Usando Winaero (unha aplicación de terceiros)
Nota: o uso dunha aplicación de terceiros como Winaero pode ralentizar o teu PC ou causar atrasos inesperados. Hai moitas posibilidades de que non o faga, pero se experimentas algún problema co rendemento, considera desinstalar a aplicación.
Tamén podes usar unha aplicación de personalización de terceiros para obter o menú contextual antigo dentro de Windows 11. Aínda que a maioría destas utilidades aínda non se actualizaron para Windows 11, Winaero Tweaker parece seguir de preto o novo sistema operativo.
Winaero Tweaker’s latest update brings along dedicated tweaks for Windows 11 and one of these tweaks helps you enable the old right-click context menu within Windows 11. Use the link below to download and install Winaero Tweaker on your PC. You can also extract its files as a portable utility.
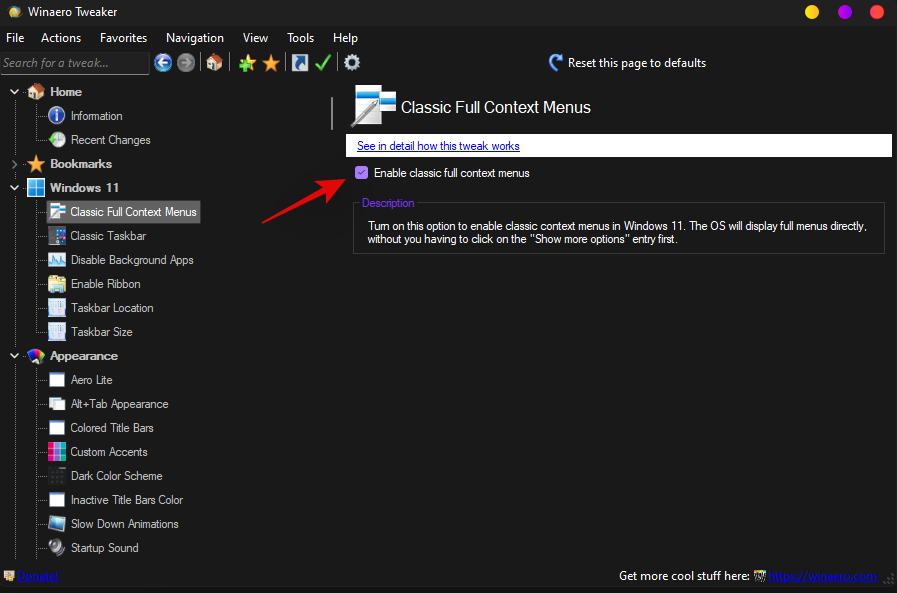
Once extracted, launch the utility and click on ‘Classic Full Context Menus’ on your left.
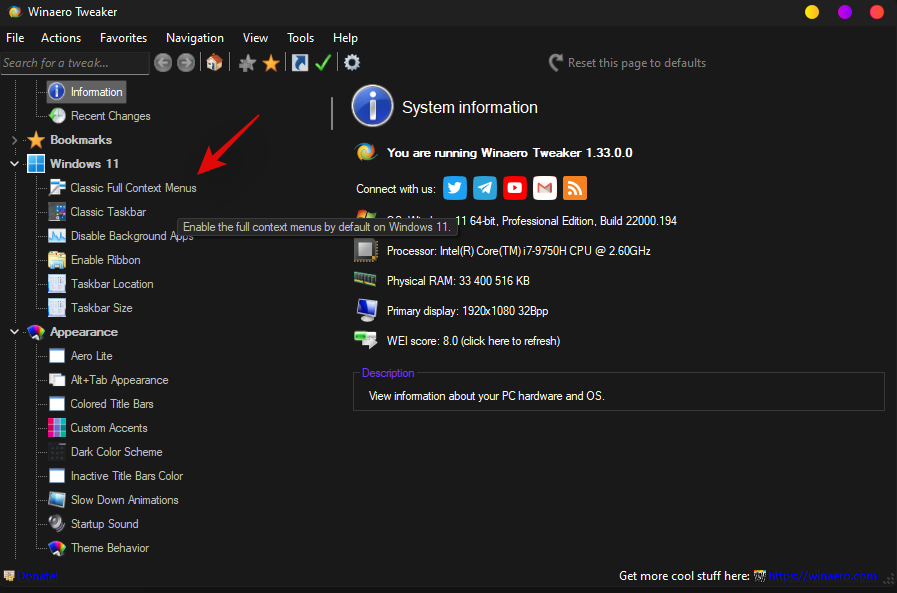
Check the box for ‘Enable classic full context menus’ on your right.
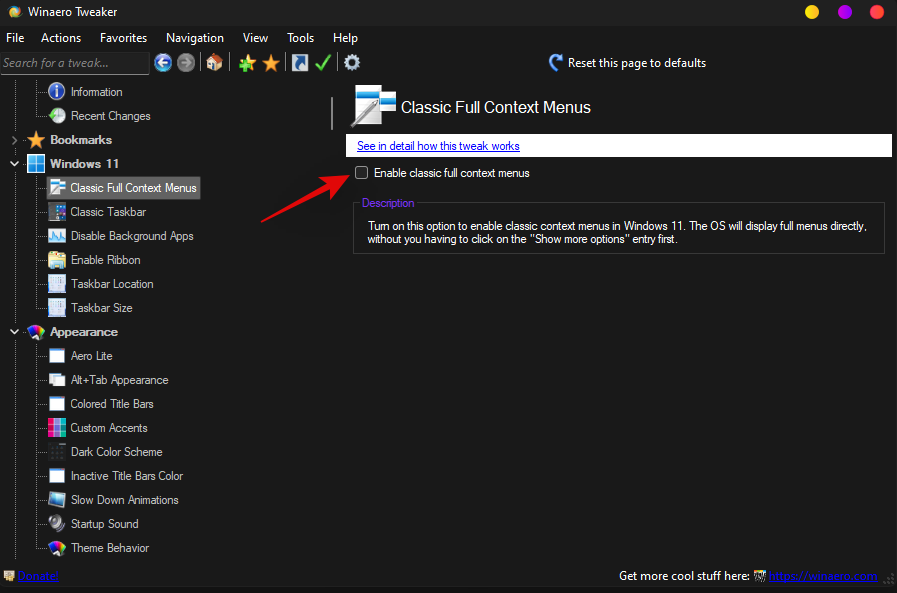
Click on ‘Restart Explorer’ at the bottom of your screen.
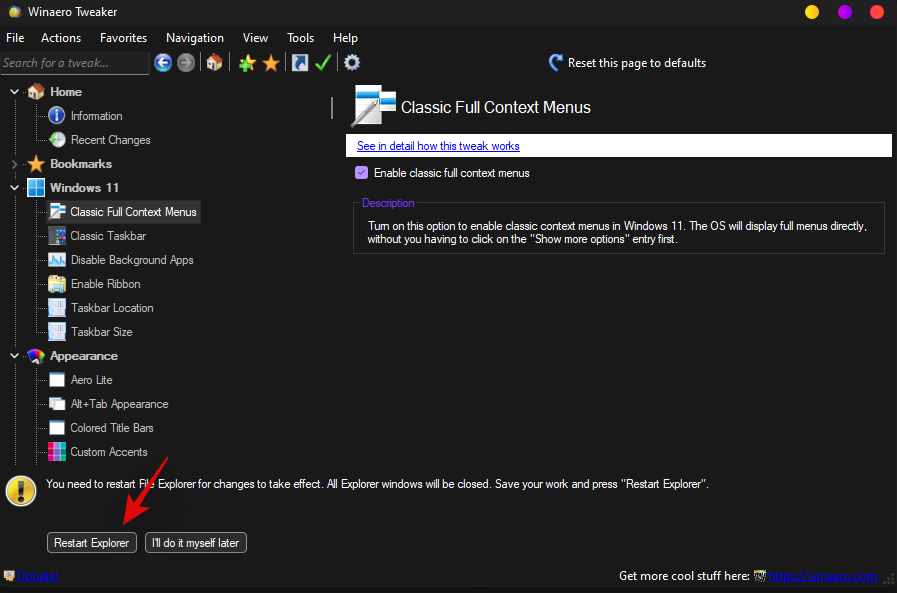
Once the Explorer.exe restarts on your system the old context menu should now be available to you. You can right-click anywhere on your screen to check the same.
Yes, most keyboards — including that on your laptop — have the right-click mouse key.
Most full-sized keyboards have this key sitting between the right Windows key and the right Ctrl key. In others, it may be between the “Fn” key and the right Ctrl key.

It is a little different on laptops, however. On some laptops, the Menu key is fitted between the right Alt and Ctrl, while in others, it is dispensed with altogether in order to save space.

If your keyboard has this button, then you don’t need much else to right-click on a selected item with your keyboard. Simply hover over or select an item and press this button to reveal the file/folder options.
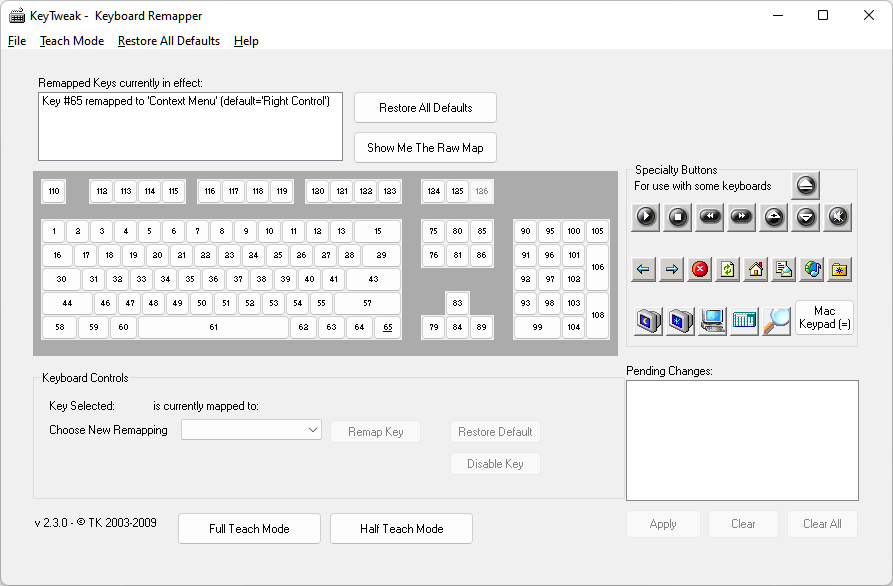
Using a software like KeyTweak, you can assign any key on your keyboard to function as a context-menu key instead of its usual function. In the image above, we have reassigned the Right Control key to the Context Menu function. It is simple and quite effective as it boosts your productivity by a notch.
Method #05: Using Shift+F10 shortcut combo
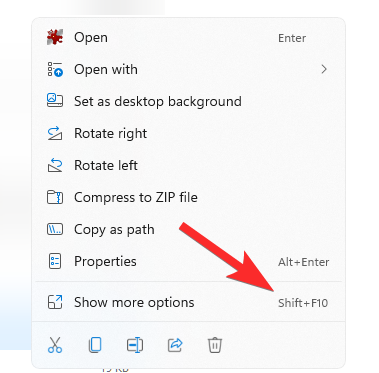
If you simply press Shift+F10 on your keyboard with a file selected, you will get the full context menu. That’s easy, too, but you will soon realize it’s quite tedious to press this combo and you wish for an easy fix.
This is why we have put this solution at number 5 only, even though it works straightaway and doesn’t require any tweaks or even installing something.
FAQs
Here are some commonly asked questions that should help clear up a few things for you when it comes to getting back the old Windows 10 right-click context menu in Windows 11.
Should you use third-party utilities to modify your system?
This is a personal choice but as Windows 11 is fairly new, we would recommend you to avoid using untrusted, new, or outdated utilities to customize Windows 11. Windows 11 has changed numerous things in the background and this includes how your visual styles, themes, context menus, and more are managed.
Using outdated or untrusted utilities can not only break your system but also force you to reset your system in case a major error occurs on your system. Hence we recommend you stay away from such utilities and only use the trusted and compatible ones with your version of Windows 11.
Is the automatic registry hack safe?
Yes, the automatic registry hack is a simple notepad file with the desired commands to make the necessary changes in your registry editor. You can check the code yourself by changing the extension for the file back to .txt on your PC and then opening it using a compatible text editor. You can also find the enclosed code mentioned below for your convenience.
If you wish to revert your changes and get back the new context menu in Windows 11, then you can use the guides below.
1. If you manually changed the Registry
If you made changes manually to the registry editor then navigate to the path given below, and delete the key for ‘InprocServer32’.
HKEY_CURRENT_USER\Software\Classes\CLSID\{86ca1aa0-34aa-4e8b-a509-50c905bae2a2}\InprocServer32
Once deleted, restart your system and the new context menu should be restored on your system.
2. If you used the automatic registry script
If you used the automatic registry hack instead, then you should run the file named ‘Disable’ by double-clicking on it.

Click on ‘Yes’ to allow changes to your registry and then restart your PC for good measure. Once restarted, your new context menu should now be restored to your system.
3. If you used Winaero Tweaker
Double click and launch Winaero Tweaker on your system and click on ‘Classic Full Context Menus’.
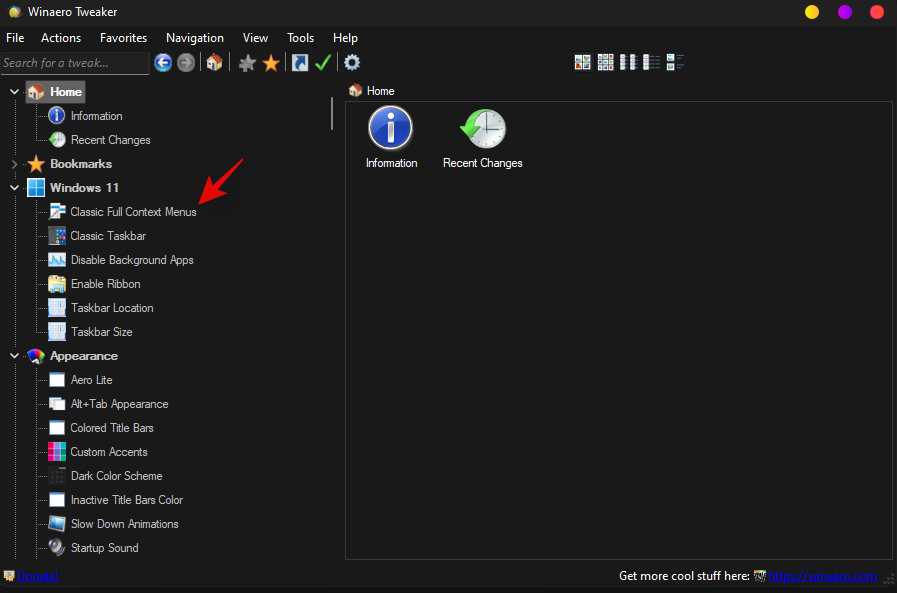
Uncheck the box for the same on your right.
Click on ‘Restart Explorer’ at the bottom.
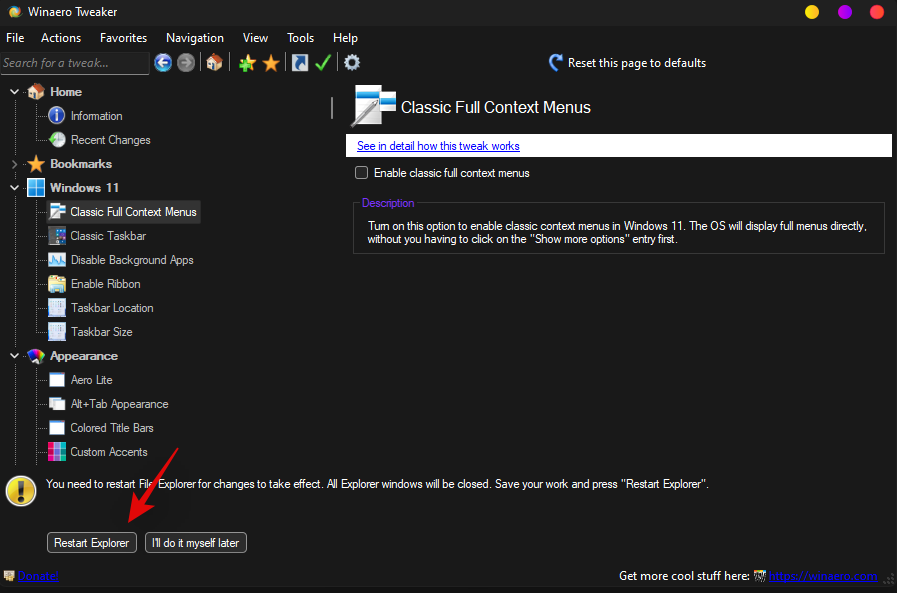
Once done, your new Windows 11 context menu should now be restored to your system.
We hope you were able to easily get the old Windows 10 context menu using the methods above on Windows 11. If you face any issues or have any more questions, feel free to drop them in the comments section below.
Related:







![Como corrixir o erro da pantalla verde de Windows 11 [8 xeitos] Como corrixir o erro da pantalla verde de Windows 11 [8 xeitos]](https://blog.webtech360.com/resources8/images31/image-5564-0105182715287.png)
![[Actualización: 8 de novembro] A ferramenta de recorte non funciona en Windows 11? Como solucionar problemas de erro ou atallos de Esta aplicación non se pode abrir. [Actualización: 8 de novembro] A ferramenta de recorte non funciona en Windows 11? Como solucionar problemas de erro ou atallos de Esta aplicación non se pode abrir.](https://blog.webtech360.com/resources8/images31/image-6552-0105182756436.jpg)
