How to Clean a PS5 Fan Without Taking It Apart: A Safe Beginner Guide

Learn how to clean PS5 vents safely without opening the console, using Sony-recommended low-power vacuuming, dry wiping, and proper airflow.
A blob of hot glue on fabric looks alarming because it grips fibers as it cools, but the safest first move is usually not to scrub, melt, or soak it. Let the glue become fully hard, make it colder, then lift it away with as little force as possible. A small amount of rubbing alcohol can help with stubborn residue on some fabrics, but only after checking the fiber content, care label, and colorfastness.
Illustrative scenario: imagine a small, clear bead of hot glue lands on a blue 100% cotton sweatshirt during a craft project. This example is hypothetical and is used only to show how the decision process works; it is not a test result or a claim about every cotton garment. The goal is to remove the glue while leaving the fabric's color, texture, and shape unchanged.
For washable fabric, a practical sequence is: let the hot glue cool completely, chill the spot with a freezer or bag of ice, peel or scrape the hardened glue with a fingernail or dull plastic edge, and then deal with any thin residue. Adhesive manufacturer Loctite specifically recommends freezing a garment for about 30 minutes or using a bag of ice when the item is too large for a freezer. It also advises against rubbing hot glue into fabric. See the manufacturer's hot-glue removal guidance.
The American Cleaning Institute gives the same general direction for adhesive stains: harden the material with ice or cold water, scrape gently with a dull edge, then rinse and launder as appropriate. Its stain removal guide is a useful reference for the laundering stage.
The care label matters because the same chemical or amount of friction can be harmless to one textile and damaging to another. The Federal Trade Commission's Care Labeling Rule guidance explains that garment care instructions and warnings are intended to tell consumers which cleaning, drying, and ironing procedures can be used without substantial harm.
In the hypothetical sweatshirt example, the label says 100% cotton and allows machine washing. That makes a cautious cold-and-lift approach reasonable. If your item says dry clean only, has an unknown fiber content, or includes fragile finishes, sequins, glued trim, velvet pile, delicate lace, or a structured backing, stop before adding solvents or aggressive scraping. A professional cleaner may be the lower-risk choice.
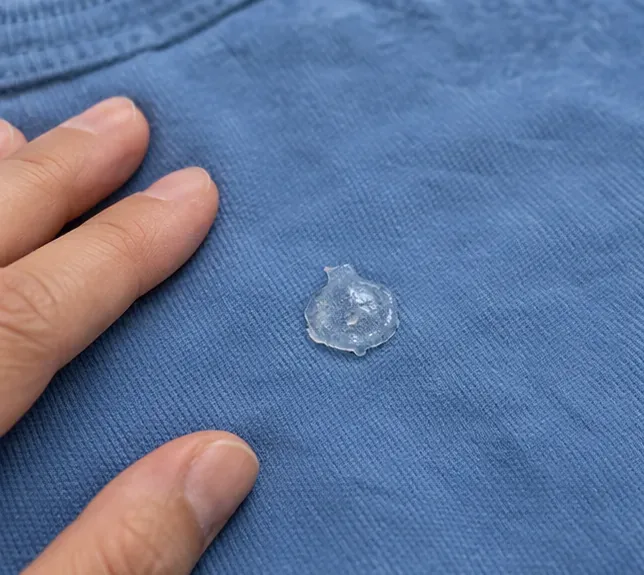
Do not rub a fresh glue spill. While it is soft, rubbing can push adhesive farther between yarns and enlarge the affected area. Wait until the blob is cool and firm. On a thick deposit, this may take longer than the surface appearance suggests.
For our hypothetical sweatshirt, the correct result at the end of this step is a firm, non-tacky bead sitting on top of the knit. If it still stretches, smears, or feels warm, wait longer. Do not use an iron or hair dryer as a first response; reheating can soften the adhesive again and make it easier to spread into surrounding fibers.
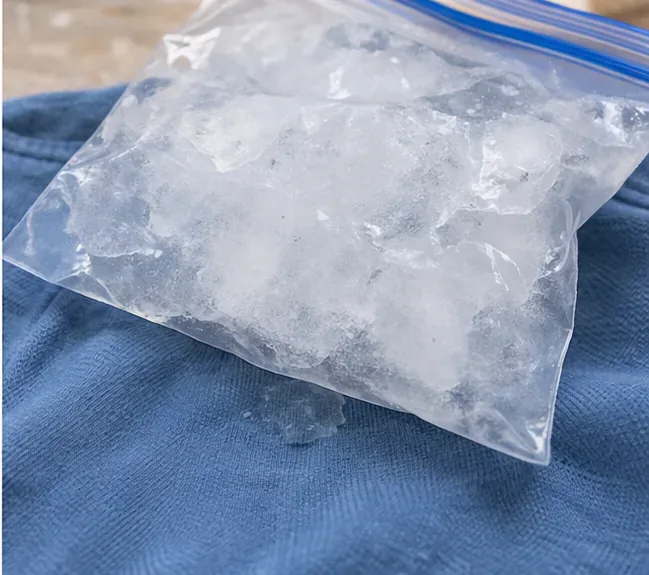
Cold makes the hardened adhesive easier to separate mechanically from many textile surfaces. Loctite recommends putting the garment in a freezer for about 30 minutes, or placing a bag of ice on the area when the item cannot go into a freezer. Keep loose ice and meltwater contained so you are not unnecessarily soaking the fabric.
In the illustrative sweatshirt case, place the ice bag directly over the bead until the glue feels rigid. Then move straight to lifting. If the glue bends instead of cracking or releasing at the edge, chill it again rather than increasing force.
Success check: the edge of the glue should feel easier to catch with a fingernail or dull plastic edge. If the cloth begins to stretch, fuzz, or distort before the glue moves, stop pulling and return to the cold step.
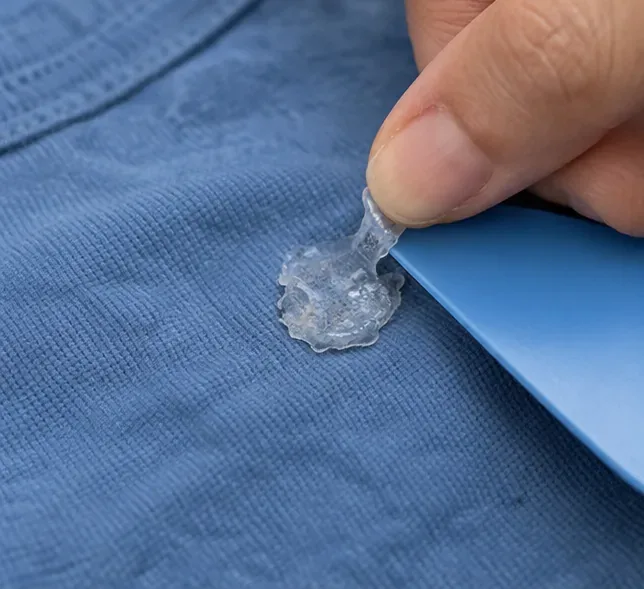
Start at the outer edge of the hardened glue. Try a fingernail first. If you need more leverage, use a dull plastic card, the rounded edge of a spoon, or a similar non-sharp tool. Keep the tool nearly parallel to the fabric and lift the adhesive rather than digging downward into the yarns.
For the hypothetical cotton sweatshirt, imagine the main glue bead lifting as one piece but leaving a thin glossy halo. That is a good reason to stop mechanical scraping. Chasing a faint film with more pressure can damage the fabric surface more than the residue itself.
The University of Georgia Extension's textile-care material also emphasizes gentle scraping with a dull tool and pretesting cleaning agents in an inconspicuous place. See its glue stain guidance for textiles.
A sharp blade can cut individual fibers before you realize it, especially on knits, fleece, loosely woven fabrics, and lightweight synthetics. A dull tool gives you more feedback and makes it easier to stop when the fabric starts to move with the glue.
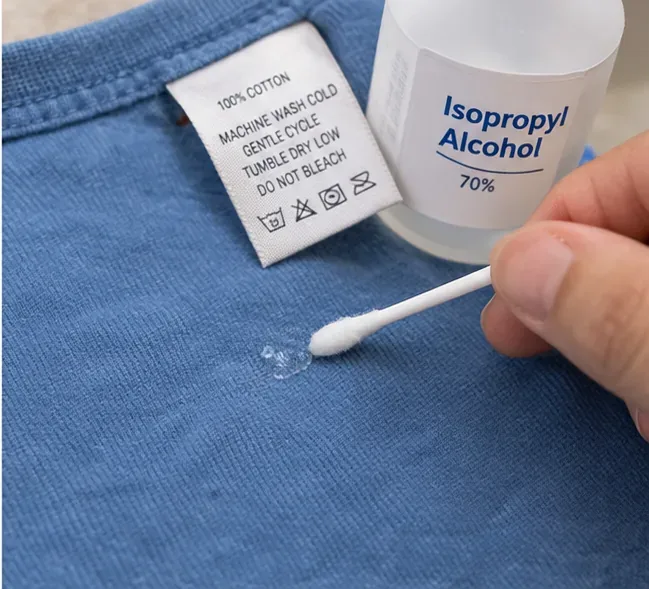
If a thin film remains after chilling and peeling, Loctite suggests using rubbing alcohol on a cotton swab, working gently from the edge of the dried glue. This is an optional step, not a universal rule. First test the alcohol on a hidden area and wait for it to dry. Check for color transfer, fading, texture change, or a tide mark before touching the visible spot.
This limitation is important. The University of Georgia Extension warns that rubbing or denatured alcohol can fade some dyes and can damage acetate, triacetate, modacrylic, and acrylic fibers. Its textile stain-removal product reference also recommends pretesting cleaning agents. If your label lists one of those fibers, or if you cannot identify the fiber, skip the alcohol step and consider professional cleaning.
For the hypothetical 100% cotton sweatshirt, after a successful hidden-area test, dampen the cotton swab rather than saturating it. Touch the residue at its edge, wait briefly for the bond to weaken, and try lifting again. Do not flood the fabric, and keep alcohol away from flames or other ignition sources because it is flammable.
Acetone is not necessary for the basic hot-glue method described here, and it creates extra compatibility risk. University of Georgia Extension specifically says not to use acetone on fabrics containing acetate and notes that triacetate is also vulnerable. For ordinary hot-glue residue, cold plus gentle lifting is the better first-line approach. If you are unsure what the material is, do not experiment with stronger solvents.
Once no solid glue remains, launder the item only in a way permitted by its care label. The American Cleaning Institute recommends repeating stain treatment if necessary and not putting a stained garment into the dryer until the stain is gone. That advice is useful here because heat can make it harder to judge and treat any remaining residue.
Air-dry the cleaned area first and examine it in good light. A successful result means there is no hard adhesive, no tacky patch, no new discoloration, and no obvious change in the fabric's texture. If you still see a shiny film but the textile is beginning to fuzz or lose color, stop. Preserving the garment is more important than forcing the last trace out at home.
| Situation | Best first move | When to change course |
|---|---|---|
| Thick, fully hardened blob on washable fabric | Chill, then peel from an edge | Re-chill if the glue bends or the fabric stretches |
| Large item that will not fit in a freezer | Use a sealed bag of ice over the spot | Keep meltwater contained and avoid soaking the area |
| Thin residue after the main blob is removed | Patch-test first; use a tiny amount of isopropyl alcohol only on compatible fabric | Stop immediately if dye transfers or texture changes |
| Acetate, triacetate, modacrylic, acrylic, unknown fiber, or delicate construction | Use cold and very gentle mechanical removal only | Skip alcohol and stronger solvents; consider professional cleaning |
| Dry-clean-only or valuable garment | Keep the glue hardened and avoid home solvent experiments | Take the item to a professional cleaner and identify the stain as hot-melt glue |
Stop home treatment if the garment is dry-clean-only, the fiber content is unknown, the glue is embedded in velvet or a delicate pile, the fabric begins to pill or stretch, a hidden test shows color transfer, or the item is valuable enough that a small cosmetic change would be unacceptable. Also stop if the adhesive has bonded multiple fabric layers together; separating them mechanically can tear the underlying material.
The cold-and-lift method works best when hot glue has formed a discrete hardened deposit on the surface. It is less predictable when the molten adhesive has soaked deeply through an open weave, bonded to a backing, or fused with heat-sensitive synthetic fibers. In those cases, complete removal without visible change may not be possible.
To remove hot glue from fabric, wait until it is fully hard, chill it, lift it from the edge with a fingernail or dull tool, and reserve rubbing alcohol for compatible fabrics that pass a hidden-area test. Follow the care label when laundering, and inspect the item before machine drying. In the hypothetical blue cotton sweatshirt example, the safest path is deliberately simple: cold first, minimal force second, solvent only if needed, and stop as soon as the fabric shows signs of stress.
Learn how to clean PS5 vents safely without opening the console, using Sony-recommended low-power vacuuming, dry wiping, and proper airflow.
Learn how to clean a car air filter safely, when a paper filter should be replaced instead, and how reusable filters require different care.
Learn how to clean a Keurig entrance and exit needle safely, clear coffee-ground clogs, rinse the brewer, and know when descaling is the next step.
Learn how to remove dried nail glue from clothes safely, when acetone is appropriate, which fabrics need extra care, and when to stop and call a cleaner.
Learn how to clean a metal range hood filter safely, when dishwasher cleaning is okay, and why charcoal filter care depends on your exact model.
Learn how to remove rust from golf clubs safely, judge the result, protect raw and plated finishes, and know when cleaning should stop.
Learn how to clean fabric blinds safely with gentle vacuuming, spot cleaning, rinsing, and drying—plus when water, washing, or DIY deep cleaning can cause damage.
Learn how to season gas grill grates safely, including when cast iron needs seasoning, when porcelain enamel does not, and how to check the result.
Clean a Breville toaster oven safely with mild soap, soft cloths, and the right sequence. Learn what clean should look like, what to avoid, and when to stop.
Learn how to clean a microwave grease filter, when a dishwasher is appropriate, and why charcoal filters should be replaced instead of washed.








