How to Clean a PS5 Fan Without Taking It Apart: A Safe Beginner Guide

Learn how to clean PS5 vents safely without opening the console, using Sony-recommended low-power vacuuming, dry wiping, and proper airflow.
Quick answer: For most washable clothes, remove any excess lipstick without smearing it, pretreat the spot with a prewash stain remover or liquid laundry detergent, work the product in gently, then wash according to the garment’s care label. Air-dry and inspect before using a machine dryer. If color remains, repeat the treatment rather than assuming one wash will finish the job.
This approach closely follows the American Cleaning Institute’s guidance for cosmetics and lipstick stains: pretreat, then launder. The exact product, water temperature, bleach option, and drying method should still be governed by the care label. The Federal Trade Commission’s Care Labeling Rule is the reason those instructions matter: manufacturers are required to provide care directions and warnings intended to prevent substantial harm during regular cleaning.
| Item or fabric | Best first move | What to avoid |
|---|---|---|
| Machine-washable cotton, polyester, or blends | Lift excess lipstick, pretreat with liquid laundry detergent or a prewash stain remover, then wash by the label | Rubbing hard, machine drying before the stain is gone |
| White washable fabric | Use the standard pretreat-and-wash method first; use bleach only if the care label and bleach product directions permit it | Assuming “white” automatically means chlorine bleach is safe |
| Delicate washable fabric | Use a mild label-compatible detergent, very gentle blotting, and minimal agitation | Abrasive brushing, aggressive solvents, high heat |
| Dry-clean-only clothing | Remove loose excess carefully and take the item to a professional cleaner; identify the lipstick stain | Home soaking, scrubbing, or solvent experiments |
| Unknown fiber or missing care label | Test any treatment on a hidden area and use the mildest method first | Strong bleach or solvent treatments without knowing fabric compatibility |
You do not need every item above for every stain. The shortest effective treatment is usually better than stacking multiple cleaners. Start with detergent or a purpose-made laundry pretreatment; move to a more targeted spot method only if the stain remains and the fabric can tolerate it.
If there is a visible smear or small chunk of lipstick sitting on the surface, lift it away with the edge of a spoon, dull knife, or plastic card. Work from the outside of the mark toward the center so you do not spread color into clean fibers. Avoid vigorous rubbing with a dry napkin; that can push the colored residue farther across the fabric.
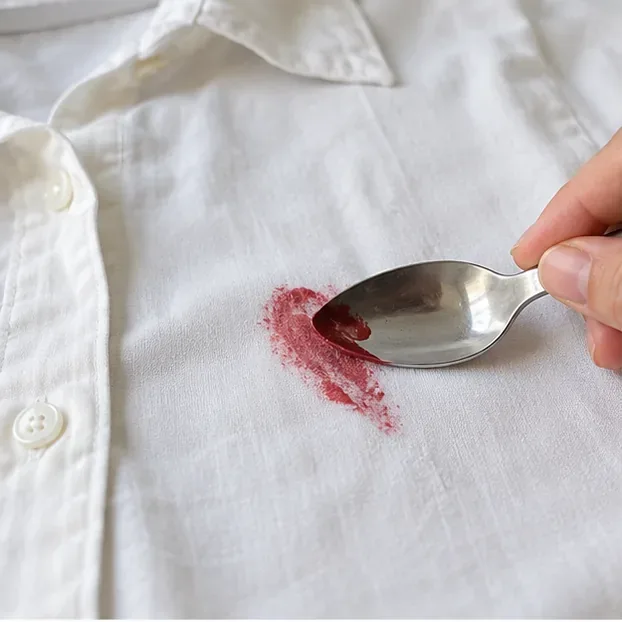
Place a clean white towel or several layers of white paper towel beneath the stained area. Apply a small amount of liquid laundry detergent or a prewash stain remover directly to the mark. The American Cleaning Institute lists liquid detergent, prewash stain remover, a paste made from powdered laundry product and water, or bar soap as suitable pretreatment options for cosmetics and lipstick.
Follow the product label for contact time. More product is not necessarily better: the goal is to wet the stained fibers enough for the detergent or pretreatment to work, not to saturate half the garment.

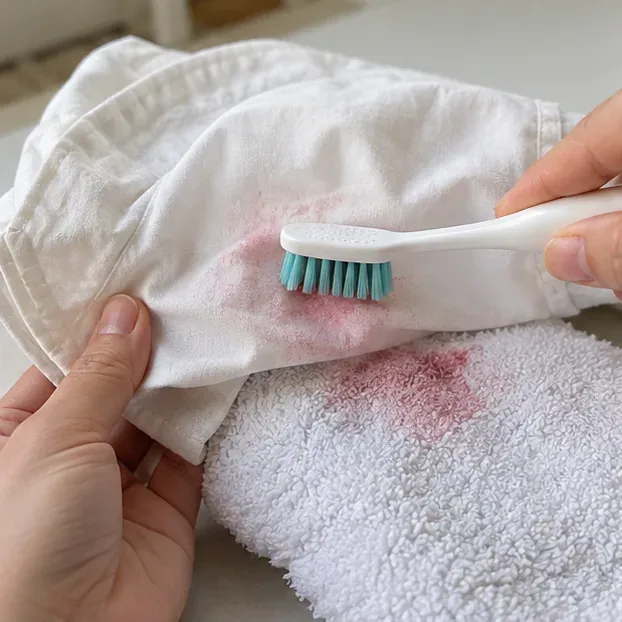
For a sturdy washable shirt, lightly massage the fabric with your fingers or use a soft-bristled brush with short, gentle strokes. If the item is delicate, skip the brush and blot or press the treatment in instead. When pigment begins transferring to the towel underneath, move the garment to a clean section of the towel so you are not pressing removed color back into the fabric.
Do not treat “more force” as “more cleaning.” Friction can roughen fibers, distort knits, or create a light-looking abrasion spot that remains even after the lipstick is gone.
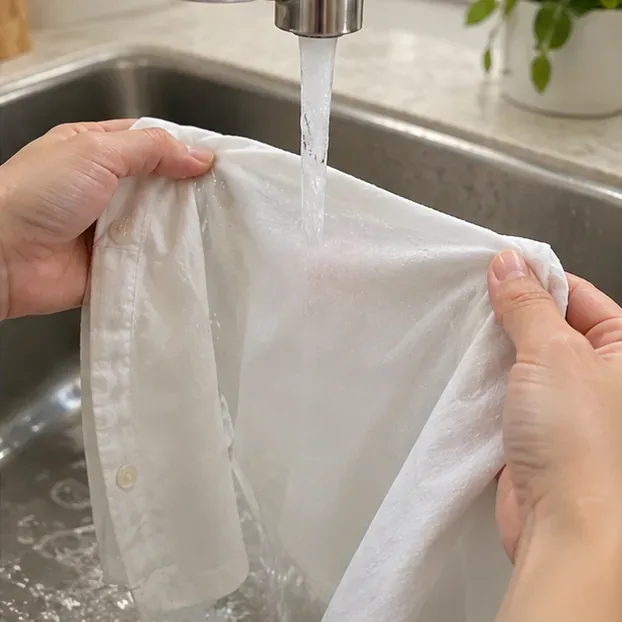
Rinse the treated area thoroughly using a water temperature that is safe for the garment, then wash it as directed on the care label. The FTC explains that U.S. care labels address washing, drying, bleaching, ironing, and warnings where needed. That means a generic stain-removal trick should never override a specific “hand wash,” “no bleach,” “wash cold,” or “dry clean” instruction.
If the label allows bleach and a residual tint remains after pretreatment, use only the type of laundry bleach permitted by the care label and the bleach product’s own directions. Do not assume that a white garment automatically tolerates chlorine bleach; trims, dyes, finishes, stretch fibers, and construction details can change what is safe.
After washing, check the area in good light while the garment is still damp, then let it air-dry if you are not sure the stain is completely gone. The American Cleaning Institute’s lipstick guidance for napkins specifically recommends air-drying and repeating the process if a little color remains. That is a useful practice for clothing too because it gives you another chance to treat remaining pigment before routine machine drying.
If a faint shadow remains, repeat the same pretreatment process once more. A second controlled pass is usually preferable to immediately jumping to a harsher chemical.
Older and transfer-resistant lipstick marks may require more than one treatment because the colored residue has had more time to settle into fibers. Start with the same detergent or prewash method. Let the product work for the time stated on its label, rinse, wash, and inspect.
For sturdy, colorfast washable fabric, there is one additional option worth knowing about: the American Cleaning Institute describes placing lipstick-stained napkins face-down on absorbent towels and dabbing from the back with 70% or 90% rubbing alcohol. This is not a universal garment instruction. If you consider it for clothing, first test a hidden area, avoid flooding the fabric, stop if color transfers from the garment itself, and do not use it when the care label or fabric manufacturer warns against solvent spot cleaning. Afterward, rinse thoroughly and launder as allowed by the label.
Stop and use a professional cleaner if the garment is labeled dry-clean-only, if the stain sits on silk-like or highly delicate fabric, if the item has beading or special finishes, if the garment’s own dye begins transferring, or if repeated gentle treatment is not improving the mark. Tell the cleaner that the stain is lipstick and mention any product you already applied. That information can help them choose a compatible professional process.
The core stain-removal steps in this guide are based on the American Cleaning Institute stain removal guide, including its cosmetics/lipstick pretreatment guidance and its separate lipstick method for napkins. Care-label recommendations are based on the Federal Trade Commission guidance on the Care Labeling Rule. These sources provide general cleaning guidance; the garment’s own care label and the directions on any cleaning product you use remain the most specific instructions for the item in front of you.
Learn how to clean PS5 vents safely without opening the console, using Sony-recommended low-power vacuuming, dry wiping, and proper airflow.
Learn how to clean a car air filter safely, when a paper filter should be replaced instead, and how reusable filters require different care.
Learn how to clean a Keurig entrance and exit needle safely, clear coffee-ground clogs, rinse the brewer, and know when descaling is the next step.
Learn how to remove dried nail glue from clothes safely, when acetone is appropriate, which fabrics need extra care, and when to stop and call a cleaner.
Learn how to clean a metal range hood filter safely, when dishwasher cleaning is okay, and why charcoal filter care depends on your exact model.
Learn how to remove rust from golf clubs safely, judge the result, protect raw and plated finishes, and know when cleaning should stop.
Learn how to clean fabric blinds safely with gentle vacuuming, spot cleaning, rinsing, and drying—plus when water, washing, or DIY deep cleaning can cause damage.
Learn how to season gas grill grates safely, including when cast iron needs seasoning, when porcelain enamel does not, and how to check the result.
Clean a Breville toaster oven safely with mild soap, soft cloths, and the right sequence. Learn what clean should look like, what to avoid, and when to stop.
Learn how to clean a microwave grease filter, when a dishwasher is appropriate, and why charcoal filters should be replaced instead of washed.








