Home
» How To
»
How to Disinfect a Hairbrush Safely: A Practical Step-by-Step Guide
How to Disinfect a Hairbrush Safely: A Practical Step-by-Step Guide
A hairbrush collects shed hair, skin flakes, oils, dust, and styling-product residue. The most important point is that cleaning comes before disinfecting. Cleaning physically removes debris and many germs; disinfecting uses a chemical product to kill germs that remain on a suitable surface. The U.S. Centers for Disease Control and Prevention (CDC) says routine cleaning is enough in many household situations, while disinfection is more useful when someone is sick or when an item may have been exposed to an infectious condition.
This guide shows a practical method for a washable synthetic brush with hard, nonporous surfaces. Wood handles, natural bristles, padded or cushioned bases, and electrical brushes need more caution because soaking or strong chemicals can damage them. When the brush maker gives care instructions, those instructions should take priority.
Quick reference: choose the method by brush type
Brush type
Routine cleaning
Disinfection approach
Main caution
One-piece plastic or other hard, nonporous brush
Remove hair, scrub with soap or detergent and water, rinse, dry
Use an EPA-registered disinfectant only if its label permits the surface and application method
Keep the surface wet for the full label contact time
Cushioned or padded brush
Remove hair and clean the bristle area without prolonged soaking unless the maker allows it
Use only a compatible brush sanitizer or disinfectant method approved for the materials
Water can become trapped under a cushion
Wood or natural-bristle brush
Follow the manufacturer's care method; use minimal moisture when directed
Do not assume a household surface disinfectant is safe for porous materials
Soaking can swell wood or damage natural fibers
Electric or heated brush
Unplug it and follow the appliance instructions
Disinfect only the external surfaces and only when the manufacturer permits the product
A comb, hair pick, or blunt-ended tool for lifting trapped hair
A small clean toothbrush or brush-cleaning tool
Warm water and a small amount of mild soap or detergent
Clean paper towels or a freshly laundered towel
If true disinfection is needed, an EPA-registered disinfectant whose label allows use on the brush's hard, nonporous material
Gloves if the disinfectant label recommends them
Do not choose a disinfectant just because it smells strong. An EPA-registered product has directions that specify where it can be used, how long it must remain wet, and what safety precautions are required. CDC guidance likewise says to clean first, follow the product label, ventilate when needed, and never mix cleaning or disinfecting chemicals. See the CDC cleaning and disinfecting guidance.
How to disinfect a washable hairbrush step by step
1. Inspect the brush before adding water
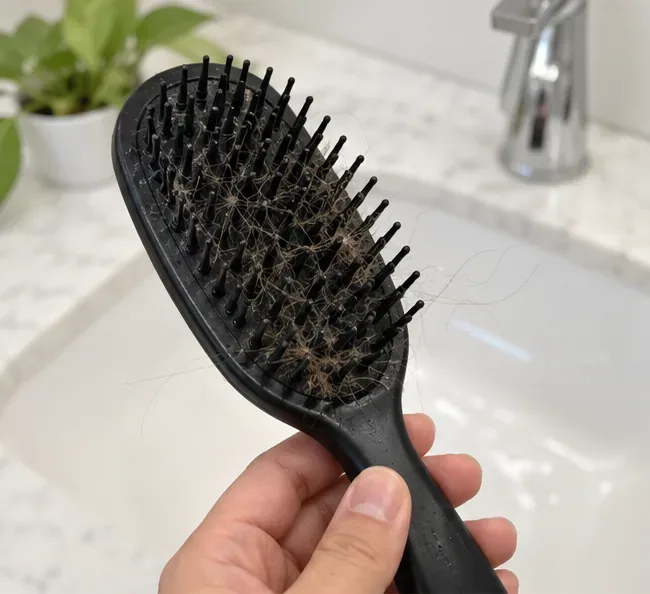
Look at the handle, bristle bed, cushion, seams, vents, and any metal or electrical parts. If the brush has wood, natural fibers, a soft cushion, batteries, a heating element, or an unknown finish, stop and check the manufacturer's care instructions before soaking or spraying it. This prevents a hygiene task from turning into a damaged brush.
Start by inspecting the brush and identifying visible hair, residue, and materials that may limit soaking or chemical disinfection.
2. Remove every strand of trapped hair you can reach
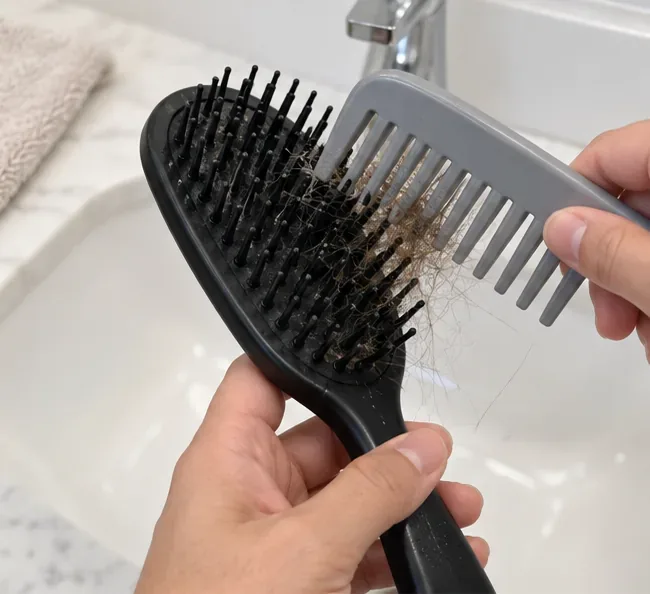
Pull loose hair away from the bristles with your fingers, then work a comb or brush-cleaning tool under the remaining loops. Removing hair first exposes the bristle base and prevents clumps from blocking soap or disinfectant. Be patient around capped bristles so you do not bend or pull them out.
Lift hair out before washing so soap and later disinfectant can reach the bristle bed instead of sitting on debris.
3. Scrub off oils and styling-product residue
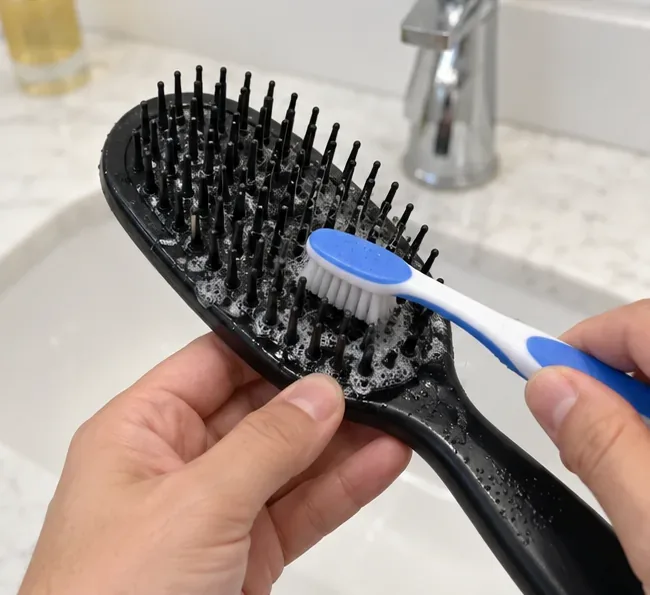
Wet a small toothbrush with warm, soapy water and scrub between rows of bristles and around the base. Pay attention to cloudy films, sticky hairspray residue, and compacted dust. This mechanical scrubbing matters: the CDC notes that dirt and other impurities can make disinfectants less effective if they are left on the surface.
Use mild soap or detergent and a small brush to loosen oily residue and buildup around the bristle base.
4. Wash the brush, but immerse it only if the manufacturer allows it
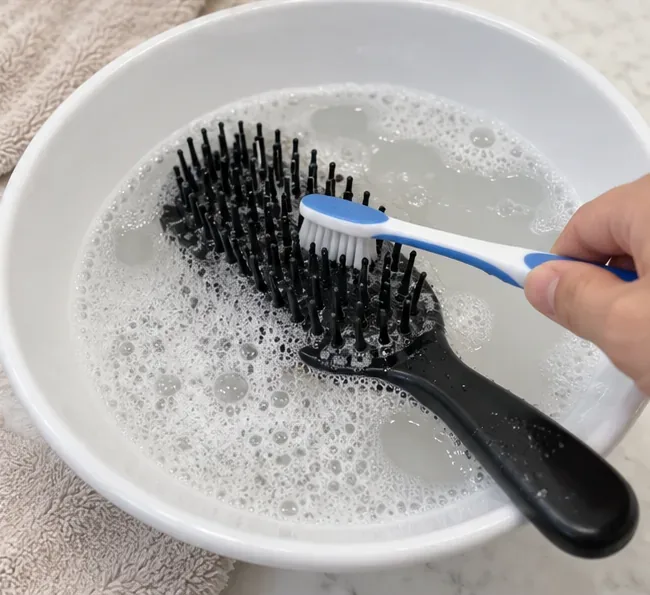
For a fully washable plastic brush, briefly work the bristle area in warm soapy water and continue scrubbing until visible soil is gone. Do not use this immersion step automatically for cushioned, wooden, natural-bristle, or electrical brushes. Some manufacturers specifically recommend a gentler surface-cleaning method instead.
For example, Tangle Teezer instructs users of its Original brush to remove loose hair, scrub between the teeth and base with soap in warm water, rinse, and allow it to dry naturally. See the manufacturer's care instructions for the Tangle Teezer Original.
Only a brush confirmed to be washable should be immersed; keep cushioned, wooden, natural-bristle, and electrical brushes out of standing water unless their maker says otherwise.
5. Rinse away soap and loosened debris
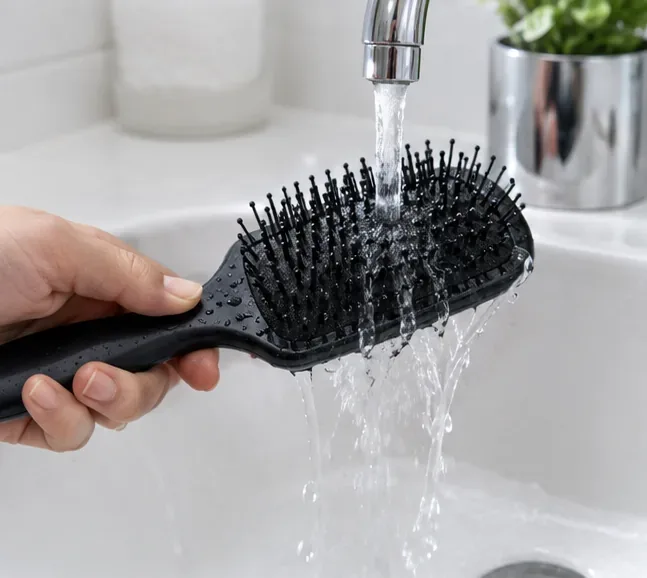
Rinse a washable brush under clean running water until the suds are gone. Residual soap and organic matter can interfere with a later disinfectant step, so the goal is a visibly clean surface before any chemical is applied. If the brush should not be held under running water, use the manufacturer's approved wiping or rinsing method instead.
Rinse away loosened debris and soap so the surface is clean before any optional disinfectant is applied.
6. Remove excess water and let the surface become clean and ready
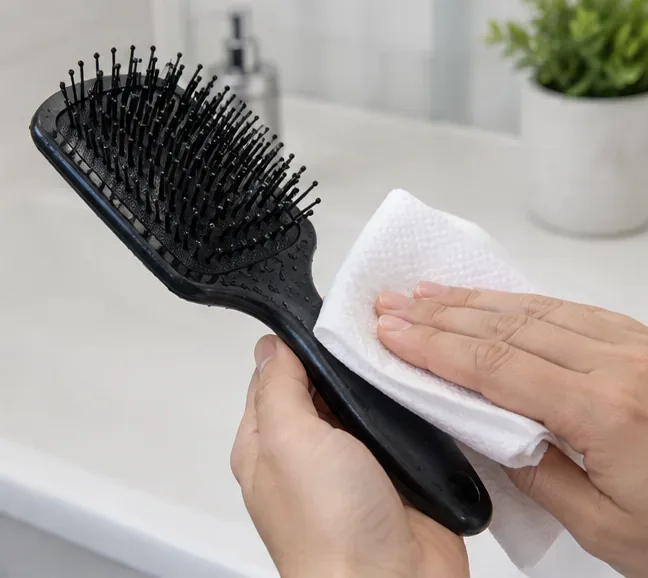
Shake off water and blot the handle and outer surfaces with a clean paper towel or freshly laundered towel. Do not force a towel deep into a cushion where it can snag bristles. If a disinfectant label requires a dry surface before application, wait until the brush reaches that condition. Professional salon rules provide a useful sequence: remove visible debris, clean with soap or detergent and water, dry, then disinfect according to the product directions.
The California Board of Barbering and Cosmetology describes that sequence for disinfectable non-electrical tools in its health and safety regulations.
Remove excess water after rinsing and follow the disinfectant label if it specifies whether the surface should be dry before application.
7. Apply a compatible disinfectant for the full contact time
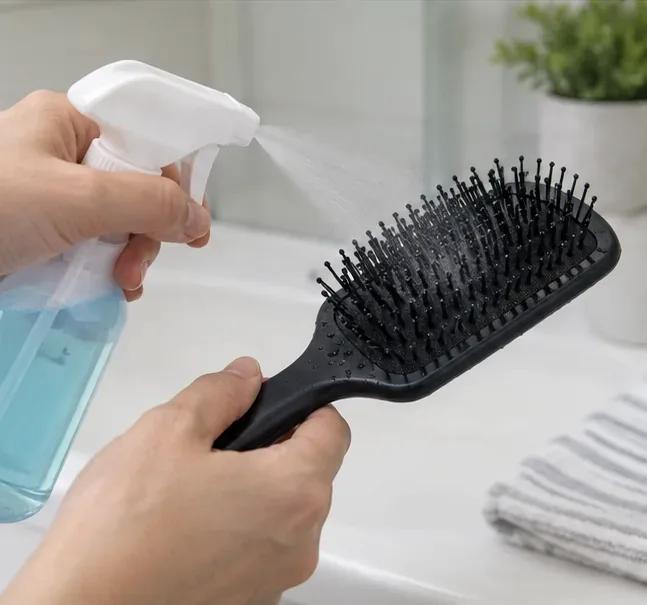
If disinfection is actually needed, apply an EPA-registered disinfectant that is labeled for the brush's hard, nonporous material. The product may direct you to spray, wipe, or immerse the item. Follow that exact method. Most importantly, keep the treated surface visibly wet for the entire contact time stated on the label. Reapply only as directed if the surface begins drying too soon.
Do not improvise a stronger concentration, combine products, or mix bleach with other cleaners. CDC and EPA guidance warn against mixing cleaning and disinfecting chemicals. If the label calls for rinsing after the contact time, rinse as instructed; if it does not, do not invent an extra step that could affect the product's performance.
When disinfection is needed, use a product labeled for the brush material and keep the surface wet for the full contact time stated on the product label.
8. Air-dry completely and store the brush clean
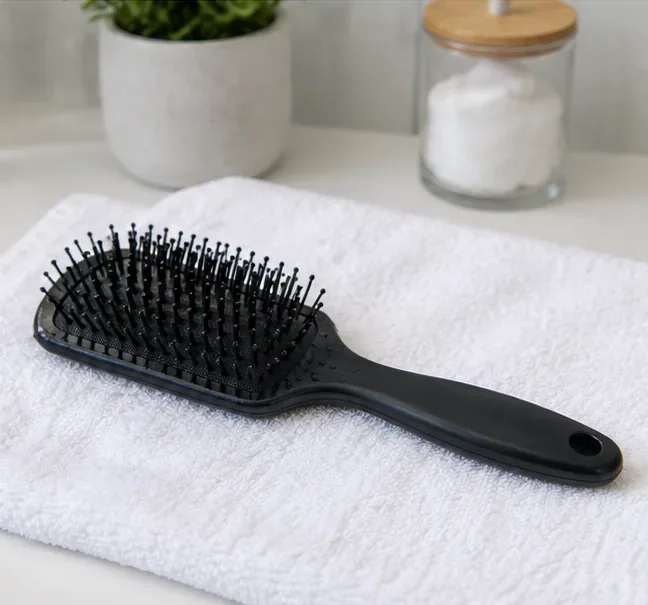
Place the brush on a clean surface and let it air-dry fully before using or storing it. Positioning depends on the brush design; the goal is to let water drain rather than collect inside a seam or cushion. Once dry, keep the brush somewhere clean instead of dropping it back into a drawer full of loose hair or used styling tools.
Allow the brush to dry completely in a clean area before returning it to storage or using it again.
When is disinfection actually necessary?
At home, you do not need to disinfect a hairbrush after every use. CDC guidance says cleaning alone removes most germs in many routine household situations. Disinfection becomes more relevant after illness, after suspected infectious contamination, or when an item has been shared with someone who may have a transmissible condition. The simplest prevention habit is not to share brushes in the first place; the CDC's hair and scalp hygiene guidance specifically recommends not sharing brushes, combs, and similar personal items.
Special case: head lice
Head lice require a specific approach that is not the same as ordinary surface disinfection. The CDC recommends soaking combs and brushes used by an infested person in hot water at at least 130°F (54°C) for 5 to 10 minutes. That temperature can damage some plastics, glues, finishes, or cushioned brushes, so confirm that the brush can tolerate the treatment. The CDC also says fumigant sprays and fogs are not necessary for head lice and can be toxic if inhaled or absorbed through the skin. See the CDC head lice treatment guidance.
Special case: ringworm or another fungal infection
Ringworm is caused by fungi and can spread through shared personal items. CDC prevention guidance says not to share personal items, including hairbrushes, and notes that common disinfectants can kill the fungus on appropriate surfaces. A hairbrush still presents a materials problem: a hard plastic surface may be compatible with a registered disinfectant, while wood, natural bristles, or deep padding may be difficult to disinfect without damage. In that situation, follow the brush manufacturer's instructions and the disinfectant label rather than soaking the item by guesswork. See the CDC ringworm prevention guidance.
What not to do
Do not disinfect a visibly dirty brush first. Remove hair and clean away residue before applying a disinfectant.
Do not mix chemicals. Never combine bleach, ammonia, vinegar, alcohol, or other cleaners in an attempt to make a stronger solution.
Do not assume every brush can be submerged. Cushions, wood, natural bristles, glues, and electrical components may be damaged by soaking.
Do not guess the disinfectant contact time. Read the label and keep the surface wet for the specified time.
Do not use a general household disinfectant without checking compatibility. Olivia Garden, for example, advises using sanitizing products designed for hairbrushes and following the sanitizing product manufacturer's directions to preserve brush performance. See the Olivia Garden brush-care guidance.
Do not put a damp brush straight into a closed drawer or bag. Let it dry completely first.
How often should you clean a hairbrush?
There is no single evidence-based household schedule that fits every brush and every person. A practical rule is to remove trapped hair whenever it becomes noticeable and wash the brush when you see oily residue, dust, or styling-product buildup. Disinfect only when there is a reason to do so, such as illness, suspected infectious contamination, or a professional-use requirement. Brand-specific care schedules can be more detailed; for example, Mason Pearson says its brushes should be dry-cleaned every one to two weeks and thoroughly cleaned monthly, but that recommendation is for its own brush construction and should not be treated as a universal rule.
Final checklist
Identify the brush material before using water or chemicals.
Remove hair and visible debris first.
Clean with soap or detergent and water using a method the brush can tolerate.
Rinse or wipe away cleaning residue as appropriate.
Use a disinfectant only when needed and only on a compatible surface.
Follow the disinfectant label's exact contact time, dilution, ventilation, and safety directions.
Use the CDC's hot-water method for head-lice brushes only when the brush can tolerate it.
Air-dry completely and store the brush in a clean place.
For most people, the best routine is simple: keep the brush free of hair and buildup, avoid sharing it, and reserve true disinfection for situations where it adds a clear hygiene benefit. That approach is easier on the brush and is consistent with current CDC and EPA guidance.