How to Clean a PS5 Fan Without Taking It Apart: A Safe Beginner Guide

Learn how to clean PS5 vents safely without opening the console, using Sony-recommended low-power vacuuming, dry wiping, and proper airflow.
The safest way to clean an air fryer heating element is to work with the appliance unplugged and fully cooled, remove the basket so you can see the upper cooking chamber, then use as little moisture as possible: a soft damp sponge or cloth for greasy film and a soft- to medium-bristle brush for stuck crumbs. Do not spray cleaner directly onto the heater, soak the main unit, or scrape the element with steel wool, a metal tool, or a hard brush.
That basic approach is supported by current manufacturer guidance, but one detail varies by model: access. Philips, for example, tells owners of the models covered by its support page to place the appliance upside down on a soft cloth to reach the heater. That does not mean every air fryer should be inverted. Check your own manual before changing the unit's normal orientation.
Usually, yes—if you are removing surface grease, crumbs, or cooked-on food from an intact heating element. This is routine cleaning, not electrical repair. The Electrical Safety Foundation International's guidance for cleaning electrical equipment says equipment should be de-energized when possible, hot surfaces should be allowed to cool, cleaning solutions should dry before power is restored, and manufacturer instructions should be followed.
Stop and seek manufacturer support instead of continuing if the heating element is loose, bent, cracked, visibly damaged, or if the appliance repeatedly trips a breaker. Likewise, cleaning is not a fix for a frayed cord, burned connector, or an electrical smell coming from the housing.
Find the model number and, if possible, open the cleaning section of its manual. That matters because basket-style air fryers, dual-basket models, toaster-oven air fryers, and steam-capable models can have different access points and cleaning restrictions.
| Use | Why |
|---|---|
| Soft microfiber cloth or non-abrasive sponge | Removes grease without aggressive scraping |
| Soft- to medium-bristle cleaning brush | Lifts crumbs and residue from the heater and nearby metal |
| Flexible soft-bristle detail brush | Helps reach behind the element only where the manual permits access |
| Warm water | Dampens a cloth or sponge; it should not be poured into the main unit |
| Dry towel or paper towel | Removes remaining moisture before reassembly |
Avoid steel wool, metal scrapers, hard-bristle brushes, abrasive powders, and direct sprays. Cosori's April 3, 2025 cleaning guidance specifically recommends a soft-bristle brush around the heating element, says not to apply water directly to it, and calls for the interior and heating area to be fully dry before reassembly. See Cosori's air fryer cleaning and maintenance guidance.
Disconnect the plug from the wall before you touch the cooking chamber. Do not rely only on the power button. Wait until the basket, chamber, and heater are cool enough to touch safely. If you just finished cooking, removing the basket after shutdown can help the interior release heat, but follow your manual's handling instructions.
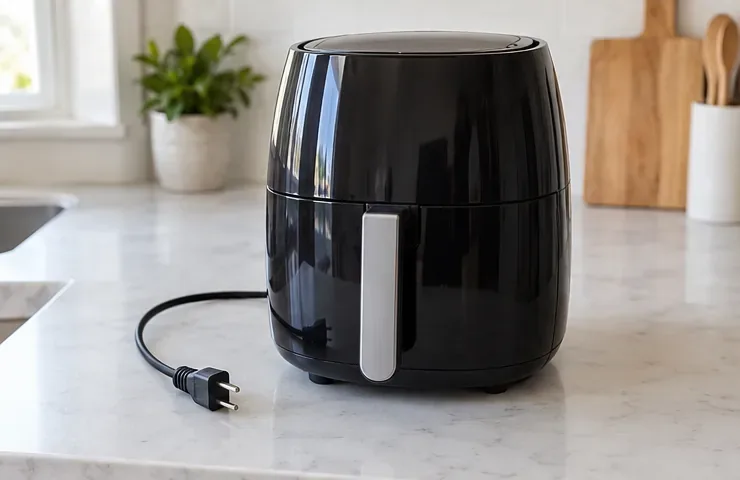
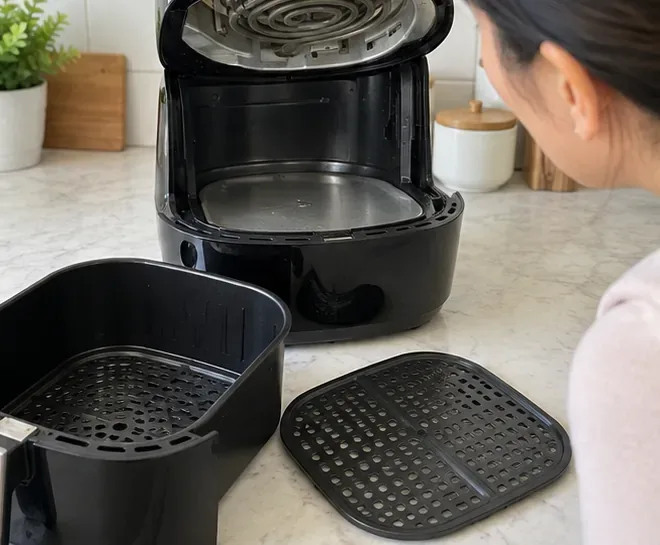
Pull out the basket or drawer and remove the crisper plate, rack, or insert. Clean those parts separately according to the manual. Taking them out gives you a clear line of sight to the upper interior and prevents loose crumbs from falling back into the basket while you work.
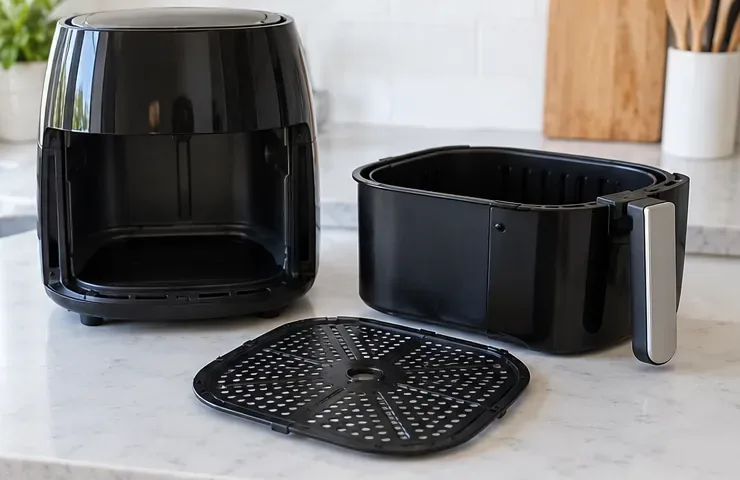
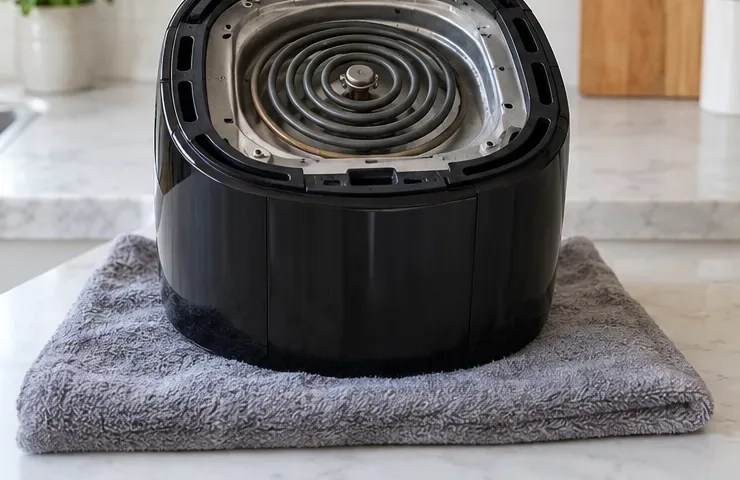
For many basket air fryers, you can simply look upward into the empty chamber. Some models are easier to reach from another approved position. Philips' current support instructions for the models listed on its page say to place a soft cloth underneath and turn the appliance upside down to reach the heating element. Read the Philips Airfryer cleaning instructions before using that method, and do not generalize it to a different brand or model.
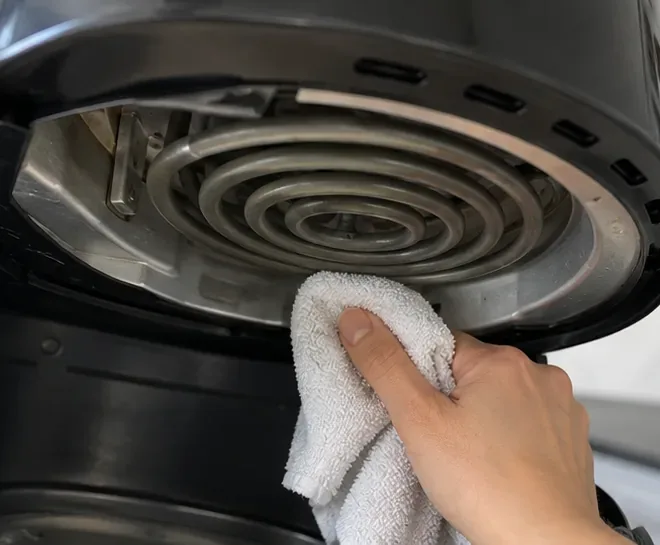
Use a soft sponge or cloth dampened with warm water and wrung out well. Work on the metal surfaces around the heater and, where the manual allows, gently wipe the element itself. The goal is to transfer grease to the cloth—not to flood the upper chamber. Re-wet and wring the cloth rather than pouring water into the machine.
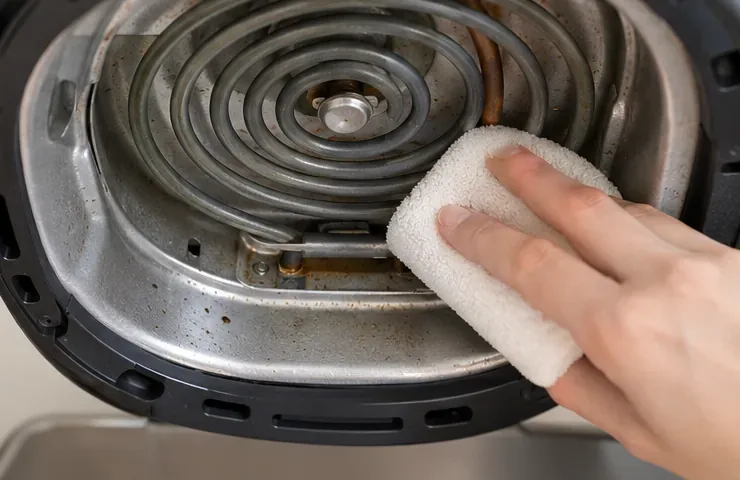
If wiping does not remove dry debris, use a soft- to medium-bristle brush and light pressure. Philips warns against steel wire and hard-bristle brushes because they can damage the heater's coating. A Ninja AF100-series owner's guide likewise instructs users to clean the heating element with a cleaning brush to remove food residue. See the Ninja AF100 Series owner's guide.
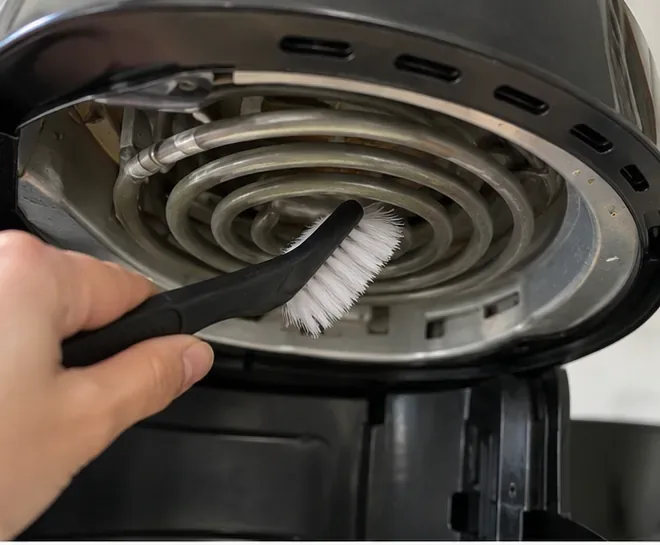
Crumbs can collect behind the coil where airflow carries light food particles. Philips notes that the area behind its heating element can be reached with a flexible brush. If your model offers similar access, guide a flexible soft-bristle brush through open spaces without bending the coil, dislodging brackets, or forcing the brush into wiring or the fan housing.
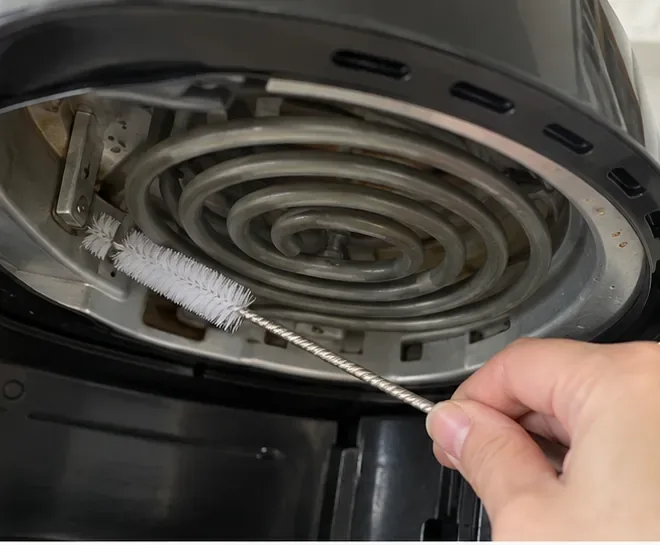
After brushing, wipe away the loosened particles with a clean, slightly damp cloth, then follow with a dry cloth or paper towel. Do not leave droplets on the element, nearby metal, controls, or electrical openings. ESFI recommends letting cleaning solutions dry before re-energizing electrical equipment, and Cosori tells users to dry the heating area completely.
Return the appliance to its normal upright position if you moved it. Look for remaining crumbs, greasy patches, pooled moisture, a displaced bracket, or anything touching the heater that should not be there. Reinstall the dry basket and accessories only after the interior is dry.
Do not automatically run every air fryer empty after cleaning. Philips tells owners of the models covered by its cleaning page to run the appliance for a few minutes without food after cleaning so loosened residue can fall into the pan, but that is a model-specific manufacturer instruction. If your own manual does not direct an empty run, simply reassemble the appliance when dry and use it normally.
Do not treat any of them as a universal heating-element cleaner. Manufacturer instructions separate the removable basket from the electrical cooking chamber. For example, Cosori discusses baking soda for stubborn stains on removable basket parts but tells users to be cautious around the heater and avoid applying water directly to it. Philips discusses stronger liquid degreaser for grease stains on the pan or basket, while its heater instructions call for a soft sponge with hot water and a soft- to medium-bristle brush.
For the heating element itself, the conservative default is warm water on a well-wrung soft cloth or sponge plus a soft brush. Do not spray oven cleaner, disinfectant, or degreaser into the heater area unless your exact model's manufacturer explicitly says that product and method are acceptable. ESFI also advises against sprays or atomized cleaning agents on electrical equipment unless the manufacturer specifically instructs their use.
No, not as a general rule. Turning a unit over is an access technique, not a requirement of air-fryer cleaning. Philips explicitly recommends it on its current support page for the models that page covers, using a soft cloth to prevent scratches. Other manufacturers may not. If your manual is silent, keep the machine in its normal orientation and clean only what you can reach safely.
Frequency depends on the food you cook and the manufacturer's instructions. Greasy meats, breading, cheese, and light crumbs can create more splatter or debris than dry foods. A useful habit is to inspect the heater area after cooking once the appliance is cool and remove visible residue before it repeatedly reheats.
Philips' support page about white smoke says greasy residues from previous use can contribute to smoke and advises cleaning the pan, basket, and heating element thoroughly after every use for the covered models. It also notes that light ingredients can be pulled toward the heating element by strong airflow. See Philips' troubleshooting guidance for white smoke. Other brands may specify a different routine, so your model manual remains the final reference.
Repeat gentle wiping and brushing rather than escalating to a sharp tool. If residue does not lift with the manufacturer-approved method, contact the brand's support team before trying stronger chemicals. Carbonized material may be stubborn, but damaging a coating, bending the element, or pushing liquid into electrical parts creates a bigger problem than the stain.
Stop using the appliance and seek service if you see physical damage, the element appears loose, the unit trips a breaker, or smoke continues after visible food and grease have been removed. Persistent smoke can have causes other than surface dirt, so continued scraping is not a sound troubleshooting strategy.
You are looking for a practical result, not a factory-new shine. The heater and surrounding metal should be free of loose crumbs and obvious grease deposits, the chamber should have no pooled water or soap residue, and the element should look intact and sit in its normal position. A few permanent discoloration marks may remain on metal after repeated high-heat use; do not grind at them simply for appearance.
Before plugging the air fryer back in, confirm that every cleaned surface is dry and that the basket and accessories are correctly reinstalled. If the first normal cooking cycle produces an unusual electrical odor, sparking, or repeated breaker trips, disconnect the appliance and contact the manufacturer or an authorized service provider.
Learn how to clean PS5 vents safely without opening the console, using Sony-recommended low-power vacuuming, dry wiping, and proper airflow.
Learn how to clean a car air filter safely, when a paper filter should be replaced instead, and how reusable filters require different care.
Learn how to clean a Keurig entrance and exit needle safely, clear coffee-ground clogs, rinse the brewer, and know when descaling is the next step.
Learn how to remove dried nail glue from clothes safely, when acetone is appropriate, which fabrics need extra care, and when to stop and call a cleaner.
Learn how to clean a metal range hood filter safely, when dishwasher cleaning is okay, and why charcoal filter care depends on your exact model.
Learn how to remove rust from golf clubs safely, judge the result, protect raw and plated finishes, and know when cleaning should stop.
Learn how to clean fabric blinds safely with gentle vacuuming, spot cleaning, rinsing, and drying—plus when water, washing, or DIY deep cleaning can cause damage.
Learn how to season gas grill grates safely, including when cast iron needs seasoning, when porcelain enamel does not, and how to check the result.
Clean a Breville toaster oven safely with mild soap, soft cloths, and the right sequence. Learn what clean should look like, what to avoid, and when to stop.
Learn how to clean a microwave grease filter, when a dishwasher is appropriate, and why charcoal filters should be replaced instead of washed.








