Home
» How To
»
How to Clean a Stained Dry-Erase Board Without Damaging the Surface
How to Clean a Stained Dry-Erase Board Without Damaging the Surface
A stained dry-erase board can look permanently ruined even when the problem is only old ink residue, a dirty eraser, or a cleaner film left behind after earlier attempts. The safest fix is not to jump straight to the strongest solvent. Different writing surfaces tolerate different cleaners, so the best process starts gently, confirms the board type when possible, and escalates only when the manufacturer allows it.
Illustrative example: imagine Maya opens a small conference room on Monday morning and finds the whiteboard covered with faint blue and red shadows from last week, plus one dark black line that does not erase. This is a hypothetical example used only to show how the decision process works; it is not a report of a real cleaning test or testimonial. Maya's goal is not simply to make the board look whiter. She wants the surface to erase cleanly afterward without leaving a sticky film, dull patch, or damaged coating.
Quick answer: start with the gentlest method that matches the board
For ordinary dry-erase ghosting, first erase the board thoroughly with a clean eraser or microfiber cloth. Then use water or a whiteboard cleaner that the board manufacturer approves, wipe with a soft clean cloth, and dry the surface completely. If a mark is actually permanent marker, one manufacturer-backed technique is to cover the mark with fresh dry-erase ink, wait briefly, and erase it. Stronger products such as isopropyl alcohol should be used only when the instructions for that specific surface permit them.
This last point matters. Claridge's care sheet for its melamine markerboard says not to use alcohol or alcohol-based cleaners, while its porcelain care sheet recommends isopropyl alcohol for permanent-marker residue. That contrast is a practical reminder that "whiteboard" is a category, not one single surface material.
First, identify what kind of problem you have
What you see
Likely issue
Best first move
Faint colored shadows after erasing
Ghosting or dry-erase ink residue
Erase thoroughly, then clean with water or an approved whiteboard cleaner
Smears that move around instead of disappearing
Dirty eraser, oily residue, or cleaner film
Switch to a clean microfiber cloth and remove residue before adding more cleaner
A dark line that barely changes when erased
Possible permanent marker
Try the dry-erase-marker-over method, then follow surface-specific guidance
Sticky patch
Adhesive or other residue
Check the board maker's care instructions before using solvents
Matte patch, scratch, peeling coating, or discoloration that is part of the surface
Physical wear or damage
Stop aggressive cleaning; a removed or scratched coating cannot be cleaned back into place
In Maya's example, the blue and red haze behaves like normal ghosting, while the black line behaves differently. She treats those as two separate problems instead of attacking the entire board with one strong chemical.
What you need before you clean
A clean dry-erase eraser or clean microfiber cloth
A second clean, dry microfiber cloth or soft lint-free towel
Clean water
A board cleaner approved for your surface, if water alone is not enough
A fresh dry-erase marker if you need to test a suspected permanent-marker line
The board model name, label, manual, or manufacturer support page when available
Avoid assuming that rubbing alcohol, glass cleaner, disinfectant, acetone, abrasive powder, or a melamine-foam cleaning pad is universally safe. Manufacturer instructions differ. Quartet, for example, advises against general household cleaners on its boards and recommends its board-specific cleaners; Claridge gives different alcohol guidance for different surface types.
How to clean a stained dry-erase board in four steps
Step 1: Erase dry ink and remove loose residue
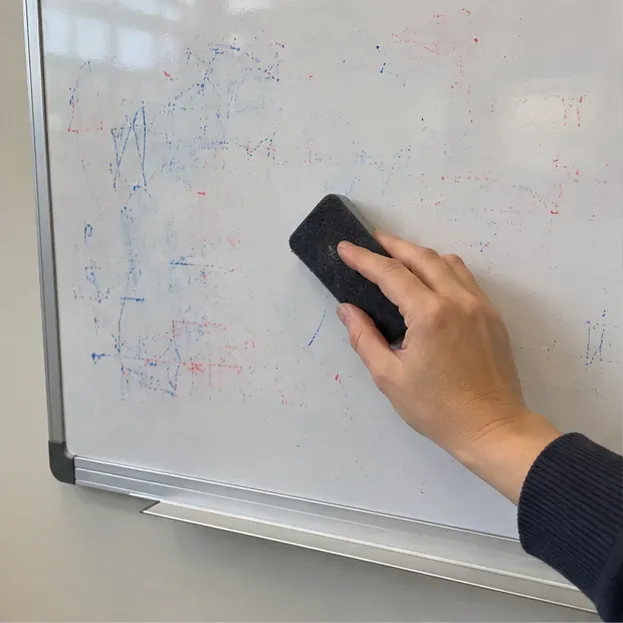
Start with the board dry. Use a clean eraser to remove as much dry-erase ink as possible, working across the entire stained area rather than rubbing one spot aggressively. This loosens dry ink dust and makes it easier to see which marks are actually persistent. If the eraser leaves gray or colored smears behind, stop and switch to a clean microfiber cloth; a loaded eraser can redistribute ink instead of removing it.
Step 1: Remove loose dry-erase ink first so you can distinguish ordinary residue from marks that need further treatment.
In the hypothetical conference-room board, Maya finds that much of the pale haze lightens at this stage. The black line remains almost unchanged, which is useful information: it may not be ordinary dry-erase residue.
Step 2: Spot-test the cleaner your board maker allows
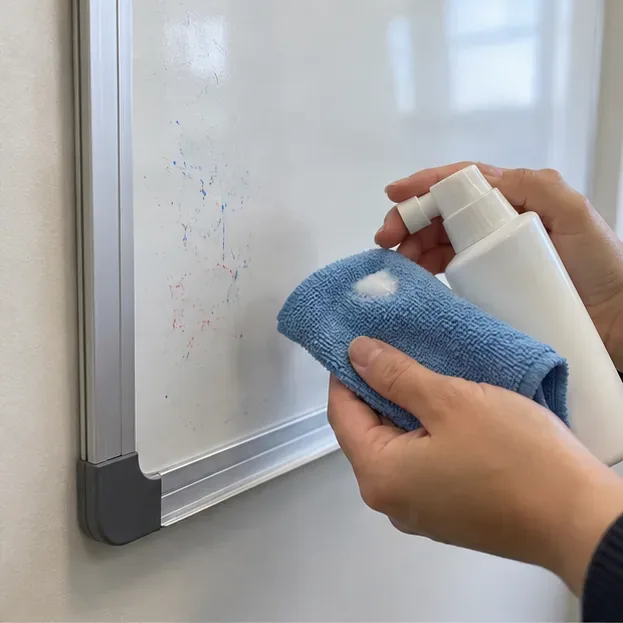
Before wet-cleaning the whole surface, check the care guidance for the board if you can identify it. For many boards, plain water or a purpose-made whiteboard cleaner is the appropriate starting point. Apply the product exactly as directed. If the cleaner is unfamiliar, test a small, inconspicuous area first and check for dulling, tackiness, color change, or a coating that feels different after drying.
Step 2: Use only a cleaner that is appropriate for the board surface, and spot-test unfamiliar products before treating the full stained area.
This is where Maya avoids a common mistake. She does not reach automatically for rubbing alcohol just because it is a popular household solvent. If her board turns out to be a melamine model whose manufacturer excludes alcohol, that shortcut could work against the goal of preserving the writing surface.
Step 3: Clean in small sections with a soft cloth
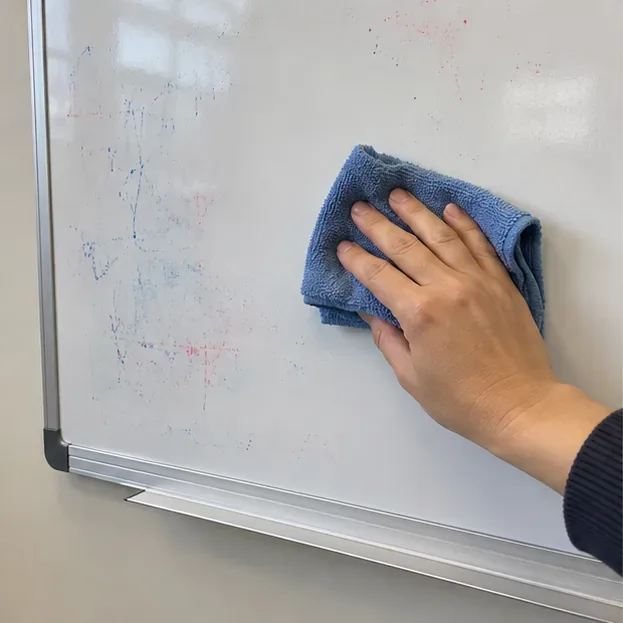
Wipe the stained area with a clean, soft microfiber cloth, using light to moderate pressure. Work in small sections and turn the cloth to a clean face as pigment transfers onto it. If the cloth becomes visibly dirty, replace or rinse it rather than continuing to spread residue. The goal is to lift ink and cleaner residue, not polish the surface through force.
Step 3: Wipe in small sections with a clean microfiber cloth, changing to a clean section of cloth as ink residue lifts from the board.
Some manufacturer instructions call for a clean-water rinse after a cleaning solution, while others tell you to wipe the cleaner away and dry the board. Follow the directions for the actual product and board you have rather than combining instructions from different brands. Polyvision's markerboard care guide, for example, emphasizes rinsing with clean water and then drying, while Quartet's routine directs users to wipe away its board cleaner and dry thoroughly.
Step 4: Dry completely, then test erasability
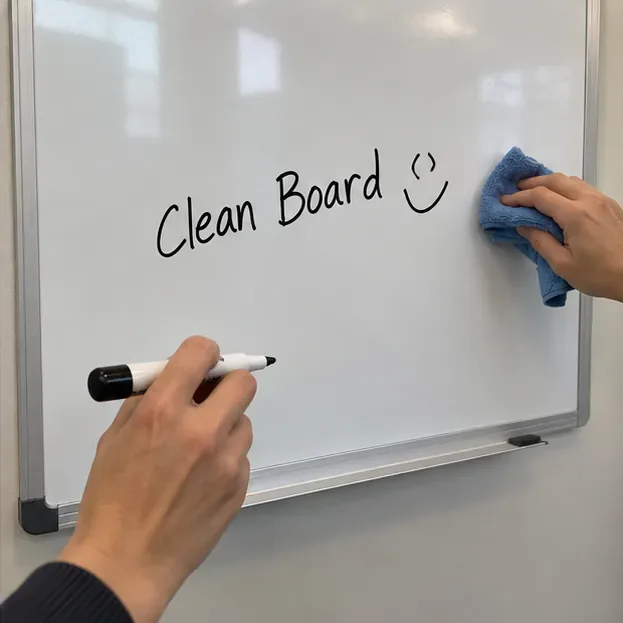
Finish with a second clean, dry cloth and leave the surface dry to the touch. This matters because cleaner residue can contribute to smearing and poor erasability. When the board is dry, make a small fresh dry-erase mark in a cleaned test area, let it dry normally, and erase it. A successful result is not just a whiter-looking board: the test mark should erase without unusual drag, oily streaks, or a persistent shadow.
Step 4: After the surface is dry, use a fresh dry-erase mark as a simple check that the cleaned area still writes and erases normally.
In Maya's illustrative example, this check tells her whether the red and blue ghosting was simply residue. If the test mark erases normally but the old black line remains, she now has a localized permanent-marker problem rather than a reason to keep scrubbing the whole board.
What if the stain is permanent marker?
Quartet's product FAQ recommends tracing over accidental permanent-marker writing with a fresh dry-erase marker, waiting a few minutes, and then wiping or erasing it. This is a reasonable first recovery attempt because it targets the mark without automatically exposing the entire board to a stronger solvent.
If that does not remove the mark, the next step depends on the writing surface. Claridge's porcelain-markerboard guidance says a clean cloth moistened with isopropyl alcohol can be used for permanent marker, followed by a clear-water rinse and drying. But Claridge's melamine guidance specifically says not to use alcohol, alcohol wipes, or alcohol-based cleaners on that surface. Do not transfer the porcelain instruction to melamine just because both boards look white.
For Maya, the practical decision is simple: if she cannot identify the board, she uses the dry-erase-over method first and avoids escalating to alcohol until she can verify that the surface allows it.
Cleaning methods to avoid unless your manufacturer specifically approves them
Abrasive scrubbers or powders: they can change the sheen or scratch a coated writing surface. A dull or scratched patch may become harder to erase than the original stain.
Acetone, nail-polish remover, lacquer thinner, or strong solvents: these can damage finishes on some markerboards. Surface-specific care guidance should take priority over household cleaning folklore.
Unapproved household cleaners: additives can leave a film that causes streaking or poor erasability. Quartet explicitly advises against general household cleaners for its whiteboards and glass boards.
Excess liquid: do not soak the frame, seams, backing, or accessories. Use enough moisture to clean the writing surface, then remove residue and dry it.
Hard scrubbing as the first response: more pressure is not automatically more effective. If a stain is chemically different from dry-erase ink, repeated friction may wear the surface while leaving the mark in place.
How to tell whether the board is clean enough
Use a functional check rather than judging only by color. A cleaned dry-erase board should be dry to the touch, reasonably uniform in appearance, free of obvious cleaner film, and able to release a fresh dry-erase mark normally. If a faint cosmetic shadow remains but new writing erases cleanly, additional aggressive cleaning may offer little benefit. If new writing immediately smears or sticks, stop adding products and remove any remaining cleaner residue according to the board maker's instructions.
If you see permanent matte areas, scratches, peeling, or a worn coating, cleaning has reached its limit. Stain removal can remove residue; it cannot rebuild a damaged writing surface. At that point, replacement or resurfacing may be more sensible than progressively stronger chemicals.
How to prevent ghosting from coming back
Routine maintenance is easier on the board than periodic rescue cleaning. Erase writing when it no longer needs to stay up, keep marker caps tight, and clean or replace erasers when they begin spreading residue. Quartet's maintenance guidance specifically recommends erasing after use, keeping markers capped, monitoring eraser residue, and drying the board thoroughly after cleaning.
For frequently used boards, use the maintenance frequency recommended for the actual surface. Some manufacturers recommend multiple cleanings per week for heavily used porcelain or ceramic-steel boards. The exact schedule is less important than preventing layers of ink dust and cleaner residue from accumulating.
Manufacturer guidance referenced
The recommendations above were checked against manufacturer guidance available on September 13, 2026. Because formulations and product lines can change, confirm the instructions for your exact board before using a solvent or abrasive product.
The key lesson from Maya's hypothetical board is restraint: diagnose the mark, use the gentlest approved method, and judge success by how the writing surface performs afterward. That approach gives you a better chance of removing stains without turning a cosmetic problem into permanent surface damage.