How to Clean a PS5 Fan Without Taking It Apart: A Safe Beginner Guide

Learn how to clean PS5 vents safely without opening the console, using Sony-recommended low-power vacuuming, dry wiping, and proper airflow.
If you want to clean a shower head without vinegar, the safest starting point is not to replace vinegar with another random household acid. Use warm water, mild soap, and gentle mechanical cleaning first, then move to a descaler only if the shower-head manufacturer specifically allows it for that model and finish.
Hypothetical example: imagine Maya has a chrome shower head in a rental apartment. The spray has become uneven, several nozzles have white crust around them, and she does not want to use vinegar because of the smell and because she is unsure how the finish will react. The steps below use Maya's situation as an illustration only; they are not a report of a real test or guaranteed result.
For routine buildup, start with warm water and a mild dish soap or other mild detergent, plus a soft cloth or non-abrasive sponge. Delta says regular cleaning can be done with a damp non-abrasive sponge, water, or mild soap, followed by drying with a soft cloth. Mira/Kohler guidance likewise recommends mild soap or washing-up detergent and soft wiping for shower components. For shower heads with flexible silicone nozzles, some manufacturers design those nozzles so scale can be rubbed away with a thumb or soft cloth.
If mineral scale remains, the next step depends on the manufacturer. For example, hansgrohe specifically recommends gentle citric-acid-based cleaners for its products and warns against cleaners containing acetic acid, which is the acid in vinegar. That is useful evidence that a vinegar-free descaling route exists, but it is not permission to use citric acid on every shower head. Finish chemistry, coatings, seals, and internal parts vary by brand and model.
Useful action: before using any descaler, find the model's care page or installation manual. If the manufacturer only approves water and mild soap, stay with those methods.
Avoid scouring pads, wire brushes, metal picks, abrasive powders, toilet-bowl cleaners, and strong acids unless the product maker explicitly says otherwise. KOHLER's general care guidance recommends testing cleaners on an inconspicuous area, using a soft damp cloth or sponge, rinsing promptly, and not allowing cleaner to stand on the surface.
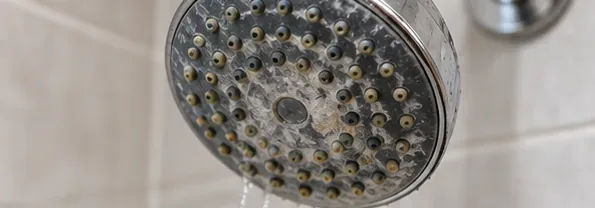
Look closely at the spray face. White, chalky material around the nozzles is commonly mineral scale. Soap film usually looks more smeared or dull. An uneven spray pattern can happen when deposits partly block individual jets, although low flow can also come from a clogged filter screen, a flow restrictor, a valve problem, or plumbing pressure.
In Maya's hypothetical case, the visible white deposits and several sideways jets make nozzle buildup a reasonable first target. But if there were no visible deposits and every outlet were weak, cleaning the face alone might not solve the problem.
Useful action: take a quick photo before cleaning. It gives you an easy before-and-after reference for the spray face and helps you avoid repeatedly scrubbing an area that is actually finish discoloration rather than scale.
If the shower head has flexible rubber or silicone nozzles, gently rub each nozzle with your fingers or a soft cloth while the fixture is still installed. hansgrohe's QuickClean guidance, for example, says scale and dirt can be mechanically rubbed from flexible silicone nozzles. Other brands use similar flexible-nozzle designs, but follow your own product instructions.
Then wipe the exterior with warm water and a small amount of mild soap. Do not spray cleaner directly into seams or openings unless the manufacturer tells you to do so. Wipe again with clean water and dry with a soft cloth.
Useful action: run the shower for 20 to 30 seconds after this light cleaning. If the spray pattern is even again, stop here; there is no benefit in escalating to a stronger treatment.
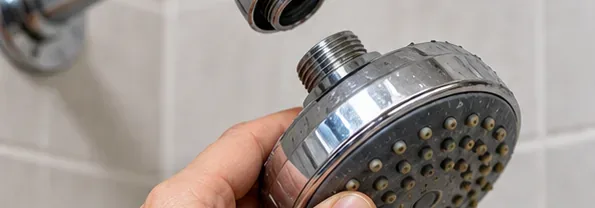
If deposits remain and your shower head is designed to be removed, turn off the water and unscrew the head or hand shower according to its manual. Many threaded shower heads can be loosened by hand. Protect the finish with a towel if you need extra grip, and avoid forcing a decorative nut.
Some shower heads are not designed to be disassembled, and some internal components or spray plates require brand-specific procedures. Do not pry the faceplate apart just because it appears to have a seam.
Useful action: set aside any washer, screen, or gasket in the exact order it came out. A missing washer can create a leak even if the cleaning itself went perfectly.
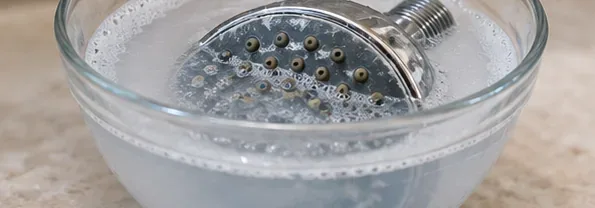
Place the removable shower head in a bowl of warm water with a small amount of mild soap, if mild soap is permitted for the finish. This is useful for loosening soap film, body-care residue, and light debris. It may not dissolve heavy mineral scale the way an acid does, but it is a low-risk first pass for many finishes.
Keep the soak short and practical rather than leaving the fixture submerged for hours without a manufacturer recommendation. Afterward, wipe the surface gently.
Useful action: inspect the deposits after the mild soak. If they now wipe away, continue to rinsing. If they remain hard and chalky, check the manufacturer's approved descaling method before moving on.
This is where internet advice often becomes too broad. Baking soda, lemon juice, commercial lime removers, and citric acid are not interchangeable across finishes. A product that is safe for one chrome shower head may damage another coating or void care instructions.
One verified vinegar-free example comes from hansgrohe: its current care guidance recommends mild cleaners containing citric acid, says not to use products containing acetic acid, hydrochloric acid, formic acid, or chlorine bleach, and instructs users to rinse thoroughly afterward. You can read the manufacturer's guidance at hansgrohe shower care and descaling instructions.
By contrast, Delta frequently recommends vinegar for difficult mineral deposits on its own products, while also recommending warm water, mild soap, a non-abrasive sponge, and soft cloths for routine care. That difference is exactly why there is no universal substitute chemical. See Delta's shower-head cleaning guidance.
Useful action: if your manufacturer explicitly approves a citric-acid cleaner, follow its dilution and contact-time directions rather than improvising a concentration. If it does not, do not assume citric acid is safe.
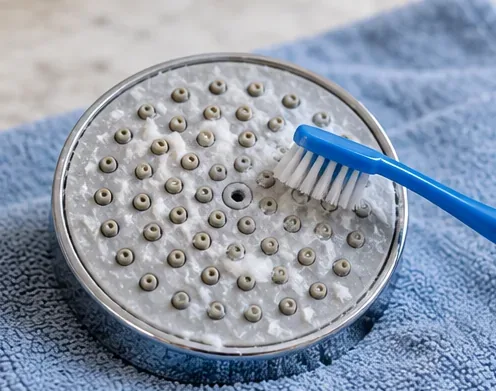
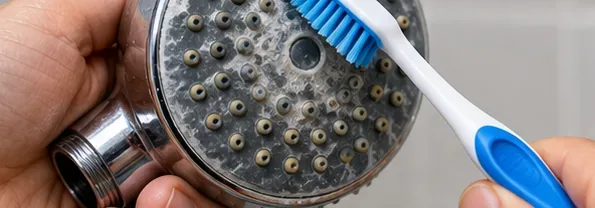
After the approved cleaning treatment, loosen softened deposits around the spray openings with a soft cloth. A soft toothbrush can be useful on some spray faces, and Delta's guidance mentions a toothbrush for helping break up remaining deposits during cleaning. However, hansgrohe cautions against brushes on finished surfaces, so keep any brushing limited to areas your own manufacturer permits.
Never push metal needles, drill bits, or pins deep into nozzle openings. They can enlarge or deform the jets, puncture silicone nozzles, or push debris farther inside.
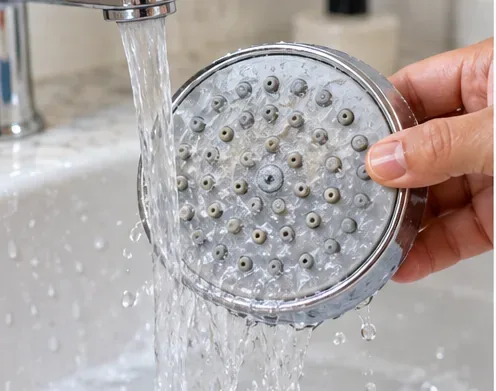
Rinse the shower head thoroughly inside and out with clean water. This matters whether you used soap or an approved descaler; residues left in internal passages can affect the spray or contact seals and finishes.
Useful action: while the head is detached, inspect any removable filter screen only if the product manual shows how. Rinse loose grit away rather than scraping the mesh.
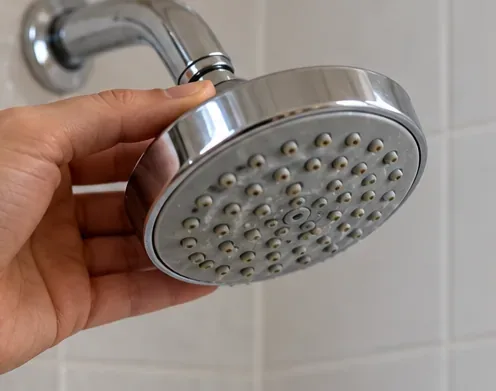
Reinsert any screen, washer, or gasket exactly as it was originally positioned. Thread the shower head back onto the arm by hand until snug. If the manufacturer's installation instructions call for plumber's tape, use it as directed; not every connection needs extra tape.
Do not overtighten. Excessive torque can crack a plastic coupling, distort a washer, or damage the finish.
Useful action: dry the connection before turning on the water. A dry joint makes it much easier to spot a fresh droplet if there is a leak.
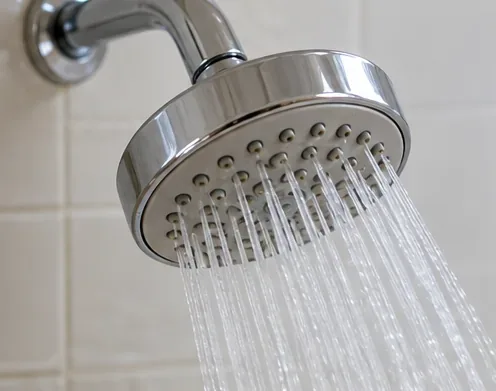
Turn on the shower and watch the full spray face. A successful cleaning should leave the water pattern more even, with fewer sideways or blocked jets. Switch through each spray mode if the shower head has more than one.
In Maya's hypothetical example, the meaningful result is not that the chrome looks shinier; it is whether the previously blocked jets now flow normally and whether the connection stays dry. If the spray remains weak across the entire head after visible scale is gone, the restriction may be elsewhere in the system.
Useful action: if low flow persists, check the manufacturer's troubleshooting instructions for the filter screen, hose, flow regulator, valve, or supply pressure rather than repeating chemical cleaning.
Baking soda is often suggested online, but it is not a universal shower-head recommendation. It is mildly abrasive, so rubbing a concentrated paste on a polished, plated, painted, or specialty finish can be a bad choice if the manufacturer has not approved it. The same caution applies to powdered cleaners.
For this reason, the finish-safe hierarchy is simple: water first, mild soap second, gentle nozzle cleaning third, and only then a manufacturer-approved descaler. That approach is slower than assuming every household cleaner is interchangeable, but it is much less likely to trade mineral spots for a scratched or dulled finish.
Useful action: if a care manual warns against abrasives, skip baking soda paste even if another website recommends it.
Lemon juice contains citric acid, but household lemon juice is not the same thing as a formulated citric-acid bathroom cleaner with a specified concentration and contact time. It can also contain pulp, sugars, fragrance compounds, or additives depending on the product. A manufacturer that approves a citric-acid cleaner is not necessarily approving raw lemon juice.
Useful action: use the product type named by the manufacturer rather than treating the word "citric" as blanket approval for every citric-acid-containing household ingredient.
There is no single schedule for every home because mineral buildup depends heavily on water hardness, temperature, use, and how quickly water dries on the fixture. A practical trigger is visible buildup, a spray pattern that starts to fan sideways, or nozzles that begin to clog. The CDC also advises cleaning showerheads when buildup is visible and following manufacturer instructions. Its home water guidance is available at CDC guidance on preventing waterborne germs at home.
For general surface care, wiping away droplets after use reduces the mineral residue left behind as water evaporates. Delta specifically recommends blotting surfaces dry to help limit mineral buildup. KOHLER likewise advises soft, non-abrasive cleaning and prompt rinsing; see KOHLER's cleaning-product care guidance.
Useful action: make a 15-second wipe-down part of your weekly bathroom routine, especially if you live in a hard-water area.
| What you notice | What it may mean | Best next action |
|---|---|---|
| Only a few jets spray sideways | Localized nozzle deposits | Continue gentle nozzle cleaning |
| The whole shower head has weak flow | Possible screen, restrictor, valve, hose, or supply issue | Check the model's troubleshooting guide |
| Water leaks at the connection | Washer, gasket, threading, or installation problem | Turn off water and reinstall correctly |
| Finish becomes cloudy or discolored | Cleaner may be incompatible | Stop using the product and contact the manufacturer |
| Cracked nozzles or damaged housing | Physical wear rather than dirt | Replace the damaged component or shower head |
You can clean a shower head without vinegar, and in some cases avoiding vinegar is exactly what the manufacturer recommends. The most reliable method is to begin with warm water, mild soap, soft wiping, and mechanical cleaning of flexible nozzles. Remove the head only when needed, rinse everything thoroughly, and treat stronger descaling as a product-specific decision rather than a universal household recipe.
For Maya's hypothetical shower head, that means starting conservatively, checking the care instructions before any acid-based treatment, and judging success by an even spray pattern and a leak-free connection. That same decision process works across brands because it respects the one variable generic cleaning advice often ignores: the actual materials and finish on the fixture in front of you.
Learn how to clean PS5 vents safely without opening the console, using Sony-recommended low-power vacuuming, dry wiping, and proper airflow.
Learn how to clean a car air filter safely, when a paper filter should be replaced instead, and how reusable filters require different care.
Learn how to clean a Keurig entrance and exit needle safely, clear coffee-ground clogs, rinse the brewer, and know when descaling is the next step.
Learn how to remove dried nail glue from clothes safely, when acetone is appropriate, which fabrics need extra care, and when to stop and call a cleaner.
Learn how to clean a metal range hood filter safely, when dishwasher cleaning is okay, and why charcoal filter care depends on your exact model.
Learn how to remove rust from golf clubs safely, judge the result, protect raw and plated finishes, and know when cleaning should stop.
Learn how to clean fabric blinds safely with gentle vacuuming, spot cleaning, rinsing, and drying—plus when water, washing, or DIY deep cleaning can cause damage.
Learn how to season gas grill grates safely, including when cast iron needs seasoning, when porcelain enamel does not, and how to check the result.
Clean a Breville toaster oven safely with mild soap, soft cloths, and the right sequence. Learn what clean should look like, what to avoid, and when to stop.
Learn how to clean a microwave grease filter, when a dishwasher is appropriate, and why charcoal filters should be replaced instead of washed.








