Home
» How To
»
How to Clean a Coffee Grinder: Burr and Blade Grinder Care
How to Clean a Coffee Grinder: Burr and Blade Grinder Care
Coffee grinder cleaning is simple in principle, but the right method depends on the machine. Current manufacturer guidance still varies by model: KitchenAid gives a general cleaning cadence of about every two weeks while noting that use and oily beans can change that interval; Baratza recommends routine care around every four to six weeks for many of its grinders; and Fellow says the Ode Gen 2 exit chute and anti-static area may need attention after roughly 60 light- or medium-roast cycles. Those are model-specific reference points, not one universal rule. The safest approach is to watch your grinder for retention, oily residue, stale aromas, slower grinding, or a clogged chute and then follow the owner's manual for anything that involves removing burrs or washing parts.
What you need before cleaning a coffee grinder
For most home grinders, you need only a few basic items:
A grinder cleaning brush or clean, dry toothbrush
One or two microfiber cloths
Warm water and a small amount of dish soap for parts the manufacturer says are washable
A clean towel or drying rack
Optional grinder-cleaning tablets approved for your grinder
Optional hand air blower or small vacuum if your manual permits it
Before you start, check the manual for your exact model. Some hoppers, lids, or grounds bins are dishwasher-safe; others are not. Some burr carriers are designed to be removed by the user, while other grinders require a specific alignment or calibration procedure after disassembly.
How to clean a burr coffee grinder in 8 steps
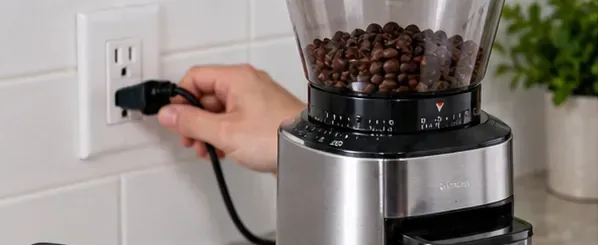
1. Empty the beans, clear the grinding path, and unplug the grinder
Return unused beans to an airtight container. If your grinder's instructions allow it, briefly run the grinder with the hopper empty so remaining beans pass through the burrs. Turn the grinder off and unplug it before opening the grind chamber. Battery-powered models should have the battery removed before cleaning when the manufacturer specifies that procedure.
Disconnect power before opening the grinder or reaching near the burrs; handle any remaining beans according to your model's instructions.
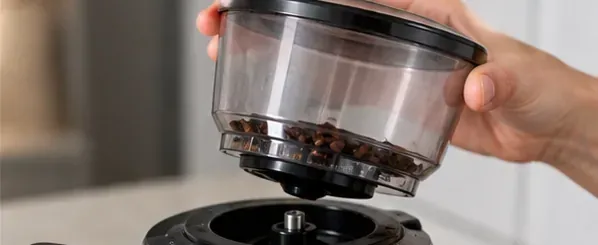
2. Remove the hopper and grounds container
Take off the hopper, hopper lid, grounds bin, and other user-removable accessories. Do not force a part that will not release. Many burr grinders use a lock or alignment mark, and forcing the hopper can damage tabs or shift the adjustment mechanism. Put small components in one place so they do not disappear while you work.
Remove the hopper, lid, and grounds container according to your grinder's manual.
3. Open the burr area only as far as your manual allows
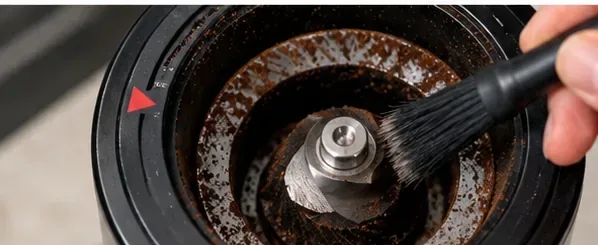
If the upper burr is designed for routine removal, lift it out as directed by the manufacturer. Otherwise, leave the burr assembly in place and clean only accessible areas. Use a dry brush around the burr teeth, burr carrier, grind chamber, and nearby ledges. Coffee oils and fine particles tend to cling to these surfaces, especially after darker roasts.
Use a dry grinder brush to loosen retained grounds and coffee residue around accessible burr surfaces.
4. Brush removable burrs instead of automatically washing them
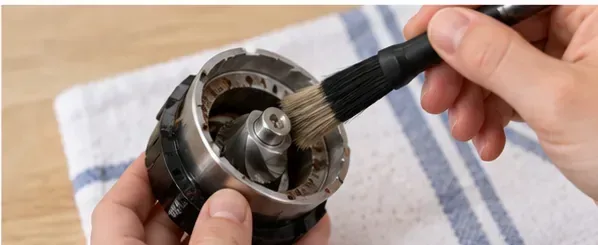
Dry brushing is the safe default for metal burrs. Sweep residue from the cutting edges, grooves, and back side of a removable burr. Do not put a burr under the faucet unless your grinder manufacturer explicitly says that the specific part is washable. Water left on steel parts can cause corrosion, and moisture inside the grinder can damage electrical components or create clumped coffee residue.
Brush a removable burr dry unless your manufacturer specifically says that part may be washed.
5. Clear the grind chamber and exit chute
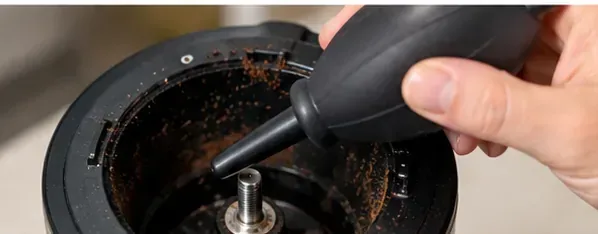
Brush loosened grounds toward an opening where they can be removed. A hand air blower or a small vacuum can help on models where the manufacturer allows it. Pay particular attention to the exit chute, because compacted fines can slow dispensing and increase retention. Fellow's current Ode Gen 2 guidance, for example, specifically tells owners to brush around the exit chute and nearby anti-static pins when retention increases.
After brushing, remove loosened grounds from the chamber and chute without introducing water into the motor area.
6. Wipe the exterior without soaking the motor housing
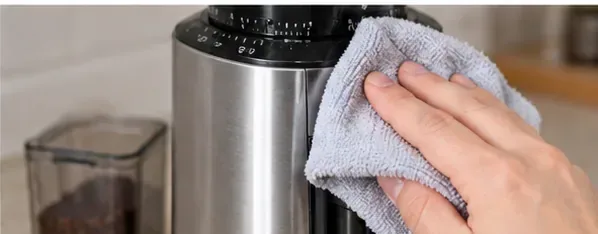
Use a soft cloth that is only lightly damp. Wipe the grinder body, adjustment dial, base, and accessible exterior surfaces, then dry them. Never immerse the motor housing, cord, plug, or electrical base in water. KitchenAid's blade-grinder care guidance likewise tells owners to wipe the motor housing with a damp soft cloth rather than submerge it.
Wipe the grinder body with a lightly damp cloth, keeping moisture away from electrical openings.
7. Wash only approved removable parts, then dry them completely
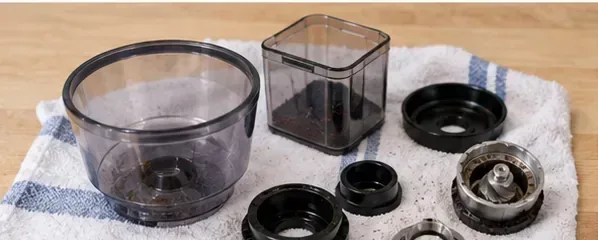
If the manual permits washing the hopper, lid, grounds bin, or removable bowl, clean those parts with warm soapy water, rinse away detergent, and dry them fully. Do not assume dishwasher safety. Breville's Dose Control manual, for example, tells owners not to put grinder parts or accessories in the dishwasher, while some KitchenAid blade-grinder bowls and covers are approved for the top rack. Model-specific instructions win.
Set cleaned components aside until fully dry; do not wash metal burrs unless your grinder manufacturer explicitly permits it.
8. Reassemble, check alignment, and test
Return the burr carrier, hopper, lids, and grounds container in the correct orientation. Make sure any burr that was removed sits fully in its intended position. If your manual requires calibration after burr removal, complete that procedure before grinding coffee. Plug the grinder in only after everything is dry and secure. A short no-load or coarse-grind test can confirm that parts move normally, but follow the manufacturer's startup instructions for your model.
Reassemble the grinder correctly, then test it only after all parts are secure and dry.
How to clean a blade coffee grinder
Blade grinders are usually easier because they have fewer parts, but their designs still differ. Start by unplugging the grinder or removing its battery. If the bowl and lid are removable and the manual says they are washable, wash them with warm soapy water, rinse, and dry thoroughly. Wipe the motor housing with a soft damp cloth and never immerse the electrical base.
If your blade grinder has a fixed metal bowl, do not automatically pour water into it. Check the manual first. Some models have a removable bowl that can be washed separately; others are intended to be wiped out while the motor base stays dry.
How often should you clean your coffee grinder?
There is no single schedule that fits every grinder and every coffee. Frequency depends on how much coffee you grind, roast level, bean surface oil, fines, static, and the design of the chute and burr chamber.
Situation
Practical cleaning approach
Light home use
Brush visible residue periodically and deep-clean when retention or stale aromas begin to increase.
Daily use
Inspect the chute and burr area more often; follow the model's recommended maintenance interval.
Dark or oily beans
Expect more frequent cleaning because oils make fines adhere to internal surfaces.
Espresso grinding
Check for compacted fines more frequently because very fine settings can increase buildup.
Noticeable retention or slow dispensing
Clean the chute and grind chamber before assuming the grinder has a mechanical fault.
As reference examples rather than universal targets, KitchenAid says grinders may generally benefit from cleaning about every two weeks, with weekly attention for heavy daily use or oily beans. Baratza's current cleaning guidance suggests routine cleaning every four to six weeks for its grinders. Fellow's Ode Gen 2 support page says its anti-static system may need chute and pin cleaning after about 60 cycles with light or medium roasts, while also noting that coffee characteristics can change the interval.
Should you use grinder-cleaning tablets?
Cleaning tablets can be useful for compatible burr grinders because they are designed to pass through the burrs and absorb coffee oils. They are optional maintenance, not a substitute for removing packed grounds from a blocked chute or brushing accessible surfaces.
Use only a product your grinder manufacturer allows, and follow both the grinder and tablet instructions. Do not substitute uncooked rice simply because it looks similar. Baratza's current grinder guidance specifically warns that rice can become a hard, gummy material, strain or jam the motor, and leave its own residue. A manufacturer-approved cleaning tablet is the safer choice when that cleaning method is supported.
What should never get wet?
The motor housing or electrical base
The power cord, plug, battery contacts, or control electronics
Metal burrs unless the manufacturer's instructions explicitly permit washing them
Any internal part that cannot be completely dried before reassembly
A useful rule is to separate “food-contact removable plastic parts” from “precision and electrical parts.” The former may be washable when the manual says so; the latter are generally cleaned dry or with a carefully dampened cloth.
How do you know the grinder is clean enough?
You do not need the inside to look factory-new. A good result is functional: loose old grounds are gone, oily film is reduced, the exit chute is open, removable parts are dry, and there is no obvious stale-coffee odor. After reassembly, coffee should dispense normally without a sudden increase in retention, unusual rubbing, or a new grinding noise.
If the burrs do not turn freely, the grinder makes a new metal-on-metal sound, or the adjustment mechanism no longer moves normally after reassembly, stop using it. Recheck alignment and the model manual rather than forcing the machine. Some grinders require calibration after burr removal.
Common cleaning mistakes to avoid
Cleaning while the grinder is energized: unplug it before reaching into any area near the burrs or blade.
Washing every removable-looking part: removable does not automatically mean washable or dishwasher-safe.
Reassembling damp parts: trapped moisture can cause clumping, corrosion, or electrical risk.
Using rice as a cleaning shortcut: follow manufacturer guidance and use approved cleaning tablets when appropriate.
Forcing a burr carrier or hopper: grinders often use alignment tabs, locks, or calibration positions.
Ignoring the chute: the burrs can be clean while compacted fines still restrict the path out of the grinder.