Home
» How To
»
How to Clean a Breville Toaster Oven for a Better, Safer Result
How to Clean a Breville Toaster Oven for a Better, Safer Result
A good Breville toaster-oven cleaning should leave the crumb tray free of loose debris, the accessories free of greasy residue, the interior walls wiped clean without scratching the coating, and every surface completely dry before the oven is plugged back in. You do not need aggressive chemicals to get there. In fact, Breville's own care instructions favor soft sponges, warm soapy water, mild or non-abrasive cleaners, and careful drying.
The most important quality check is not whether every old mark disappears. It is whether loose crumbs, grease, and fresh splatter are removed without damaging the nonstick interior, glass, controls, accessories, or heating elements. If a stain does not respond to the gentle methods Breville allows, escalating to metal scrubbers or standard oven cleaner can create a worse problem than the stain itself.
This guide covers the cleaning approach shared by current Breville Smart Oven documentation, including the Smart Oven Air Fryer Pro BOV900. Because Breville sells several toaster-oven models with different accessories, always check the instruction book for your exact model before treating a removable part as dishwasher-safe or using a product not listed for that model. The current BOV900 manual, for example, recommends hand-washing accessories to extend their life. You can review Breville's BOV900 instruction book.
What you need
A soft sponge or soft microfiber cloth
Warm water
Mild dish detergent
A soft plastic scouring pad only if your manual allows it for the part you are cleaning
A dry towel for accessories
Glass cleaner or mild detergent for the glass door, if needed
Avoid abrasive cleansers, metal scouring pads, steel wool, metal utensils used as scrapers, and standard oven cleaner. Breville specifically warns that abrasive materials can scratch surfaces, while the BOV900 manual says standard oven cleaner can deteriorate the interior metal surface.
Step 1: Unplug the oven, let it cool completely, and remove the loose parts
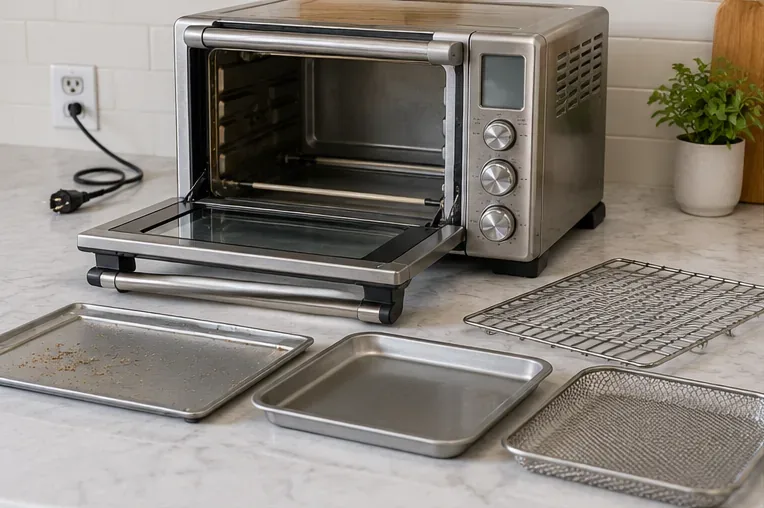
Turn the oven off, unplug it from the wall outlet, and wait until the oven and all accessories are completely cool. Then remove the crumb tray, wire rack, baking or roasting pan, broiling rack, pizza pan, and air-fry basket if your model includes them.
This first step determines whether the rest of the cleaning is safe and controlled. Breville's manuals instruct users to disconnect power and allow the oven and accessories to cool before disassembly and cleaning. The oven body, power cord, and plug should never be immersed in water or any other liquid.
The oven is unplugged and cool, with removable racks, trays, and basket taken out so each part can be cleaned separately.
What a good result looks like at this stage
You should have an empty, cool oven cavity and all removable parts laid out where you can inspect them. There should be no food still sitting on a rack or hidden under the crumb tray.
If grease is still warm or liquid, wait longer rather than trying to wipe it immediately. If a part appears warped, cracked, badly corroded, or damaged around a coating, cleaning will not restore it; consult Breville support or the parts information for your model instead of trying to grind or scrape the defect away.
Step 2: Clean the crumb tray, racks, pans, and other removable accessories
Start with the crumb tray because it collects the material most likely to burn and smoke during future cooking. Breville recommends sliding it out after each use, discarding the crumbs, and wiping it with a soft damp sponge. If grease is baked on, the BOV900 manual allows soaking the tray in warm soapy water, then washing with a soft sponge or soft plastic scouring pad before rinsing and drying thoroughly.
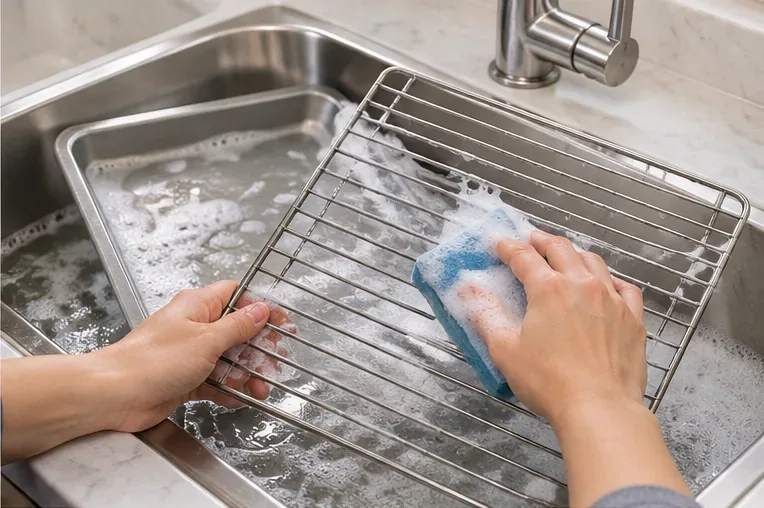
Wash racks, pans, and other compatible accessories in warm soapy water using a soft sponge. Rinse them well and dry them completely. Breville's BOV900 manual advises against abrasive cleansers, metal scouring pads, and metal utensils on accessories because they can damage the surfaces. It also says that, to extend accessory life, Breville does not recommend putting those accessories in the dishwasher.
For a model-specific demonstration, Breville also provides a Smart Oven crumb-tray cleaning tutorial, which recommends mild dish soap, water, and a soft sponge.
A removable rack is hand-washed with warm soapy water and a soft sponge, avoiding abrasive pads that can scratch or damage the surface.
How to judge the result
The accessory is ready when it no longer feels greasy to clean fingers, no loose food remains in corners or wire intersections, and rinse water does not leave obvious soap residue. Dry it thoroughly before putting it back into the oven.
If a baked-on spot remains after normal washing, soak the affected removable part longer in warm soapy water if your model's manual permits it. Do not automatically move to steel wool or a metal scraper. A stubborn cosmetic mark is usually preferable to permanent scratching or loss of a coating.
Step 3: Wipe the interior gently and treat the heating elements as a special case
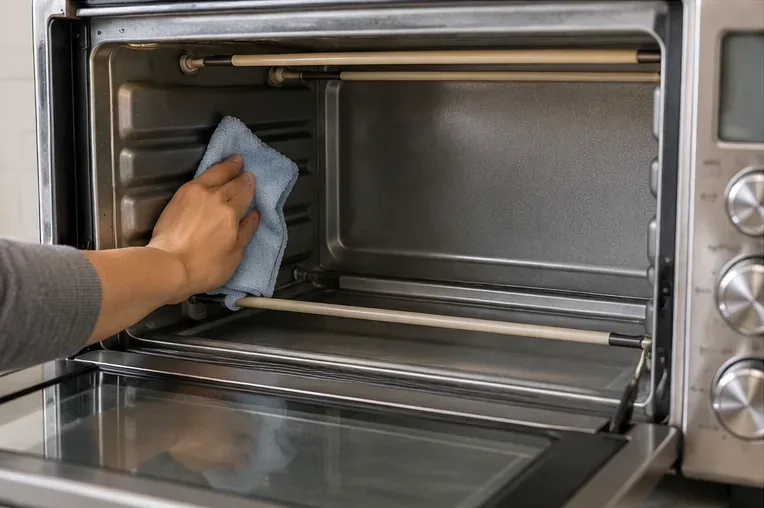
Breville describes the inner walls of many Smart Oven models as having a nonstick coating. Wipe splatter from those walls with a soft, damp sponge. If needed, use a non-abrasive liquid cleanser or mild spray solution—but apply the cleaner to the sponge, not directly to the oven surface.
The cooled oven interior is wiped with a soft damp cloth, concentrating on the walls and avoiding unnecessary contact with the heating elements.
Be much more cautious around the quartz heating elements
Do not scrub the heating elements with the same technique used on the walls. Breville says to use extreme caution. If an element needs cleaning, the oven must be completely cool; then a soft damp sponge or cloth may be rubbed gently along the length of the element. Do not apply cleanser or cleaning agent to the element.
Also do not use standard oven cleaner inside the oven. The BOV900 manual states that it can deteriorate the metal surface. This is an important limit: the goal is controlled residue removal, not stripping the cavity until it looks factory-new.
When to change your approach
If splatter remains after one gentle pass, put a small amount of permitted non-abrasive cleaner on the sponge and work gradually. If the spot still does not release, stop before increasing abrasion. For residue directly on a heating element, follow only the element-cleaning directions in your exact model's manual. If you see damage, cracking, arcing marks, or a visibly compromised element, cleaning is no longer the appropriate fix; contact Breville service.
Step 4: Clean the door, exterior, and controls, then dry and reassemble
Wipe the outer body with a soft damp sponge or cloth. If you use a non-abrasive liquid cleanser or mild spray solution, apply it to the sponge rather than spraying the oven itself. This reduces the chance of liquid reaching vents, control gaps, or electrical parts.
For the glass door, Breville allows glass cleaner or mild detergent with a soft damp sponge or soft plastic scouring pad. Avoid abrasive cleanser and metal scouring pads because they can scratch the oven surface.
For an LCD display, use a soft damp cloth. Breville's BOV900 instructions say to put cleaner on the cloth, not on the LCD, and warn that dry cloths or abrasive cleaners may scratch the surface.
The exterior is finished with a soft damp cloth while the cleaned accessories remain out until both the oven and parts are fully dry.
Do not reconnect power until the oven and all cleaned surfaces are thoroughly dry. Reinsert the crumb tray before using the appliance again. Breville's instructions specifically call for the crumb tray to be reinstalled before plugging the oven back in and turning it on.
Quality checklist: is the oven actually clean enough?
Area
Good result
Needs another gentle pass
Stop and reassess
Crumb tray
No loose crumbs; surface dry
Greasy film or food residue remains
Coating or metal appears damaged
Racks and pans
No food residue; no soapy feel
Baked-on residue remains after normal washing
You are tempted to use metal scraping tools
Interior walls
Fresh splatter and loose grease removed
Localized stain remains
Cleaning would require abrasives or standard oven cleaner
Heating elements
No loose residue; element visually intact
Minor residue that the manual allows you to wipe gently
Crack, deformation, electrical damage, or need for chemicals
Door and exterior
No greasy fingerprints or cleaner residue
Streaks remain
Abrasive treatment would be required
Before power-on
Everything is fully dry and correctly reassembled
Any dampness remains
Water reached electrical areas
How often should you clean a Breville toaster oven?
The crumb tray deserves the most frequent attention. Breville's BOV900 instructions say to slide it out and discard crumbs after each use. Other parts can be cleaned according to residue and cooking frequency, but waiting until grease is heavily baked on makes the job harder and often tempts people to use methods that are too aggressive.
A practical routine is to empty the crumb tray after cooking, wipe obvious fresh splatter once the oven has cooled, and wash greasy removable accessories before residue has repeatedly reheated. This keeps later deep cleaning focused on maintenance rather than restoration.
What this method will not fix
Cleaning cannot correct a failed heating element, damaged cord, broken door mechanism, damaged coating, faulty controls, or other hardware problem. It also may not erase every stain or discoloration that has accumulated over years of high-temperature use. The safe endpoint is a clean, dry, functional surface—not necessarily a perfectly new-looking one.
If the oven smokes after the crumb tray and accessible grease have been cleaned, or if you notice an electrical smell, sparking, visible element damage, a malfunctioning display, or a damaged power cord, stop using the appliance and consult Breville's support resources rather than continuing to scrub. The Breville Smart Oven support hub provides manuals, cleaning guides, warranty information, and repair resources.
Bottom line
The best way to clean a Breville toaster oven is deliberately rather than aggressively: unplug and cool it, clean removable parts with warm soapy water and soft tools, wipe the nonstick interior gently, treat heating elements with extra caution, clean the door and exterior without abrasives, and let everything dry completely before reassembly and use.
You have achieved a good result when crumbs and fresh grease are gone, surfaces feel clean rather than oily or soapy, accessories are dry, the heating elements are undamaged, and nothing had to be scratched or soaked in harsh oven cleaner to get there. When gentle cleaning stops working, the next step is usually model-specific guidance or service—not a stronger abrasive.