Windows verkefnisstikan hefur verið miðpunktur allrar athygli síðan hún fékk nýtt endurbætt útlit með útgáfu Windows 11. Þú getur nú sent verkstikuna þína í miðju, notið nýju aðgerðamiðstöðvarinnar, breytt röðun hennar og sett hana á hvorri hlið skjásins. Því miður hefur uppsetning þessa eiginleika verið minna en árangursrík þar sem fleiri og fleiri notendur eiga í erfiðleikum með að fá verkstikuna sína til að virka á Windows 11 í nokkra mánuði.
Þó að Microsoft hafi viðurkennt vandamálið, gefið út lausn og vinnur nú að lagfæringu, virðast notendur enn ekki geta fengið verkefnastikuna til að virka aftur. Ef þú ert á sama báti þá höfum við tekið saman lista yfir allar tiltækar lagfæringar til að koma verkstikunni aftur í gang á Windows 11. Fylgdu leiðbeiningunum hér að neðan til að koma þér af stað.
Innihald
Af hverju birtist verkefnastikan mín ekki?
Windows 11 verkstikan hefur nýtt útlit sem kemur frá endurbættri útfærslu á virkni þess. Verkstikan byggir nú á nokkrum þjónustum og Start valmyndinni sjálfri til að virka rétt. Svo virðist sem uppfærsluferlið frá Windows 10 í Windows 11 virðist klúðra verkefnastikunni eftir því hvaða útgáfu af Windows 10 þú hefur sett upp á vélinni þinni og hvaða Windows 11 útgáfu þú ert að uppfæra í.
Að auki virðist nýleg Windows uppfærsla, sem gefin var út í síðasta mánuði, einnig valda þessu vandamáli hjá sumum notendum á meðan aðrir standa frammi fyrir því sama vegna ósamræmdra kerfistíma þrátt fyrir að hafa allt rétt uppsett. Það eru margar leiðir til að laga verkstikuna þína og við mælum með að þú byrjir á lagfæringunum hér að neðan eina í einu.
12 leiðir til að laga vandamál á verkefnastikunni á Windows 11
Notaðu aðferðirnar hér að neðan til að byrja að laga verkstikuna þína á Windows 11. Ef þú hefur þegar reynt að endurræsa kerfið þitt geturðu sleppt fyrstu aðferðinni.
Lagfæring #1: Endurræstu tölvuna
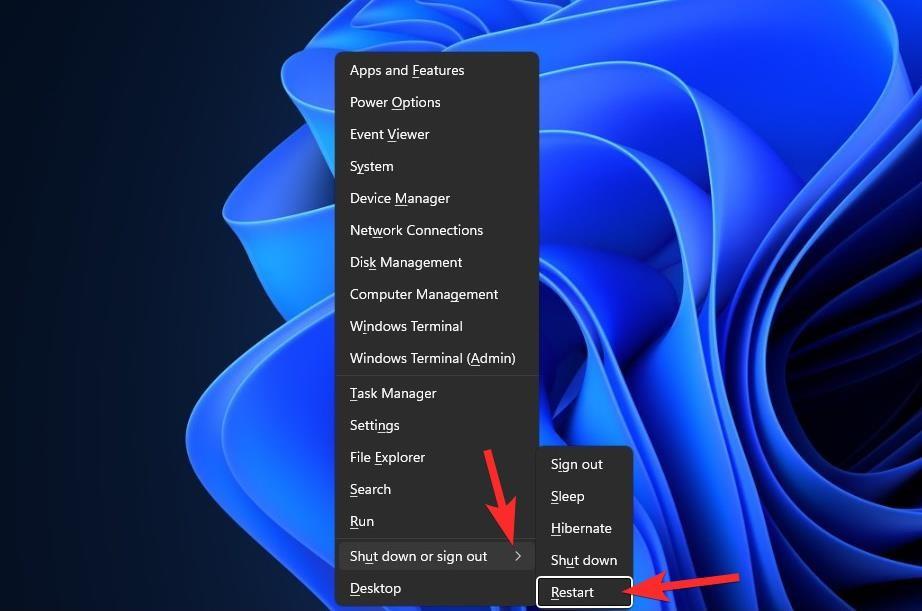
Áður en þú prófar eitthvað fínt er gott að prófa einfaldari ráðstafanir, eins og að endurræsa tölvuna eða Windows Explorer (sjá hér að neðan). Með því að gera það mun kerfið þitt fá mjúka endurstillingu, sem gerir gögnunum kleift að endurhlaða og, hugsanlega, laga vandamál með verkefnastikuna og Start valmyndina.
Lagfæring #2: Gakktu úr skugga um að „Fela verkstikuna sjálfkrafa“ sé óvirkt
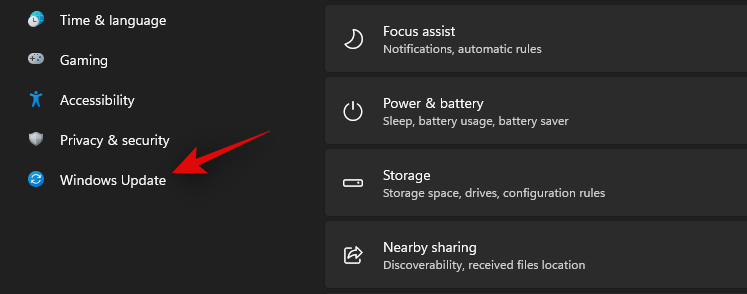
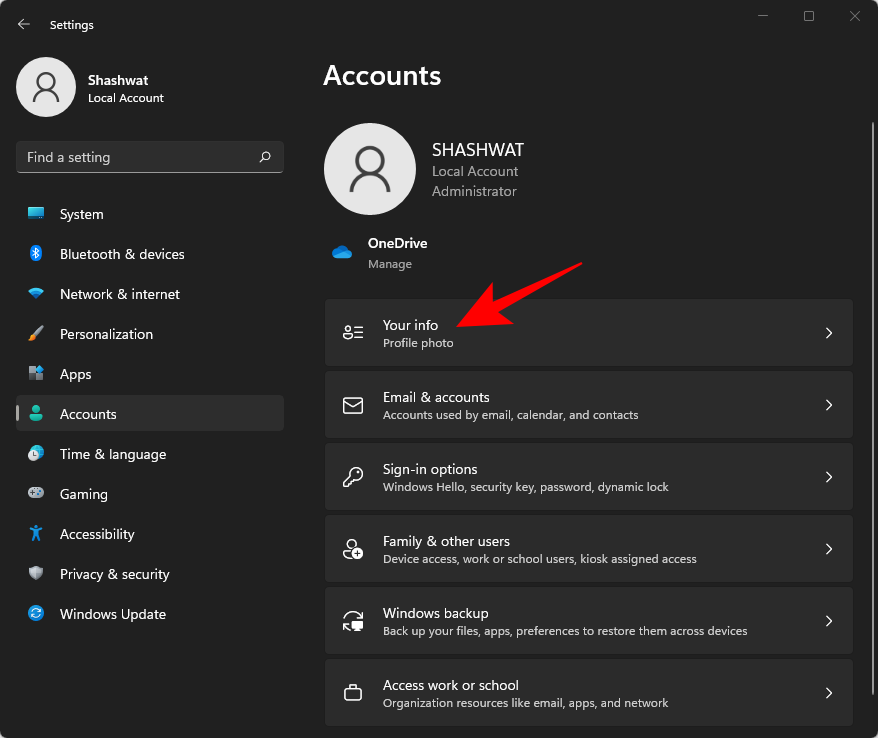
Ýttu Windows + iá lyklaborðið þitt og smelltu á 'Persónustilling' vinstra megin.
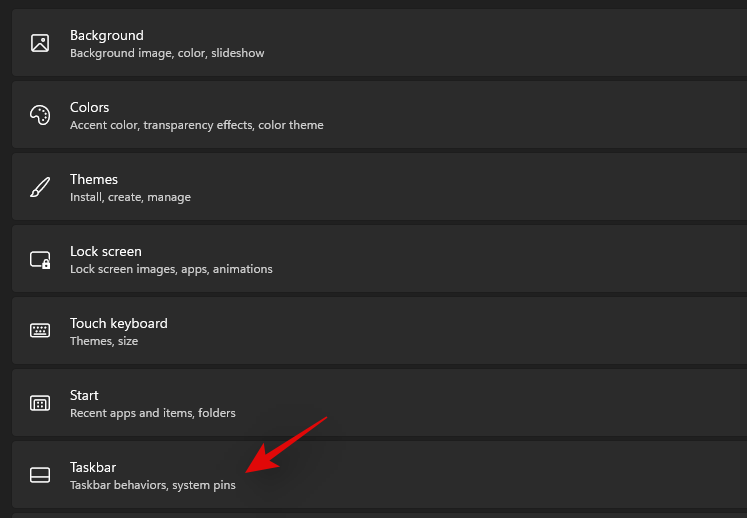
Smelltu á 'Taskbar'.
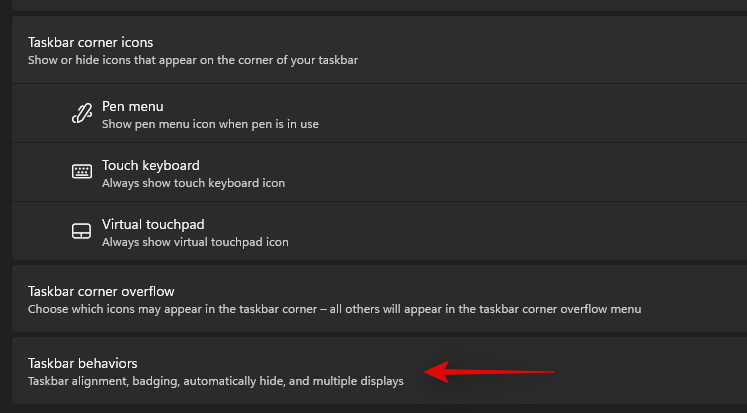
Smelltu nú á 'Hegðun verkefnastikunnar'.
Taktu hakið úr reitnum fyrir 'Fela verkstikuna sjálfkrafa'.

Lokaðu nú stillingarforritinu og ef verkstikan þín var sjálfkrafa falin, þá ætti það nú að vera óvirkt á vélinni þinni.
Lagfæring #3: Endurræstu nauðsynlega þjónustu
Eins og fyrr segir hefur Windows 11 endurbætt verkstikuna sem þýðir nú að hún treystir á margar þjónustur til að virka rétt á hvaða kerfi sem er. Við skulum endurræsa alla þessa þjónustu til að tryggja að bakgrunnsátök komi ekki í veg fyrir að verkefnastikan virki rétt á kerfinu þínu.
Ýttu Ctrl + Shift + Escá kerfið þitt til að ræsa Task Manager. Skiptu yfir í „Upplýsingar“ flipann efst.
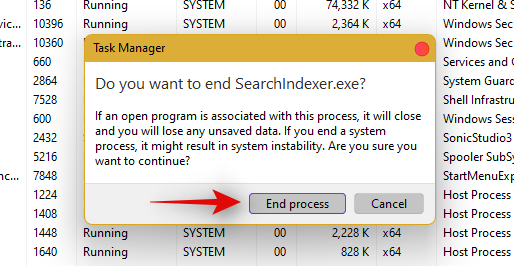
Finndu nú eftirfarandi hlaupandi þjónustu og veldu þær með því að smella á þær. Smelltu á 'Eyða' á lyklaborðinu þínu og staðfestu val þitt með því að velja 'Ljúka ferli'.
- Explorer.exe
- ShellExperienceHost.exe
- SearchIndexer.exe
- SearchHost.exe
- RuntimeBroker.exe
Við skulum endurræsa Windows Explorer núna. Smelltu á 'Skrá' efst í vinstra horninu og veldu 'Keyra nýtt verkefni'.
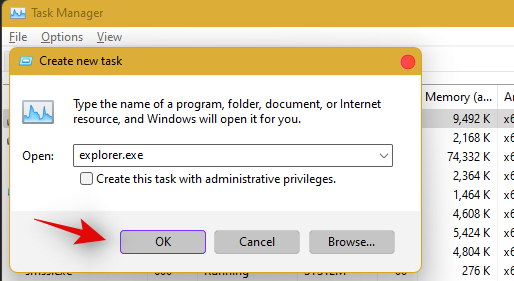
Sláðu inn 'explorer.exe' og ýttu á Enter á lyklaborðinu þínu. Þú getur líka smellt á 'Í lagi' ef þörf krefur.
Þegar Explorer hefur verið endurræst skaltu einfaldlega endurræsa tölvuna þína til að endurræsa aðra þjónustu á kerfinu þínu.
Verkstikan ætti nú að vera endurheimt ef bakgrunnsþjónustuárekstur var orsök vandamálsins.
Lagfærðu #4: Eyddu IrisService í Registry og endurræstu
Ýttu á Ctrl + Shift + Esctil að opna Task Manager. Smelltu síðan á File efst í vinstra horninu.
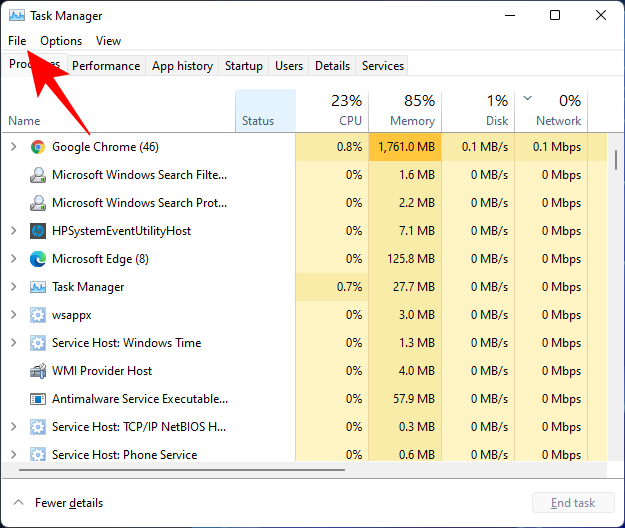
Veldu Keyra nýtt verkefni .
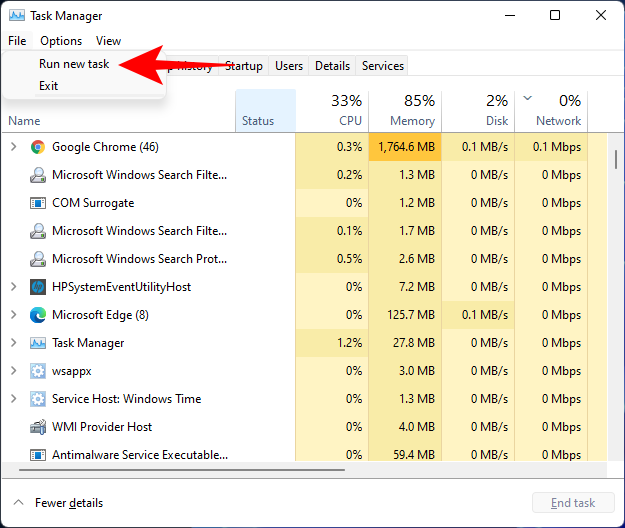
Sláðu inn cmd og ýttu á Enter.
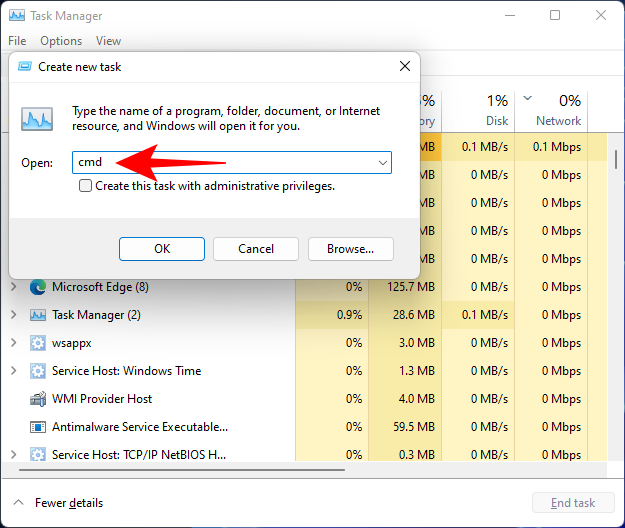
Þetta mun opna upphækkað tilvik af stjórnskipuninni. Afritaðu nú eftirfarandi skipun og límdu hana í skipanalínuna:
reg delete HKCU\SOFTWARE\Microsoft\Windows\CurrentVersion\IrisService /f && shutdown -r -t 0

Ýttu síðan á Enter. Um leið og þú gerir það mun tölvan þín endurræsa. Þegar það hefur verið ræst aftur upp ætti hlutirnir að vera aftur í eðlilegt horf, þar á meðal verkefnastikan.
Lagfærðu #5: Bættu við UndockingDisabled í Registry
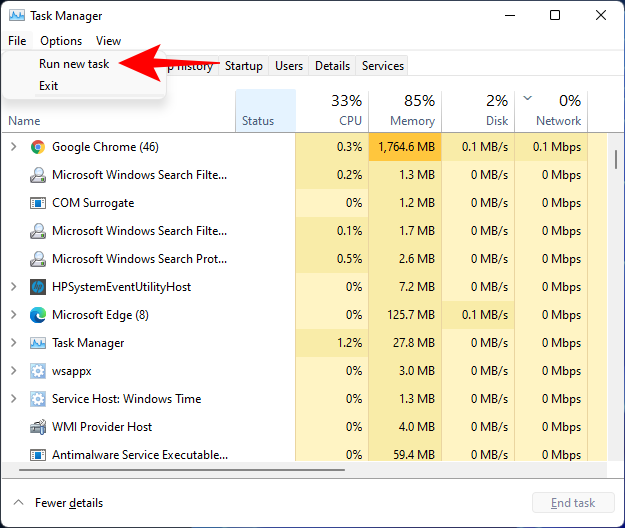
Ýttu á Ctrl + Shift + Esctil að opna Task Manager. Smelltu síðan á File (efst í vinstra horninu) og Keyra nýtt verkefni .
Sláðu inn regedit og ýttu á Enter.
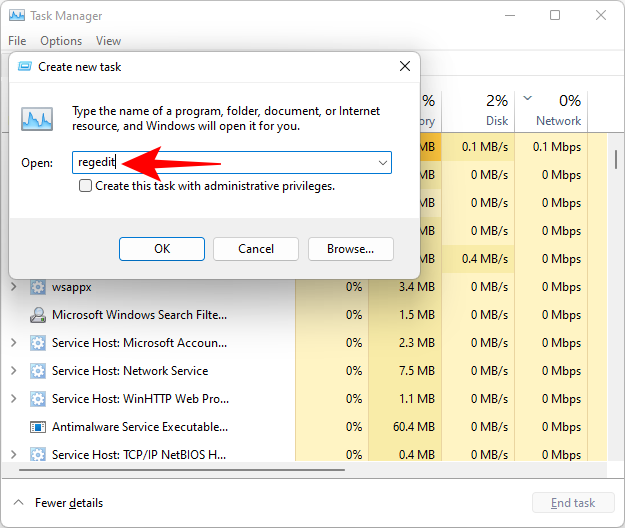
Þetta mun opna Registry Editor. Farðu nú á eftirfarandi heimilisfang:
Computer\HKEY_LOCAL_MACHINE\SOFTWARE\Microsoft\Windows\CurrentVersion\Shell\Update\Packages
Að öðrum kosti, afritaðu bara ofangreint og límdu það inn í veffangastiku skráningarritstjórans, eins og svo:

Þegar þú ýtir á Enter verður þér vísað á tilgreindan lykil. Hægra hægri smelltu á bil og veldu Nýtt > DWORD (32-bita) gildi .
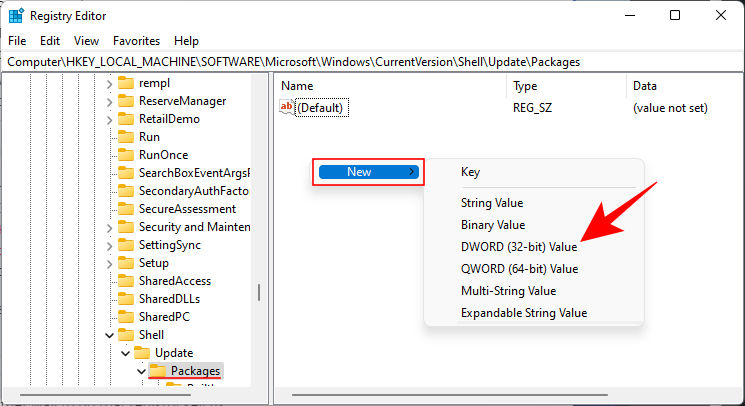
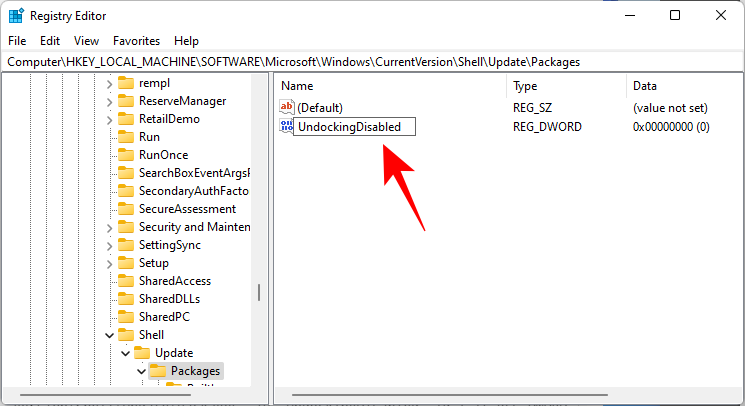
Nefndu þetta nýstofnaða DWORD UndockingDisabled .
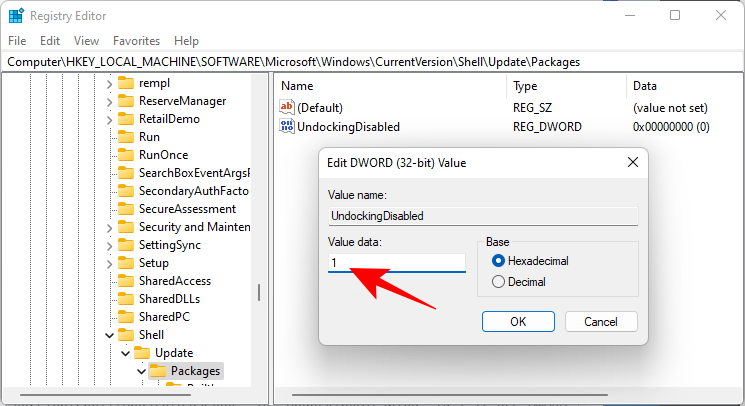
Tvísmelltu síðan á það og breyttu „Value data“ í 1 . Smelltu síðan á OK .
Endurræstu tölvuna þína til að breytingarnar taki gildi.
Lagfæring #6: Keyrðu SFC & DISM skipanir
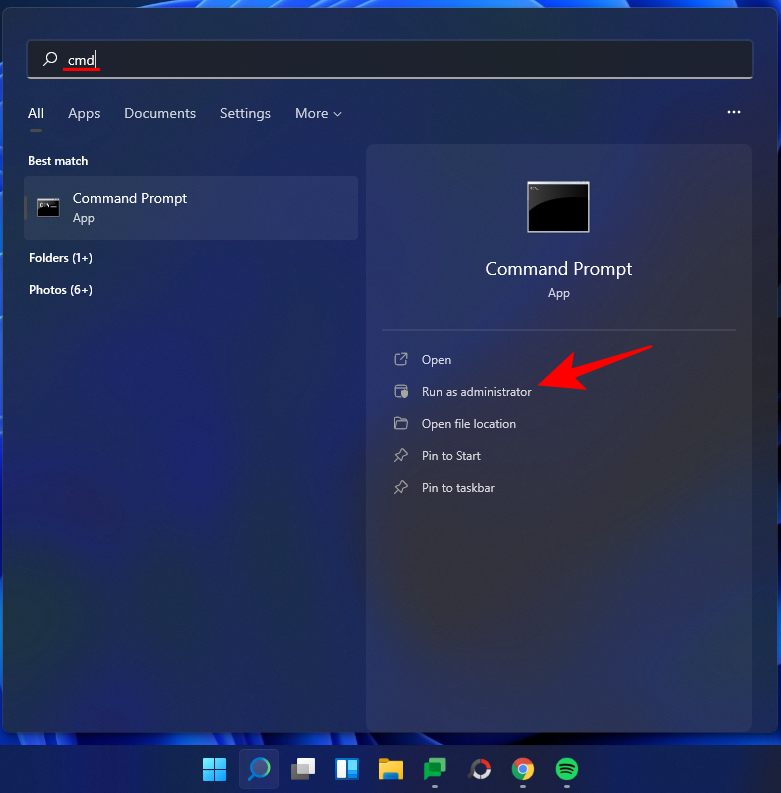
Ýttu á Start, sláðu inn cmd og smelltu á Keyra sem stjórnandi .
Sláðu nú inn eftirfarandi skipun:
sfc /scannow
Ýttu á Enter. Bíddu eftir að SFC lýkur skönnun og lagar öll vandamál sem fundust.

Næst skaltu keyra eftirfarandi DISM skipun fyrir Deployment Image Servicing and Management tólið:
dism /online /cleanup-image /scanhealth
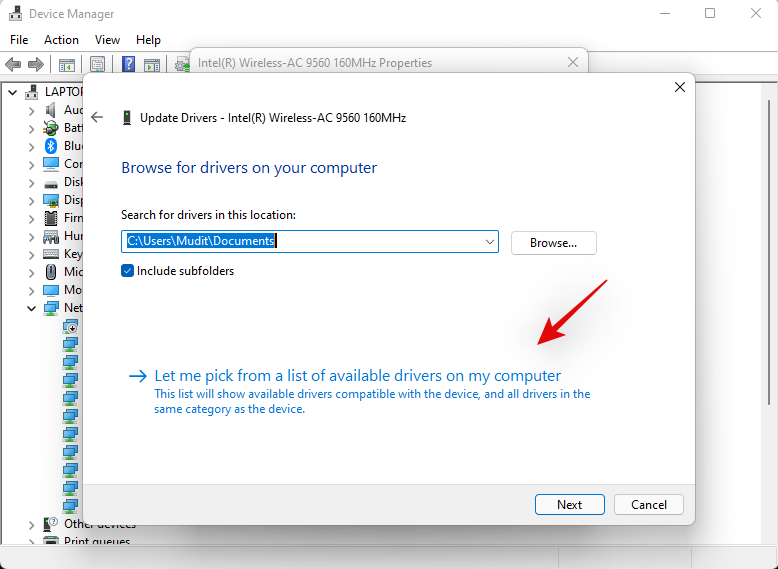
Ýttu síðan á Enter. Aftur, bíddu eftir að skönnuninni lýkur.

Keyrðu nú eftirfarandi DISM skipun:
dism /online /cleanup-image /restorehealth

Ýttu á Enter. Bíddu eftir að DISM endurheimti heilsuna.

Að lokum skaltu keyra chkdsk skipunina til að keyra Check Disk tólið:
chkdsk c: /r
Ýttu á Enter. Skipunarlínan mun senda upp skilaboð sem segja þér að það "getur ekki læst núverandi drifi ... vegna þess að hljóðstyrkurinn er í notkun af öðru ferli", og biðja þig um leyfi til að skipuleggja skönnun fyrir næstu ræsingu. Sláðu inn Ytil að fara eftir.

And press Enter. Now restart your computer, let the Check Disk tool do its job, and check if the taskbar has resumed normal functioning.
Fix #7: Reinstall UWP
Press Ctrl + Shift + Esc on your keyboard to launch the Task Manager. Click on ‘File’ and select ‘Run new task’.
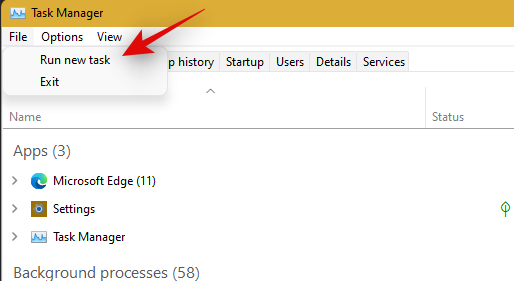
Type in ‘PowerShell’ and press Ctrl + Shift + Enter on your keyboard.
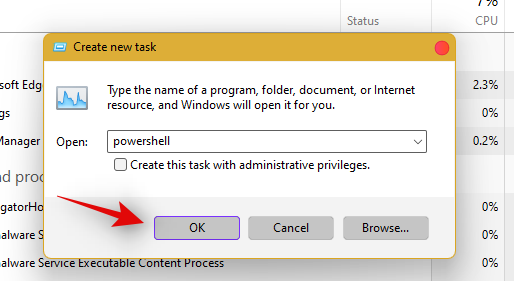
PowerShell will now be launched as an administrator on your system. Type the following command:
Get-AppxPackage -AllUsers | Foreach {Add-AppxPackage -DisableDevelopmentMode -Register “$ ($ _. InstallLocation) \ AppXManifest.xml”}
Press Enter. PowerShell will throw up a running list of messages in red. But don’t worry about it. Just wait for the command to finish executing.

Fix #8: Check UAC and add edit Registry if needed
UAC is a must-have for all modern apps and features including the Start Menu and the taskbar. You should first enable UAC if it is disabled and restart your system. If the Taskbar still fails to work for you, then we recommend you try adding a Xaml Start menu value to your Registry Editor.
Adding this value seems to restart and re-register Taskbar services which seem to get Taskbar working again on most systems. Follow the guide below to get you started.
Check and enable UAC if disabled
Press Ctrl + Shift + Esc on your keyboard to launch the task manager. Now click on ‘File’ in the top left corner of your screen and select ‘Run new task’.

Type in ‘cmd’ and press Ctrl + Shift + Enter on your keyboard.
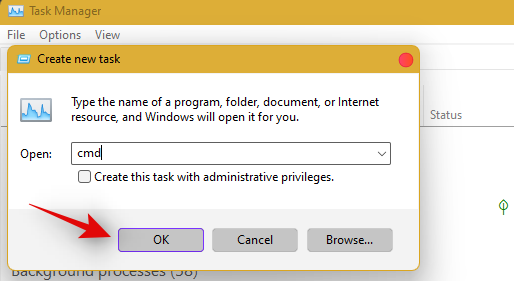
Now type in the following command and press Enter to execute the command.
C:\Windows\System32\cmd.exe /k %windir%\System32\reg.exe ADD HKLM\SOFTWARE\Microsoft\Windows\CurrentVersion\Policies\System /v EnableLUA /t REG_DWORD /d 0 /f
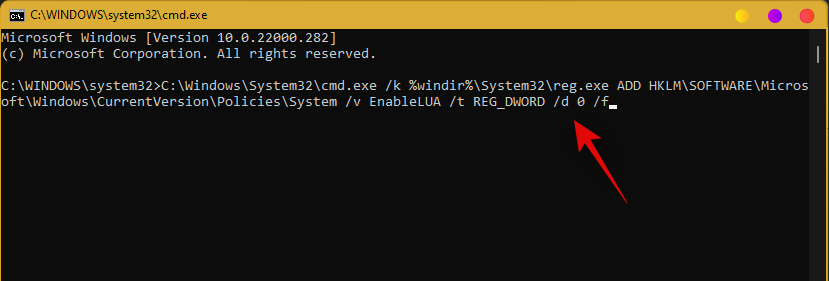
UAC will now be enabled for your system. Restart your PC for the changes to take effect on your system. Once restarted, Taskbar should be up and running on your system if UAC was the issue for you. If not, use the guide below to trigger the taskbar’s functionality on your system.
Add Registry Value
Press Ctrl + Shift + Esc to launch the task manager. Now click on ‘File’ in the top left corner and select ‘Run new task’.

Type in ‘cmd’ and press Ctrl + Shift + Enter on your keyboard.

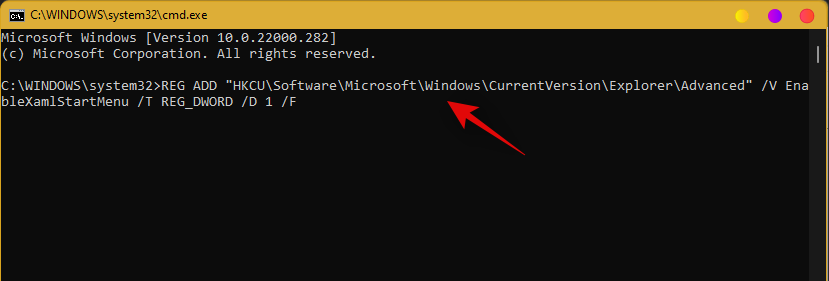
Now type in the following command and press Enter on your keyboard.
REG ADD "HKCU\Software\Microsoft\Windows\CurrentVersion\Explorer\Advanced" /V EnableXamlStartMenu /T REG_DWORD /D 1 /F
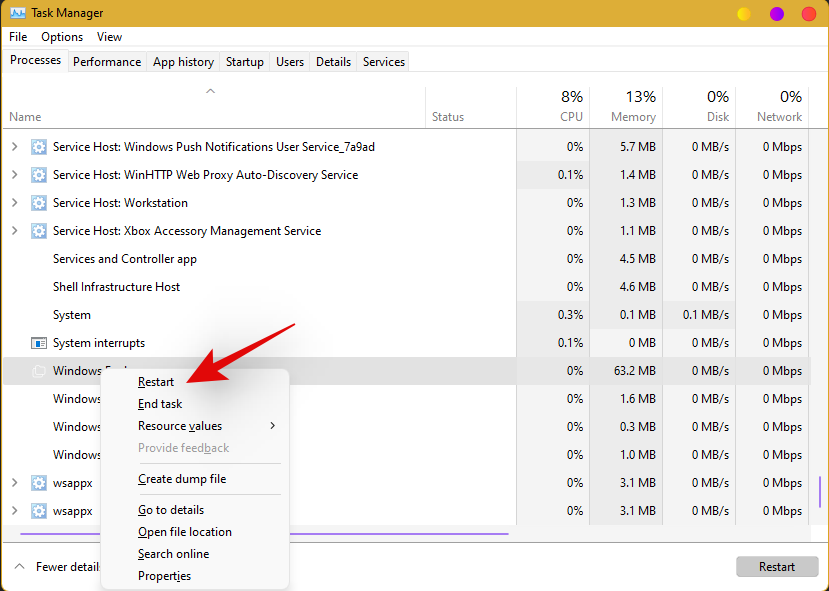
Go back to the task manager now, find Windows Explorer in the list, and right-click on it. Select Restart to restart explorer.exe.
Once restarted, try to access your taskbar. The taskbar should now be available on your system.
Fix #9: Edit date and time to fix Taskbar
Date and Time settings seem to be the major cause of issues with the taskbar in Windows 11. Use the guide below to try out the following time fixes to see which one works the best for you.
Ensure that your time is correctly synchronized with the time server
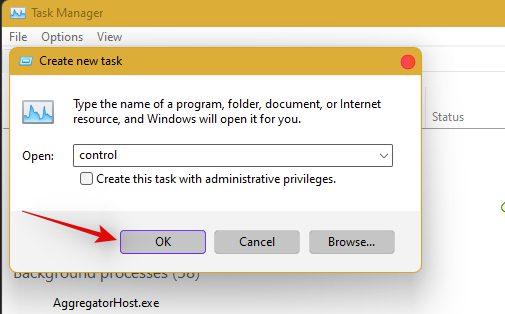
Press Ctrl + Shift + Esc on your keyboard and click on ‘File’. Select ‘Run new task’.

Type in ‘Control’ and hit Enter on your keyboard.
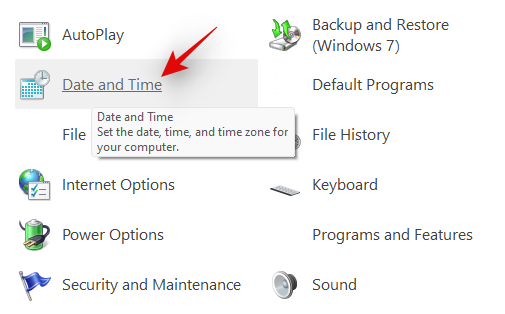
Click on ‘Date and Time’.
Select ‘Internet Time’ from the top.
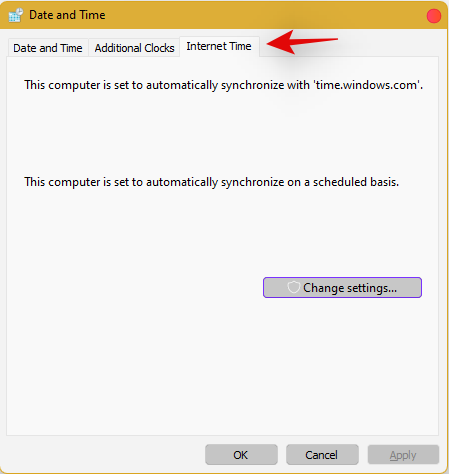
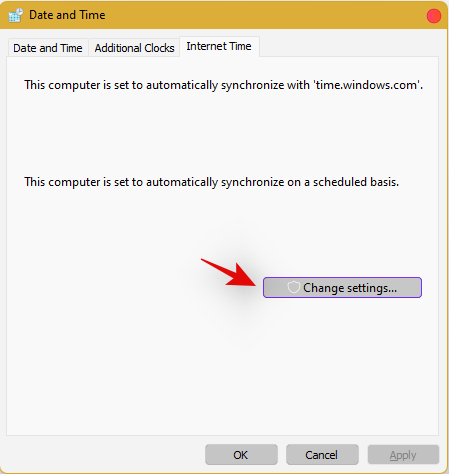
Click on ‘Change Settings’.
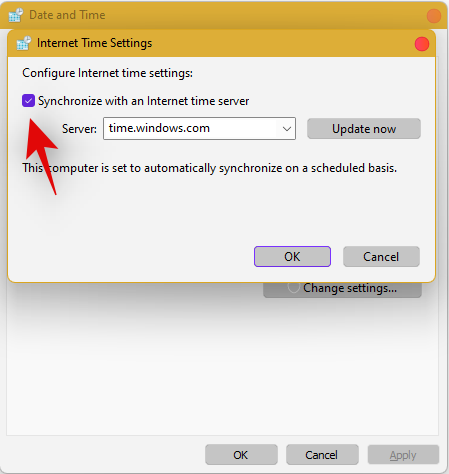
Uncheck the box for ‘Synchronize with an Internet time server’.
Click on ‘Ok’ once you are done.
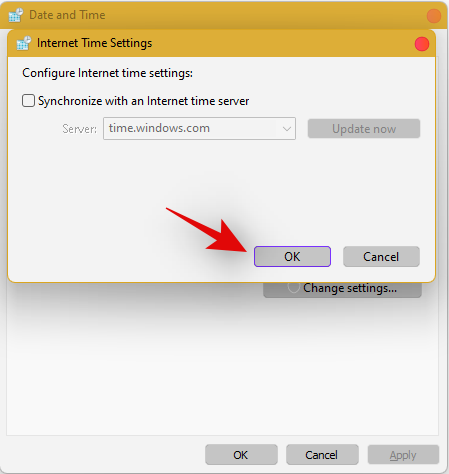
Restart your PC at this point and check your taskbar. If it is still disabled, do not fret, follow the steps above and enable Synchronization with an Internet Time Server again.
Once enabled, press Ctrl + Shift + Esc on your keyboard, and find Windows Explorer in the list on your screen. Right-click the listing and select ‘Restart’.

Once explorer restarts, try using the Taskbar. If synchronization was your issue, then it should now be fixed on your system. If not, continue with the other time fixes mentioned below.
Change date to 1 day ahead
Open the Task Manager by pressing Ctrl + Shift + Esc simultaneously. Then click on File.
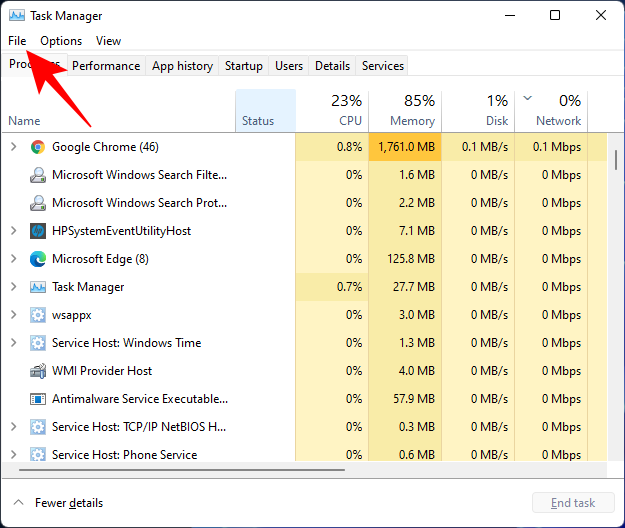
Click on Run new task.
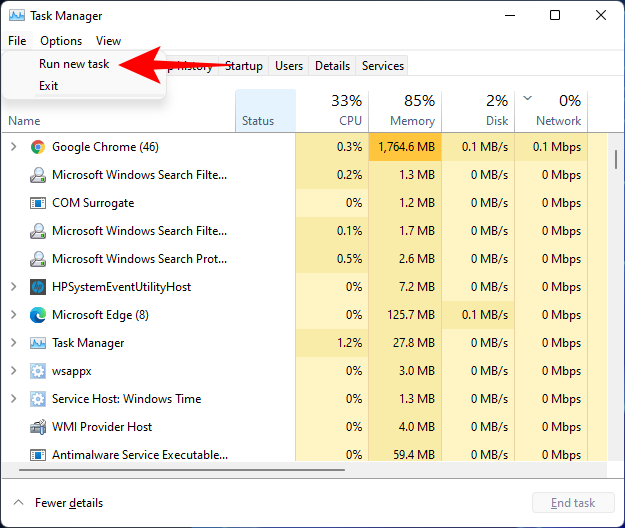
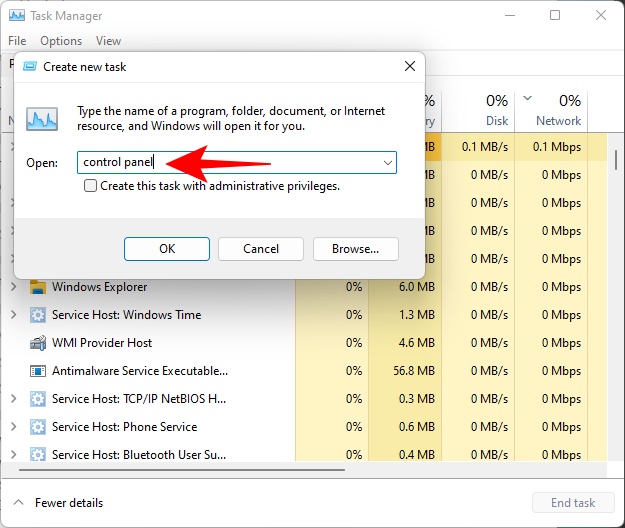
Type control panel and hit Enter.
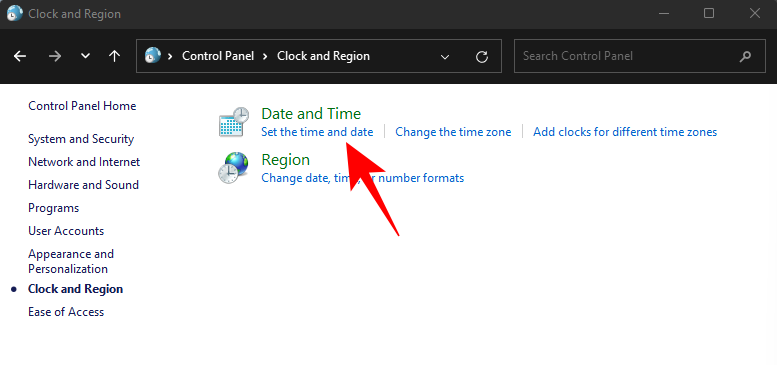
Now click on Clock and Region.
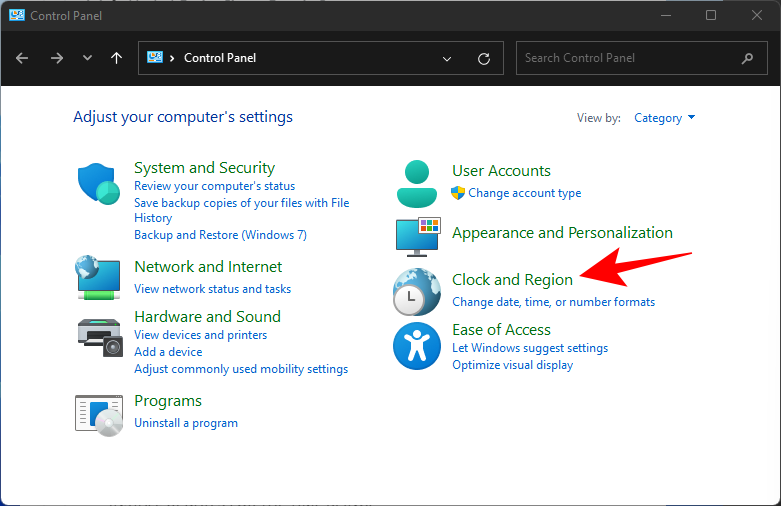
Under “Date and Time”, click on Set the time and date.
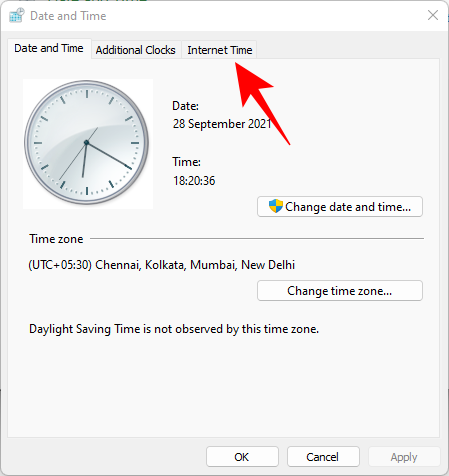
Click on the Internet Time tab to switch to it.
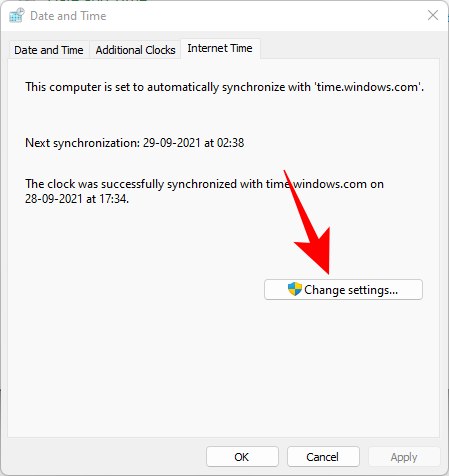
Click on Change settings…
Uncheck Synchronize with an Internet time server, then click OK.
Now click on the Date and Time tab to switch back to it.
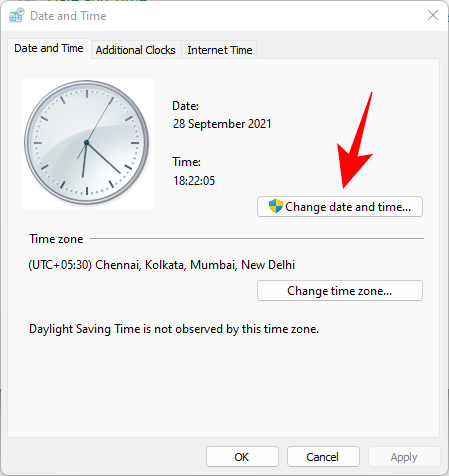
Here, click on Change date and time…
Now change the date and time to reflect tomorrow. As of writing this post, it is the 1st November so we will be changing the date to 2nd November.
Change Dates to last cumulative updates
If you are still unable to get the Taskbar working then you will have to jump through a few hoops to change your date and time multiple times and get the taskbar working on your system. Follow the guide below to get you started.
Press Ctrl + Shift + Esc on your keyboard, click on ‘File’ and select ‘Run new task’.

Type in ‘Control’ and press Enter on your keyboard.

Select ‘Date and Time’.

Switch to ‘Internet time’.

Click on ‘Change Settings’.

Uncheck the box for ‘Synchronize with an Internet Time Server’.

Click on ‘Ok’.

Switch back to ‘Date and Time’. Click on ‘Change Date and Time’ and select your date as 2nd September.
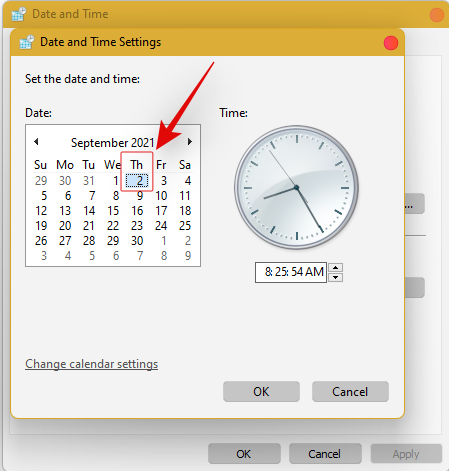
Close all windows and restart your system. Once restarted, open the ‘Date and Time’ dialog box again and change your date to 7th October this time.
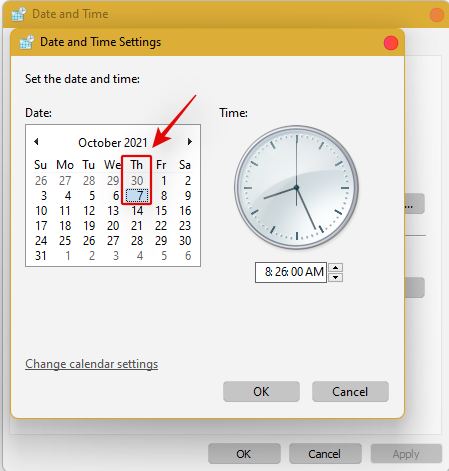
Restart your system again and Taskbar should now be back up and running on your system again. You can now enable synchronization for time again using the steps above on your system.
If synchronizing time does not work, move a month ahead to restore Taskbar
If you are still unable to get Taskbar up and running on your system again you can try the last date change fix. We recommend you use the steps above to change your date and time to a month ahead of your current date. Once changed, restart your system, and the taskbar should be up and running on your system now.
The downside of this fix is that if you revert to your normal date, Taskbar will stop working on your system. Having a mismatched date can cause issues with background syncs for various applications and cause some websites to malfunction. You will also have issues installing and getting the latest Windows Updates, so you will need to check all of these manually when updating in the future.
Fix #10: Uninstall the latest cumulative Windows Update ie: KB5006050
The cumulative update released in September for Windows 11 seems to also cause issues with the taskbar on some desktops and laptops. Use the guide below to uninstall the necessary update from your system.
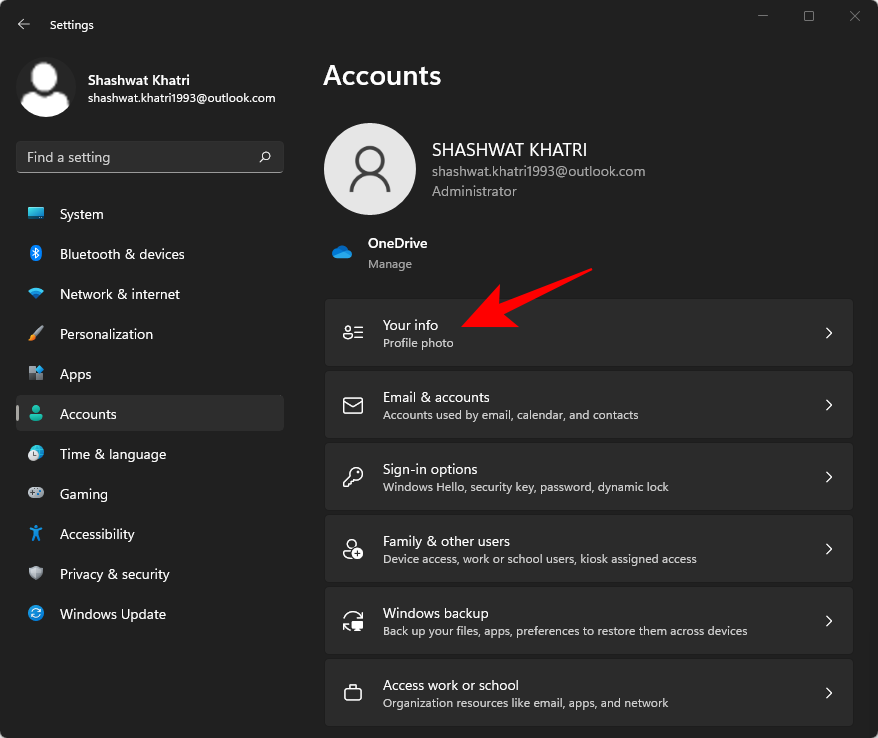
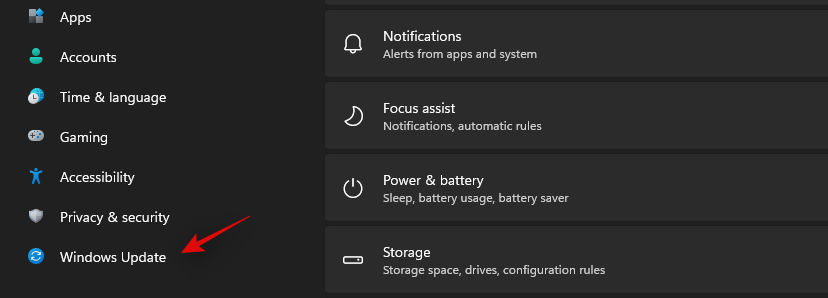
Press Windows + i and select Windows Update from the left.
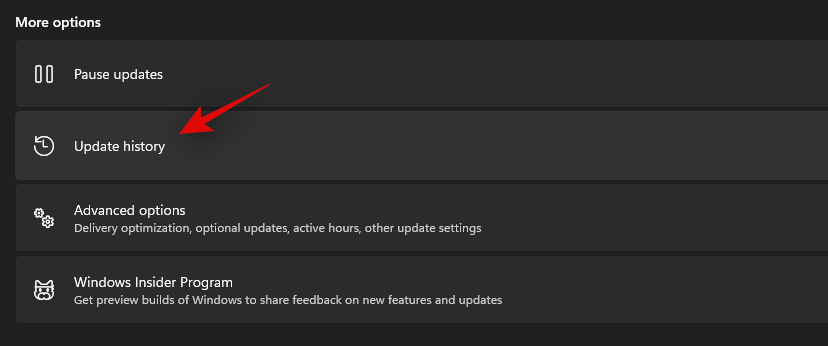
Click on ‘Update history’.
Now select ‘Uninstall updates’.
Click and select Windows Cumulative update KB5006050 from the list.
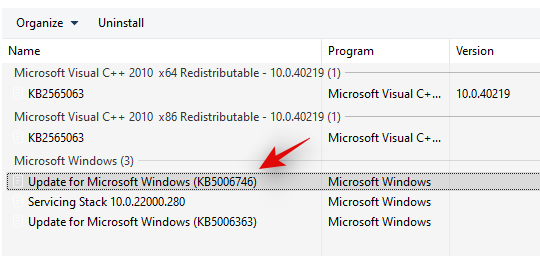
Now click on ‘Uninstall’ at the top and confirm your choice to uninstall the selected update.
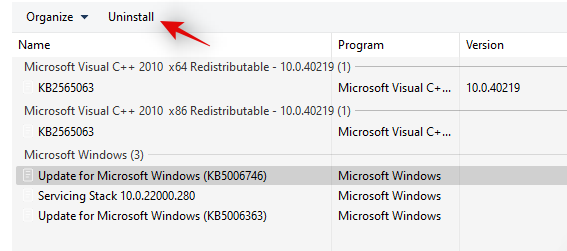
Restart your system and taskbar functionality should now be restored on your system.
Fix #11: Restore PC to a previous restore point
If you had the taskbar working at a previous point in time then we recommend you restore your PC to a previously available restore point on your system. Follow the guide below to get you started.
Press Ctrl + Shift + Esc on your keyboard and click on ‘File’. Select ‘Run new task’ once you are done.

Type in CMD and press Ctrl + Shift + Enter on your keyboard.

Now type in ‘rstrui.exe’ and press Enter on your keyboard.
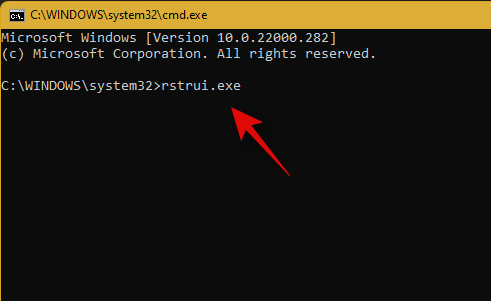
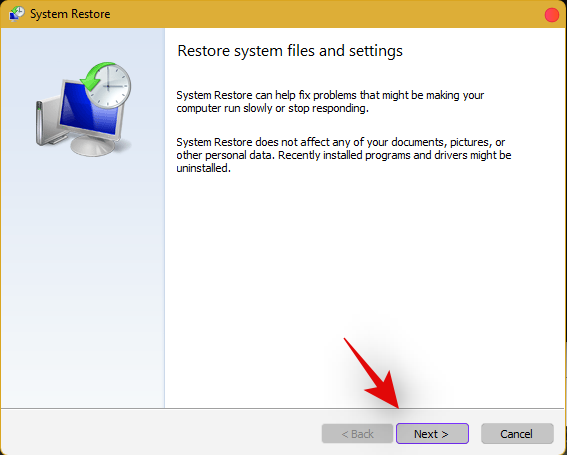
The system restore utility will now launch on your system. Click on ‘Next’.
Select the desired restore point from the list on your screen. Click on ‘Next’ once you are done.
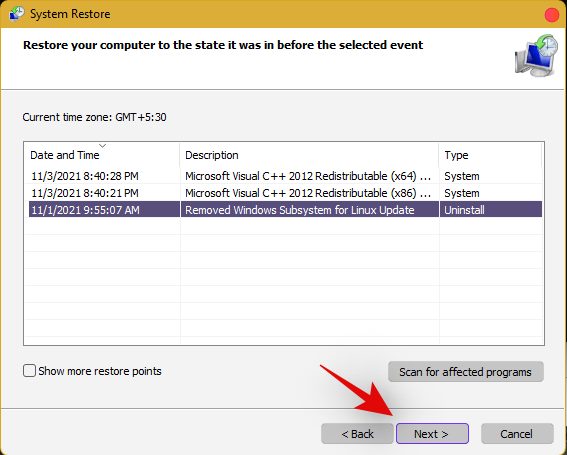
Tip: Click on ‘Scan for affected programs’ to view a list of installed programs that will be removed from your system during the restore process.
Click on ‘Finish’ once the restore finishes and restart your system.
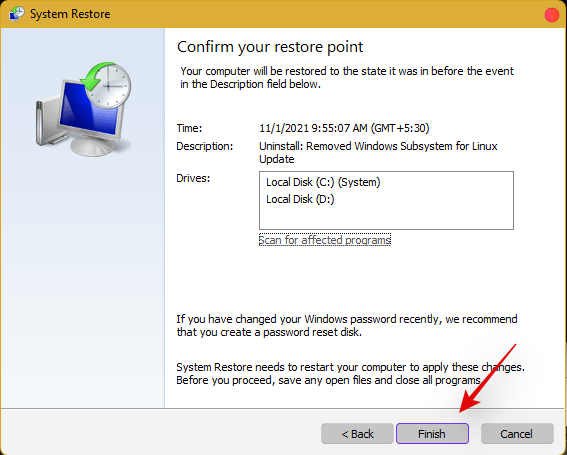
The taskbar should now be back up and running on your system again.
Fix #12: Last Resort: Create a new local admin account and transfer all your data
If by this point Taskbar still fails to work for you then it’s time for some drastic measures. You can create a new local admin account, check if Taskbar is working there, and then transfer all your data to the new account. This will be a tedious process but it is the next best way to get the taskbar working on your system without resetting your PC. Follow the guide below to get you started.
Create a new local admin account
Herre’s how you can create a new local admin account on your system.
Note: Most users facing the taskbar issue are unable to access the Settings app as well. Hence we will be using CMD to add a new local admin account to your PC. However, if the Settings app is available to you then you can use the same to add a new account as well.
Press Ctrl + Shift + Esc on your keyboard, click on ‘File’ and select ‘Run new task’.

Type in ‘cmd’ and press Ctrl + Shift + Enter on your keyboard.

CMD will now be launched as an administrator. Use the command below to add a new local admin account. Replace NAME with the Username of your choice for the new account. You can add a password later once you have confirmed that the taskbar is available in the new account.
net user /add NAME 
Once you have added the new user, use the command below to convert it to an administrator account on your PC. As usual, replace NAME with the Username for the new account you created earlier.
net localgroup Administrators NAME /add

Now type in the following to log out of your current account.
logoff

Once logged out, click on the newly added account to log in to the same. Once logged in, check if the taskbar is available in the new account. If it is, you can use the next section to transfer all your data. However, if the taskbar is still missing then you have no choice but to perform a fresh install of Windows 11 on your PC from a removable USB media drive.
Transfer all your data
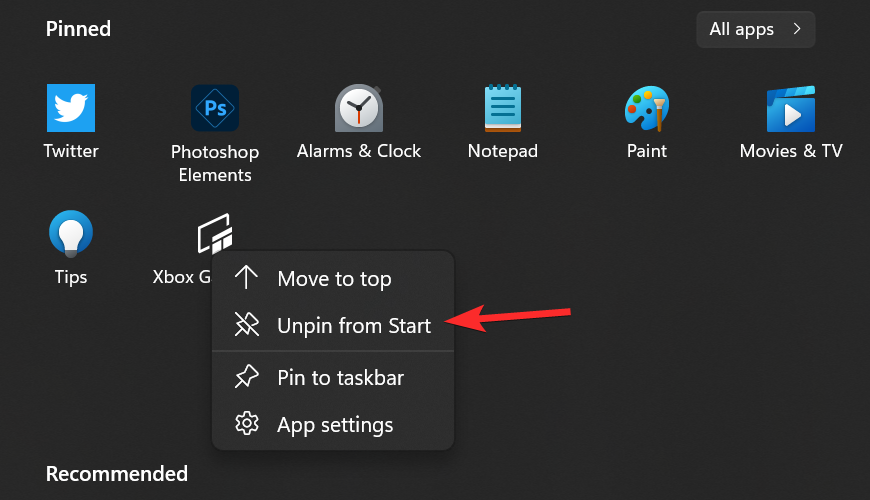
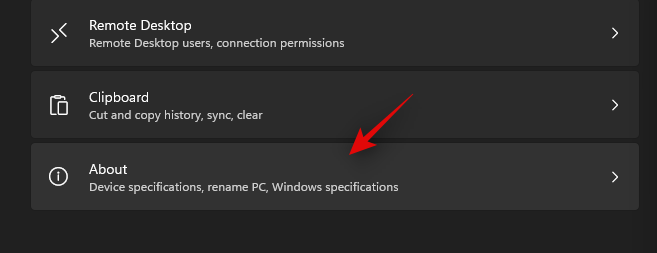
Press Windows + i on your keyboard and click on ‘About’ on your right.
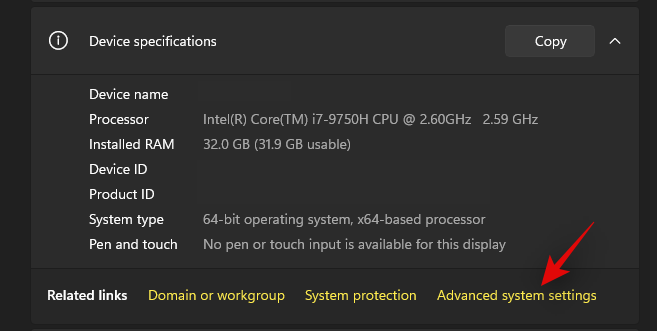
Click on ‘Advanced system settings’.
Click on ‘Settings’ under ‘User Profiles’.
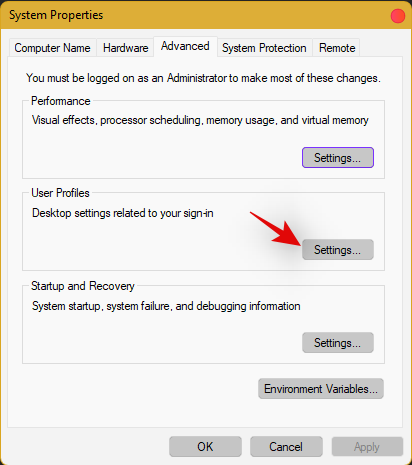
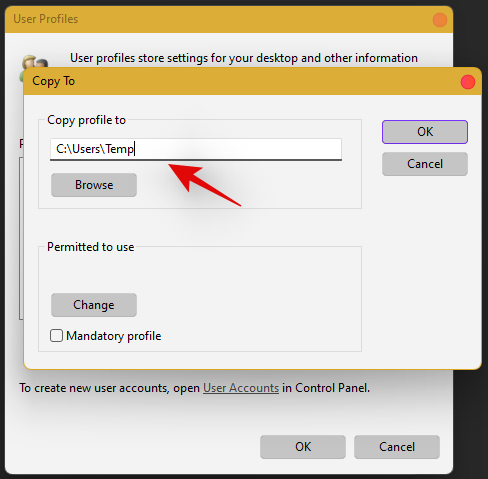
Select your original profile by clicking on it and selecting ‘Copy To’.
Now enter the following path under ‘Copy profile to’. Rename NAME to the username of your previous profile from where you wish to copy all your data.
C:\Users\NAME
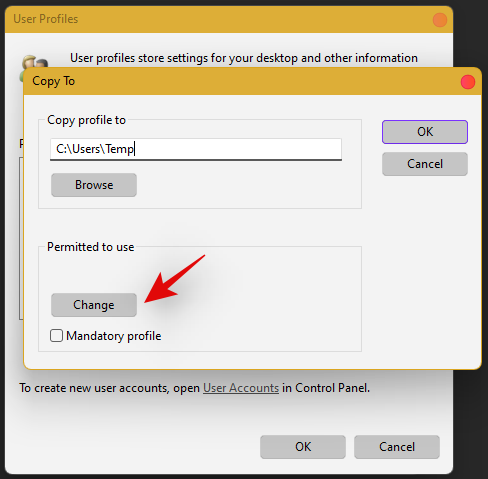
Click on ‘Change’.
Enter the name for your new user profile and press Enter on your keyboard.
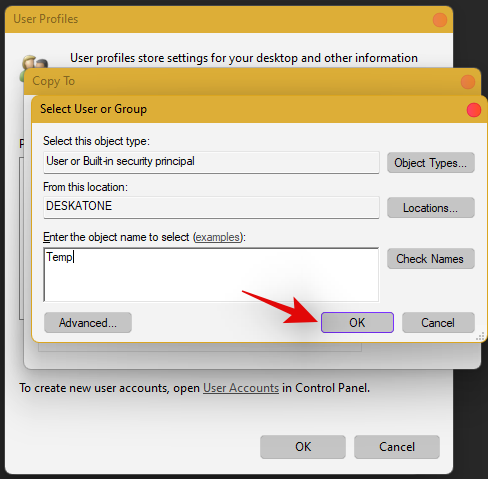
Click on ‘Ok’ once you are done.
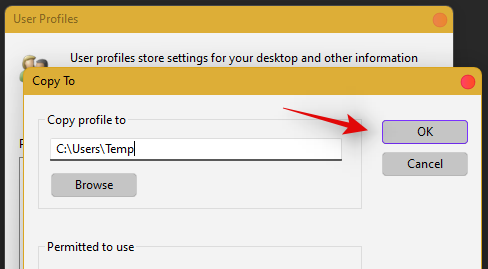
All your data will now be copied over to the new profile where the taskbar is functional on your PC. You can now delete your previous user account and set a password for your new account as well.
Frequently Asked Questions (FAQs):
With so many fixes, you are bound to have a few questions on your mind. Here are some commonly asked ones that should help you get up to speed.
How do I access Windows apps and Settings without a taskbar?
You can use the Task Manager to launch almost any program or Settings page on your system. To launch the desired program, launch the Taskbar > File > Run new task and enter the path to the program you wish to launch. Press Enter if you wish to launch the program normally or press Ctrl + Shift + Enter if you wish to launch the program with administrator privileges.
Is it safe to edit the Registry?
Registry edits are never safe as they have the potential to break your system. Fixes from trusted sources can help you avoid such issues but a good rule of thumb is to always back up your registry before making any edits. This way you can easily restore your Registry values in case some get messed up when editing the Registry.
When will Microsoft fix this issue?
Því miður á Microsoft enn eftir að gefa út viðeigandi lagfæringu á þessu vandamáli. Fyrirtækið hefur reynt að gefa út lagfæringu í fyrri uppsöfnuðum uppfærslum á Windows 11 en þær hafa verið vinsælar. Við gerum ráð fyrir að Microsoft muni laga þetta mál algjörlega í komandi eiginleikauppfærslu í Windows 11 þegar stýrikerfið fær getu til að keyra Android forrit opinberlega.
Get ég uppfært Windows 11 minn eftir að hafa lagað verkstikuna?
Þetta fer eftir lagfæringunni sem þú ert að nota núna. Ef þú ert að nota dagsetningarleiðréttingu muntu ekki geta sett upp uppfærslur fyrr en þú endurheimtir núverandi tíma. Þetta mun hins vegar valda því að verkstikan verður óvirk aftur og breytingarnar verða yfirfærðar eftir að þú hefur uppfært tölvuna þína. Hins vegar, ef þú ert að nota einhverja aðra lagfæringu þá geturðu auðveldlega uppfært Windows.
For users with the date fix, you should try updating with the modified time first. If the update gets stuck on ‘Installing 0%’ or ‘Downloading 100%’ then change your date and time to the current date and time and update your PC. Ensure that you do not restart explorer or your PC during this process to keep the current instance of the taskbar alive on your system during the update process. This should help fix the issue for you once Microsoft officially releases an update to fix the issue.
We hope you were able to easily get the taskbar back up and running on your system using the guide above. If you face any more issues, feel free to reach out to us using the comments section below.
Related:


