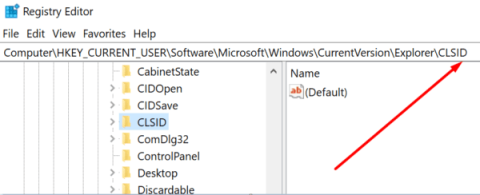
O rexistro de Windows é o banco de memoria do teu PC onde rexistra case todo o que fas no teu sistema. É exactamente o que suxire o nome: un rexistro. Xa sexa información sobre a ducia de ficheiros de vídeo que moveches unhas semanas atrás ou o último programa que instalou, todo está documentado nesta base de datos, incluíndo todas as opcións e preferencias específicas da túa máquina. É a prudencia natural, entón, a que guía á xente para que se alonxe de xogar con ela.
Windows, con todo, non é tan hábil para limpar o rexistro como para enchelo. Co paso do tempo, invariablemente se incha e ralentiza o ordenador, e ninguén o aprecia. Entón, se estás buscando limpar o rexistro e acelerar un pouco o teu ordenador, tes que saber o que estás facendo e como facelo.
Contidos
Que causa o lixo do Rexistro?
Un rexistro inchado pode ser a causa de varios erros de rexistro. Por exemplo, non é raro que as entradas de programas e software desinstalados permanezan no rexistro. Se reinstala programas ou os actualiza, o rexistro obterá claves duplicadas. Co paso do tempo, obtén centos de entradas que quedan orfas e sen ningunha boa razón que non sexa a ineptitud de Windows para limpar.
Tamén se mantén un rexistro de rexistro para as paradas do sistema. E se o sistema falla ou se apaga bruscamente, pode perturbar estes rexistros e causar un problema (lembras BSOD?). Ademais, as entradas do rexistro tamén son atacadas pola infestación de malware que pode modificar as claves e causar problemas graves. Se estas cousas pasan desatendidas, poderías estar mirando un sistema que está a piques de renunciar.
Relacionado: Que servizos de Windows 11 desactivar de forma segura e como?
Deberías limpar o teu rexistro?
Dadas as vulnerabilidades ás que está aberto o rexistro, tería sentido limpar o rexistro de cando en vez. Pero poden xurdir unha serie de complicacións se non se ten coidado co proceso, especialmente se o está a facer manualmente. A eliminación accidental de entradas esenciais para o bo funcionamento do sistema pode ser prexudicial para el, deixando sen resposta e morto. Aínda que utilices aplicacións de terceiros dedicadas a este fin, non se recomenda que as aplicacións limpen automaticamente o rexistro.
Podes limpar o teu rexistro facilmente por ti mesmo?
É importante saber exactamente o que estás facendo cando estás limpando o rexistro ti mesmo. Deben tomarse certas precaucións antes de asumir a tarefa de limpar o rexistro por si mesmo. Facer unha copia de seguranza do rexistro debería ser o primeiro que hai que facer para que poidas reverter os cambios no caso de que fagas eliminacións erróneas.
A outra cousa a asegurar é que non elimina as entradas do rexistro das que non ten nin idea. Aínda que os propios nomes dos cartafoles clave poden indicarche de que se trata, se nalgún momento non tes claro de onde proviñan, é mellor deixalos sós.
Con todo isto en mente, vexamos como podes limpar o rexistro en Windows 11.
Relacionado: Como enviar o teléfono ao PC: 5 xeitos explicados
Como facer unha copia de seguridade do rexistro
Antes de entrar nos distintos métodos para limpar o rexistro, tanto se o estás a facer manualmente como se utiliza unha ferramenta para iso, é imprescindible facer unha copia de seguridade do rexistro. Aquí tes como facelo.
A forma máis sinxela de facer unha copia de seguranza do rexistro é exportando os seus rexistros a través do propio Editor do Rexistro. Aquí tes como facelo:
Prema Win + Rpara abrir o cadro de diálogo EXECUTAR, escriba regedit e prema Intro.
![Como limpar o rexistro en Windows 11 [4 xeitos] Como limpar o rexistro en Windows 11 [4 xeitos]](https://img2.webtech360.com/resources8/images31/image-396-0105182733734.png)
Fai clic en Ficheiro .
![Como limpar o rexistro en Windows 11 [4 xeitos] Como limpar o rexistro en Windows 11 [4 xeitos]](https://img2.webtech360.com/resources8/images31/image-7261-0105182733924.png)
Seleccione Exportar .
![Como limpar o rexistro en Windows 11 [4 xeitos] Como limpar o rexistro en Windows 11 [4 xeitos]](https://img2.webtech360.com/resources8/images31/image-8330-0105182734009.png)
Dálle un nome a este ficheiro de copia de seguridade do rexistro e fai clic en Gardar para facelo.
![Como limpar o rexistro en Windows 11 [4 xeitos] Como limpar o rexistro en Windows 11 [4 xeitos]](https://img2.webtech360.com/resources8/images31/image-5847-0105182734096.png)
Dependendo do número de entradas no rexistro, isto pode levar algún tempo. Unha vez feito isto, pode comezar a usar os seguintes métodos para limpar o rexistro.
Como limpar o seu rexistro en Windows 11
Asegúrate de facer unha copia de seguranza do teu rexistro primeiro como se indica anteriormente. Unha vez feito isto, use calquera dos seguintes métodos para limpar o rexistro do seu PC con Windows 11.
Método #01: Usando a limpeza de disco
Aínda que este método non é para o rexistro, en rigor, limpa o disco onde se almacenan os ficheiros de rexistro e elimina unha gran cantidade de ficheiros de volcado de erros temporais e do sistema, todos eles ficheiros innecesarios ligados ao rexistro que ralentiza. o ordenador abaixo.
Prema Inicio, escriba Limpeza de disco e seleccione a primeira opción dispoñible.
![Como limpar o rexistro en Windows 11 [4 xeitos] Como limpar o rexistro en Windows 11 [4 xeitos]](https://img2.webtech360.com/resources8/images31/image-8848-0105182734211.png)
Unha vez que se abra a ferramenta, seleccione a unidade C: (predeterminada) e faga clic en Aceptar .
![Como limpar o rexistro en Windows 11 [4 xeitos] Como limpar o rexistro en Windows 11 [4 xeitos]](https://img2.webtech360.com/resources8/images31/image-9917-0105182734308.png)
Unha vez que a ferramenta remate de escanear, faga clic en Limpar ficheiros do sistema .
![Como limpar o rexistro en Windows 11 [4 xeitos] Como limpar o rexistro en Windows 11 [4 xeitos]](https://img2.webtech360.com/resources8/images31/image-4787-0105182956242.png)
Fai clic de novo en Aceptar . Isto fará que a ferramenta escanee unha segunda vez e lle dará máis opcións.
![Como limpar o rexistro en Windows 11 [4 xeitos] Como limpar o rexistro en Windows 11 [4 xeitos]](https://img2.webtech360.com/resources8/images31/image-4088-0105182734536.png)
Cando se complete a dixitalización, comprobe todos os ficheiros adicionais que pode eliminar e prema en Aceptar .
![Como limpar o rexistro en Windows 11 [4 xeitos] Como limpar o rexistro en Windows 11 [4 xeitos]](https://img2.webtech360.com/resources8/images31/image-9884-0105182734620.png)
Método #02: Usando o símbolo do sistema (co comando DISM)
Para executar o comando de xestión e mantemento de imaxes de implementación, estamos a usar o símbolo do sistema. Para abrilo, preme Inicio, escribe cmd e fai clic en Executar como administrador .
![Como limpar o rexistro en Windows 11 [4 xeitos] Como limpar o rexistro en Windows 11 [4 xeitos]](https://img2.webtech360.com/resources8/images31/image-2674-0105182734693.png)
Agora escriba o seguinte comando:
DISM /Online /Cleanup-Image /ScanHealth
![Como limpar o rexistro en Windows 11 [4 xeitos] Como limpar o rexistro en Windows 11 [4 xeitos]](https://img2.webtech360.com/resources8/images31/image-8470-0105182734800.png)
Preme Intro. A exploración buscará e corrixirá automaticamente os erros atopados.
![Como limpar o rexistro en Windows 11 [4 xeitos] Como limpar o rexistro en Windows 11 [4 xeitos]](https://img2.webtech360.com/resources8/images31/image-9539-0105182734887.png)
Aínda que isto non só está relacionado co rexistro, o teu ordenador beneficiarase moito desta comprobación.
Método #03: Usando o propio Editor do Rexistro (en modo seguro)
Now, onwards to the actual registry cleanup. Since this method requires you to manually delete registry files yourself, and because of the high chance that you may end up deleting something you shouldn’t, it’s better to be safe and do so from the Safe Mode.
To boot your PC into safe mode, press Start, click on the Power button, and then, while pressing the “Shift” key, click Restart.
![Como limpar o rexistro en Windows 11 [4 xeitos] Como limpar o rexistro en Windows 11 [4 xeitos]](https://img2.webtech360.com/resources8/images31/image-709-0105182734988.png)
Now, while the computer is restarting, you will be taken to the Advanced Restart options. Select Troubleshoot.
![Como limpar o rexistro en Windows 11 [4 xeitos] Como limpar o rexistro en Windows 11 [4 xeitos]](https://img2.webtech360.com/resources8/images31/image-158-0105182735092.png)
Click on Advanced options.
![Como limpar o rexistro en Windows 11 [4 xeitos] Como limpar o rexistro en Windows 11 [4 xeitos]](https://img2.webtech360.com/resources8/images31/image-4779-0105182735202.png)
Click on Startup Settings.
![Como limpar o rexistro en Windows 11 [4 xeitos] Como limpar o rexistro en Windows 11 [4 xeitos]](https://img2.webtech360.com/resources8/images31/image-676-0105182735289.png)
Click Restart.
![Como limpar o rexistro en Windows 11 [4 xeitos] Como limpar o rexistro en Windows 11 [4 xeitos]](https://img2.webtech360.com/resources8/images31/image-3677-0105182735412.png)
Now press the number that corresponds to Enable Safe Mode with Networking.
![Como limpar o rexistro en Windows 11 [4 xeitos] Como limpar o rexistro en Windows 11 [4 xeitos]](https://img2.webtech360.com/resources8/images31/image-9885-0105182735822.png)
Once you’re booted up in Safe Mode, press Win + R to open the RUN dialog box. Then type regedit and hit Enter.
![Como limpar o rexistro en Windows 11 [4 xeitos] Como limpar o rexistro en Windows 11 [4 xeitos]](https://img2.webtech360.com/resources8/images31/image-1367-0105182735973.png)
Now, it’s time to start removing unnecessary registry entries and exercising extreme caution while doing so. The safest registry cleaning option is to look for residual entries of programs and applications that have already been uninstalled. To do so, expand the HKEY_CURRENT USER folder and then Software.
![Como limpar o rexistro en Windows 11 [4 xeitos] Como limpar o rexistro en Windows 11 [4 xeitos]](https://img2.webtech360.com/resources8/images31/image-4368-0105182736094.png)
Now look for keys that represent applications already uninstalled, then right-click them and select Delete.
![Como limpar o rexistro en Windows 11 [4 xeitos] Como limpar o rexistro en Windows 11 [4 xeitos]](https://img2.webtech360.com/resources8/images31/image-1022-0105182736233.png)
Make sure that you delete keys and folders only if you’re completely sure what they are. For instance, we remember uninstalling Epic Games a few weeks back, which is why we’re removing it from the registry also. You will also be prompted once before you delete the registry entries for good. Click on Yes to confirm.
![Como limpar o rexistro en Windows 11 [4 xeitos] Como limpar o rexistro en Windows 11 [4 xeitos]](https://img2.webtech360.com/resources8/images31/image-7476-0105182956324.png)
Do so for all keys that you know for sure are just remnants of uninstalled programs. Once you’re finished, close the Registry Editor and restart the computer normally.
Method #04: Using 3rd-party applications
There are tons of third-party applications whose sole purpose is to clean the registry. However, even with all these sophisticated programs, you need to maintain caution while giving them the authority to clean at will.
Many of these applications will give you the option to deep clean the registry. We recommend that you don’t go with this option, and always review the deletions before they’re made.
With that in mind, let’s look at a few popular registry ‘cleaners’.
1. CCleaner
CCleaner is a useful tool when it comes to scanning issues related to the PC, especially the registry. The good thing about this program is that it gives you the opportunity to review each entry before ‘fixing’ it (read delete).
Download: CCleaner
After downloading, install CCleaner and open the application. Then click on Registry in the left panel.
![Como limpar o rexistro en Windows 11 [4 xeitos] Como limpar o rexistro en Windows 11 [4 xeitos]](https://img2.webtech360.com/resources8/images31/image-5405-0105182736495.png)
Click on Scan for Issues.
![Como limpar o rexistro en Windows 11 [4 xeitos] Como limpar o rexistro en Windows 11 [4 xeitos]](https://img2.webtech360.com/resources8/images31/image-2058-0105182736642.png)
Once the issues are found, click on Review selected Issues.
![Como limpar o rexistro en Windows 11 [4 xeitos] Como limpar o rexistro en Windows 11 [4 xeitos]](https://img2.webtech360.com/resources8/images31/image-6992-0105182736790.png)
CCleaner will ask if you want to back up the registry. Click Yes if you haven’t done so yet.
![Como limpar o rexistro en Windows 11 [4 xeitos] Como limpar o rexistro en Windows 11 [4 xeitos]](https://img2.webtech360.com/resources8/images31/image-8060-0105182736890.png)
Then save a copy of the registry and click on Save.
![Como limpar o rexistro en Windows 11 [4 xeitos] Como limpar o rexistro en Windows 11 [4 xeitos]](https://img2.webtech360.com/resources8/images31/image-9129-0105182736974.png)
Now review the issues one by one. If there is an issue that you’d like to fix, click on Fix Issue.
![Como limpar o rexistro en Windows 11 [4 xeitos] Como limpar o rexistro en Windows 11 [4 xeitos]](https://img2.webtech360.com/resources8/images31/image-2231-0105182737109.png)
Do so for all issues. If you don’t know if an issue is pertinent or safe to fix, move on to the next one.
![Como limpar o rexistro en Windows 11 [4 xeitos] Como limpar o rexistro en Windows 11 [4 xeitos]](https://img2.webtech360.com/resources8/images31/image-1681-0105182737222.png)
Close CCleaner once you’re done.
2. Wise Registry Cleaner
Wise Registry Cleaner is another tool that cleans and defrags the registry.
Download: Wise Registry Cleaner
When you run the program for the first time, you’ll be asked to create a backup first. Click on Yes to do so.
![Como limpar o rexistro en Windows 11 [4 xeitos] Como limpar o rexistro en Windows 11 [4 xeitos]](https://img2.webtech360.com/resources8/images31/image-2199-0105182737423.png)
Click on Create a full registry backup.
![Como limpar o rexistro en Windows 11 [4 xeitos] Como limpar o rexistro en Windows 11 [4 xeitos]](https://img2.webtech360.com/resources8/images31/image-6819-0105182737526.png)
Once the backup is created, scan the registry with the tool. We recommend going for the Fast Scan option as this will only scan safe entries (safe to delete, that is).
![Como limpar o rexistro en Windows 11 [4 xeitos] Como limpar o rexistro en Windows 11 [4 xeitos]](https://img2.webtech360.com/resources8/images31/image-6269-0105182737642.png)
Once the scan is completed, you will get a list of issues found with the registry.
![Como limpar o rexistro en Windows 11 [4 xeitos] Como limpar o rexistro en Windows 11 [4 xeitos]](https://img2.webtech360.com/resources8/images31/image-7337-0105182737738.png)
Click on each category to review the issues contained in it. Unselect issues that you are not sure about deleting. Then click on Clean.
![Como limpar o rexistro en Windows 11 [4 xeitos] Como limpar o rexistro en Windows 11 [4 xeitos]](https://img2.webtech360.com/resources8/images31/image-8406-0105182737827.png)
3. Auslogics Registry Cleaner
The last registry cleaner that we’re looking at today is an application that is a little on the heavier side, mainly because of the numerous features that it has.
Download: Auslogics Registry Cleaner
Once you open the application, ‘Clean Registry’ will be the default option. Click on Scan for Auslogics Registry Cleaner to start looking for registry issues.
![Como limpar o rexistro en Windows 11 [4 xeitos] Como limpar o rexistro en Windows 11 [4 xeitos]](https://img2.webtech360.com/resources8/images31/image-1508-0105182737943.png)
Once the scanning finishes, go through each category and unselect the issues that you’re not sure about fixing. Once you’re satisfied with the issues that you’re resolving, click on Resolve at the bottom (make sure the Back Up Changes option is selected).
![Como limpar o rexistro en Windows 11 [4 xeitos] Como limpar o rexistro en Windows 11 [4 xeitos]](https://img2.webtech360.com/resources8/images31/image-2890-0105182738086.png)
How to restore a Registry backup
If you made a mistake by deleting a few entries that you shouldn’t have, you may want to restore the registry as it was when a backup was made. To do so, first press Win + R to open the RUN dialog box. Then type regedit and hit Enter to open the Registry Editor.
![Como limpar o rexistro en Windows 11 [4 xeitos] Como limpar o rexistro en Windows 11 [4 xeitos]](https://img2.webtech360.com/resources8/images31/image-7510-0105182738207.png)
Click on File.
![Como limpar o rexistro en Windows 11 [4 xeitos] Como limpar o rexistro en Windows 11 [4 xeitos]](https://img2.webtech360.com/resources8/images31/image-3408-0105182738300.png)
Select Import.
![Como limpar o rexistro en Windows 11 [4 xeitos] Como limpar o rexistro en Windows 11 [4 xeitos]](https://img2.webtech360.com/resources8/images31/image-9961-0105182738432.png)
Look for the backup that you created earlier, select it, and click on Open.
![Como limpar o rexistro en Windows 11 [4 xeitos] Como limpar o rexistro en Windows 11 [4 xeitos]](https://img2.webtech360.com/resources8/images31/image-7478-0105182738516.png)
And that’s it! You have restored the registry as it was before you started the cleaning process.
Frequently Asked Questions (FAQs)
Cleaning the registry can be a tricky task, to say the least. Users tend to have a lot of questions about the risks involved in the process and whether the benefits really outweigh those risks. Here we answer a few commonly asked questions to allay some of the fears.
What risks are involved when cleaning the registry?
The biggest risk involved when cleaning the registry, whether you’re doing it manually or delegating the task to a Registry cleaning application, is that you may end up deleting registry entries that are crucial to the proper functioning of your system.
This is why throughout our guide we have placed special emphasis on reviewing the entries before going about deleting them. If you want to negate those risks, always back up the registry and clean the registry from Safe Mode, just to be on the safer side.
When is it recommended to clean the registry?
Cleaning the registry isn’t something that most people tend to do, or even need to. But if your computer is being bogged down and appears a little more sluggish than usual, cleaning the registry can be one way of speeding up Windows 11.
É unha boa práctica manter o sistema libre de aplicacións innecesarias para que non necesites usar un limpador de rexistro. Pero se realmente o necesitas, esperamos que puideses limpar o rexistro de forma responsable con esta guía sen ter ningún problema.
RELACIONADAS

![Como limpar o rexistro en Windows 11 [4 xeitos] Como limpar o rexistro en Windows 11 [4 xeitos]](https://img2.webtech360.com/resources8/images31/image-396-0105182733734.png)
![Como limpar o rexistro en Windows 11 [4 xeitos] Como limpar o rexistro en Windows 11 [4 xeitos]](https://img2.webtech360.com/resources8/images31/image-7261-0105182733924.png)
![Como limpar o rexistro en Windows 11 [4 xeitos] Como limpar o rexistro en Windows 11 [4 xeitos]](https://img2.webtech360.com/resources8/images31/image-8330-0105182734009.png)
![Como limpar o rexistro en Windows 11 [4 xeitos] Como limpar o rexistro en Windows 11 [4 xeitos]](https://img2.webtech360.com/resources8/images31/image-5847-0105182734096.png)
![Como limpar o rexistro en Windows 11 [4 xeitos] Como limpar o rexistro en Windows 11 [4 xeitos]](https://img2.webtech360.com/resources8/images31/image-8848-0105182734211.png)
![Como limpar o rexistro en Windows 11 [4 xeitos] Como limpar o rexistro en Windows 11 [4 xeitos]](https://img2.webtech360.com/resources8/images31/image-9917-0105182734308.png)
![Como limpar o rexistro en Windows 11 [4 xeitos] Como limpar o rexistro en Windows 11 [4 xeitos]](https://img2.webtech360.com/resources8/images31/image-4787-0105182956242.png)
![Como limpar o rexistro en Windows 11 [4 xeitos] Como limpar o rexistro en Windows 11 [4 xeitos]](https://img2.webtech360.com/resources8/images31/image-4088-0105182734536.png)
![Como limpar o rexistro en Windows 11 [4 xeitos] Como limpar o rexistro en Windows 11 [4 xeitos]](https://img2.webtech360.com/resources8/images31/image-9884-0105182734620.png)
![Como limpar o rexistro en Windows 11 [4 xeitos] Como limpar o rexistro en Windows 11 [4 xeitos]](https://img2.webtech360.com/resources8/images31/image-2674-0105182734693.png)
![Como limpar o rexistro en Windows 11 [4 xeitos] Como limpar o rexistro en Windows 11 [4 xeitos]](https://img2.webtech360.com/resources8/images31/image-8470-0105182734800.png)
![Como limpar o rexistro en Windows 11 [4 xeitos] Como limpar o rexistro en Windows 11 [4 xeitos]](https://img2.webtech360.com/resources8/images31/image-9539-0105182734887.png)
![Como limpar o rexistro en Windows 11 [4 xeitos] Como limpar o rexistro en Windows 11 [4 xeitos]](https://img2.webtech360.com/resources8/images31/image-709-0105182734988.png)
![Como limpar o rexistro en Windows 11 [4 xeitos] Como limpar o rexistro en Windows 11 [4 xeitos]](https://img2.webtech360.com/resources8/images31/image-158-0105182735092.png)
![Como limpar o rexistro en Windows 11 [4 xeitos] Como limpar o rexistro en Windows 11 [4 xeitos]](https://img2.webtech360.com/resources8/images31/image-4779-0105182735202.png)
![Como limpar o rexistro en Windows 11 [4 xeitos] Como limpar o rexistro en Windows 11 [4 xeitos]](https://img2.webtech360.com/resources8/images31/image-676-0105182735289.png)
![Como limpar o rexistro en Windows 11 [4 xeitos] Como limpar o rexistro en Windows 11 [4 xeitos]](https://img2.webtech360.com/resources8/images31/image-3677-0105182735412.png)
![Como limpar o rexistro en Windows 11 [4 xeitos] Como limpar o rexistro en Windows 11 [4 xeitos]](https://img2.webtech360.com/resources8/images31/image-9885-0105182735822.png)
![Como limpar o rexistro en Windows 11 [4 xeitos] Como limpar o rexistro en Windows 11 [4 xeitos]](https://img2.webtech360.com/resources8/images31/image-1367-0105182735973.png)
![Como limpar o rexistro en Windows 11 [4 xeitos] Como limpar o rexistro en Windows 11 [4 xeitos]](https://img2.webtech360.com/resources8/images31/image-4368-0105182736094.png)
![Como limpar o rexistro en Windows 11 [4 xeitos] Como limpar o rexistro en Windows 11 [4 xeitos]](https://img2.webtech360.com/resources8/images31/image-1022-0105182736233.png)
![Como limpar o rexistro en Windows 11 [4 xeitos] Como limpar o rexistro en Windows 11 [4 xeitos]](https://img2.webtech360.com/resources8/images31/image-7476-0105182956324.png)
![Como limpar o rexistro en Windows 11 [4 xeitos] Como limpar o rexistro en Windows 11 [4 xeitos]](https://img2.webtech360.com/resources8/images31/image-5405-0105182736495.png)
![Como limpar o rexistro en Windows 11 [4 xeitos] Como limpar o rexistro en Windows 11 [4 xeitos]](https://img2.webtech360.com/resources8/images31/image-2058-0105182736642.png)
![Como limpar o rexistro en Windows 11 [4 xeitos] Como limpar o rexistro en Windows 11 [4 xeitos]](https://img2.webtech360.com/resources8/images31/image-6992-0105182736790.png)
![Como limpar o rexistro en Windows 11 [4 xeitos] Como limpar o rexistro en Windows 11 [4 xeitos]](https://img2.webtech360.com/resources8/images31/image-8060-0105182736890.png)
![Como limpar o rexistro en Windows 11 [4 xeitos] Como limpar o rexistro en Windows 11 [4 xeitos]](https://img2.webtech360.com/resources8/images31/image-9129-0105182736974.png)
![Como limpar o rexistro en Windows 11 [4 xeitos] Como limpar o rexistro en Windows 11 [4 xeitos]](https://img2.webtech360.com/resources8/images31/image-2231-0105182737109.png)
![Como limpar o rexistro en Windows 11 [4 xeitos] Como limpar o rexistro en Windows 11 [4 xeitos]](https://img2.webtech360.com/resources8/images31/image-1681-0105182737222.png)
![Como limpar o rexistro en Windows 11 [4 xeitos] Como limpar o rexistro en Windows 11 [4 xeitos]](https://img2.webtech360.com/resources8/images31/image-2199-0105182737423.png)
![Como limpar o rexistro en Windows 11 [4 xeitos] Como limpar o rexistro en Windows 11 [4 xeitos]](https://img2.webtech360.com/resources8/images31/image-6819-0105182737526.png)
![Como limpar o rexistro en Windows 11 [4 xeitos] Como limpar o rexistro en Windows 11 [4 xeitos]](https://img2.webtech360.com/resources8/images31/image-6269-0105182737642.png)
![Como limpar o rexistro en Windows 11 [4 xeitos] Como limpar o rexistro en Windows 11 [4 xeitos]](https://img2.webtech360.com/resources8/images31/image-7337-0105182737738.png)
![Como limpar o rexistro en Windows 11 [4 xeitos] Como limpar o rexistro en Windows 11 [4 xeitos]](https://img2.webtech360.com/resources8/images31/image-8406-0105182737827.png)
![Como limpar o rexistro en Windows 11 [4 xeitos] Como limpar o rexistro en Windows 11 [4 xeitos]](https://img2.webtech360.com/resources8/images31/image-1508-0105182737943.png)
![Como limpar o rexistro en Windows 11 [4 xeitos] Como limpar o rexistro en Windows 11 [4 xeitos]](https://img2.webtech360.com/resources8/images31/image-2890-0105182738086.png)
![Como limpar o rexistro en Windows 11 [4 xeitos] Como limpar o rexistro en Windows 11 [4 xeitos]](https://img2.webtech360.com/resources8/images31/image-7510-0105182738207.png)
![Como limpar o rexistro en Windows 11 [4 xeitos] Como limpar o rexistro en Windows 11 [4 xeitos]](https://img2.webtech360.com/resources8/images31/image-3408-0105182738300.png)
![Como limpar o rexistro en Windows 11 [4 xeitos] Como limpar o rexistro en Windows 11 [4 xeitos]](https://img2.webtech360.com/resources8/images31/image-9961-0105182738432.png)
![Como limpar o rexistro en Windows 11 [4 xeitos] Como limpar o rexistro en Windows 11 [4 xeitos]](https://img2.webtech360.com/resources8/images31/image-7478-0105182738516.png)


