Os portátiles foron a máquina de traballo para empregados e estudantes desde que se lanzaron. As novas variacións, as melloras na potencia de procesamento, o deseño térmico e unha redución global de peso fixeron que os portátiles sexan tamén máis atractivos para os consumidores cotiáns.
Os xogadores tamén poden gozar de xogos de alto rendemento en calquera lugar cunha experiencia de escritorio case equivalente nalgúns portátiles. Con estas melloras, os portátiles teñen novas tecnoloxías de batería para axudarlles a alimentar os teus novos procesadores e outros compoñentes mellorados. A maioría dos portátiles hoxe en día veñen con baterías de litio ou níquel que teñen unha capacidade deseñada e unha vida útil estimada.
Debido a esta vida útil limitada, moitos usuarios prefiren vixiar a saúde da súa batería para aproveitar ao máximo a vida útil da súa batería. Se tamén queres controlar o estado da túa batería, aquí tes como podes facelo en Windows 11.
Contidos
Que é a saúde da batería?
Os portátiles hoxe en día usan baterías de litio e níquel que teñen unha capacidade deseñada e unha vida útil estimada. A medida que se usa, se carga e se descarga a batería ao longo da súa vida útil, lentamente comezará a perder a súa eficiencia e capacidade de deseño. A saúde da batería é unha porcentaxe medida na que a capacidade da batería actual se compara coa capacidade do deseño orixinal.
Este número axuda a determinar a porcentaxe da capacidade de deseño orixinal que queda actualmente na batería. A capacidade da batería mídese en mAh ou miliamperios-hora e podes obter facilmente a capacidade actual da batería en mAh para obter unha estimación máis precisa do estado de saúde da túa batería.
Relacionado: Como cambiar o brillo en Windows 11
Como comprobar o uso da batería en Windows 11
Windows 11 inclúe numerosas melloras na interface de usuario que inclúen a posibilidade de ver facilmente o uso da batería na aplicación Configuración. Isto fai que sexa máis fácil identificar as aplicacións que se comportan mal no teu portátil e que usan demasiada batería, o que á súa vez reduciu a vida útil da batería. Use a guía a continuación para ver facilmente o uso da batería en Windows 11.
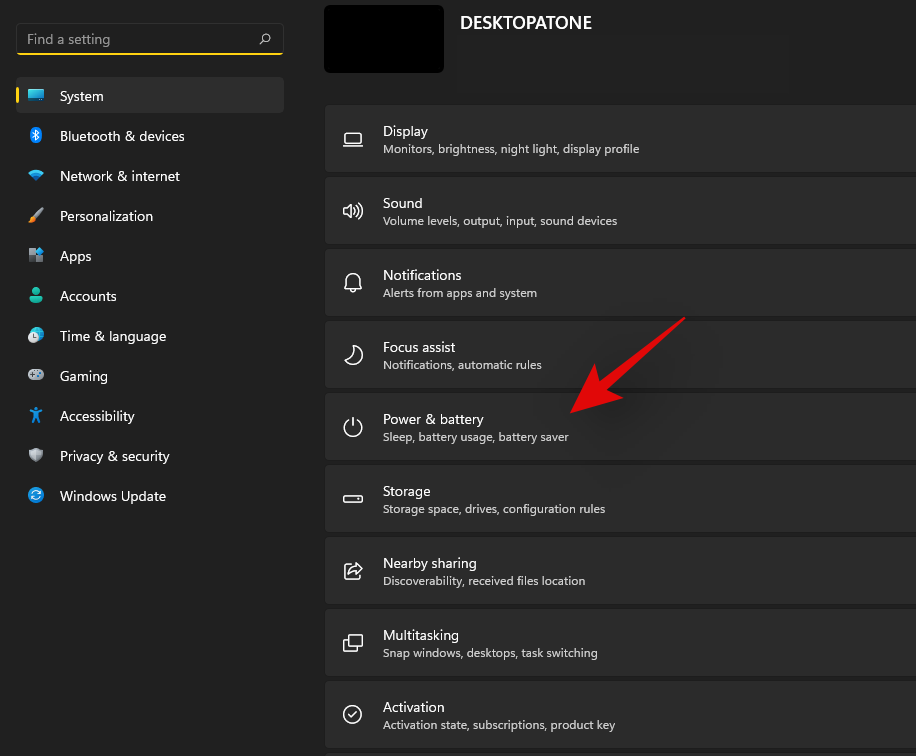
Preme Windows + ino teu teclado e fai clic en "Alimentación e batería".
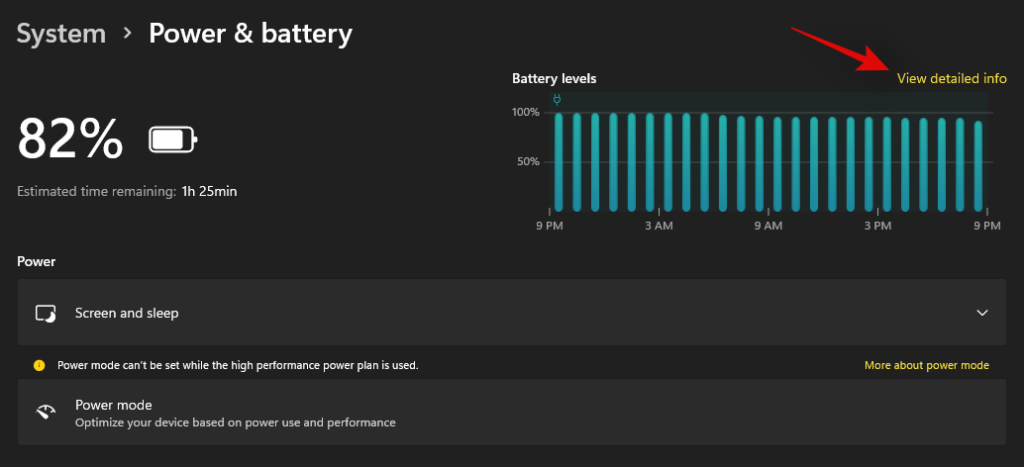
Fai clic en "Ver información detallada" na parte superior.
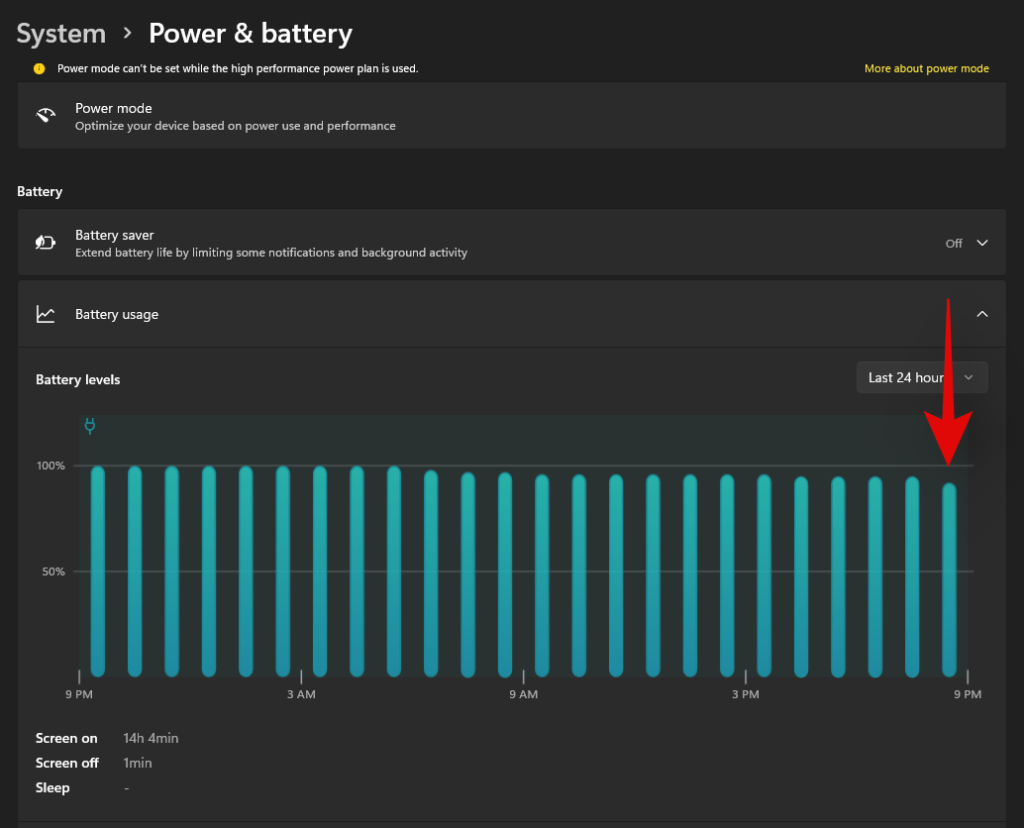
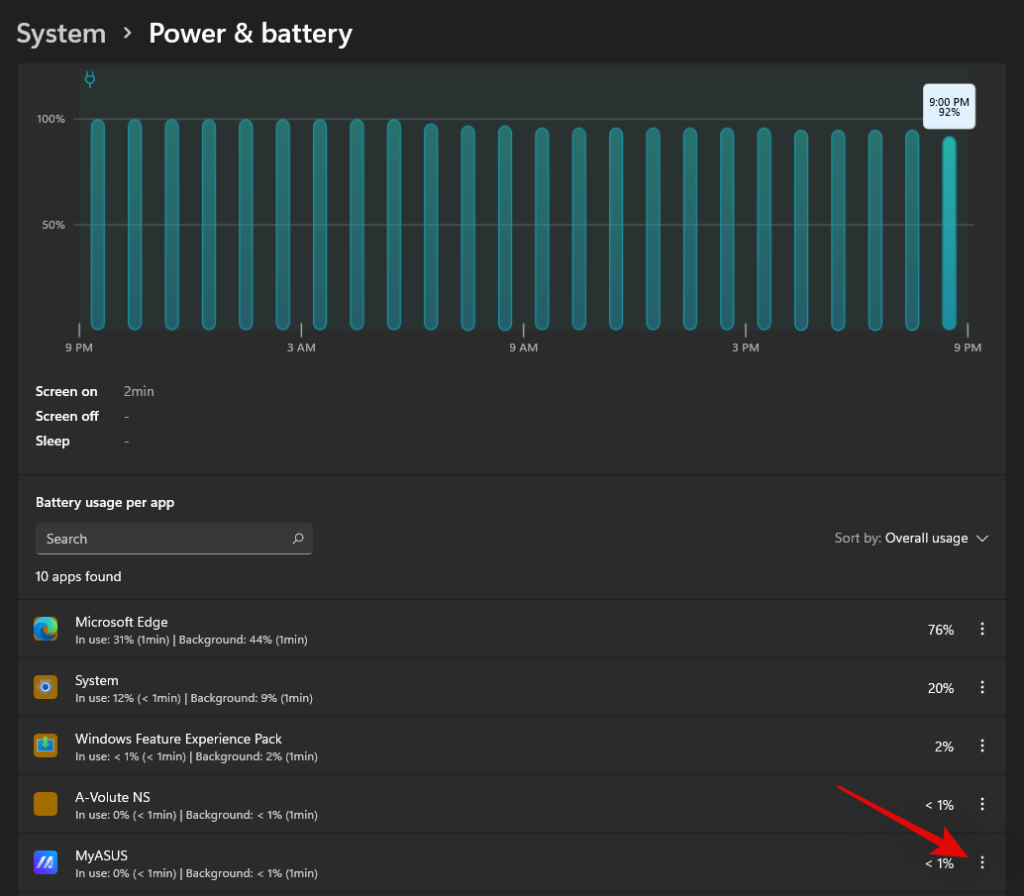
Agora amosaranse as últimas 24 horas de uso da batería rexistrada no seu sistema. Fai clic en calquera das ranuras para ver as aplicacións que consumiron máis batería durante o tempo seleccionado.
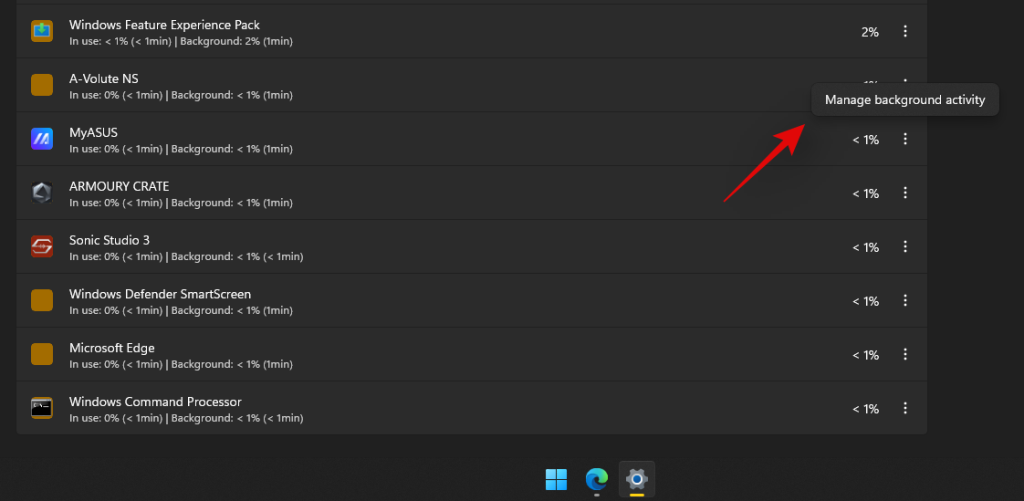
Debaixo do gráfico debería aparecer unha lista de todas as aplicacións que usan a batería durante esas horas. Se atopas que unha aplicación se comporta mal, fai clic na icona do menú "3 puntos" ao lado dela.
Seleccione "Xestionar actividade en segundo plano".
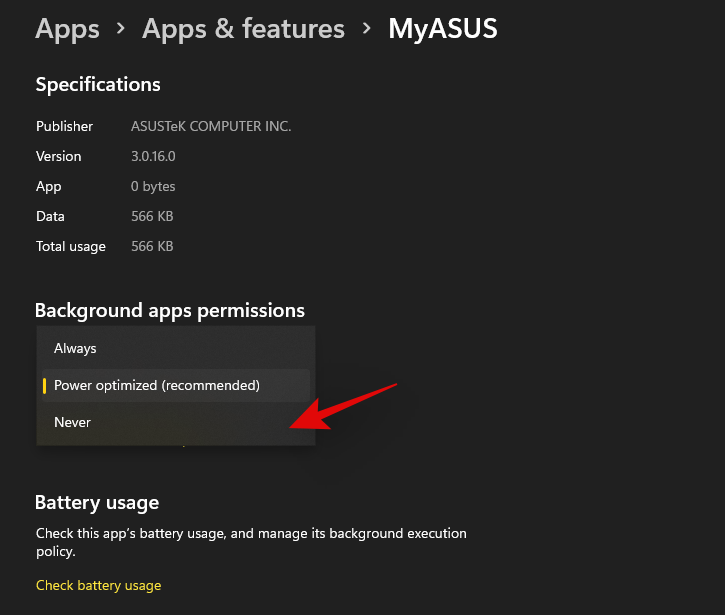
Fai clic no menú despregable en "Permisos das aplicacións en segundo plano" e selecciona "Nunca".
Fai clic en "Terminar".
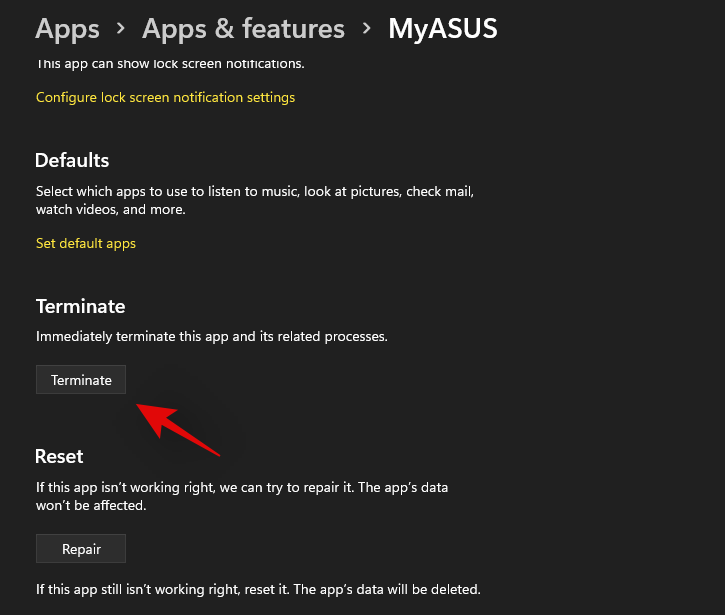
Reinicia a aplicación se necesitas os seus servizos en segundo plano.
A aplicación seleccionada debería deixar de comportarse mal e podes seguir os pasos anteriores para obter un gráfico detallado das últimas 24 horas de uso da batería.
Relacionado: Como crear un punto de restauración en Windows 11
Como comprobar o estado da batería en Windows 11
Hai moitas formas de obter a saúde da batería. Recomendámosche que comprobes o estado da túa batería mediante o método PowerShell que axuda a xerar un informe detallado sobre a túa batería. Non obstante, se non es un usuario avanzado e estás a buscar unha GUI máis amigable con datos facilmente dixeribles, podes usar un dos outros métodos que se indican a continuación.
Método #01: Usando PowerShell
Preme Windows + Se busca PowerShell. Fai clic en "Executar como administrador" nos resultados da busca.
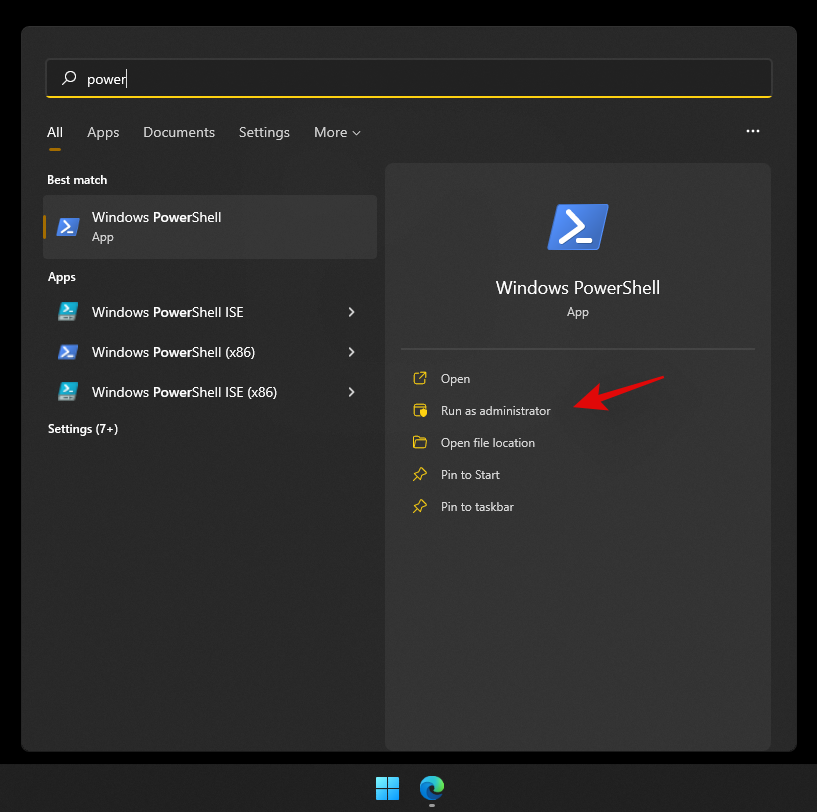
Escriba o seguinte comando e prema Intro no seu teclado. Podes substituír o camiño por un camiño personalizado a unha localización no teu almacenamento local ou substituír USER polo teu nome de usuario actual para xerar o informe da batería no teu escritorio.
Nota: asegúrese de substituír USUARIO polo nome de usuario correcto ou o proceso pode acabar xerando directorios non desexados.
powercfg /batteryreport /output "C:\Users\USER\Desktop\batteryreport.html"
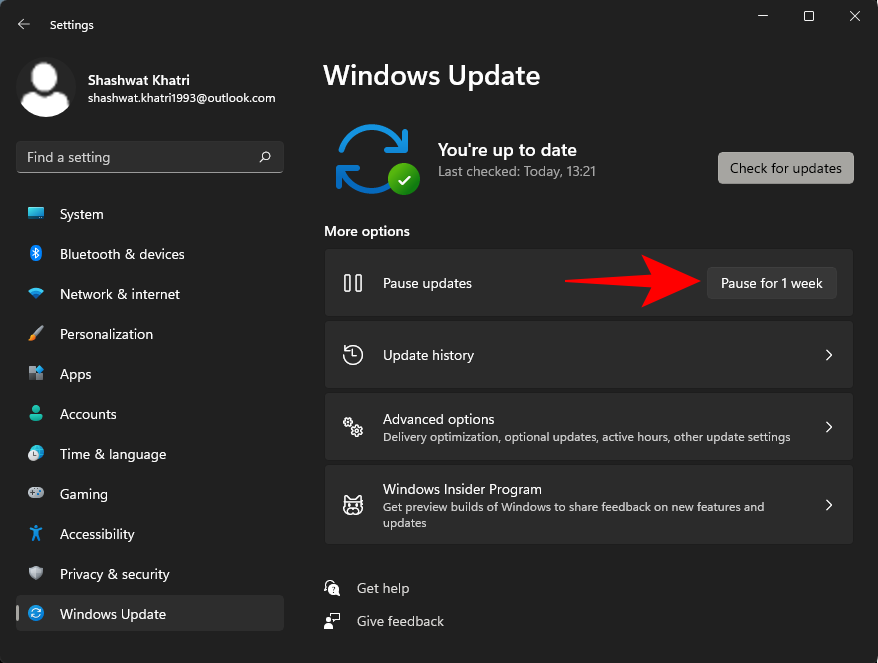
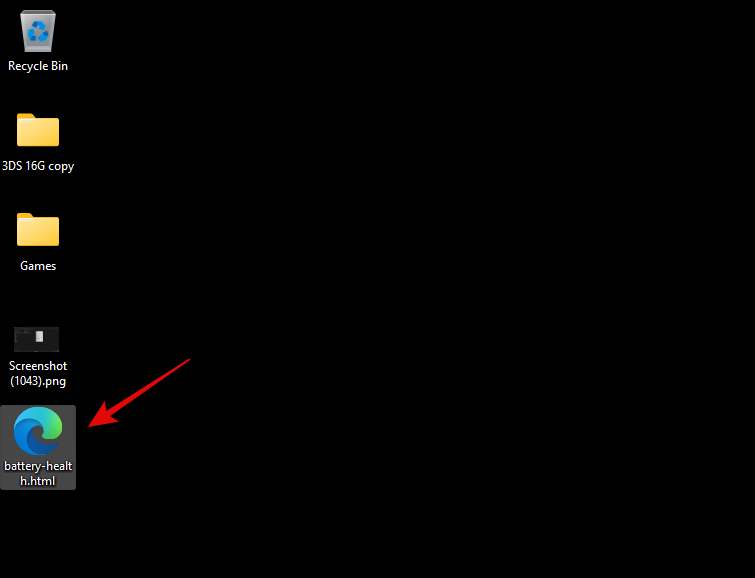
Unha vez que se execute o comando, navegue ata o seu escritorio ou a localización personalizada que definiu e abra o ficheiro .HTML.

Recibirás un informe detallado de uso e saúde da batería que agora debería abrirse no teu navegador predeterminado.
Consulte a sección "Baterías instaladas" na parte superior da pantalla.
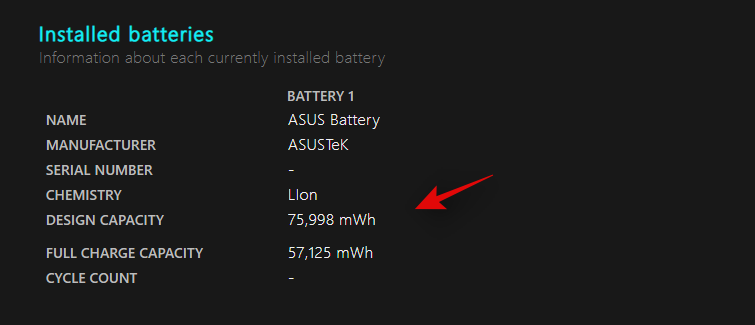
Debería obter información detallada sobre a súa capacidade de deseño e a capacidade actual da batería. Isto debería axudarche a facer unha boa idea sobre a capacidade restante da batería e a xulgar o estado actual da batería.
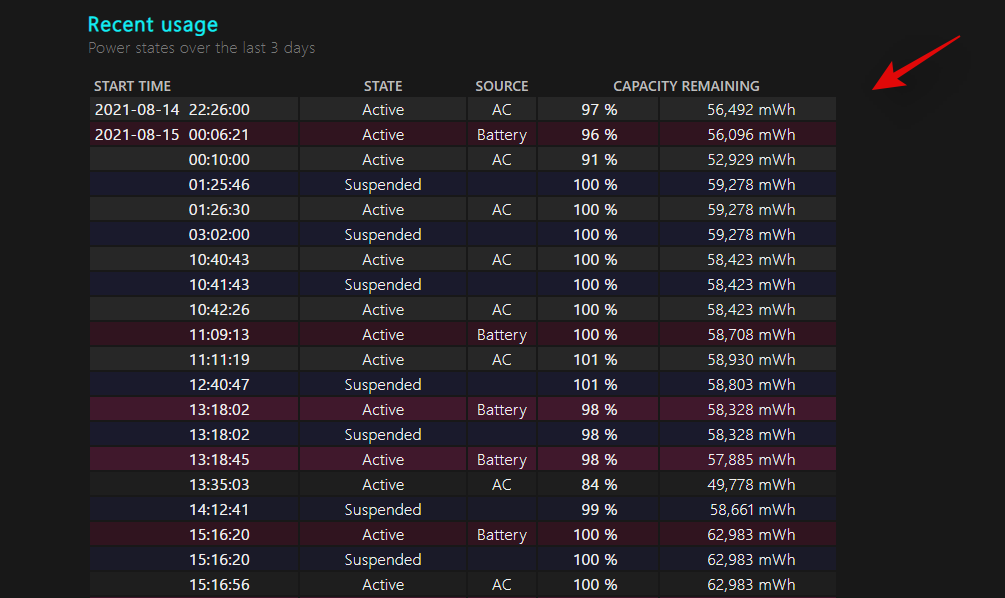
E xa está! Agora tes un bo informe sobre a túa batería.
Podes desprazarte máis no informe para obter números detallados sobre a cantidade de batería utilizada (en mWh) do teu sistema durante que horas.
Método #02: Usando a utilidade de terceiros
As utilidades de terceiros permítenche ver tamén o estado da túa batería. Podes obter a túa capacidade de deseño, a capacidade actual, os ciclos da batería e moito máis usando estas ferramentas. Recomendamos que use as seguintes ferramentas que se indican a continuación. Use o que mellor se adapte ás súas necesidades.
Software #1: Usando HWiNFO
HWiNFO ou Hardware Info é unha ferramenta popular de longa data que se usa para medir todos os datos de sensores dispoñibles no teu sistema. Se o teu PC está a xerar datos sobre o seu rendemento, podes garantir que HWiNFO pode axudarche a capturalos e lelos.
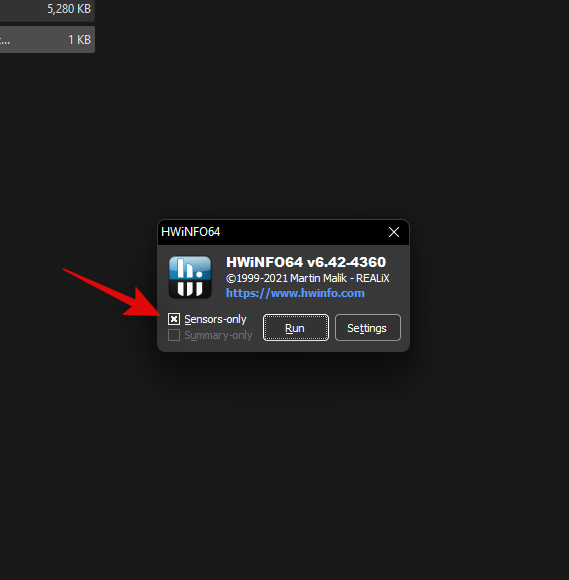
We can use HWiNFO to get detailed info on your current battery health as well as some numbers on your current battery usage. Use the link above to download HWiNFO to your system and then run it with ‘Sensors only’ checked as shown below.
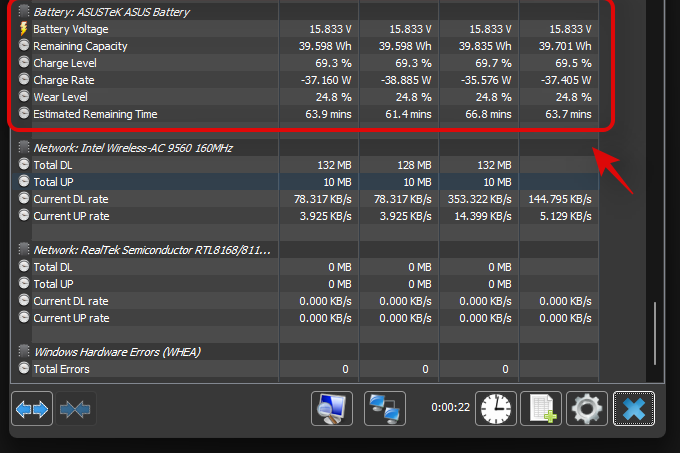
Scroll to the bottom until you find the ‘Battery’ section.
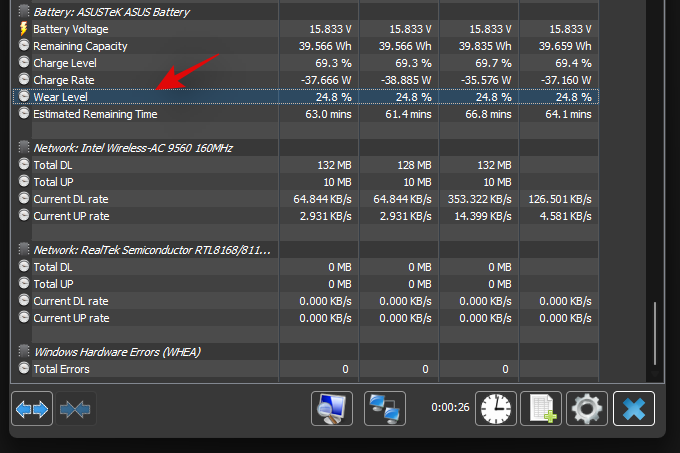
Check ‘Wear Level’ and you should get the amount of battery that has degraded compared to your original design capacity.
You can also get your current or remaining battery capacity beside ‘Remaining Capacity’ as shown below.
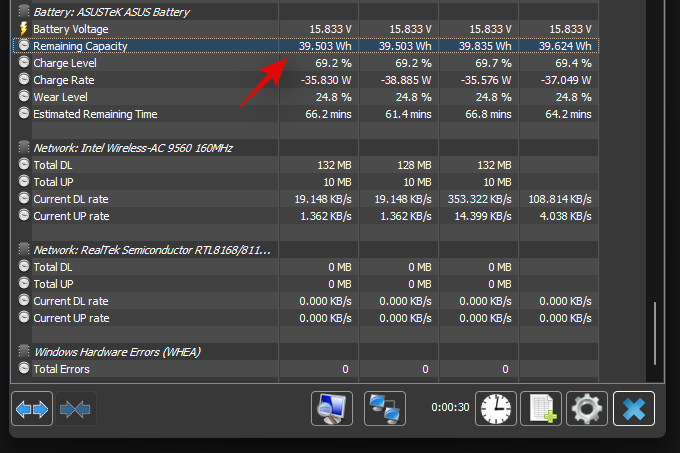
And that’s it! You will now have found your battery health on Windows 11.
Software #2: Using BatteryCat
BatteryCat is another open-source utility that you can use to get battery health and other basic data easily on your system. It is by far the most user-friendly way to get the battery statistics of your laptop on Windows 11.
It has been over 2 years since the app was updated but everything is still working on Windows 11. Use the guide below to get and use BatteryCat on your Windows 11 system.
Click on the link above and click on ‘Files’ as shown below.
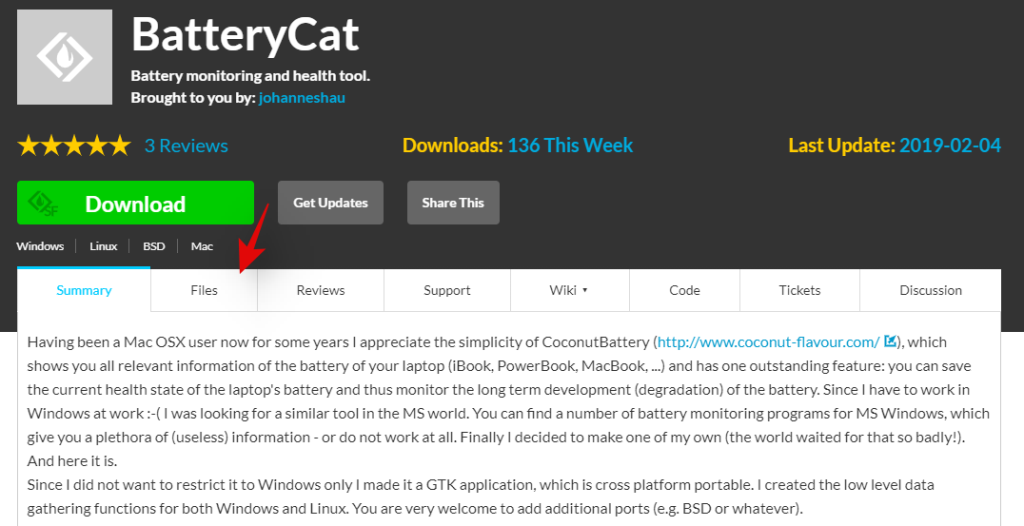
Click on ‘windows_portable’.
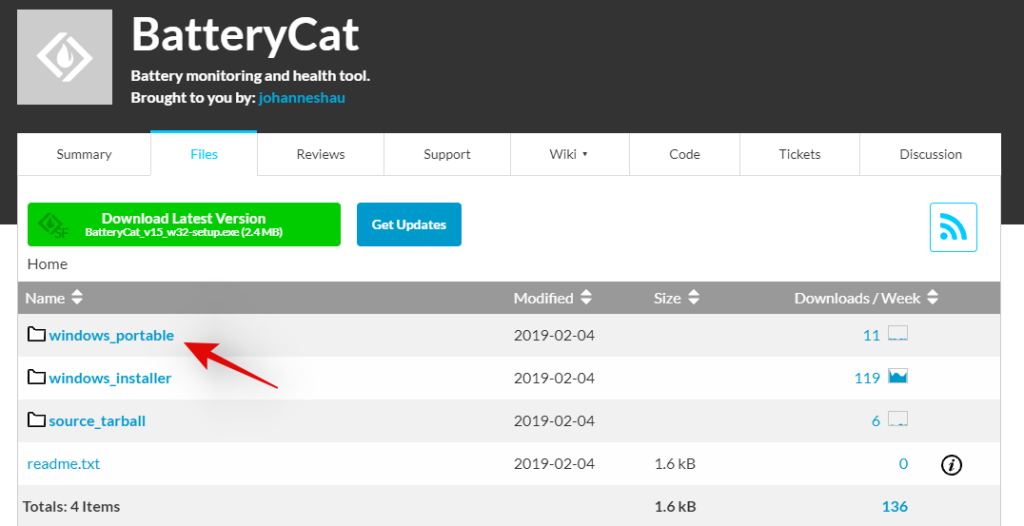
Now click and download the file at the top.
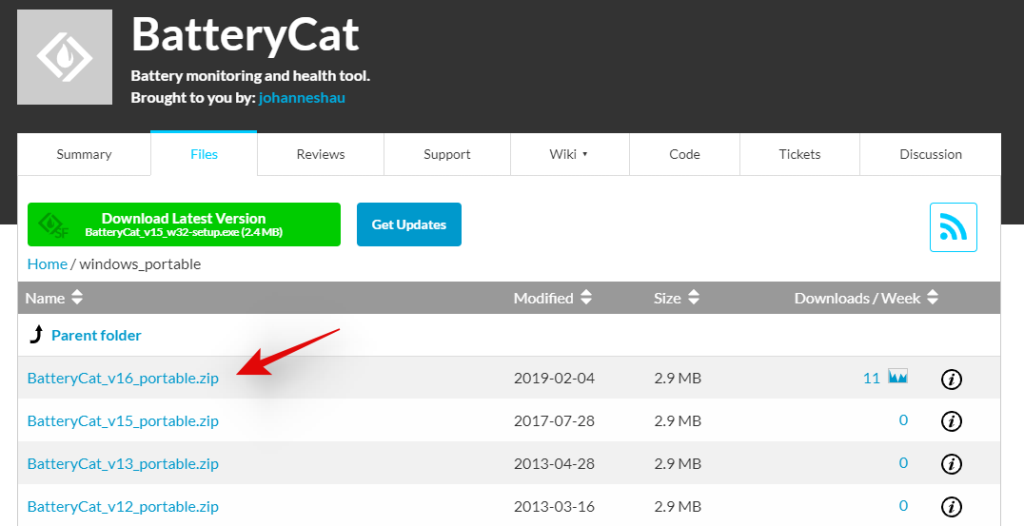
Once the archive is downloaded to your local storage, extract it to a convenient location. Once extracted, open the folder and double click on the ‘.exe’ file to launch BatteryCat on your system. You should now get a window with detailed battery stats on your system.
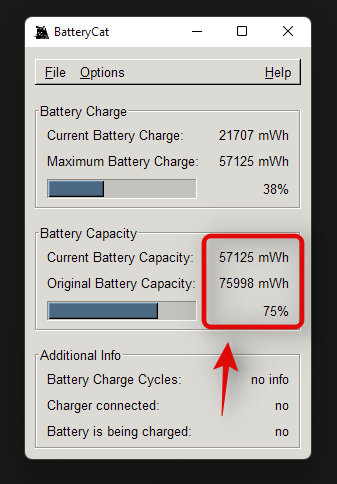
You can view the design capacity as well as the current capacity of your battery on the homepage. You should also be able to get your battery cycles right on your screen.
And that’s it! You will now have checked your battery health using BatteryCat on Windows 11.
Should you use third-party apps to monitor your battery?
Ideally, it is recommended you use your OEM app to check your battery health if any is available. Due to the different variations in each battery installed on different laptops, third-party utilities can sometimes source the wrong design capacity for systems.
This can happen with your system as well and you might have no way of verifying it. Hence it is recommended that you use your OEM app if available. In case it is not available, we recommend you use open source utilities with community reviews as they have the least chance of having malicious adware and malware coded within them.
Tips to extend your Windows 11 laptop’s battery life
Want to extend your battery life? Here are some tips to maintain your battery around its design capacity for as long as possible.
- Turn off background activity for unwanted Windows apps.
- Unplug unused components/peripherals.
- Do not let your laptop completely discharge. Ideally, you should plug it in before it reaches below 20%.
- Ambient temperatures can severely impact your laptop’s battery life. Ensure that you are always at average ambient temperatures when indoors to ensure that your battery is not negatively impacted.
- Turn off WIFI and Bluetooth when not in use. Keeping WIFI and Bluetooth on will keep scanning for nearby networks and devices which will negatively impact your battery over time.
- Use the balanced or battery saver power plan to reduce the power used by your system when sitting idle.
- If your laptop is overclocked, then we recommend you stick to the high-performance mode which can only be activated when your laptop is plugged into power.
- Use iGPU instead of dGPU for everyday apps like browsers, photo editors, and more.
- Disable unwanted start-ups to avoid exceptional load when your PC is booting. Laptop batteries, especially Lithium batteries, drain a lot depending on the power drawn from them at short intervals of time. This random power draw strains the battery which accelerated its degradation. Having minimal startup apps will minimize the power draw impact on your battery during boot times, which should help last it slightly longer.
Should you leave your laptop plugged in when it is at 100%?
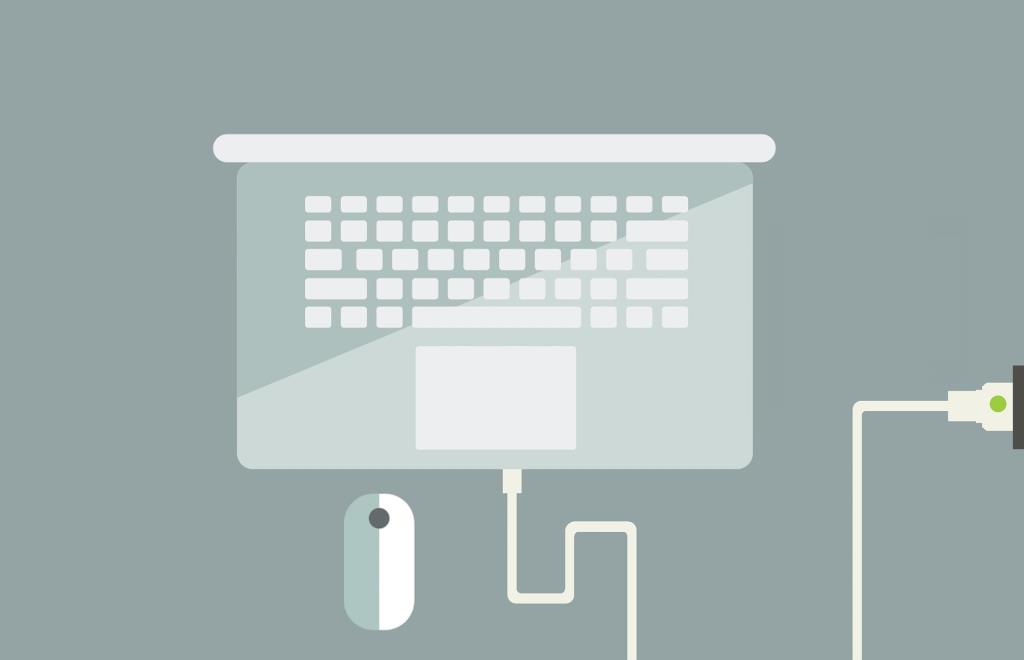
If your laptop was manufactured before 2017 or 2018, then it likely does not have the power cut-off feature which stops charging your laptop once it reaches 80%. In this case, it is not recommended to leave your laptop plugged in unless you are using a tool to limit your charge levels and cut off the power from your battery.
Most OEMs like Dell and Lenovo supplied their laptops with battery management tools that allowed you to cut off power from the battery at a custom battery charge percentage like 60% or 80%. However, in case you have a recent machine then it likely stops charging the battery automatically once it reaches a certain percentage set by the OEM even it shows 100% in the taskbar.
In such cases, you can leave the battery plugged in. However, it is still recommended to unplug your laptop whenever you are not performing resource-intensive tasks. Keeping the machine plugged in generates extra heat which can negatively impact your battery’s design and current capacity.
Should you keep Windows 11 battery saver always enabled?
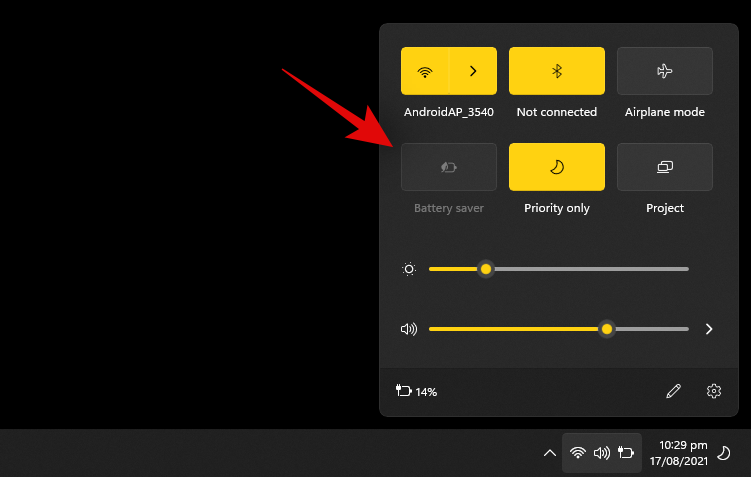
Battery Saver restricts background app usage, services, and tasks to save battery on your system. It also restricts you to the iGPU and your processor state to ensure that the least amount of battery is used on your system. Having battery saved always activated will restrict and reduce the performance of your system but there will be no other negative impact to your system.
However, you will miss out on push notifications and alerts that require third-party services to keep operating in the background. Hence it is recommended that you turn off the battery saver when you are plugged into the wall. Once unplugged, you can use battery saver to save the maximum amount of power.
Does gaming on battery mode reduce battery life?
Unfortunately yes, gaming uses and requires a lot of power especially if your laptop has a dGPU. Additionally, gaming produces intermittent high power draws on the battery which further harms it. Gaming regularly on your battery can significantly accelerate its degradation and hence it is highly recommended that you do so on certain occasions.
Additionally, when gaming on battery, ensure that you are using the high-performance mode, your laptop’s fans are spinning as fast as they can, and more importantly, ensure that your laptop does not overheat. Heat can also seriously impact the capacity of your battery which will reduce the overall battery life of your laptop.
We hope you were able to easily check your battery health using the above-stated methods. In case you have any issues, feel free to reach out to us using the comments section below.
RELACIONADAS


