Windows 11 está a facer moito ruído desde que se anunciou hai uns meses. Os expertos e os probadores beta teñen moitos aspectos positivos que dicir e a nova interface de usuario e funcións parecen encaixar ben con todos. Como tal, Windows 11 inclúe moitos cambios nas funcións existentes no sistema operativo, entre as que se atopa a nova Busca de Windows. A busca agora é máis completa, máis rápida e eficiente. Se estás buscando usar a Busca de Windows, aquí tes todo o que necesitas saber sobre iso. Imos comezar.
Contidos
Que hai de novo en Windows 11 Search?
Windows 11 inclúe toneladas de melloras na Busca, pero non hai moitos cambios notables no funcionamento externo da Busca de Windows. Aínda así, podes esperar os seguintes novos cambios coa Busca de Windows.
- Nova icona da barra de tarefas
- Busca de tipos de ficheiros dedicados
- Configuración de busca accesible desde o menú Inicio
- Compatibilidade coa busca na nube xunto cos servizos de almacenamento na nube
- Opcións de indexación completas
- Resultados máis rápidos
- Indexación eficiente con baixo consumo de batería en dispositivos móbiles
E máis. Mentres exploras a Busca de Windows en Windows 11, atoparás pequenos detalles novos en todos os aspectos da función.
Relacionado: Como compartir ficheiros e cartafoles en Windows 11
Windows 11 Buscar atallo de teclado
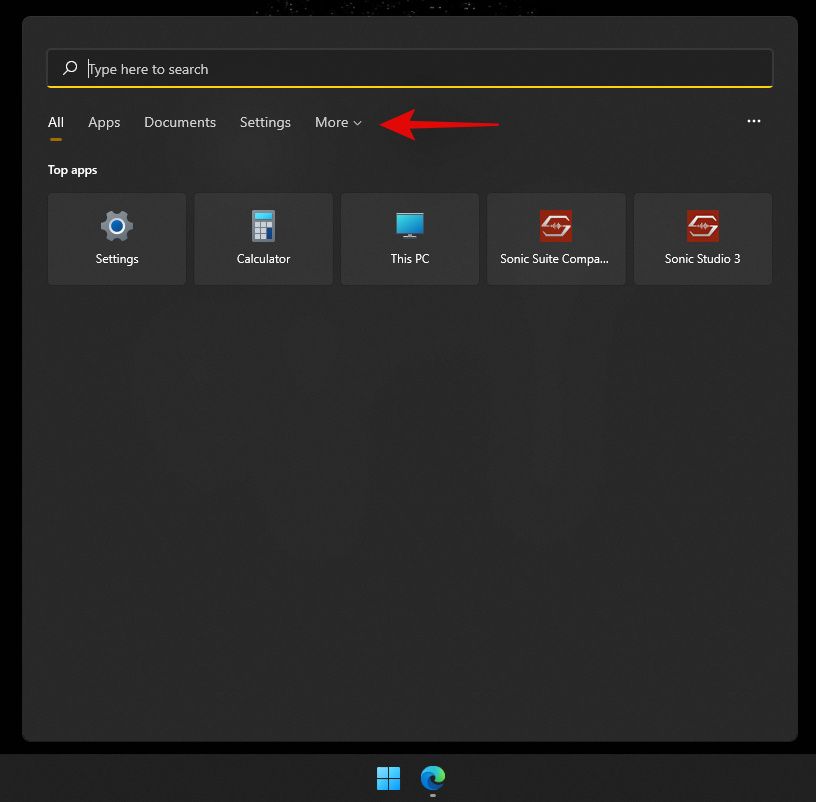
Podes usar Windows + So teu teclado para abrir a Busca de Windows directamente no teu sistema. Podes seguir escribindo para comezar a buscar no teu sistema aplicacións, ficheiros e cartafoles relevantes. Ademais, premendo Intro no teu teclado abrirá o primeiro resultado da busca no teu PC.
Relacionado: Como activar a virtualización na BIOS en Windows 11 ou 10
Como usar a busca de Windows
Podes usar a Busca de Windows usando os seguintes métodos. Cada método ten as súas propias vantaxes e vantaxes, polo que dependendo do ficheiro que busque, pode utilizar un dos seguintes métodos.
Preme a tecla Windows do teu teclado para abrir o menú Inicio. Tamén podes facer clic na icona da túa barra de tarefas.
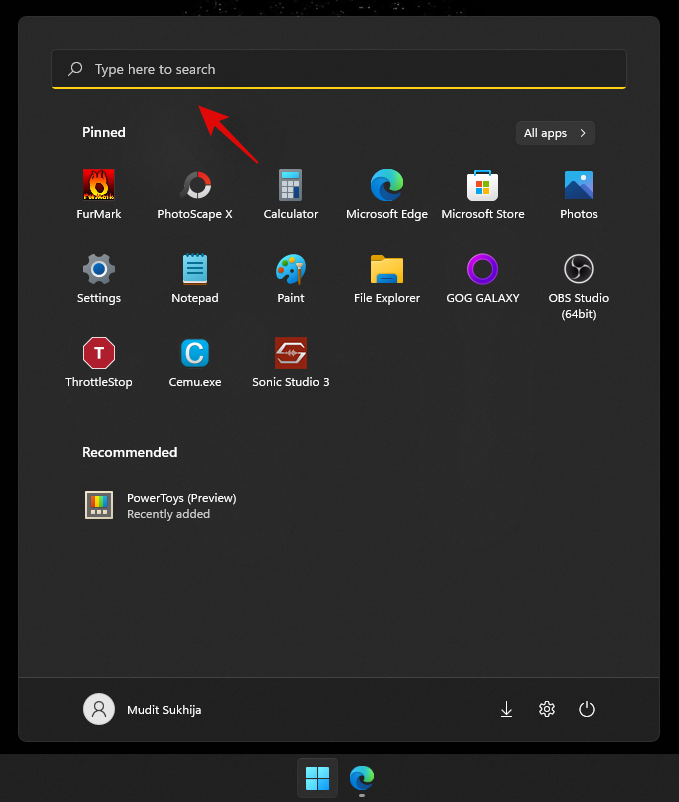
Unha vez aberto, comeza a escribir o nome do ficheiro/programa que estás a buscar, o ficheiro/cartafol/programa debería aparecer automaticamente nos resultados da busca. Se non ves o teu ficheiro na parte superior, proba a facer clic nunha das categorías seguintes para ampliar os resultados da busca.
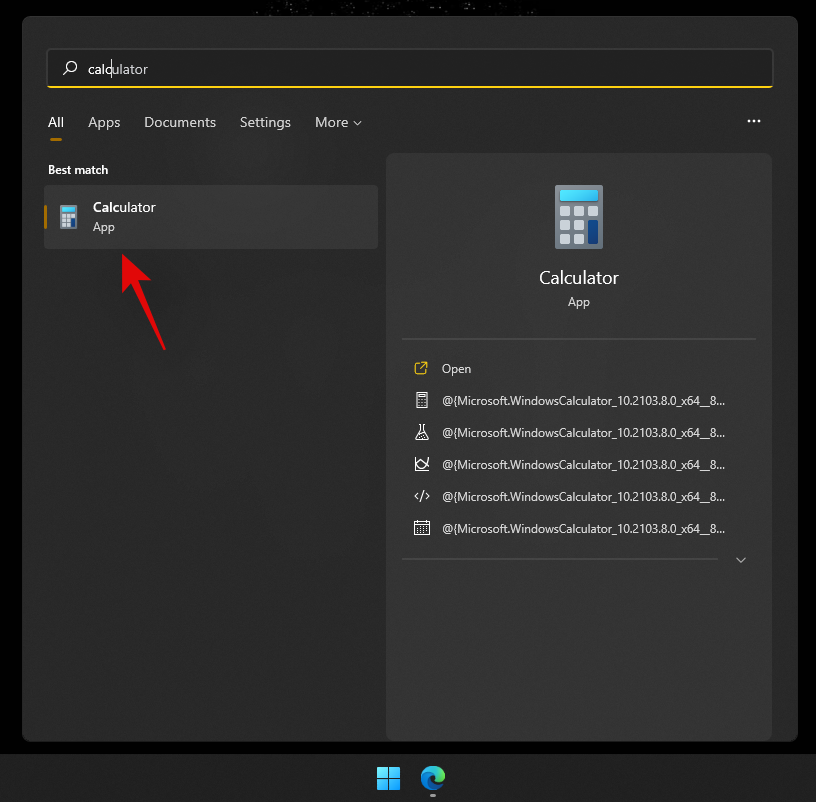
Unha vez atopado, fai clic no resultado da busca para abrilo. Tamén podes facer clic na frecha para ver máis detalles sobre el. E xa está! Agora terás usado a Busca de Windows no menú Inicio.
Relacionado: Como actualizar os controladores en Windows 11
Usando o atallo do teclado
Preme Windows + Sno teu teclado para abrir a Busca. Agora cambia ao tipo de ficheiro desexado se é necesario.
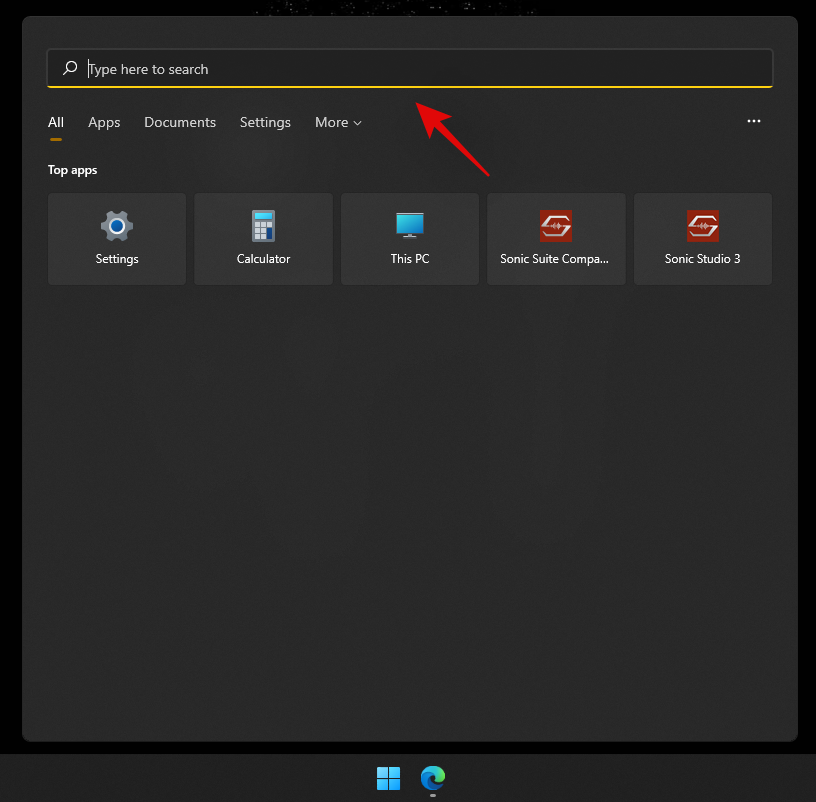
Escribe o teu termo de busca. Fai clic na caixa de texto se é necesario.
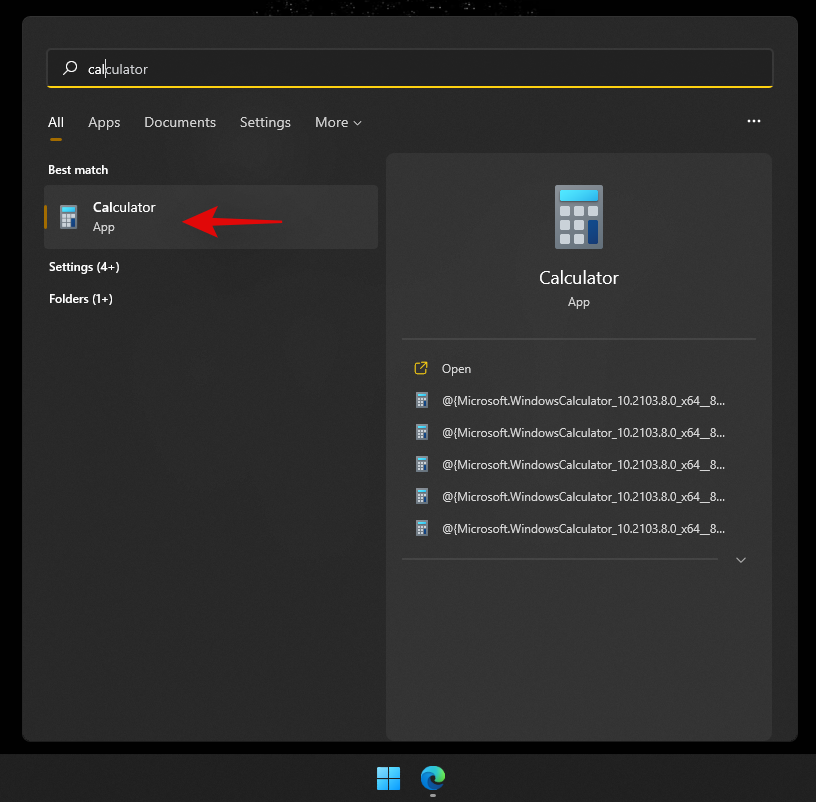
Agora Windows buscará o teu ficheiro/cartafol e os resultados mostraranse na túa pantalla. Podes facer clic e ampliar as categorías a continuación para ver máis resultados.
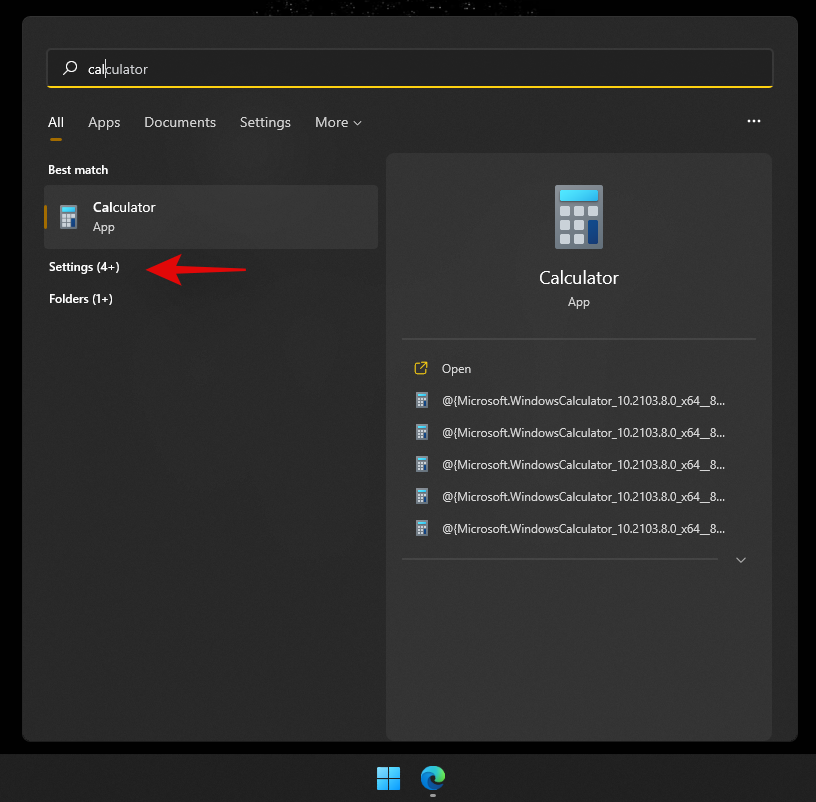
Ademais, se desexa ver máis detalles sobre un ficheiro ou programa, pode facer clic na frecha ao seu carón. Agora terás usado a Busca de Windows usando o atallo do teclado.
Usando o explorador de ficheiros
Preme Windows + Eno teu teclado para abrir o Explorador de ficheiros. Navega ata a unidade/directorio/cartafol que queres buscar. Unha vez aberto, fai clic na caixa de busca na esquina superior dereita da pantalla.

Escribe agora o teu termo de busca e preme Intro no teu teclado.

Agora Windows buscará o teu termo de busca no directorio actual e despois mostrará todos os resultados na túa pantalla. Agora podes facer clic e iniciar o ficheiro.
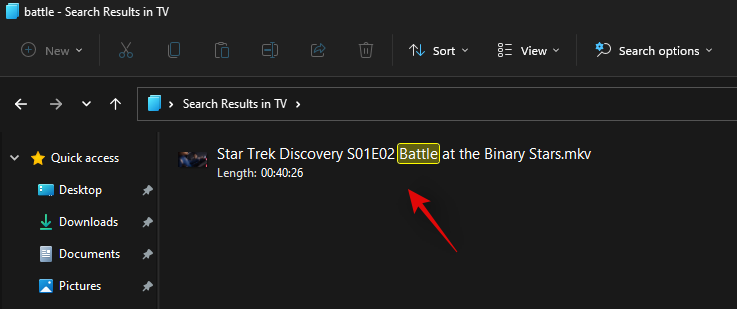
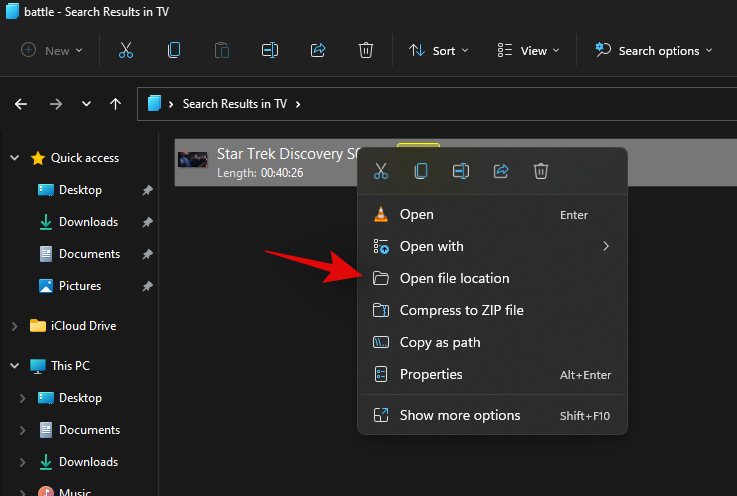
Tamén pode facer clic co botón dereito sobre el e seleccionar "Abrir localización do ficheiro" para visitar o seu directorio actual no seu almacenamento local.
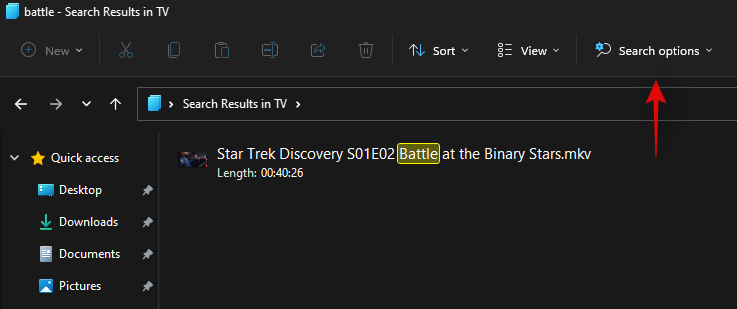
Ademais, podes usar as frechas despregábeis na parte superior para ordenar os resultados da busca e atopar o teu ficheiro/cartafol/programa máis facilmente.
E xa está! Agora utilizará a Busca de Windows mediante o Explorador de ficheiros.
Como aumentar a indexación para a busca de Windows
A busca de Windows de forma predeterminada só buscará ficheiros e termos de busca en directorios e camiños seleccionados. Estes camiños predeterminados cobren os directorios máis comúns en Windows, como o menú Inicio, documentos, música, imaxes e moito máis. Se queres aumentar a extensión da indexación en Windows 11, podes usar a seguinte guía para comezar.
Preme Windows + ino teu teclado para abrir a aplicación Configuración. Agora fai clic en "Privacidade e seguridade" á túa esquerda.
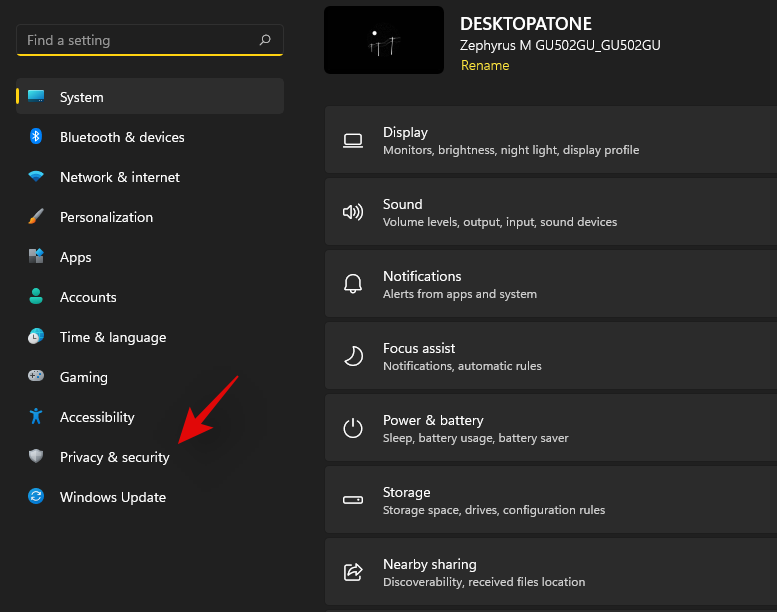
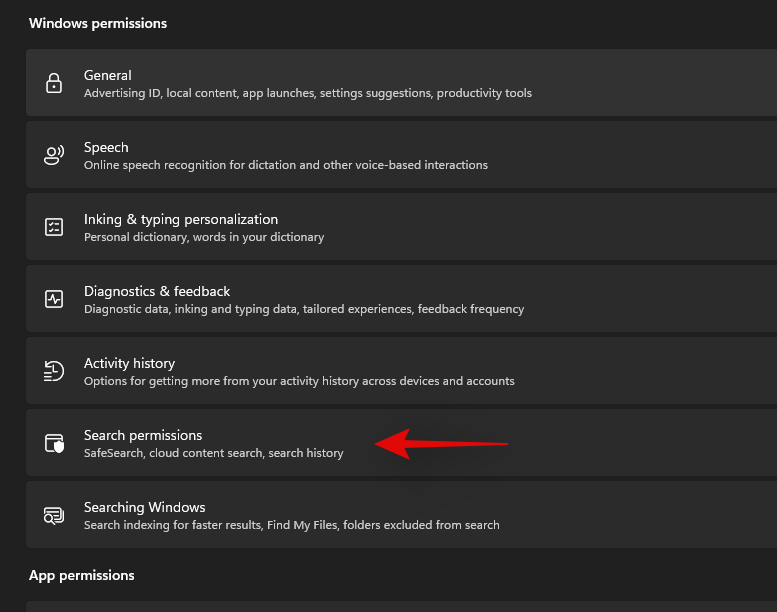
Click on ‘Searching Windows’ on your right.
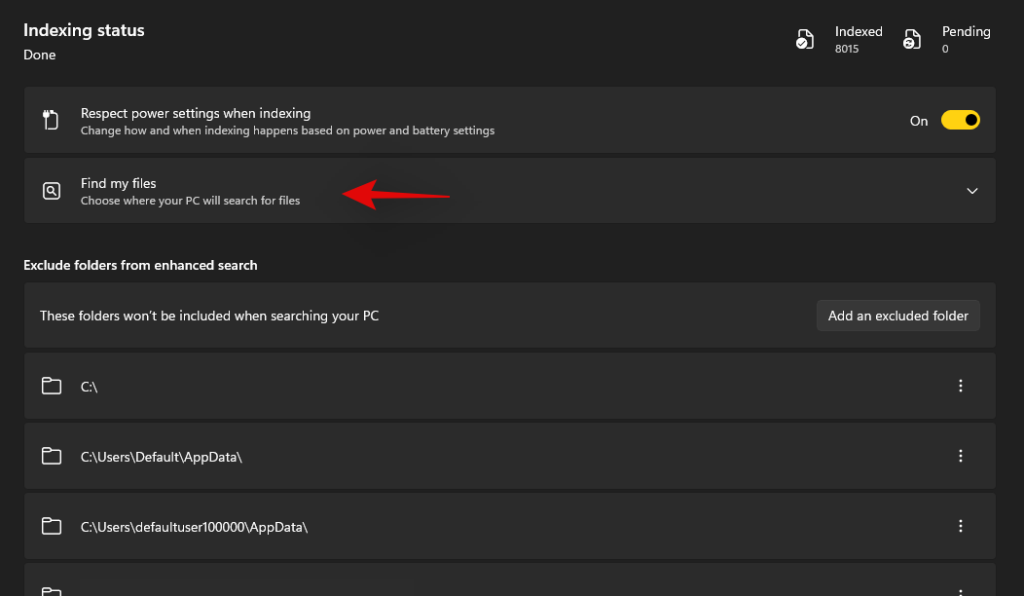
Click and expand ‘Find my files’.
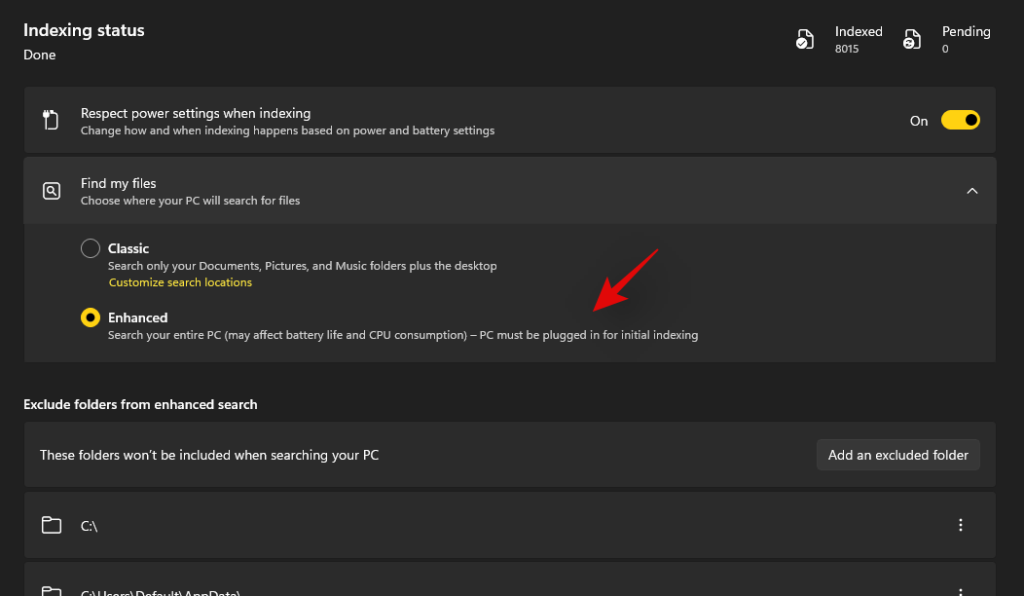
Select ‘Enhanced’.
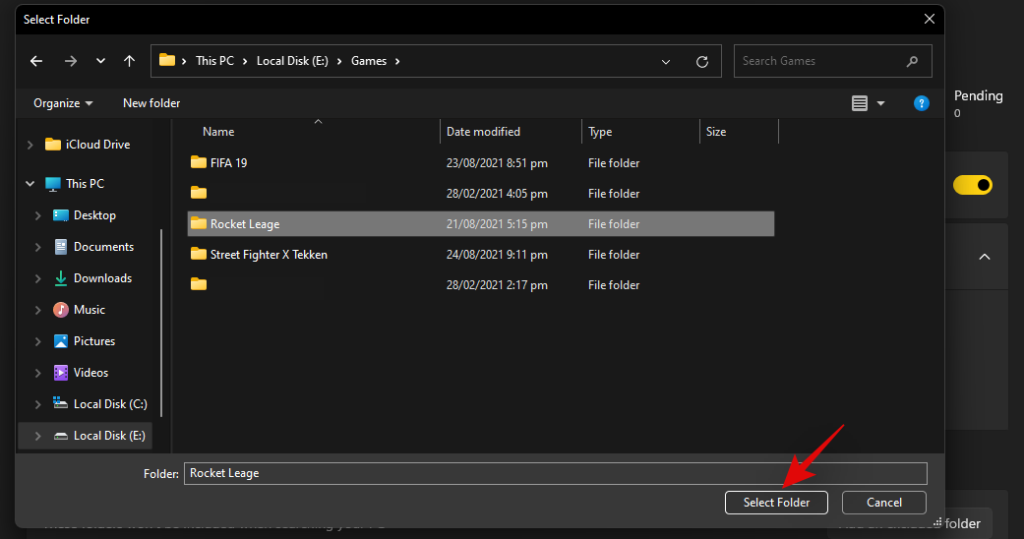
Now if you wish to exclude any folders from indexing then click on ‘Add an excluded folder’.
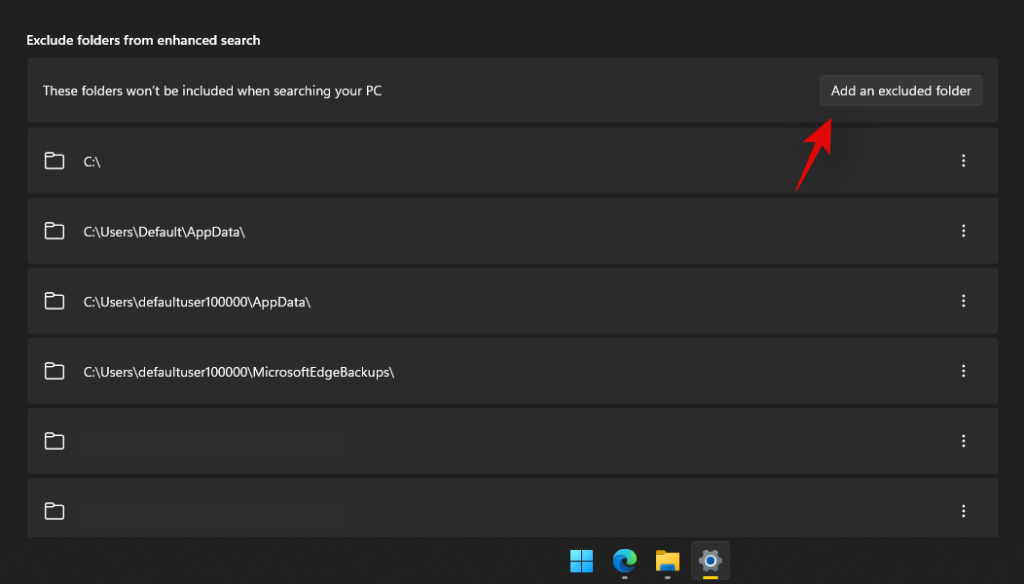
Note: Windows will have added some folders by default. We recommend continuing to exclude these folders to avoid unnecessary resource usage to index system files.
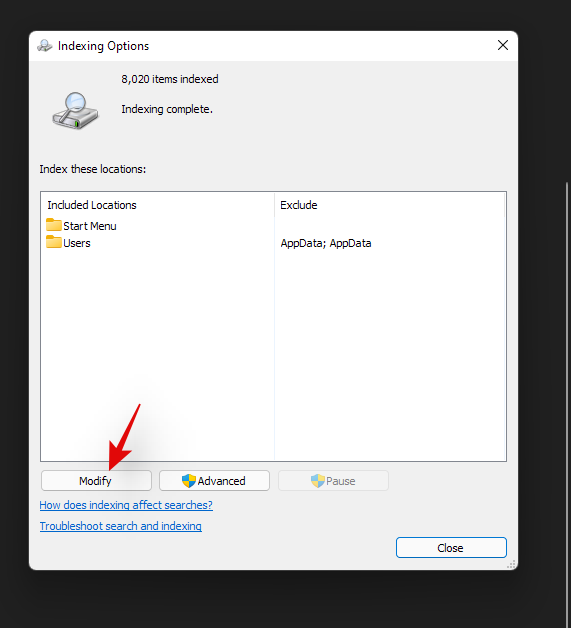
Once you have excluded all the folders, we can now start indexing all your drives. Click on ‘Advanced indexing options’ at the bottom.

Click on ‘Modify’.
Check the boxes for your drives now.
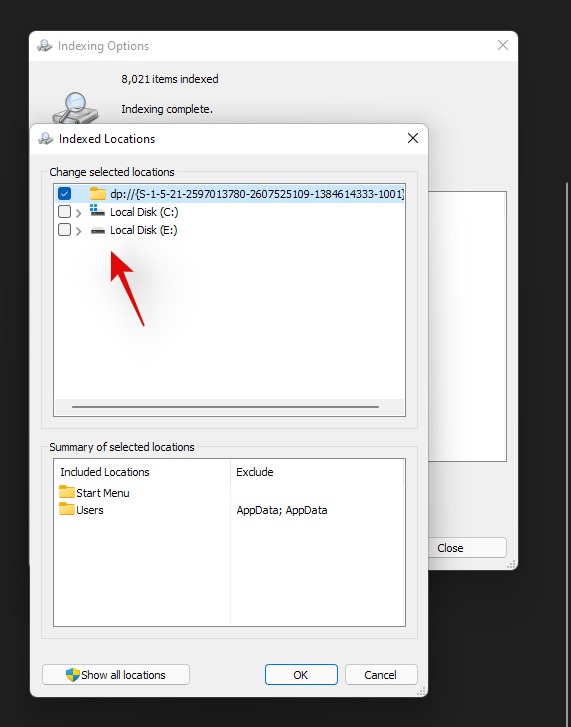
Click on ‘Ok’ once done.
Click on ‘Close’. And that’s it! You will now have increased your indexing locations within Windows Search. If using a laptop, your new locations will be indexed once your unit is connected to power.
Related: How to Create a Restore Point in Windows 11
Use Search Options
Search tools have existed for some time in File explorer now and they allow you to manage your search results with much more efficiency. This can help you find files that you do not remember the name of and only remember a few details about it. Search Tools have now been renamed as ‘Search Options’ in Windows 11 and you now get a drop-down menu for your options instead. Start by exploring your options and searching for a term in File Explorer as you normally would. Once your search results show up, you should find ‘Search Options’ at the top of your screen. Now use the following options to filter your search results accordingly.
- All folders: Search all folders in the current drive/partition for your search term.
- Current folder: Search only the current folder for your search term.
You can also dictate how your search results are sorted. This can help you find large files or files based on file types. Use one of the options below
- Date modified: Use this option to sort your results based on the time they were created on your local storage.
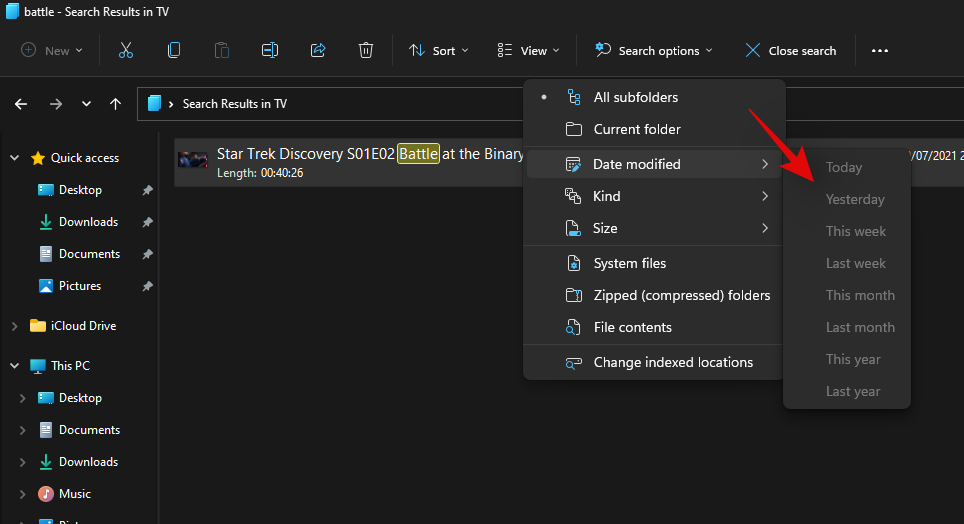
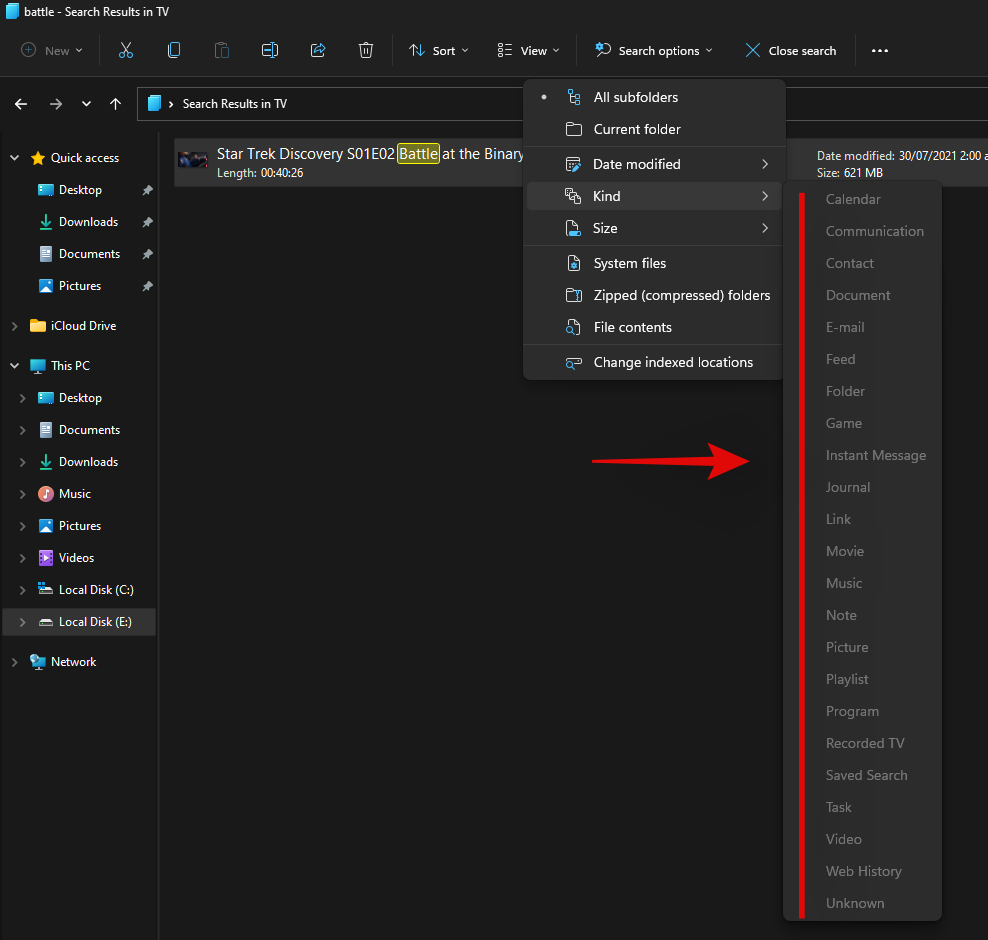
- Kind: You can use this option to sort your files by their kind. You can look for calendar files, folders, games, pictures, music, and more. You can select from over 23 different file types to sort your search results.
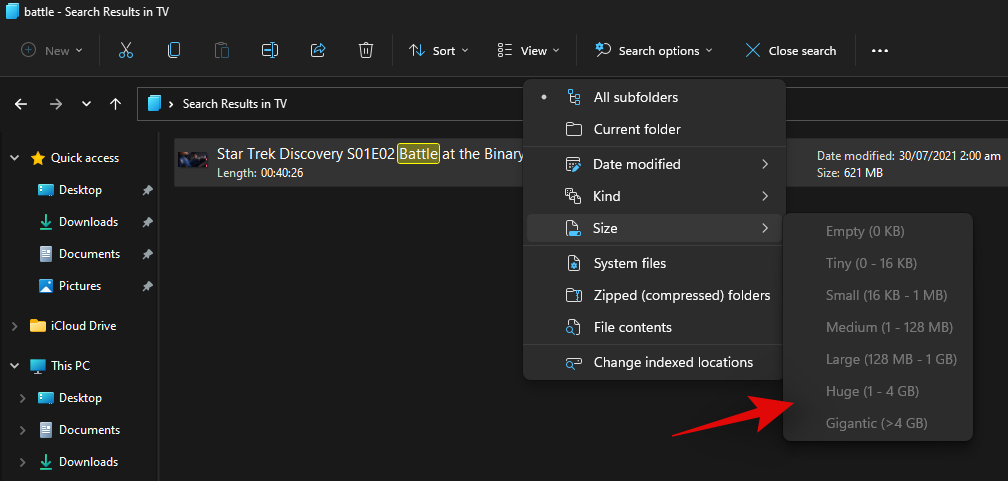
- Size: Use this option to filter your files based on their size. You will get the following options to choose from.
-
- Empty: 0kb
- Tiny: 0kb to 16kb
- Small: 16kb to 1MB
- Medium: 1MB to 128MB
- Large: 128MB to 1GB
- Huge: 1GB to 4GB
- Gigantic: Files greater than 4GB in size
Additionally, you get the following more options to filter your search results. These options will dictate where and which files will be searched by Windows. Simply click on the option to activate or deactivate it.
- System files
- Zipped (compressed) folders
- File contents
And that’s how you can use Search Options in Windows 11 to your advantage. We have a few more tips to help you make the most of Windows Search in Windows 11. You can use the section below to get started.
Related: How to Uninstall Apps on Windows 11
Tips to use Windows Search to your advantage
Windows Search has a few certain hidden shortcuts and key terms that can directly help you filter or sort your search results depending on your preferences. Here are a few tips to help you get the most out of Windows Search on Windows 11.
Find large files
You can find large files on a drive or in a folder easily by using the command ‘size:’. You can then use one of the terms from your Search Options to filter your files and display them based on their size. For example, if you wish to search for files larger than 4GB in size in the current directory then you can use the following command.
size:gigantic
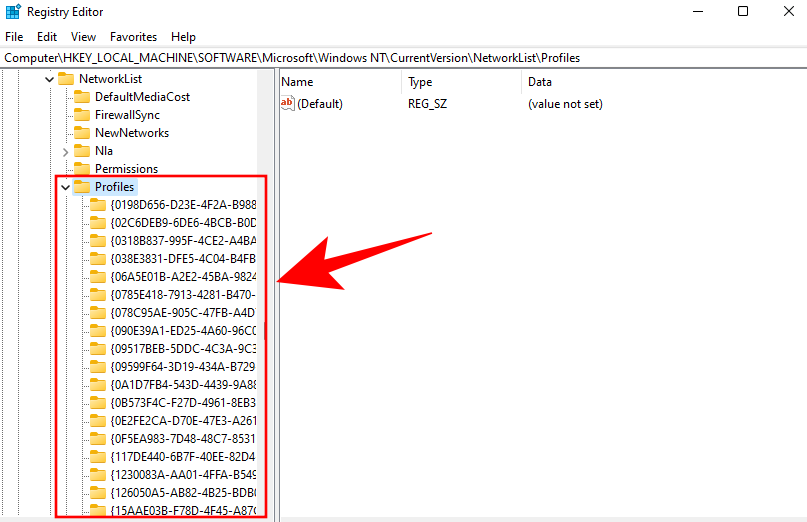
Similarly, you can further filter your search results using Search Options to identify large movies, pictures, calendar files, games, or more taking up space on your PC.
Find file types
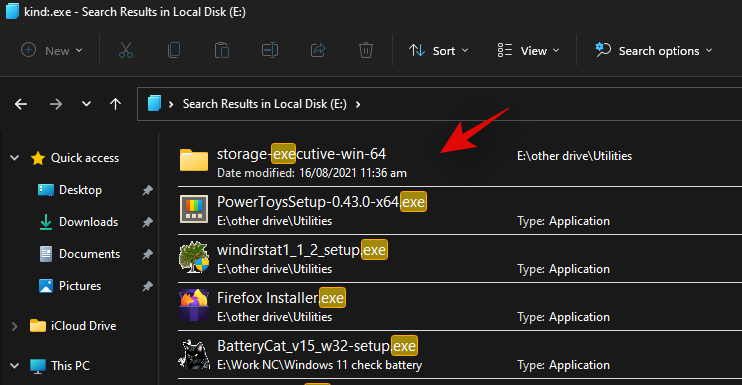
Similar to the command above, you can use the ‘kind:’ parameter to find certain files in the current directory. The ‘kind’ parameter will allow you to look for calendar files, text documents, pictures, videos games, and more. When using the kind parameter this way you are not restricted to Windows’s predefined categories, instead you can define specific file extensions as well to find them on your PC as shown below.
kind:.exe
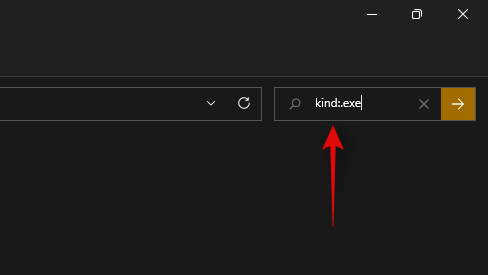
The command above will help you look for executables in the current directory.
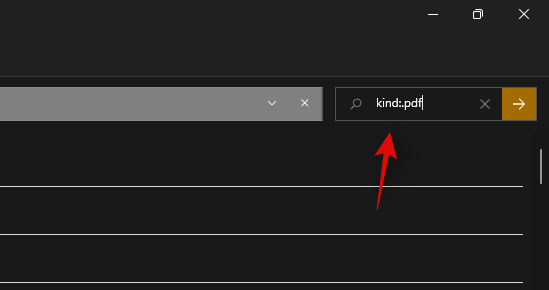
Similarly using the command below will help you find PDF files in the selected directory.
kind:.pdf
And that’s it! You can use these commands to find certain files on your PC using Windows Search.
Related: How to Hide Badges on Taskbar Icons on Windows 11
Find files by date
You can also use the ‘date:’ parameter to look for files created on a certain date. Additionally, this command can be used in conjunction with Boolean filters below to find files created or modified before or after a certain date on your PC. For example, if looking for a file created on the 1st of January 2020, then you can use the following command below.
date: 1/1/2020

Similarly if looking for a file created on the 1st January 2021, then you can use the following command.
date: 1/1/2021
Use Boolean Filters
Boolean filters can help you search multiple terms simultaneously or in conjunction with each other when using Windows Search. Here are the following Boolean filters that you can use to your advantage.
The ‘AND’ parameter
You can use the AND parameter to search for two search terms together. This way you can look for a file containing both the terms and not either one of them which should help you filter out unwanted results containing either of the terms. For example, if looking for a file containing the words ‘Samsung and ‘galaxy’ in its name then I can use the following term to search for your file.
Samsung AND galaxy

This will filter out files with only ‘Samsung’ and ‘Galaxy’ in their name. Files with either term will be filtered out.
The ‘OR’ parameter
The OR parameter is opposite to the AND parameter and allows you to search for files containing either of the terms in your search term. For example, if I wish to search for files with either ‘Apple’ or ‘Airpods’ in their name, then I can use the following search term.
apple OR airpods

Similarly, if I am looking for PDF and EXE files in a particular directory, then I can use the following command below.
kind:.exe OR .pdf
And that’s how you can use the OR parameter to look for multiple search terms in a single file name.
The ‘NOT’ parameter
If you are looking to filter out a certain search term or a filet type then you can use the NOT parameter. The NOT parameter will exclude the desired file type, kind, size, or name depending on your choice. For example, if in a folder full of .docx files you are looking for other file types and wish to filter them all out, then you can use the following command.
kind: NOT .docx

Similarly, if I am looking for a file that does not have ‘Apple” in its name then I can use the following search term.
NOT apple

Double Quotes
If you remember an exact term for the file that you are searching for then you can use double-quotes. This will force Windows Search to look for the exact search term with the specific formatting and case to find the file that you are looking for. For example, if looking for a file with ‘Apple 2019′ in its title then you can use the following command below.
“Apple 2019”

Parentheses
Parentheses is a Boolean filter that is usually used when you are searching file contents as well. Anything included between the parentheses () is searched for and files with either or all of the terms are displayed on your screen. For example, if looking for a file containing either ‘Apple, Samsung, Mi, Microsoft, and Dell’ or all of these terms, then you can use the following term.
(Apple Samsung Mi Microsoft Dell)

Similarly, you can use the following command if looking for multiple file types.
kind:(.exe .pdf .txt)

And that’s it! You will now have used parentheses to your advantage to look for multiple search terms in a particular file.
‘>’ and ‘<‘>
These two Boolean filters are usually used when looking for file types or when sorting your results based on a parameter. The greater than and less than parameters can be used to filter your results based on a number. For example, if looking for files dated after 1st January 2021 then you can use the following command.
date: >1/1/2021

Similarly, if looking for files less than 10GB then you can use the following command.
size: <>

You can use the greater than and less than parameters to your advantage this way and find the desired files on your system.
Related: How to Type Accents on Windows 11
Are there any Windows search alternatives?
Yes, there are a few Windows search alternatives out there developed by third parties that offer competitive indexing options and promise higher working efficiency when it comes to using your system’s resources. Windows Search, however, would still be our recommended tool for you as it has been installed natively on your system. Using a third-party tool will add additional workload to your PC unless Windows Search has been completely disabled. Hence, we recommend that you try PowerToys by Microsoft first to get a native utility on your PC that uses and enhances Windows Search instead. If that does not work out for you, you can then opt for any one of the third-party utilities listed below.
PowerToys
PowerToys is a collection of enhanced tools by Microsoft that offer you utilities like PowerToys Run (Windows Search), Color Picker, Power Renamer, and more to help increase your productivity and enhance your workflow. PowerToys Run is a spotlight-like search feature in PowerToys that uses Windows Search to index and display files on your PC. PowerToys Run gives you a more elegant way of using Search on your PC. Use the guide below to get you started.
Download and install PowerToys on your PC using the link above. Once installed, launch PowerToys from the taskbar as shown below.

Once PowerToys is launched, we recommend you click on each feature on your left and disable the ones that you don’t wish to use. PowerToys have comprehensive tools that can cause your system to behave unexpectedly if you do not know about them. Hence, disable all the features that you do not need or wish to use on your PC.
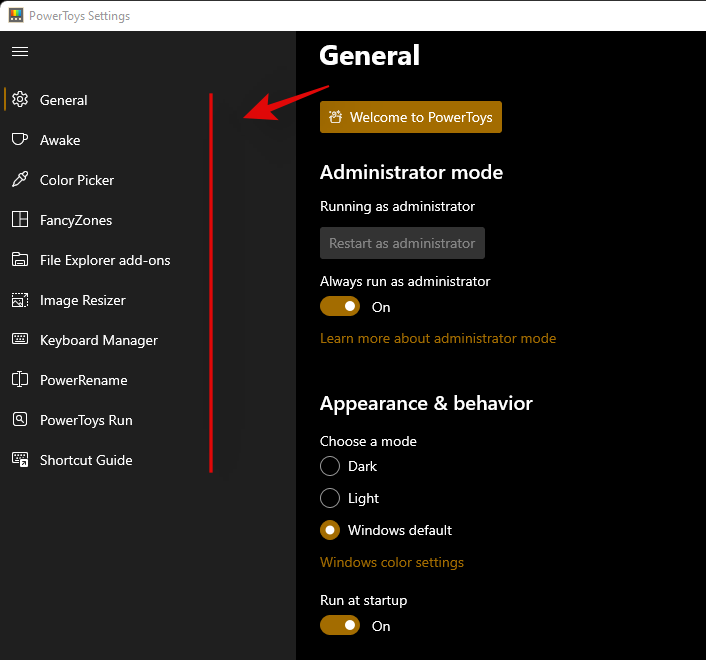
Click on ‘PowerToys Run’ on your left.
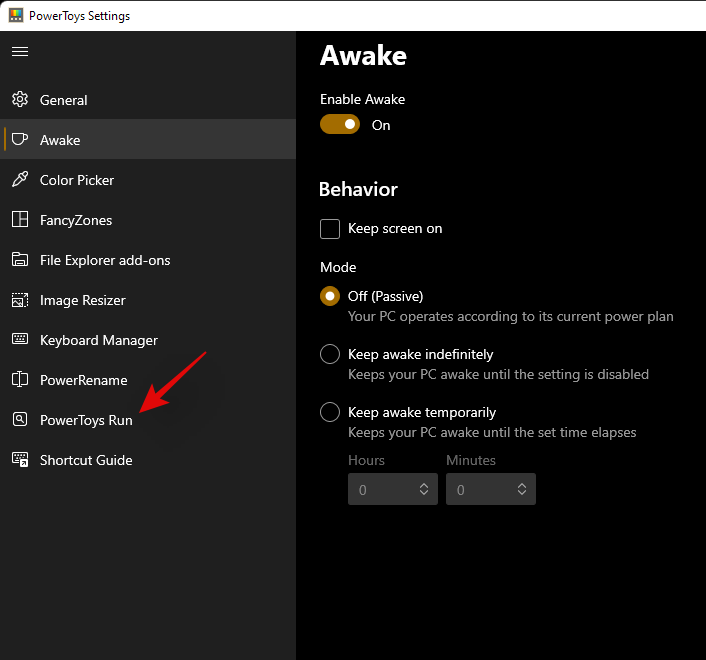
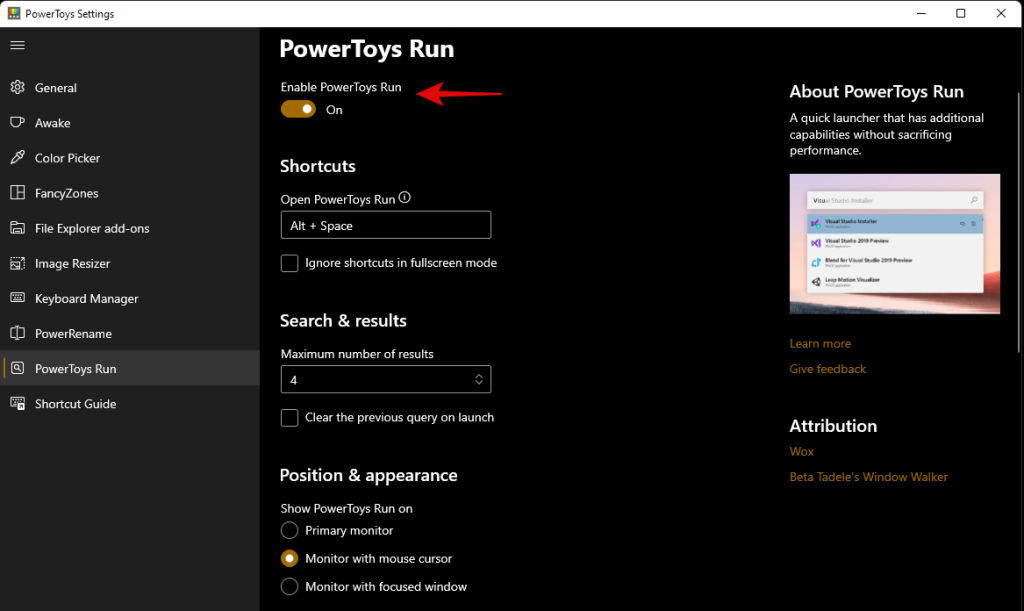
Enable the toggle at the top.
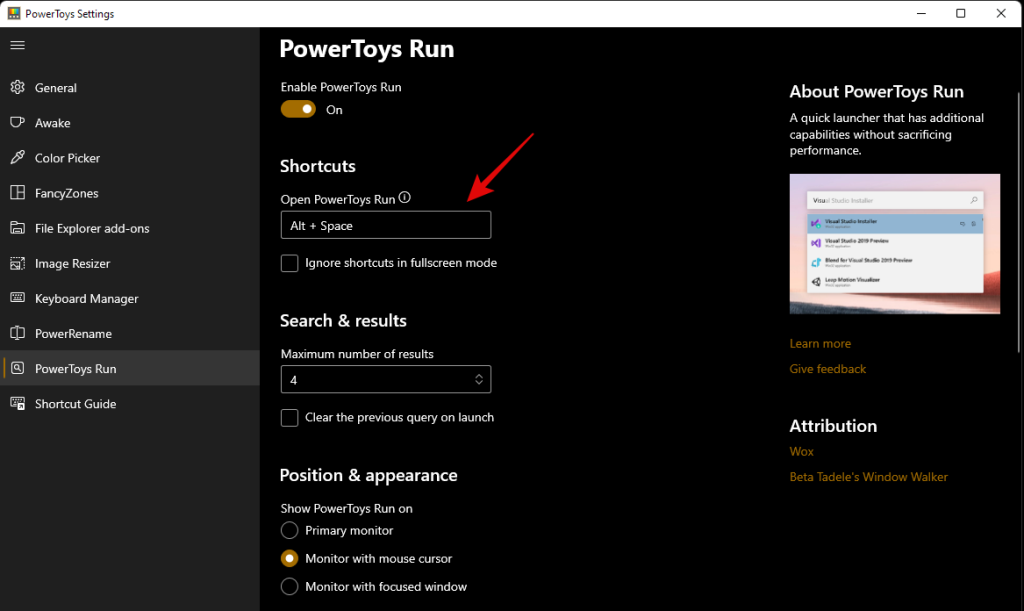
Set a custom shortcut if needed. By default, you can use Alt + Space to activate PowerToys Run.
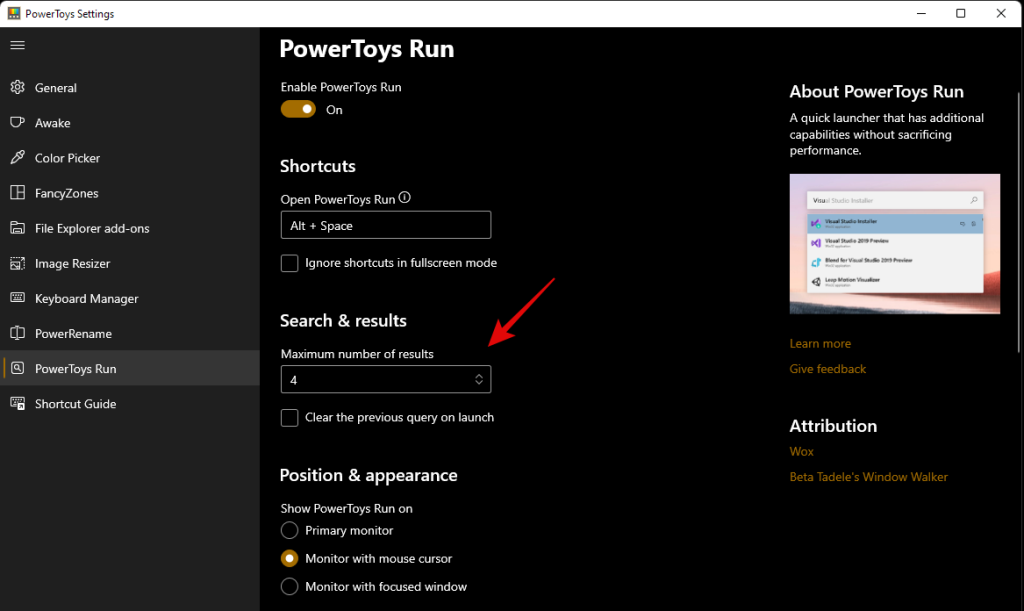
Increase the number of search results you wish to view if needed.
Set a position for the search box if you have a multi-monitor setup.
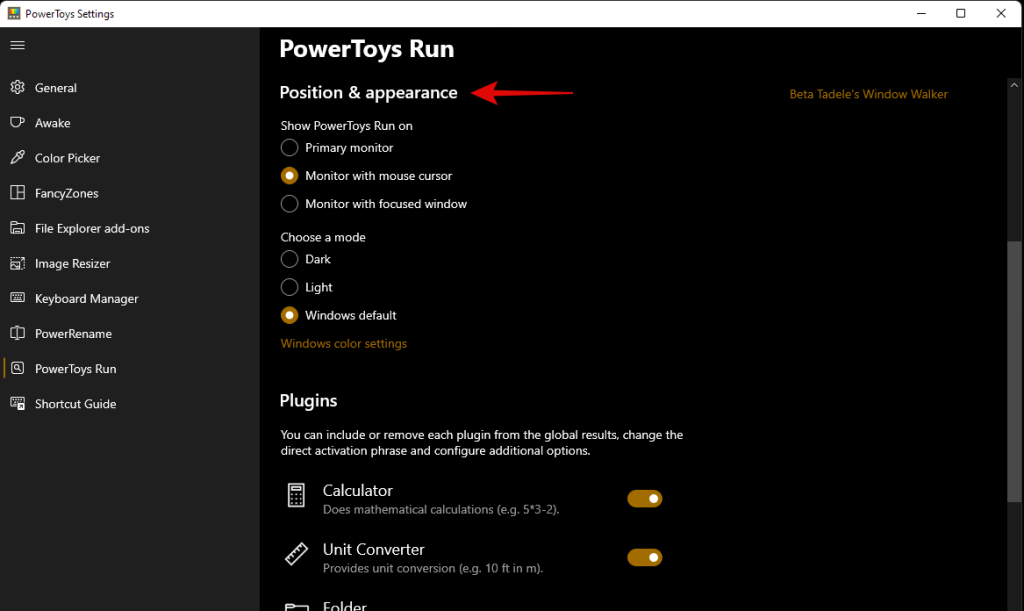
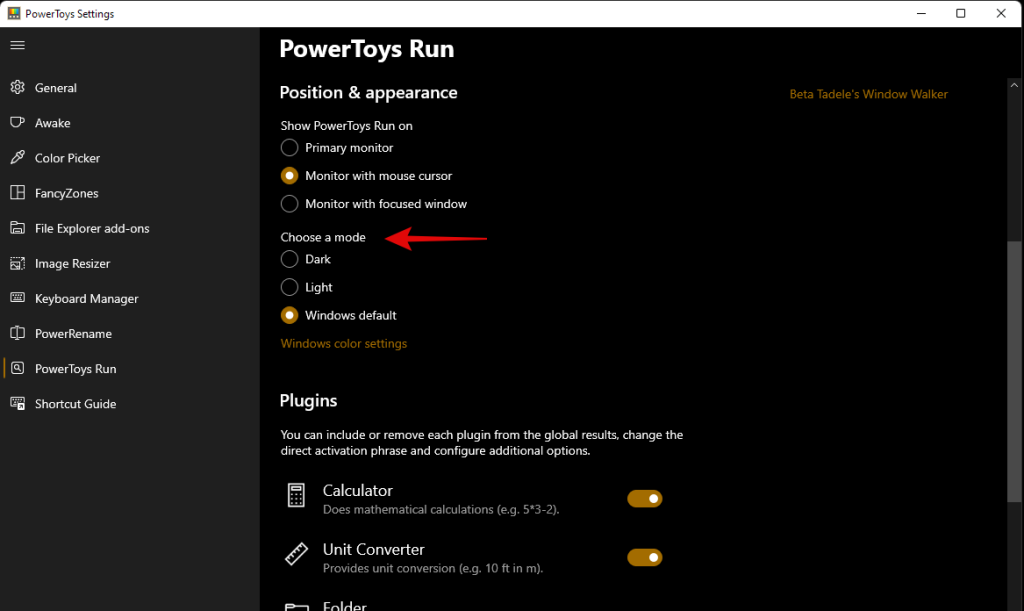
Choose a custom theme if needed.
Additionally, PoweToys Run is highly capable and can help you access apps from within the search box itself. For example, you can enter equations in the search box, and you will automatically get a result from the calculator app as a search result as shown below.

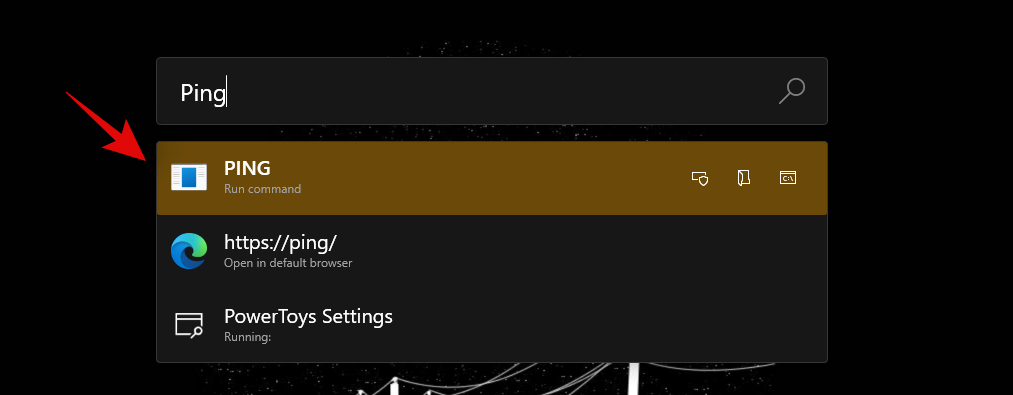
Similarly, you can also execute commands from the search box itself. Ping is a good example that shows up in the search results as shown below.
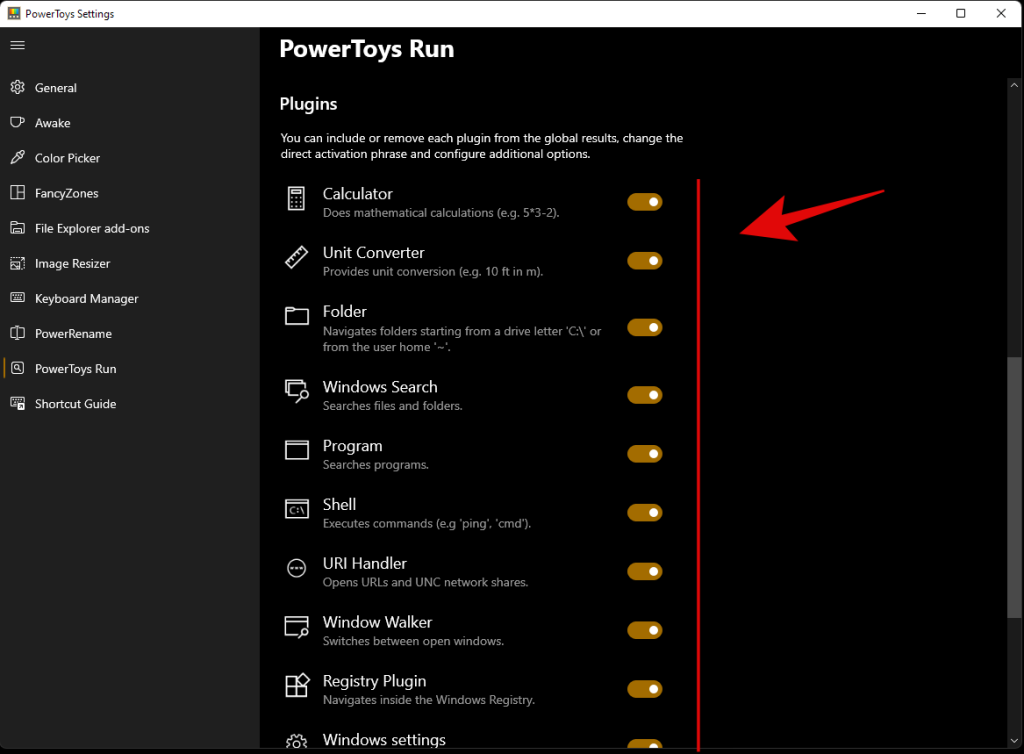
However, if you are not going to be using these features then there is no point in having them enabled on your PC. Simply disabled the plugins in the PowerToys window as shown below.
And that’s it! You will now have configured PowerToys Run on your system as a Windows Search alternative.
Third-party apps
If PowerToys is not up to mark for you and you are looking for something a bit more comprehensive then you can check out the following Windows Search alternatives below.
We hope you were able to get familiar with Windows Search in Windows 11 using the guide above. If you face any errors or have any questions for us, feel free to reach out using the comments section below.
Can you disable Windows search in Windows 11?
No and yes. Windows does not offer a native way to disable Windows Search. However, this could be detrimental to older systems where Search could end up taking vital resources in the background that would in turn slow your system down. In such cases, and more, you can use a few workarounds to disable Windows Search in the background on Windows 11. You can use the guide below to disable Windows Search on Windows 11.
How to disable Windows search
If you wish to disable Windows Search then disabling the service is the easiest way. Follow the guide below to get you started.
Press Windows + R on your keyboard and type in the following. Press Enter on your keyboard once you are done.
services.msc
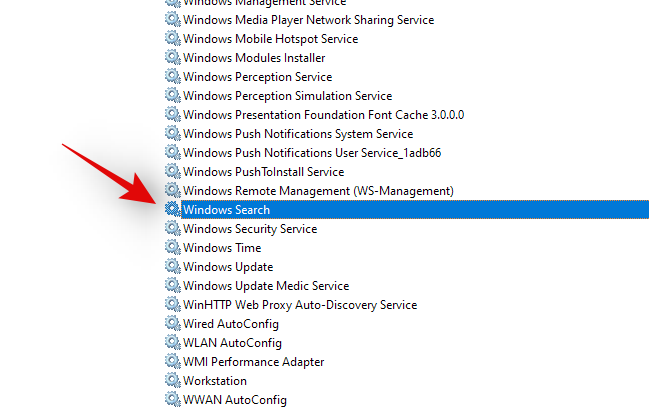
Search for a service named ‘Windows Search’ and right-click on it.
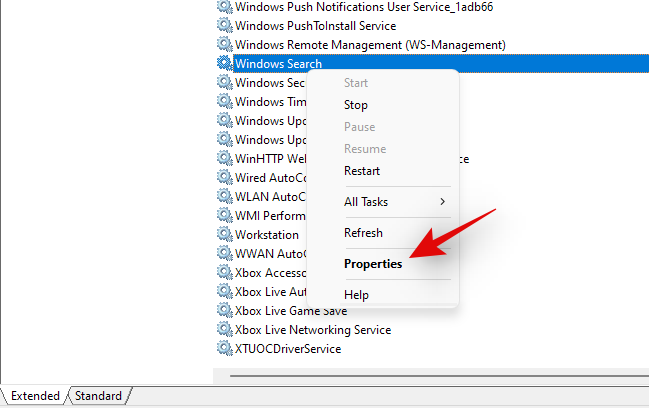
Select ‘Properties’.
Click on ‘Stop’.
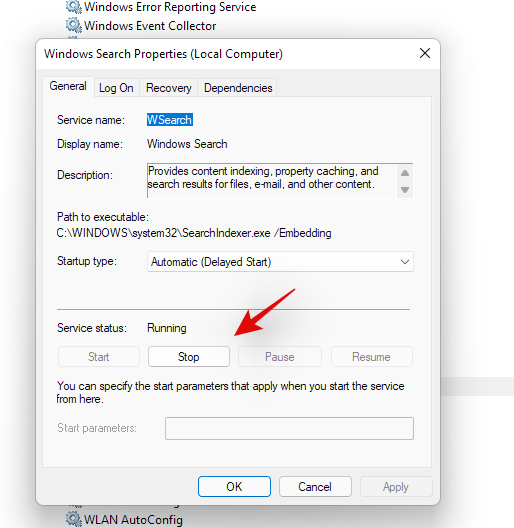
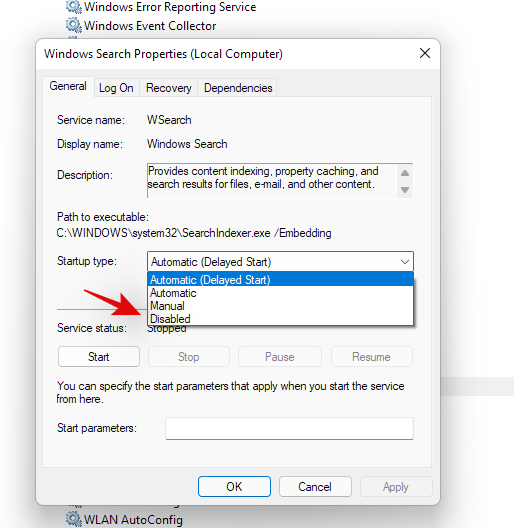
Click on the drop-down menu and select ‘Disabled’.
Fai clic en "Aceptar".
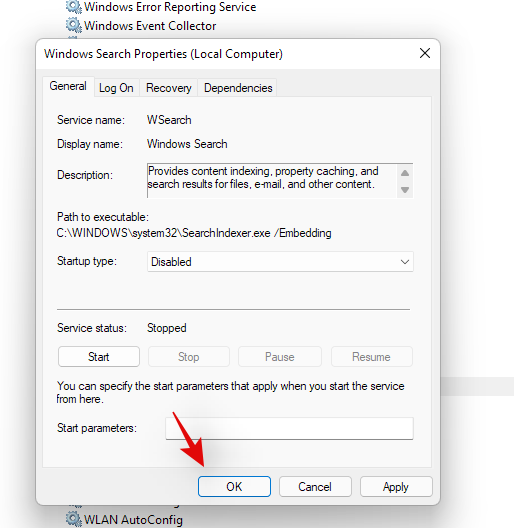
Reinicia o teu sistema e agora a Busca de Windows debería estar desactivada no teu sistema.
Relacionados:


