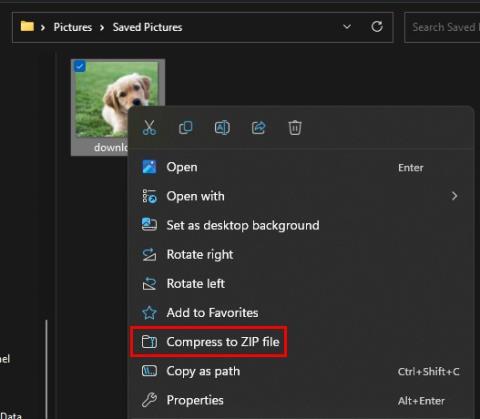
Despois dunha fase de probas beta de tres meses de duración, Windows 11 xa está dispoñible para descargar para o usuario final. Para aqueles de vostedes que están actualizando o seu PC a Windows 11, hai moitas sorpresas reservadas para vostede. Aquí tes as 10 cousas que debes facer en Windows 11 cando inicias o teu sistema por primeira vez .
Contidos
As 10 mellores cousas que facer en Windows 11
Windows 11 trae unha infinidade de novas funcións e actualiza moitas das antigas para modernizar a súa forma e función. Aínda que a maioría deles son melloras na calidade de vida, non todos os cambios son exactamente benvidos. Entón, imos repasar todas as cousas que pode querer cambiar ou comprobar no novo Windows 11.
O xurado aínda está pendente de saber se o aliñamento do centro do menú Inicio é un bo movemento por parte de Microsoft. Pero, sexa cal sexa o veredicto final, non se pode negar que é audaz e chamativo. Non obstante, non todos son fans disto, e se queres revertir o menú Inicio a onde estaba antes, aquí tes como facelo:
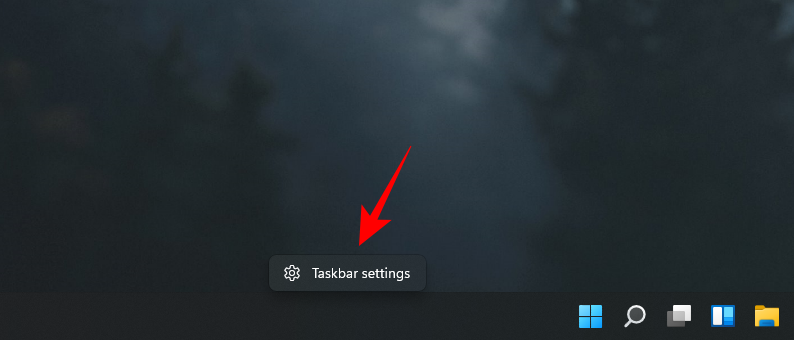
Fai clic co botón dereito na barra de tarefas e selecciona Configuración da barra de tarefas .
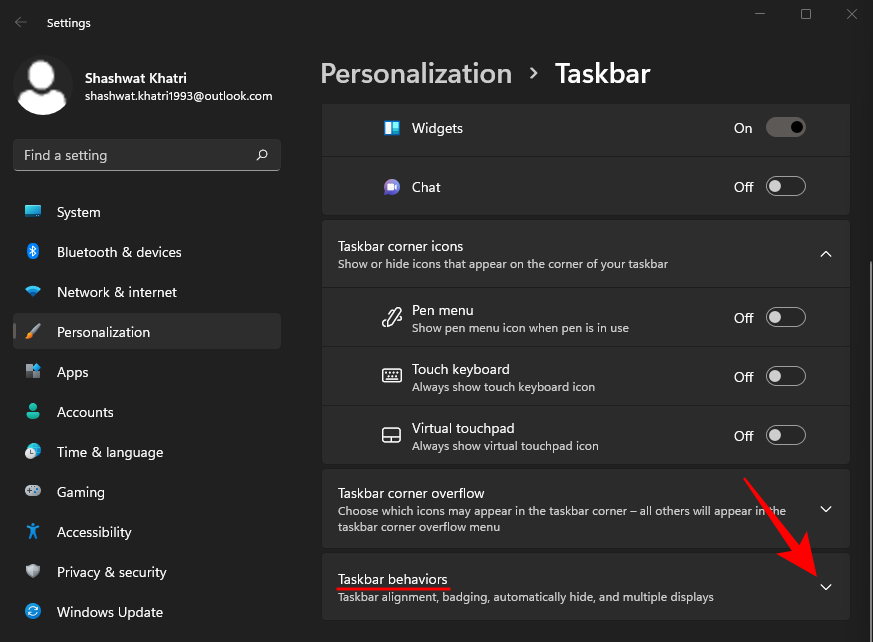
Fai clic en Comportamentos da barra de tarefas .
A continuación, xunto a "Aliñación da barra de tarefas", fai clic no menú despregable.
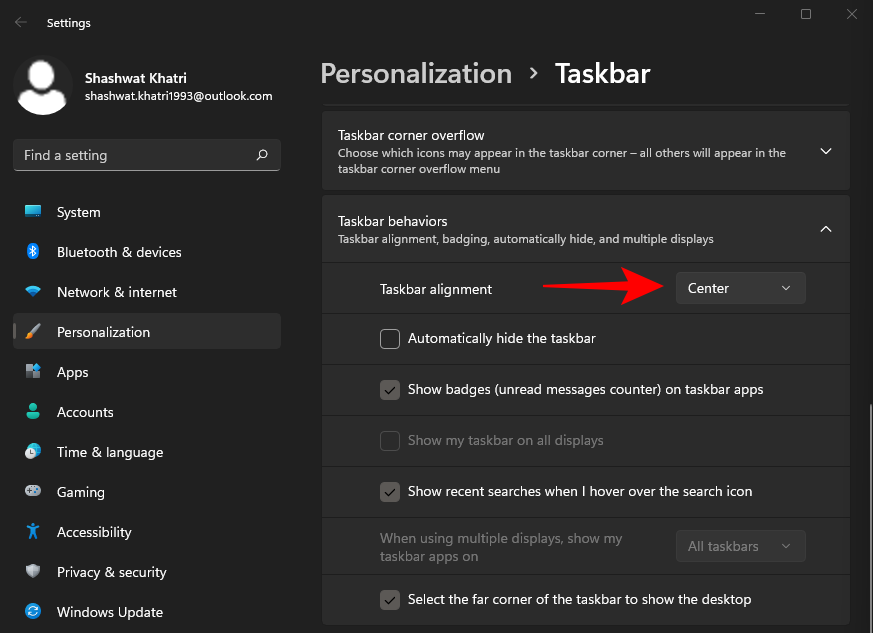
Escolla Esquerda .
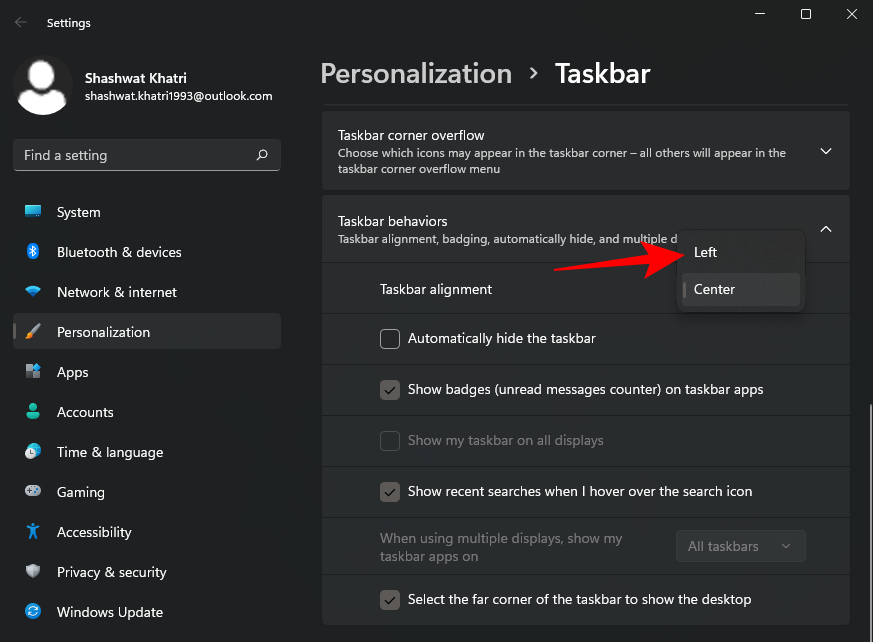
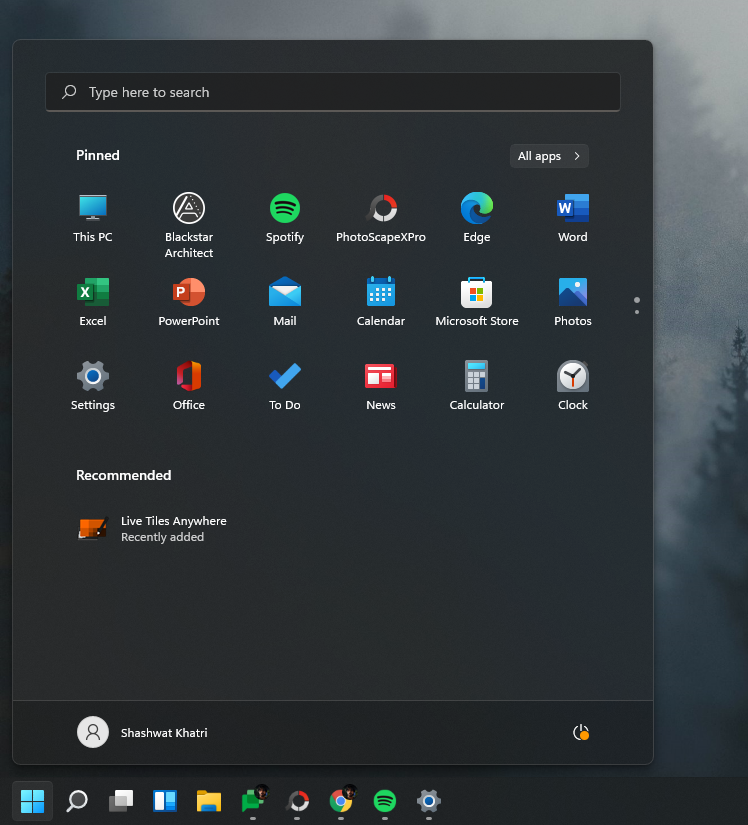
O menú Inicio desprazarase instantáneamente á esquerda.
Relacionado: Windows 11: Como recuperar o menú Inicio de Windows 10
2. Use os deseños de axustes e os grupos de axustes
Se algunha vez usaches a función FancyZones de PowerToys, sabes o que fan Snap Layouts. Cando teñas abertas varias fiestras ou cartafoles, podes pasar o rato sobre o botón "Maximizar" e seleccionar como queres expoñelos na túa pantalla. Alternativamente, preme a tecla Windows + atallo Z para mostralo.
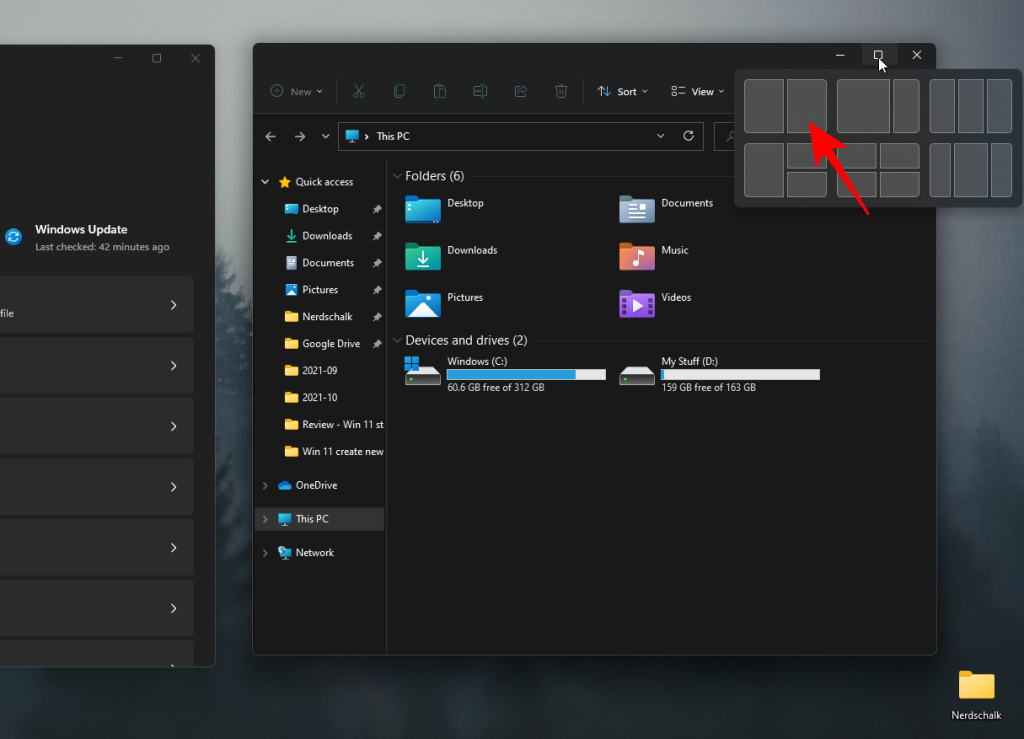
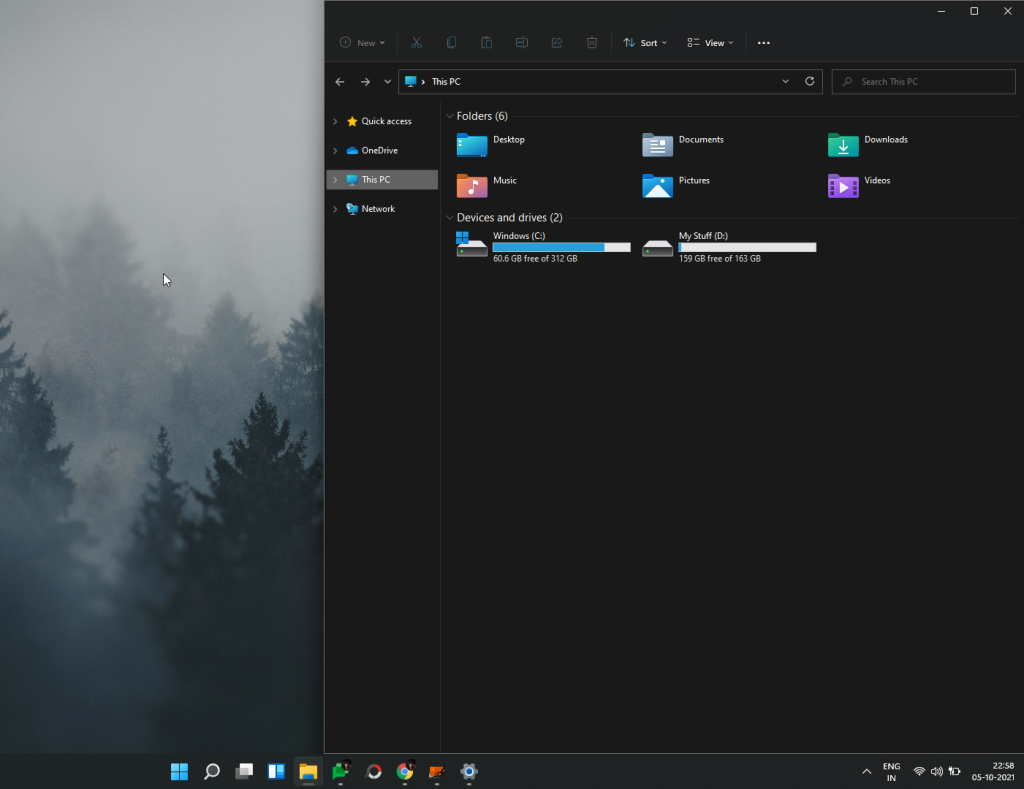
En canto elixas un deseño, pediráselle que escollas as fiestras que queres que ocupen a área restante da pantalla.
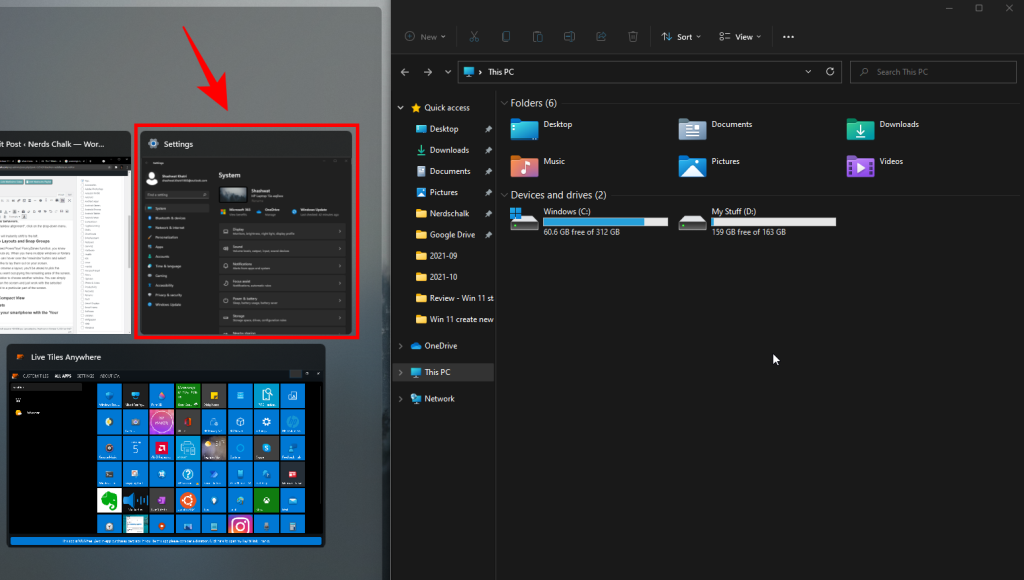
Isto axustará as fiestras segundo o deseño escollido.
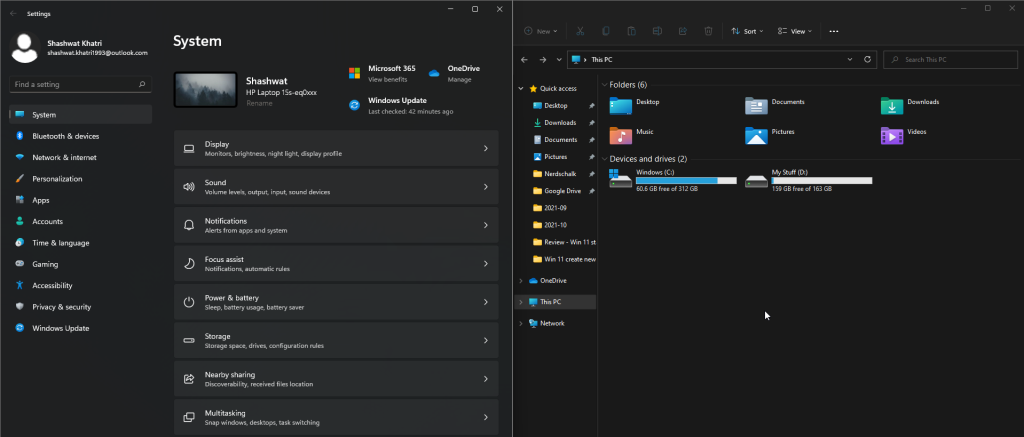
Non é unha obriga elixir outra xanela. Pode simplemente facer clic en calquera lugar da pantalla e traballar coas fiestras seleccionadas aliñadas a unha parte determinada da pantalla.
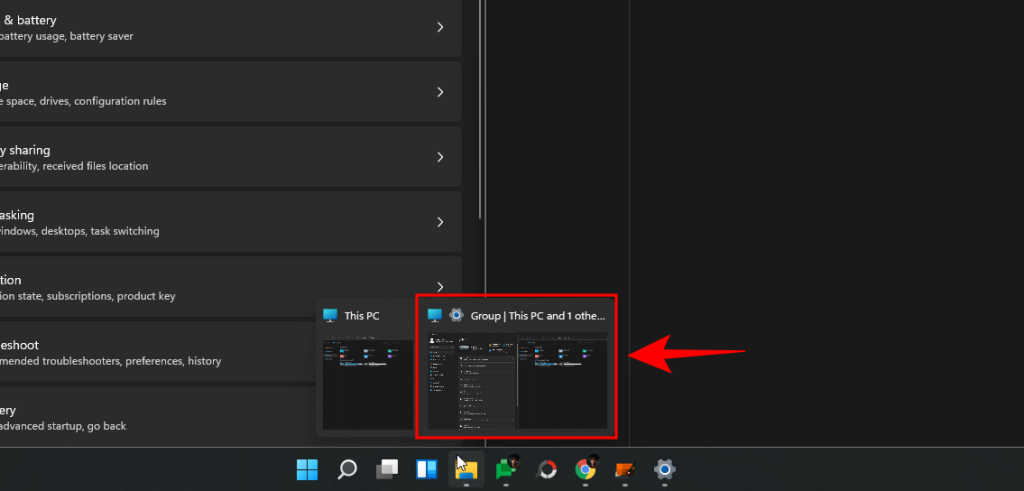
O deseño escollido gardarase como "Grupo". Isto será visible na barra de tarefas mentres pases o rato sobre as fiestras abertas na barra de tarefas.
Snap Layouts and Snap Groups é unha función moi cómoda e produtiva que che permite aliñar as fiestras e axustalas para que se axusten a unha parte da pantalla.
Relacionado: Windows 11 Snap Layouts non funciona? Aquí tes como arranxar
3. Active a Vista compacta
Unha cousa que notarás desde a porta é que os cartafoles e ficheiros do Explorador de ficheiros están un pouco espazados.
Isto é para facer as cousas un pouco máis accesibles e fáciles de ver. Pero isto tamén significa que a súa pantalla mostrará menos ficheiros na súa pantalla antes de que teña que comezar a desprazarse. Se non che gustan os ficheiros espazados, podes activar a "Vista compacta", que, como o seu nome indica, reduce o espazo entre ficheiros e cartafoles individuais e fai que parezan máis compactos na túa pantalla. Aquí tes como facelo:
Prema Win + Epara abrir o Explorador de ficheiros e, a continuación, fai clic en Ver na parte superior.
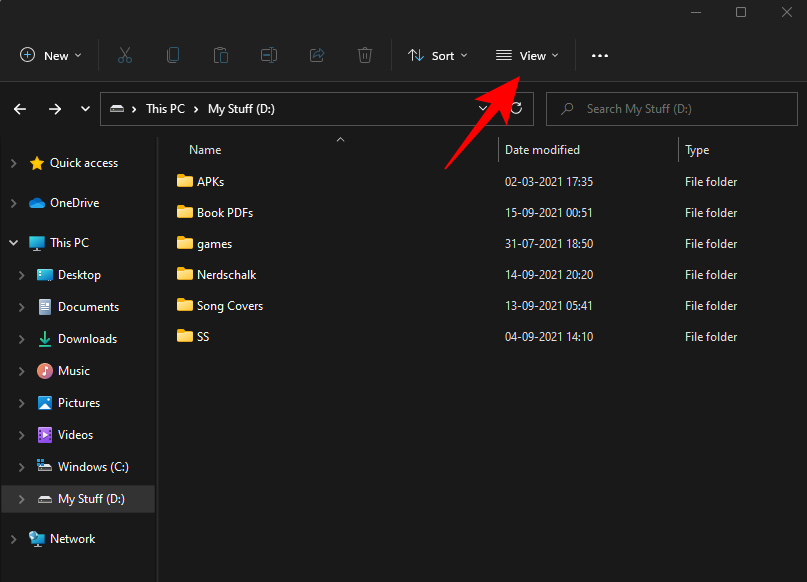
A continuación, seleccione Vista compacta .
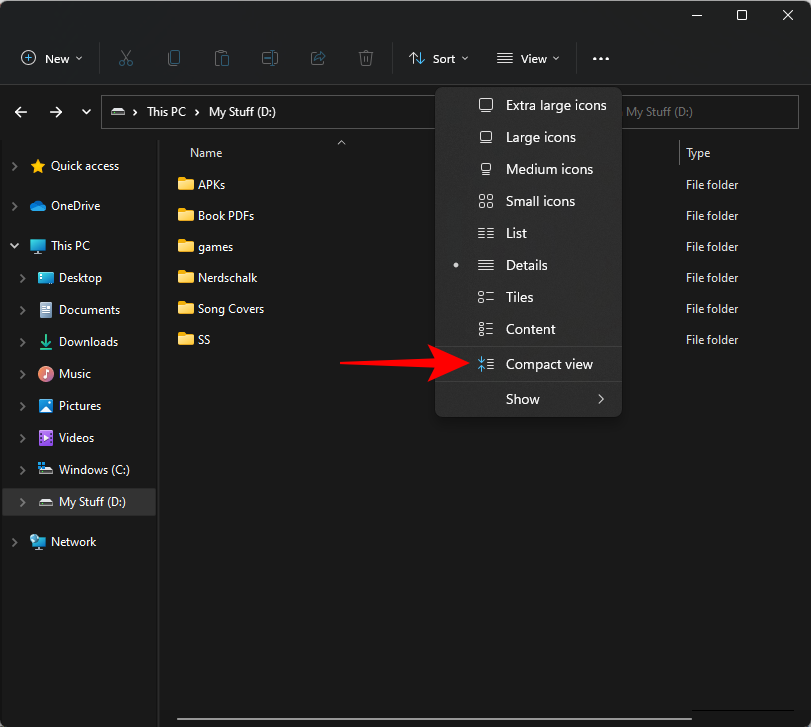
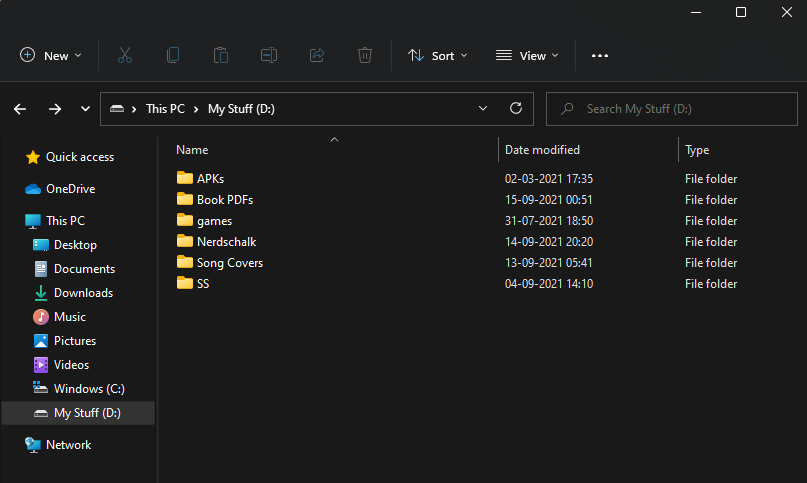
Os teus ficheiros e cartafoles mostraranse agora nunha vista máis compacta.
Relacionado: Como aumentar o espazo entre elementos no Explorador de ficheiros de Windows 11
4. Proba Widgets
Os widgets están de volta en Windows e nun avatar moito mellor que as súas iteracións anteriores. Por defecto, podes acceder aos widgets directamente desde a barra de tarefas.
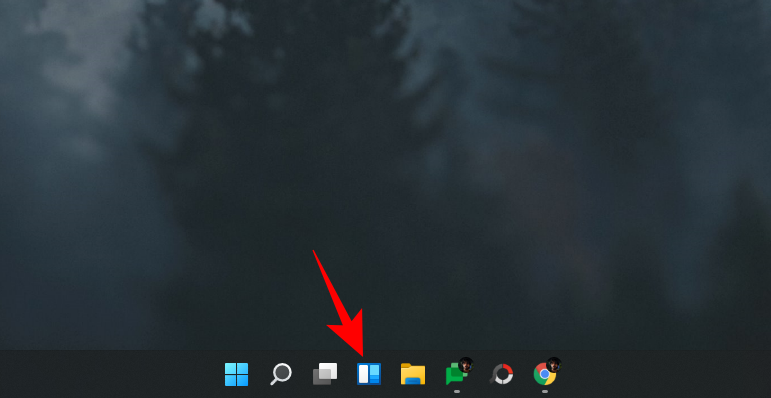
Ao facer clic nel, o panel Widgets deslizarase, proporcionando unha variedade de información: tempo, noticias, deportes e outras historias baseadas na túa localización.
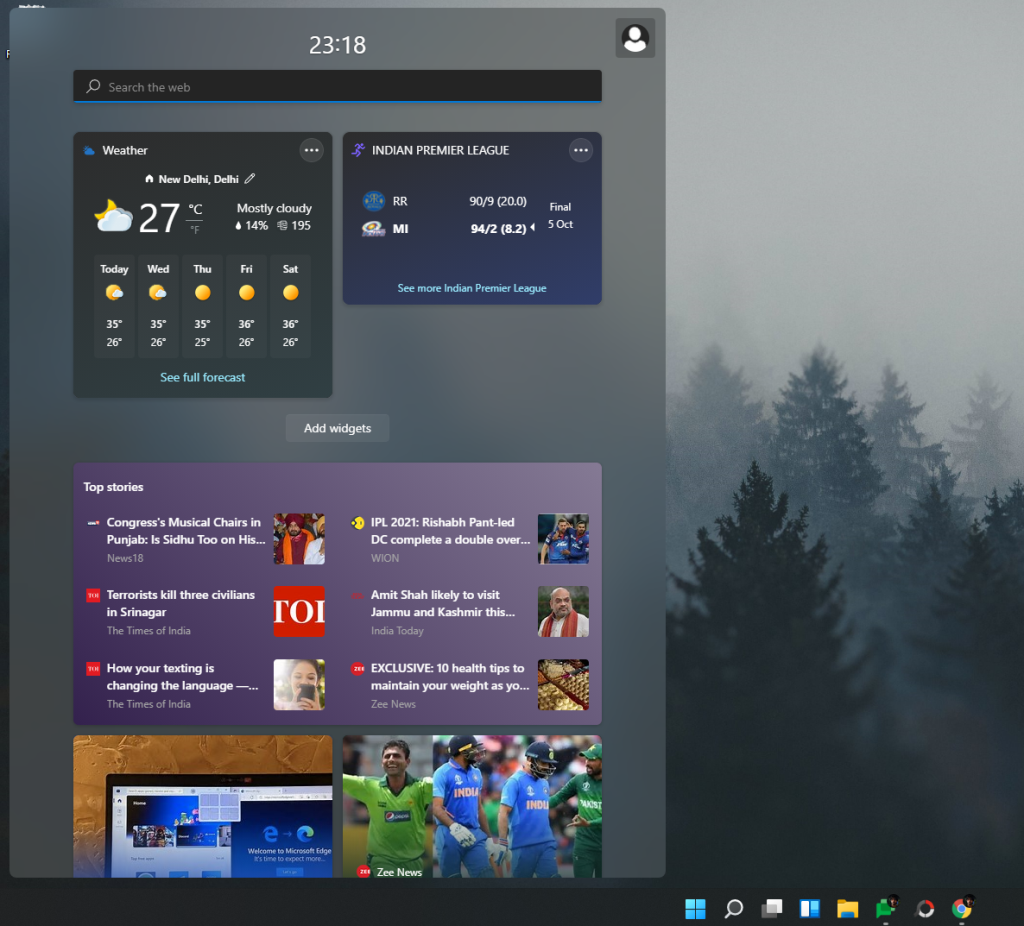
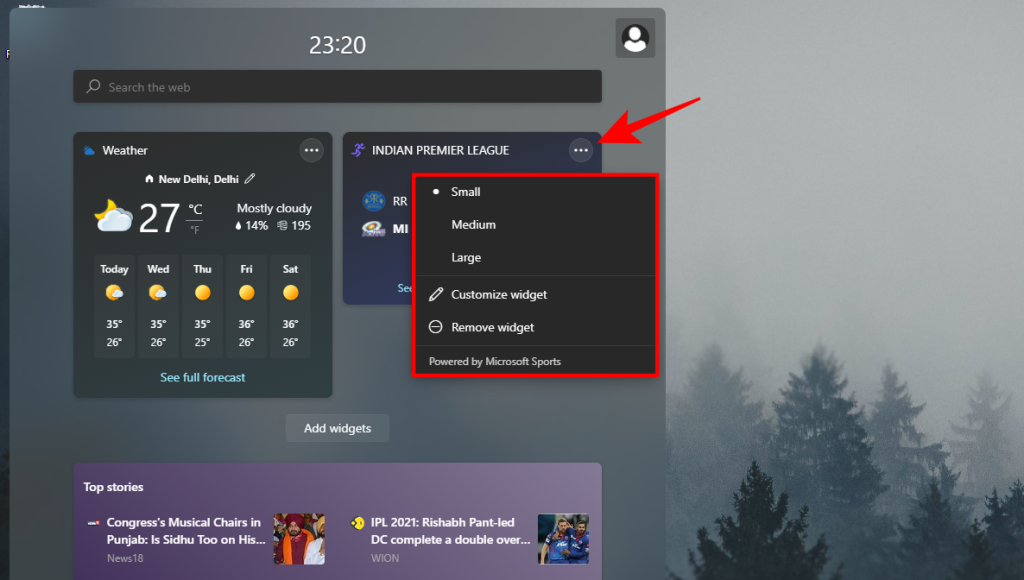
Podes personalizar os teus widgets segundo as túas necesidades para que se che mostre só o que queres controlar, nada máis. Cada widget terá unha icona de puntos suspensivos (Máis opcións) na parte superior dereita onde terá a opción de establecer o tamaño do widget, personalizalo para obter información ou eliminalo.
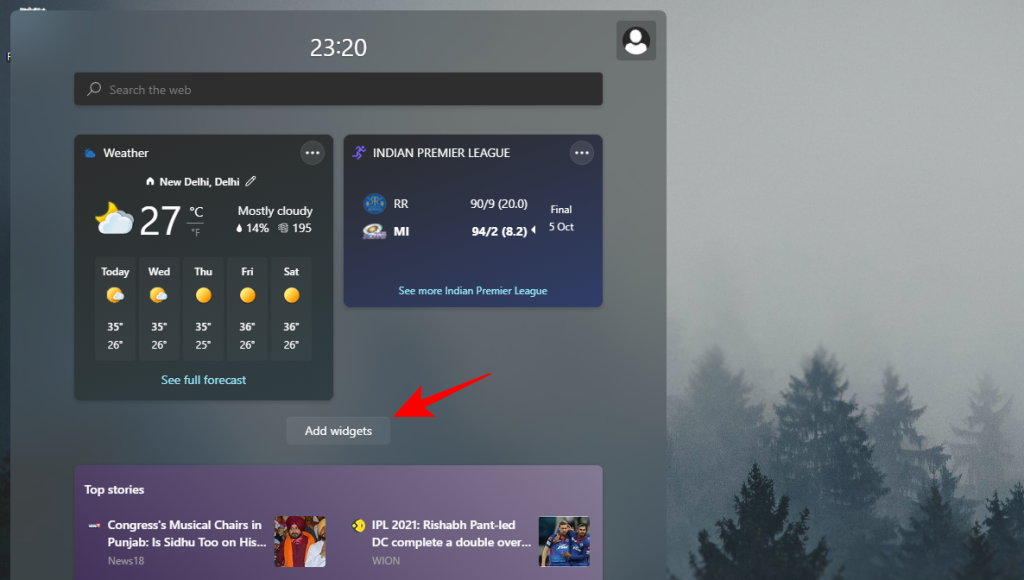
Para engadir un widget, fai clic en Engadir widgets .
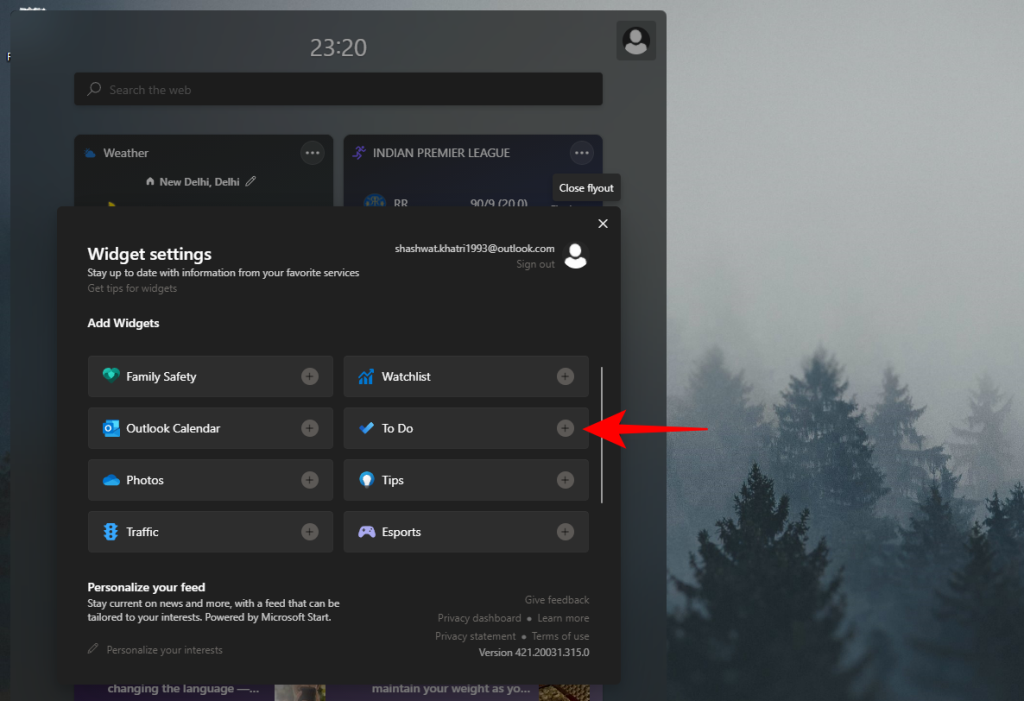
Seleccione entre os widgets dispoñibles.
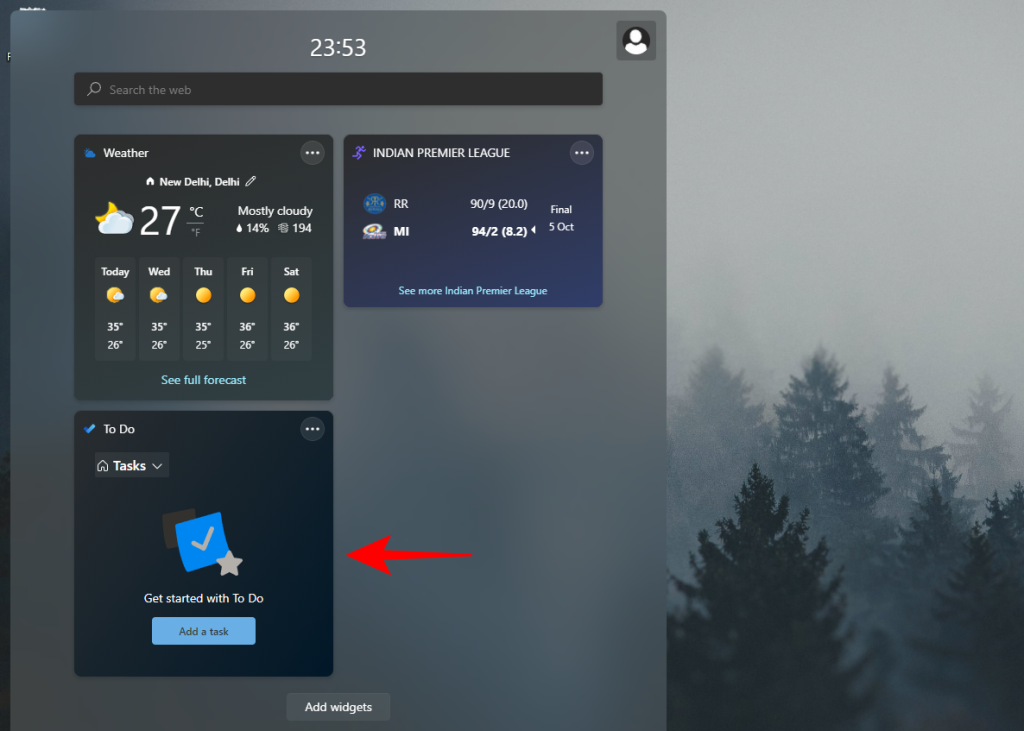
Engadirase á pantalla Widgets ao instante.
Relacionados:
5. Integra o teu teléfono intelixente coa aplicación "O teu teléfono".
The ‘Your Phone’ app has been around for a while now. But with Windows 11, the integration has become way more seamless, even more so for exclusive Samsung smartphones. On the Your Phone app, you can drag and drop files between your PC and your smartphone, use the Windows context menu on your phone’s media, check incoming notifications on your Android phone, and attend calls on the PC.
For those of us who don’t have a high-end Samsung phone, the Your Phone app is still worth a shot. With it, you can make and take calls on your PC, check messages, and manage your mobile notifications. To set it up, press Start, type ‘Your Phone’, and select the Your Phone app.
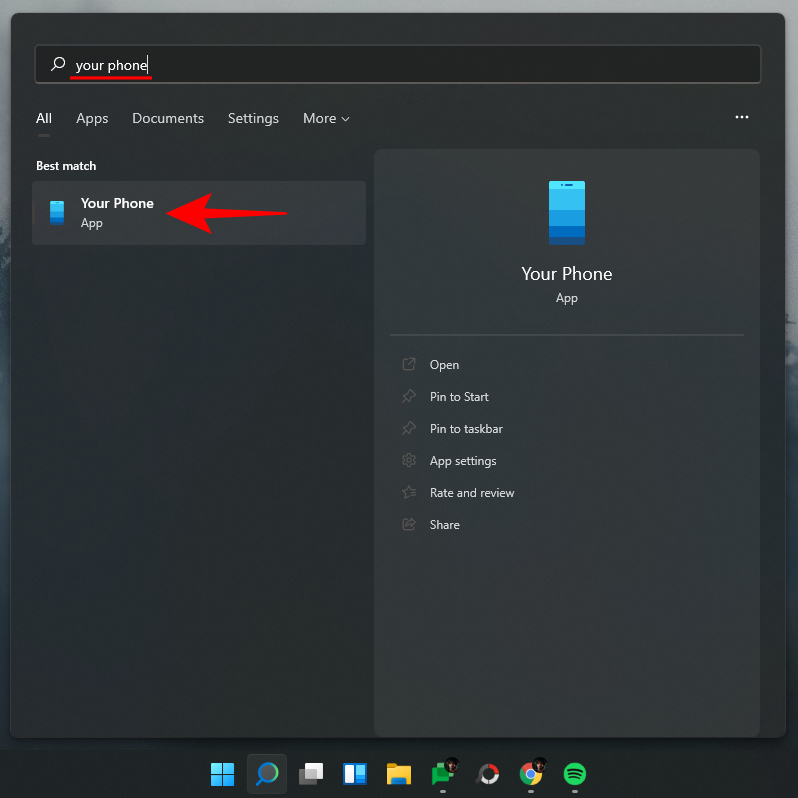
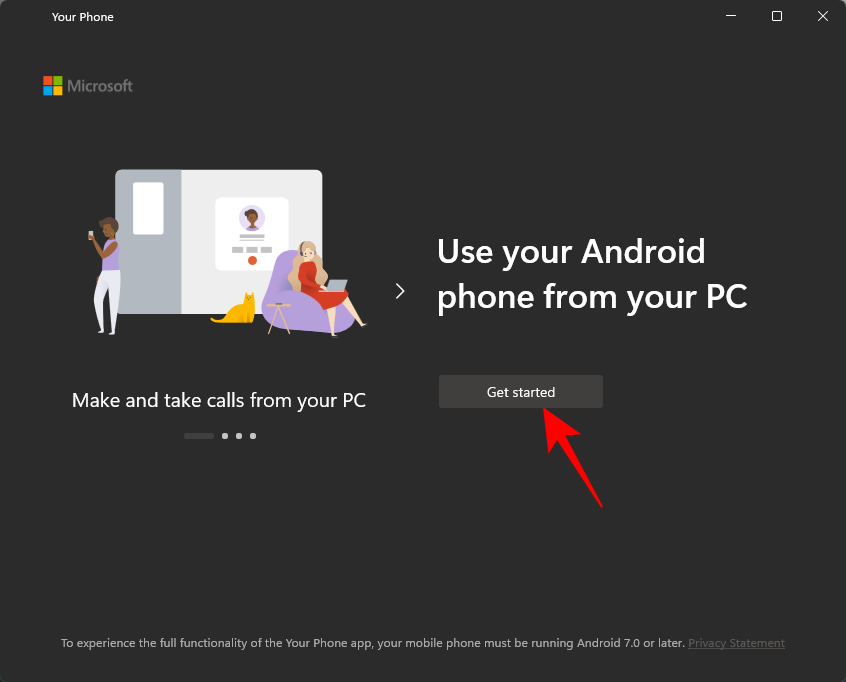
Then go through the on-screen prompts to integrate your smartphone with Windows 11.
6. Try Teams Chat (Or, remove it from taskbar)
Microsoft Teams has received a deeper integration on Windows 11, so much so that its ‘Chat’ feature has its own dedicated spot on the taskbar by default.
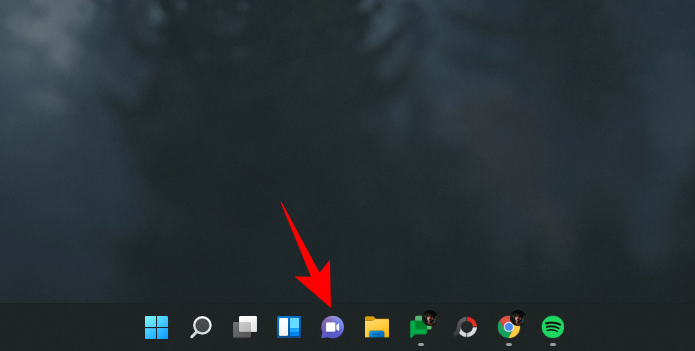
When using it for the first time, click on ‘Get Started’.
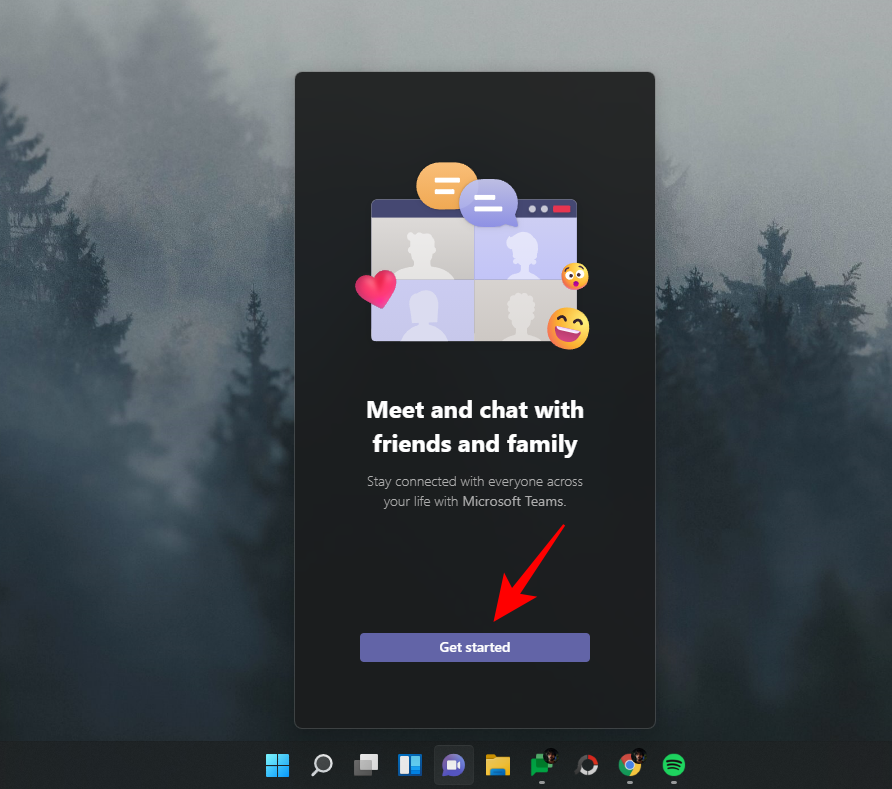
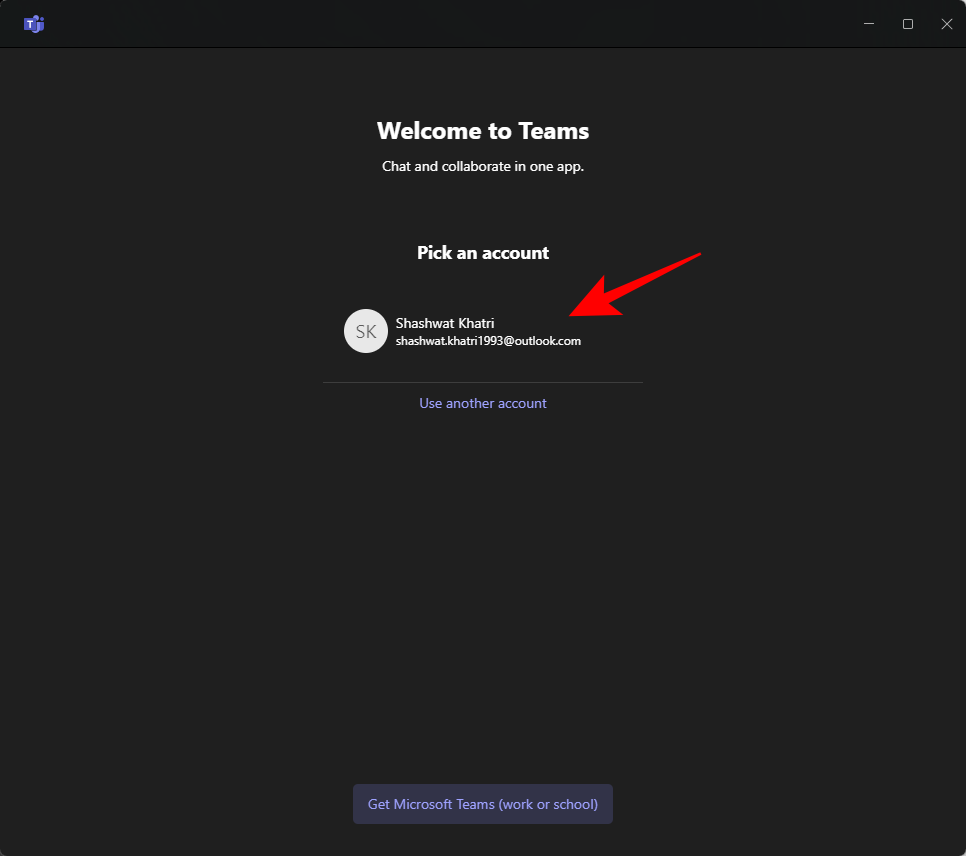
This will open the Microsoft Teams app. Select your account.
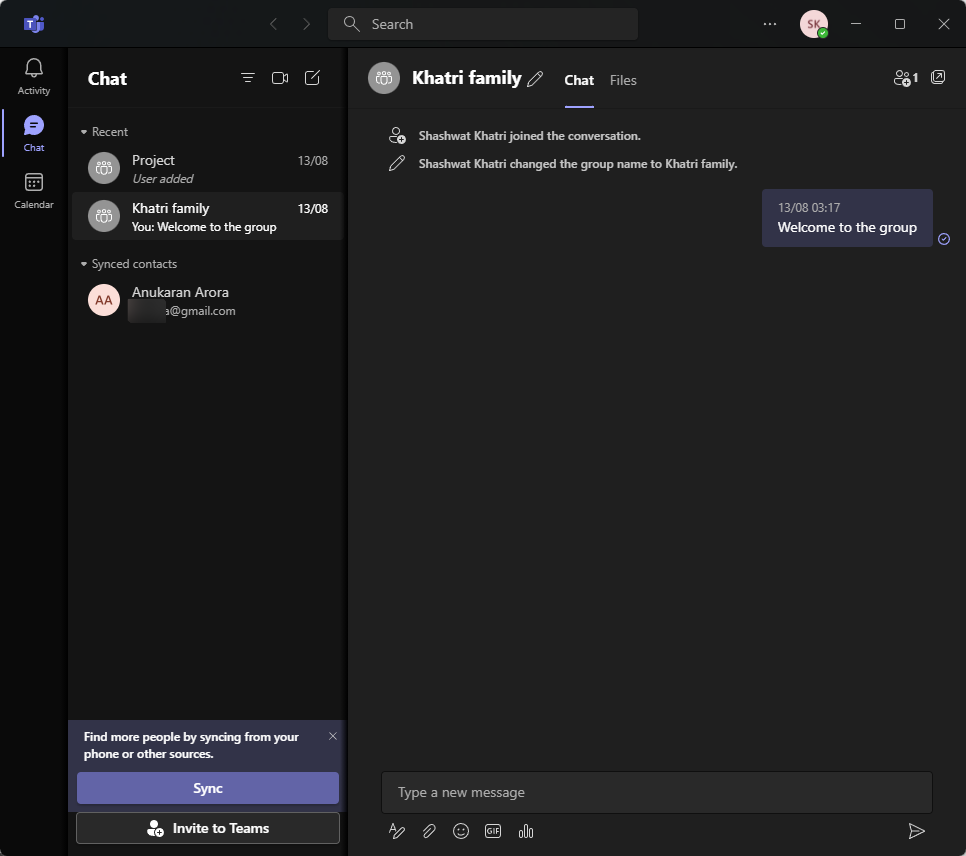
Once signed in, the Microsoft Teams app will be ready and you can start interacting with your contacts.
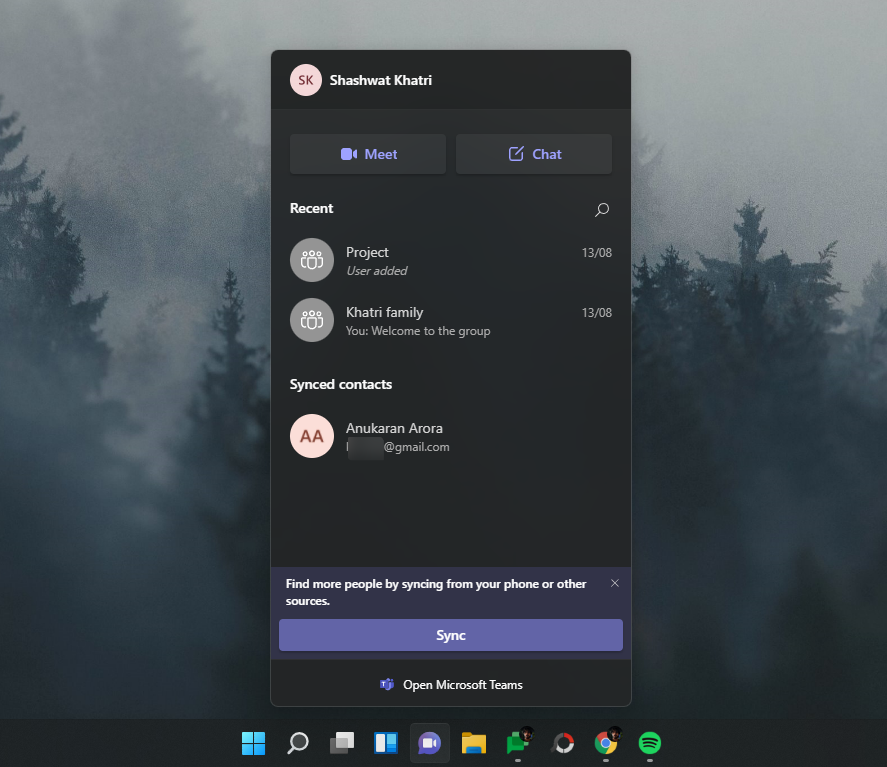
Clicking on the ‘Chat’ icon in the taskbar will reveal a list of your recent contacts for you to continue interacting with them, start a new chat, or invite them to a virtual meet.
If you don’t want the Teams ‘Chats’ appearing in your taskbar, here’s what you need to do:
Right-click on the taskbar and select Taskbar settings.
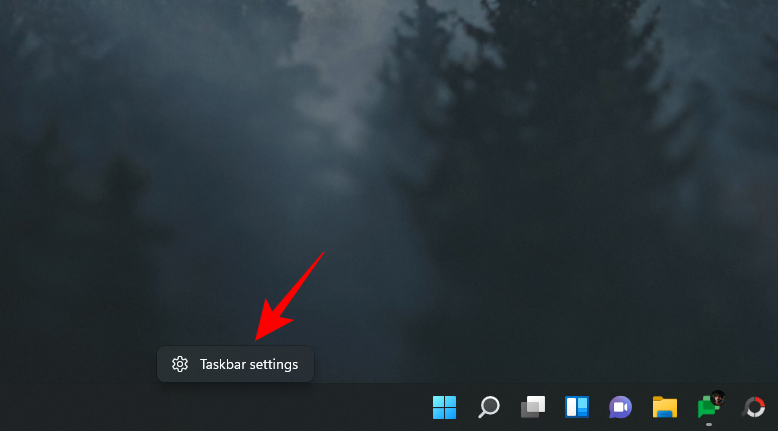
Then toggle off Chats.
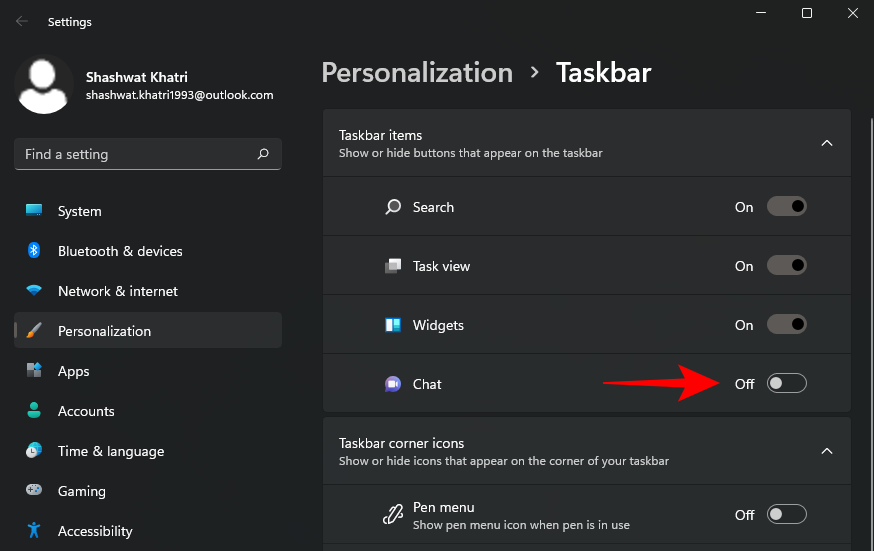
Uh, you can also remove the Teams Chat icon from your taskbar. See the guide below.
Read: How to Remove Microsoft Teams Chat From Taskbar
7. Use multiple desktops
The ability to use multiple virtual desktops on Windows is another one of those features that’s been around a while but wasn’t as accessible as it is on Windows 11.
This ‘Task View’ button is now available straight from the taskbar. Hovering over it will display the desktops that you’re currently using as well as an option to add a New Desktop.
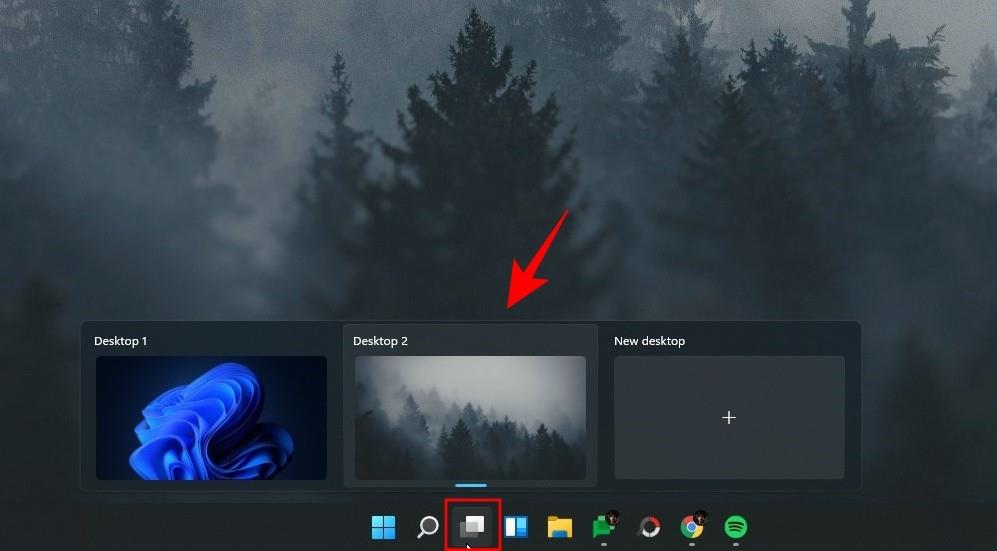
Clicking on the Task View option will display all your open windows on your current desktop. You can drag any window to a new virtual desktop and have it appear there.
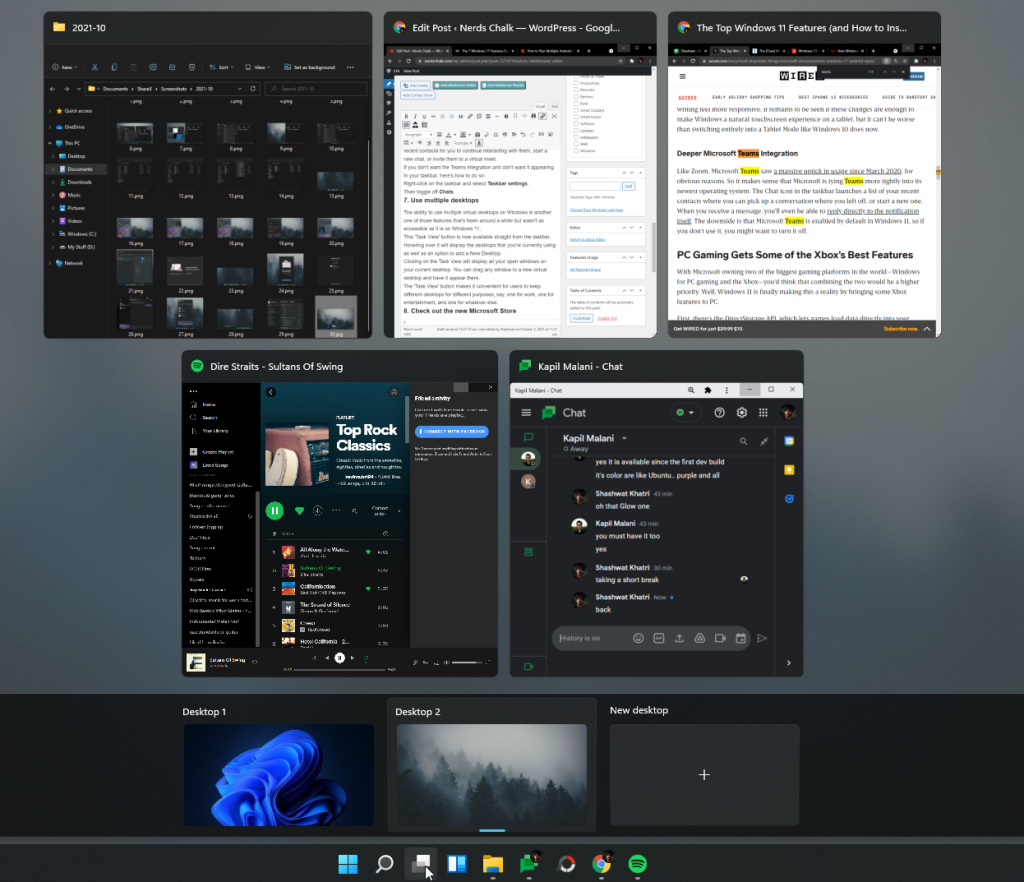
The ‘Task View’ button makes it convenient for users to keep different desktops for different purposes, say, one for work, one for entertainment, and one for whatever else.
8. Check out the new Microsoft Store
Windows Store now goes by the name of Microsoft Store. But the change isn’t just nominal; there are a variety of changes that both developers and end-users would greatly benefit from.
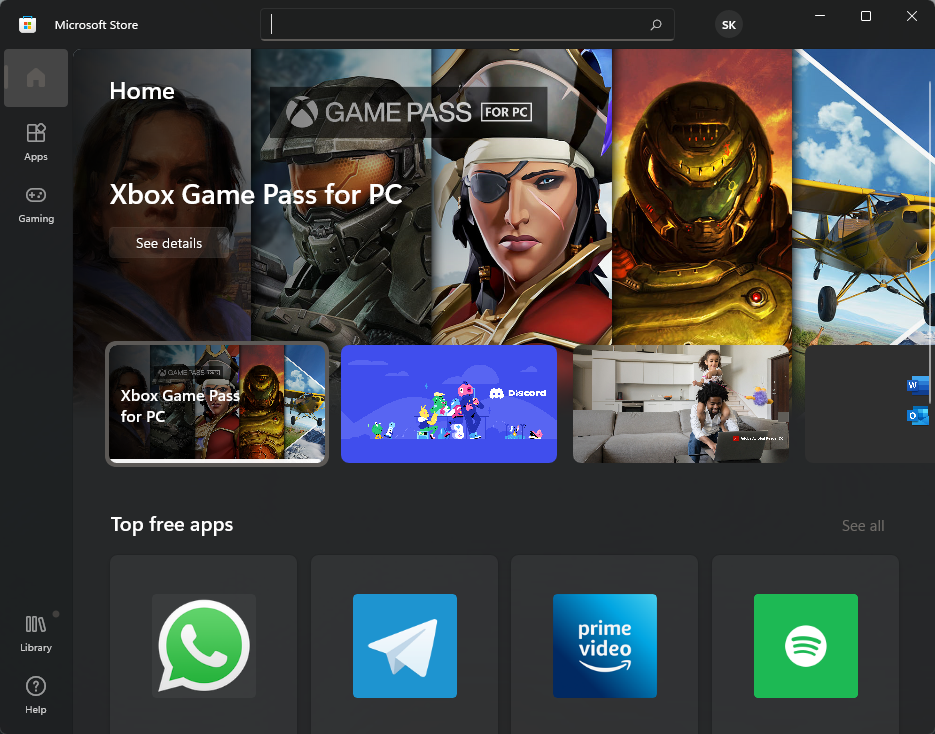
Game developers can already upload win32 versions of their apps on Microsoft Store, and now, that convenience is being afforded to other app developers as well.
But the best bit is that Microsoft is also bringing Android apps to Windows. Though the mechanism for this is quite strange, that is, through the Amazon Appstore, the end result would be that users will be able to search for and use Android apps on Windows. But this also means that users will have to sign in to their Amazon account instead of their Google account.
Though the idea is yet to materialize in its full form for Windows users, only time will tell how effective it is in getting more developers to bring their apps to the Microsoft Store and for users to use Android apps on their Windows 11 PC.
9. Open File Explorer to ‘This PC’
This is a slight modification, but one that will make it much more convenient for users to get to ‘This PC‘ when they open File Explorer. By default, when you open File Explorer, you’re taken to ‘Quick Access’. Here’s how to change that:
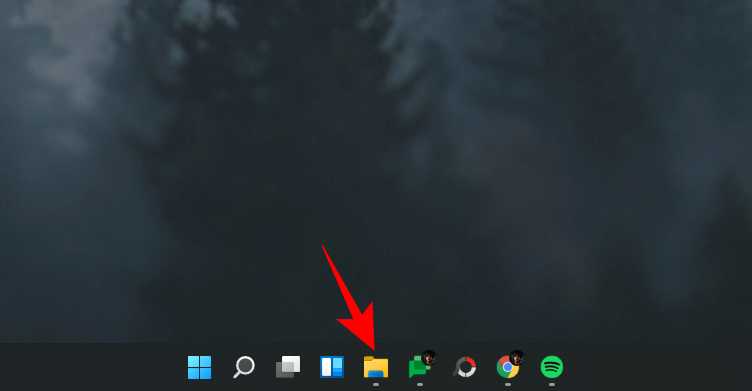
Press Win + E to open File Explorer. Alternatively, click on it in the taskbar.
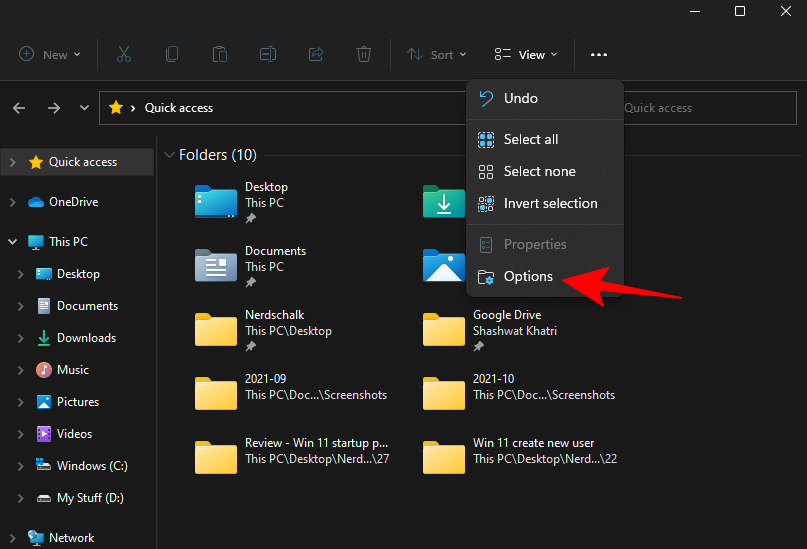
Click on the ellipsis icon (More options) in the toolbar above.
Then click on Options.
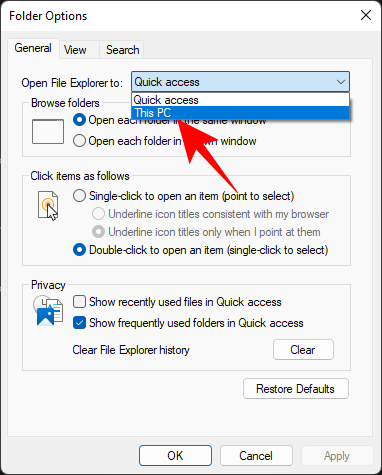
In the ‘Folder Options’ window, click on the drop-down menu next to ‘Open File Explorer to’.
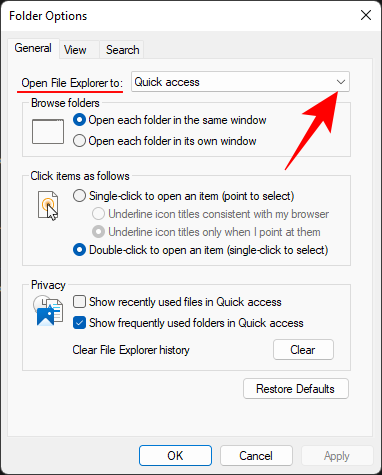
Select This PC.
Then click on OK.
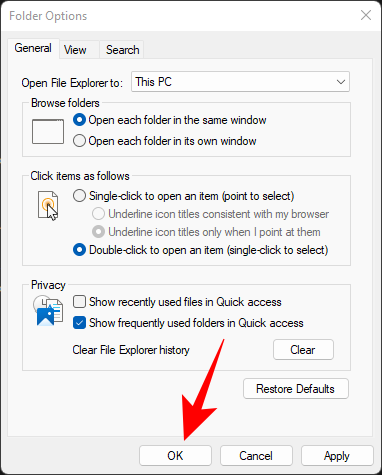
Now, whenever you open File Explorer, you’ll be taken directly to ‘This PC’.
Related: Where is ‘My Computer’ on Windows 11? How to Find ‘This PC’ Easily!
10. Customize the Action Center
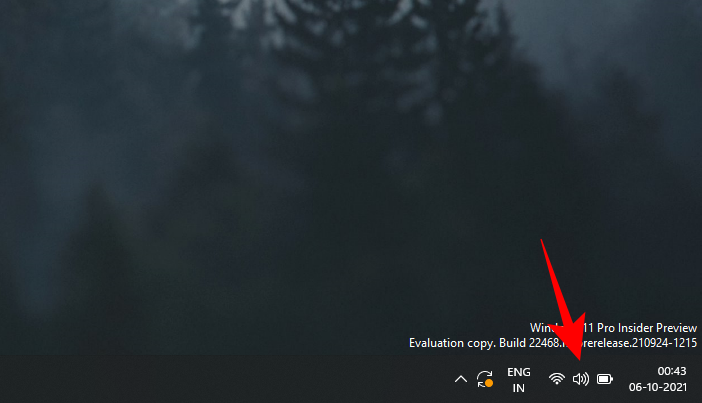
The Action Center, or the Quick Settings Menu as it is also called, has received a major revamp. It is accessible from the right side of the taskbar by clicking on the Wi-Fi, speaker, or battery icon.
This is where you’ll be able to turn on/off Wi-Fi, Bluetooth, Airplane mode, focus assist, and other featured shortcuts.
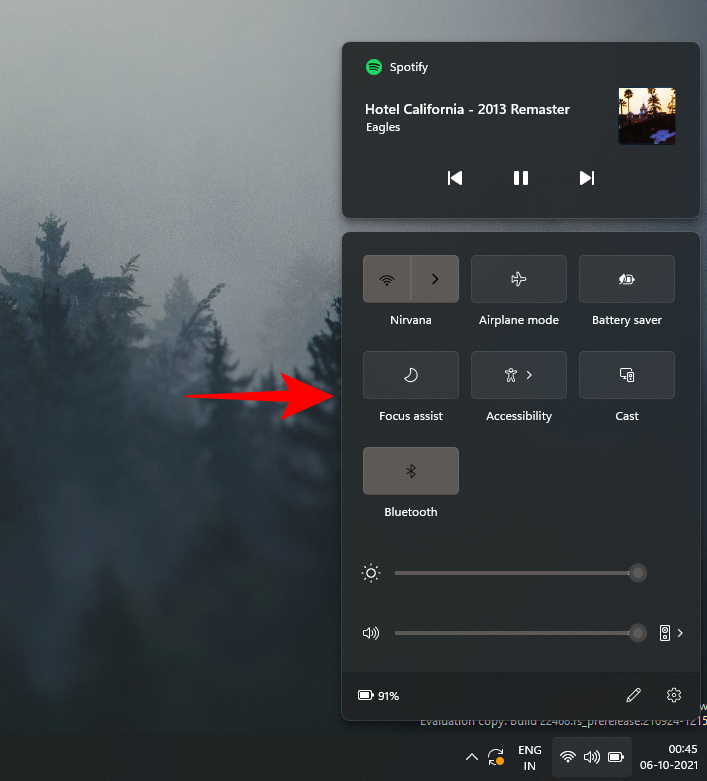
To edit which options appear in the Action Center, refer to our complete guide on How to Add, Remove, or Change Order of Shortcuts in Windows 11 Action Center.
So these were the top 10 things to do that we think you would greatly benefit from when you first boot up to Windows 11.
RELATED


