Windows 11 está a piques de ser lanzado e todos se apresuran a arranxar os seus sistemas para que sexan compatibles co próximo sistema operativo. Windows 11 ten certos requisitos de seguridade que dificultan a instalación do sistema operativo en sistemas máis antigos que executan compoñentes legados. Un bo exemplo disto sería a necesidade de TPM, Secure Boot e UEFI. Estas son todas as opcións do menú de inicio que melloran a privacidade e a seguridade no teu sistema, permitindo que as funcións de seguranza adicionais de Windows 11 funcionen correctamente no teu sistema. Se estás a usar hardware heredado, quizais te atopes con CSM. Que é? E deberías desactivalo? Imos descubrir!
Contidos
Que é CSM na BIOS?
CSM ou módulo de compatibilidade forma parte do teu sistema UEFI. UEFI é unha forma moderna de que o teu hardware se comunique co teu sistema operativo a través da BIOS. UEFI é bastante novo e, no caso de que teñas CSM no teu sistema, é probable que esteas a usar un sistema operativo herdado que actualmente non é compatible co teu sistema UEFI.
Polo tanto, CSM axuda a emular un ambiente de BIOS compatible co teu sistema operativo actual. Desactivar CSM permitirache activar UEFI no teu sistema, o que é necesario para instalar os sistemas operativos compatibles máis modernos.
Como desactivar CSM
Terás que acceder ao menú da BIOS do teu sistema para poder desactivar CSM no teu sistema. Use as guías a continuación dependendo do seu fabricante para comezar. Se o seu fabricante non aparece a continuación, pode utilizar os termos comúns na seguinte sección. Estes son os termos de uso habitual nos menús da BIOS que che permiten desactivar CSM. Podes atopar o mesmo na túa BIOS particular e desactivalos cando máis che guste. Imos comezar.
Gigabyte
Busca CSM no menú BIOS ou Seguridade dependendo da túa placa base e fai dobre clic nel.
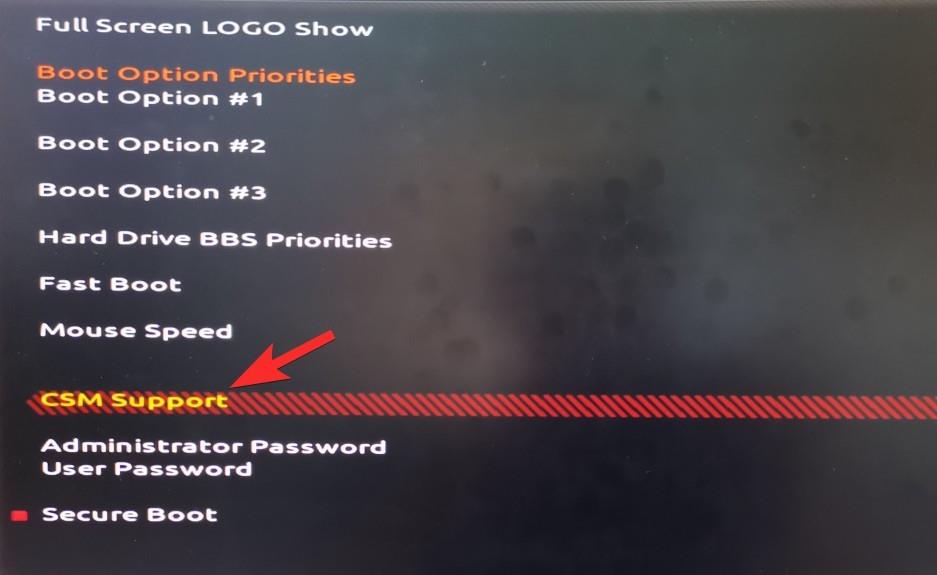
Fai clic en "Desactivado".
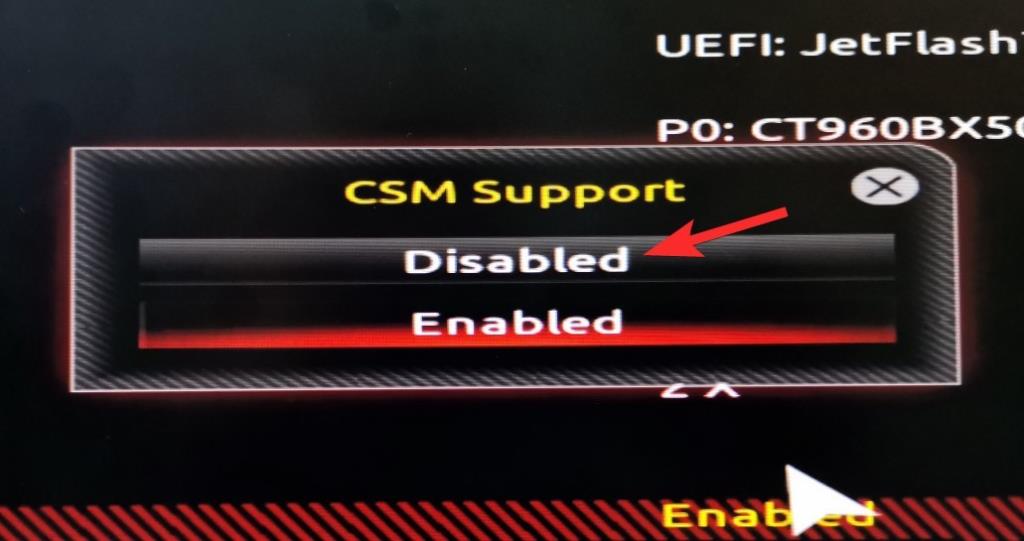
CSM agora desactivarase na túa placa base Gigabyte.
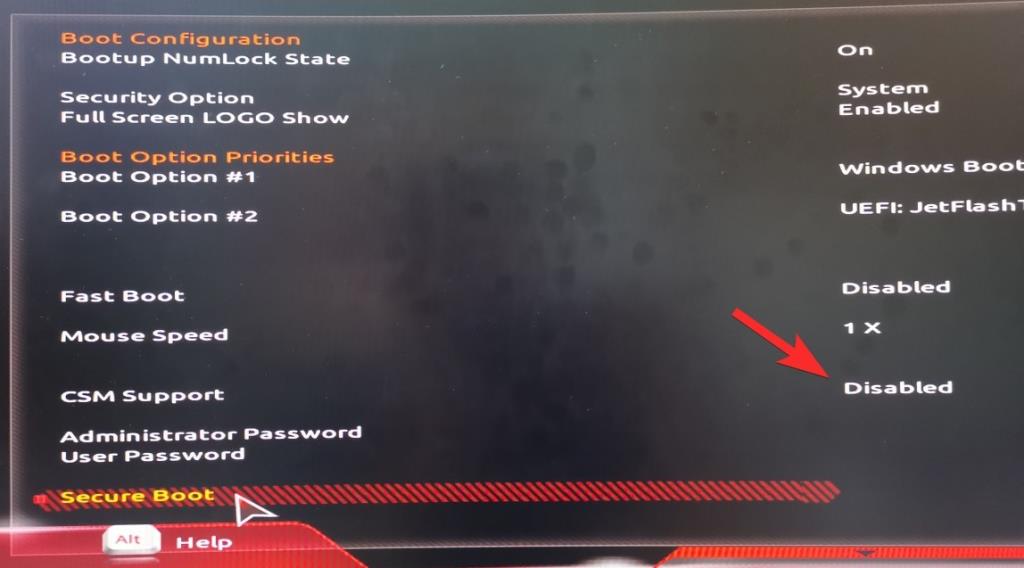
Tamén verá a opción de arranque seguro. Pero espera, aínda non podes activalo. Entón, garda e saia dos cambios e, a continuación, introduza de novo na BIOS cando se reinicie o sistema.
Vaia ao menú de enerxía e seleccione Gardar e saír da configuración.
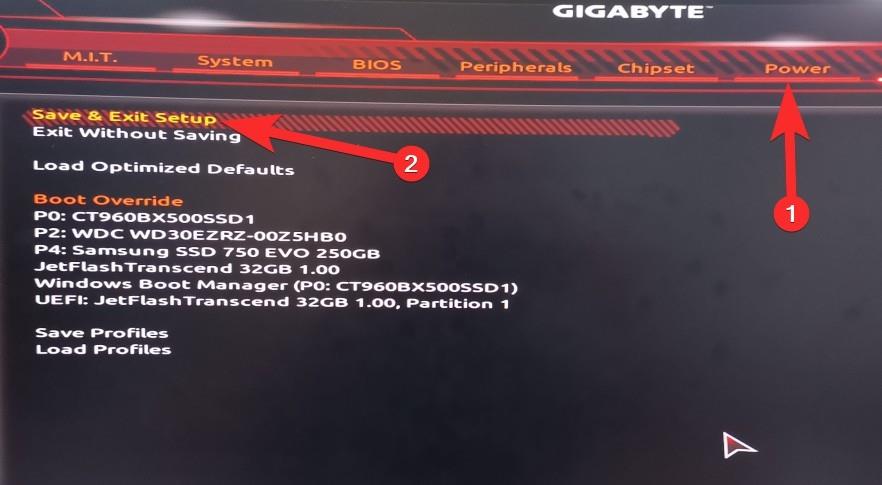
Fai clic en Si para gardar a configuración e reiniciar o sistema. Asegúrate de premer de novo a tecla necesaria para reiniciar de novo a configuración da BIOS.
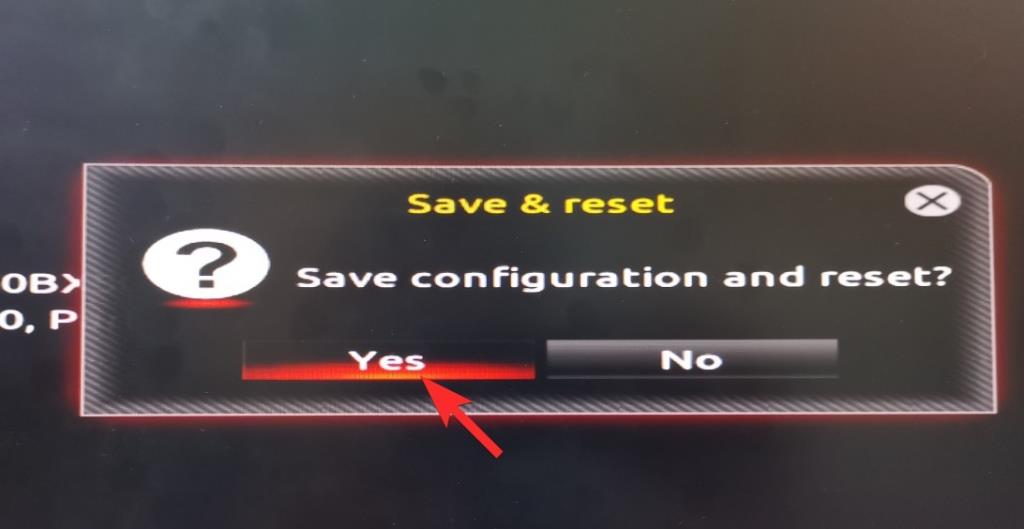
Entón, inicie de novo a configuración da BIOS premendo a tecla borrar ou a tecla F12 que usa o seu PC.
Agora, vai á configuración da BIOS de novo e fai dobre clic en Inicio seguro.
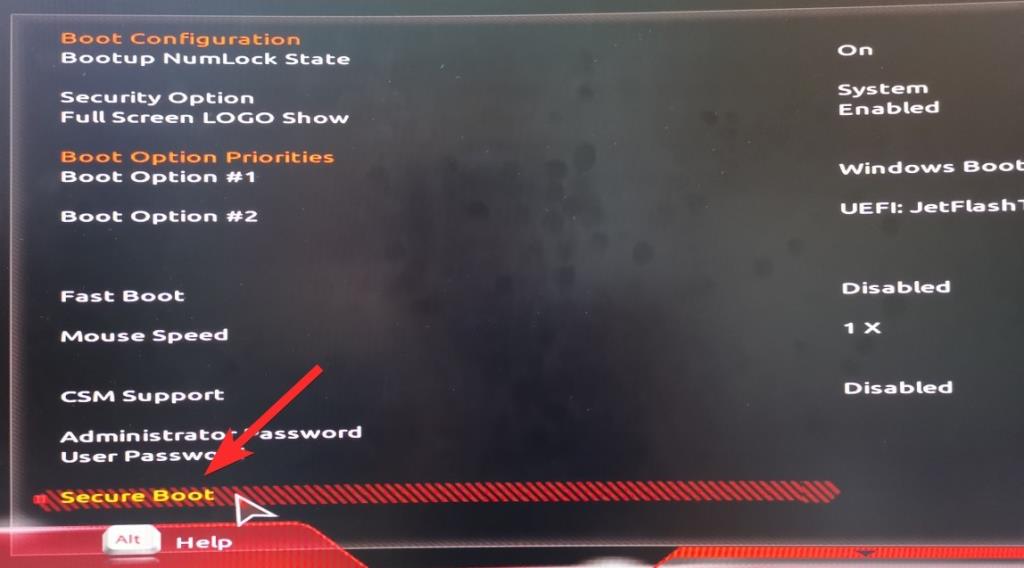
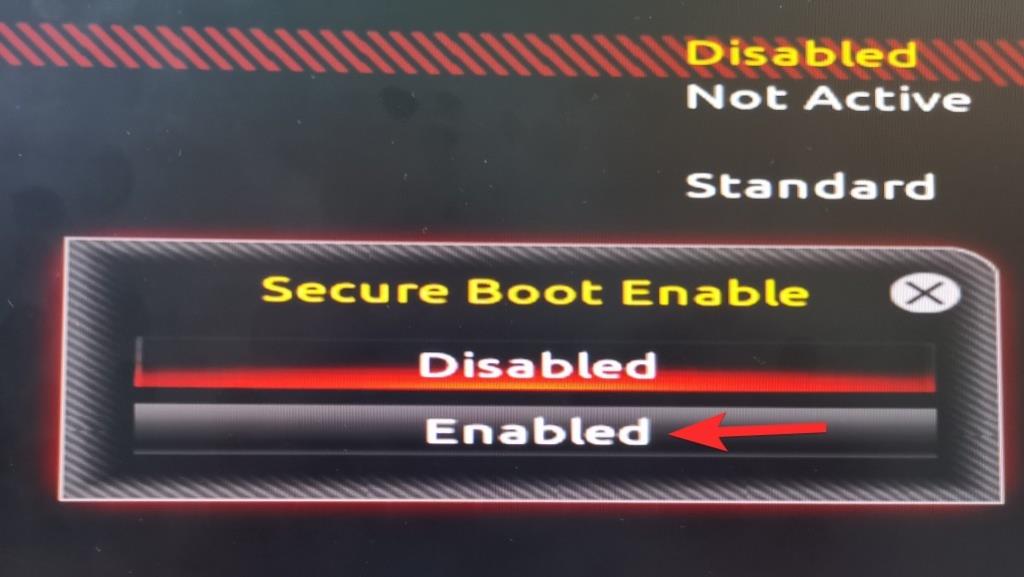
Seleccione Activado.
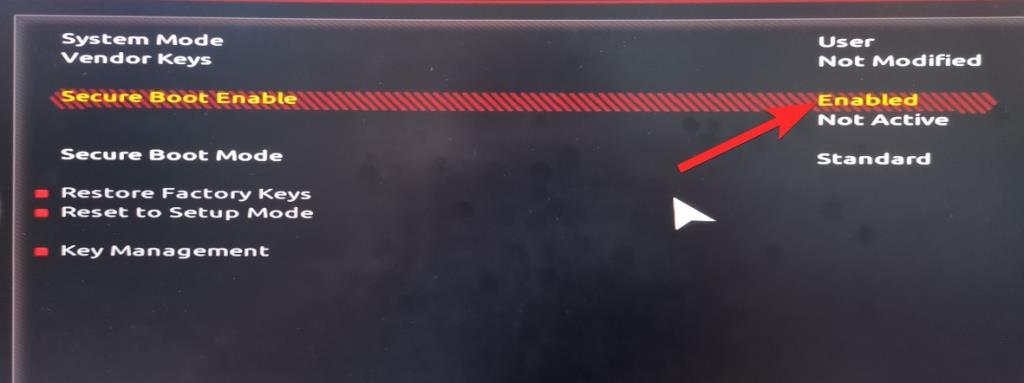
A pantalla da BIOS agora mostrará o arranque seguro como activado.
Volve ao menú de enerxía e selecciona Gardar e saír da configuración.

Fai clic en Si para gardar a configuración e reiniciar o sistema. Asegúrate de premer de novo a tecla necesaria para reiniciar de novo a configuración da BIOS. Si, de novo, xa que tamén necesitamos habilitar TPM.

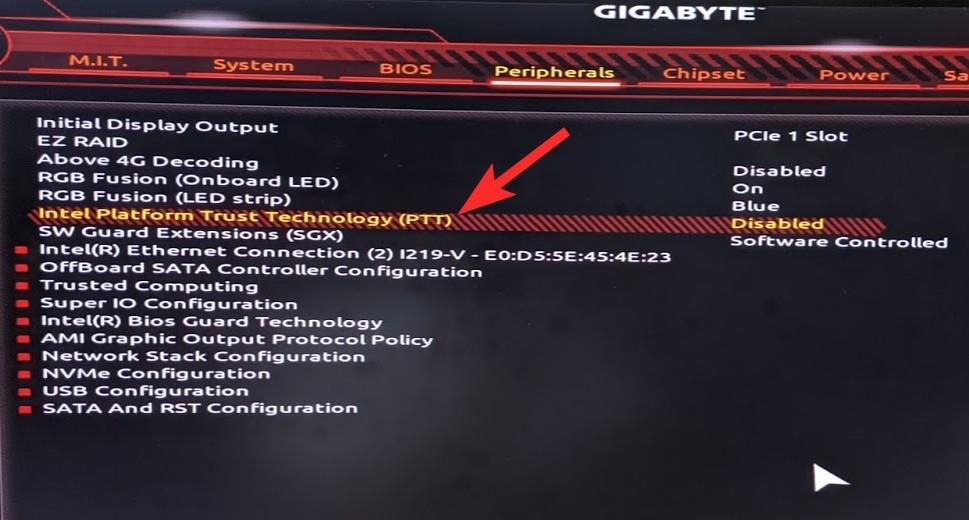
Deixa que o PC se reinicie pero inicie de novo na BIOS. Vaia a Periféricos (iso é o que hai no noso PC) e faga dobre clic en Intel Platform Trust Technology (PTT). Podes ver que está desactivado agora mesmo.
Nota: TPM tamén pode estar co mesmo nome se estás a usar unha placa base de Gigabyte fabricada máis recentemente. Ademais, se non atopas opcións, podes tentar buscar os termos comúns mencionados na seguinte sección.
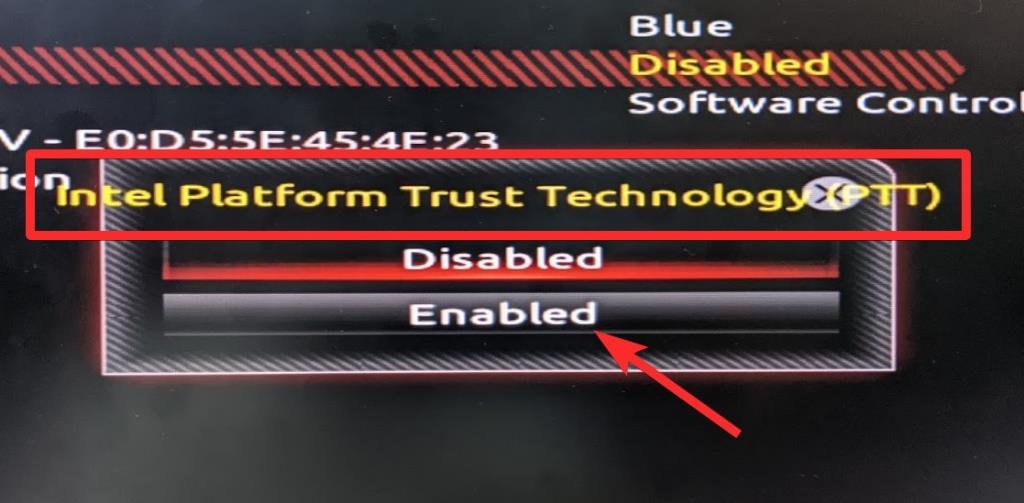
Fai clic en Activado na ventá emerxente.
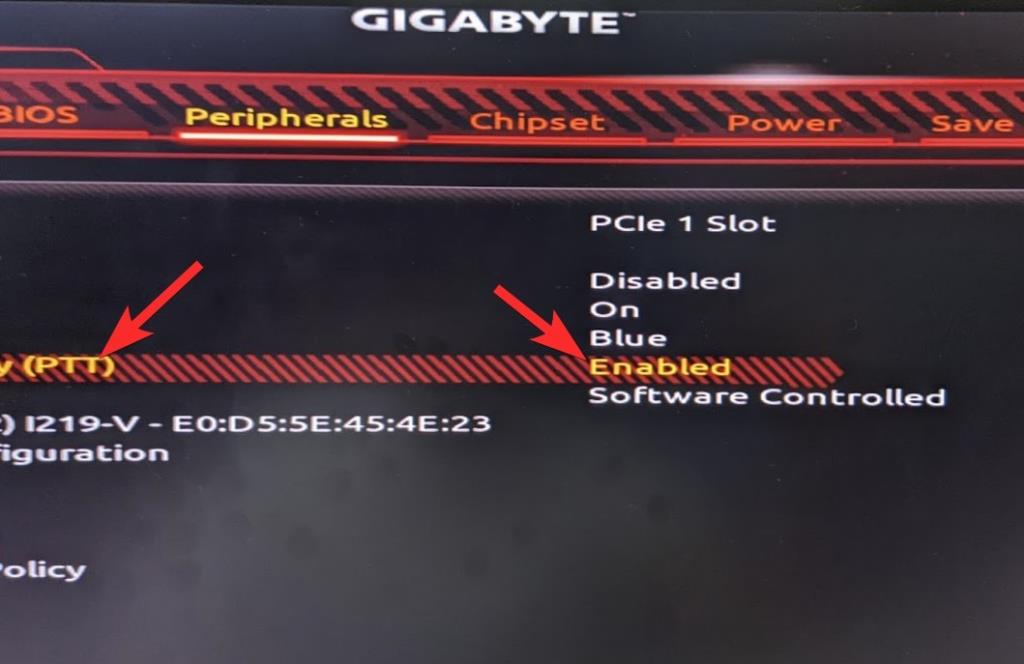
Agora, tamén mostrará o PTT como activado. É dicir, TPM 2.0 xa está dispoñible para o teu PC.
Cando revise a aplicación de comprobación de saúde de Windows 11 agora, debería mostrar que Windows 11 é compatible agora.
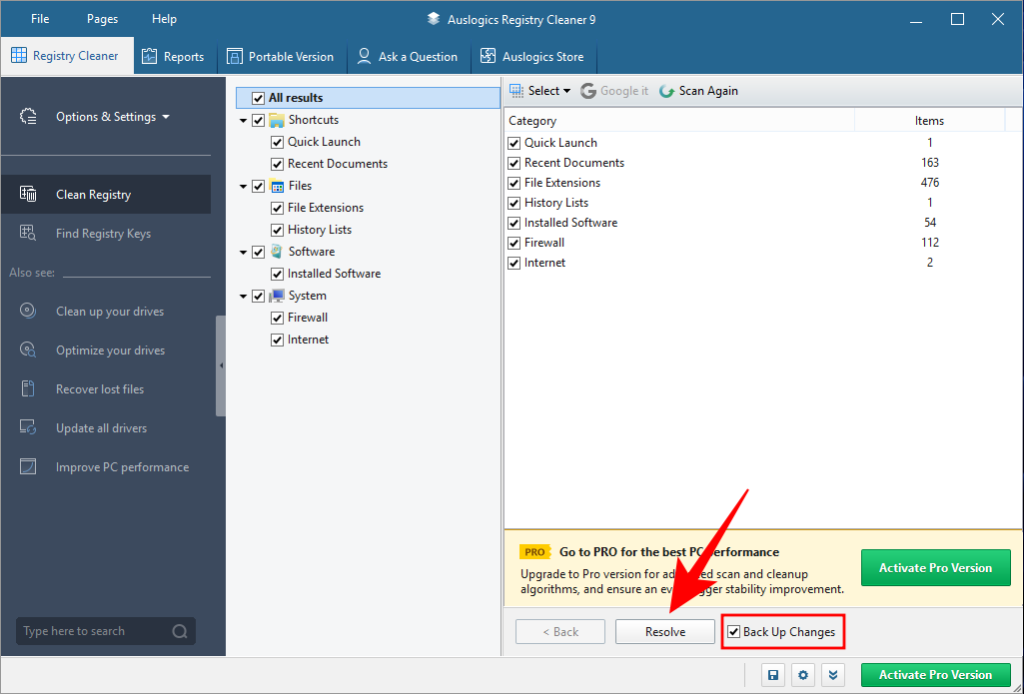
Aquí está a nosa pantalla de Xestión de TPM que obtén co comando TPM.msc. Agora mostra que TPM 2.0 xa está dispoñible. Podes
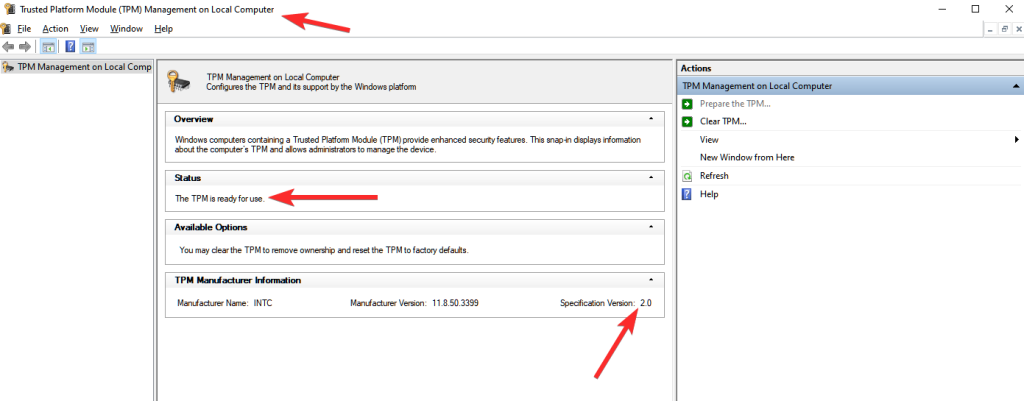
Xa estamos ben para ir. Gardamos e reiniciamos e xa deberías poder instalar Windows 11.
Asus
Os usuarios de Asus poden usar a seguinte guía a continuación. Se tes un sistema preconstruído, podes usar unha placa base ASRock. Se ese é o caso, recomendámosche que verifiques o fabricante da túa placa base antes de continuar coa seguinte guía.
Inicie o ambiente de recuperación e introduza a BIOS no seu PC. Tamén podes reiniciar o teu sistema e premer a tecla correspondente para iniciar o teu BIOS. Os sistemas Asus adoitan usar a tecla F2 ou F8 para iniciar a BIOS.
Unha vez iniciado a BIOS, cambia ao modo "Avanzado" premendo F7 no teu teclado.
Cambia á pestana de arranque na parte superior.
Desprácese cara abaixo e seleccione "CSM (módulo de soporte de compatibilidade").
Agora configura "Lanzar CSM" en "Desactivado".
Cambia á última pestana e selecciona "Gardar e saír".
Confirm your choice and let your PC reboot. You can now boot into your BIOS again and enable Secure Boot on your system. Continue with the steps below to enable Secure Boot or use this guide at a later point when Windows 11 is released to enable Secure Boot on your system.
Biostar
If you have a Biostar motherboard then you can use the following guide to disable CSM on your system.
Enter the BIOS menu on your PC. Biostar motherboards usually use the F12 key to enter the BIOS menu.
Switch to the ‘Boot’ tab once you enter your BIOS menu.
Select ‘UEFI Boot’.
Set it as Enabled.
Once enabled, reboot your system and press the F9 key to enter your Boot menu. You can now select a compatible OS to boot into. Biostar motherboards do not have a dedicated toggle for CSM. You instead get the option to enable UEFI mode. Enabling UEFI automatically disables legacy support which disables CSM on your system. If you are unable to find the UEFI option in the ‘Boot’ tab then we recommend you check the ‘Advanced’ tab instead.
ASRock
Reboot your system and boot into the BIOS menu. ASRock motherboards use the F2 key to enter the BIOS menu during the POST test.
Once you are in the Boot menu, switch to the ‘Boot’ tab by clicking on the same at the top of your screen.
Scroll down and select ‘CSM’.
Set it as ‘Disabled’.
Select ‘Exit’ at the top.
Click on ‘Save and Exit’ and let your PC reboot with the applied changes.
Once rebooted, boot into a compatible OS to continue with your setup process.
MSI
MSI users can use the following guide to disable CSM on their systems. Let’s get started.
Enter the BIOS menu on your MSI system. MSI motherboards usually use the ‘Del’ key during POST to enter the BIOS menu.
Once you are in the BIOS menu, switch to the ‘Boot’ tab at the top of your screen.
Go to ‘Boot mode select’.
Now select ‘UEFI only’.
Note: Legacy enables CSM while UEFI + Legacy allows MSI motherboards to detect and automatically use the optimum settings for your OS.
Press F10 on your keyboard to save the changes and exit BIOS. Your PC will automatically restart at this point. You can now select the desired OS or recovery drive from your boot menu. The boot menu can be entered on MSI systems by using the F11 key during the POST process.
Disable on other boards and units: Common Settings you can look for to disable CSM
If your manufacturer was not listed above then do not worry, entering the BIOS and disabling CSM is a rather simplified process. You need to keep in mind that enabling UEFI will disable CSM automatically and vice versa. This means that if you don’t find a dedicated toggle for CSM, then you can look for the option to enable UEFI on your system instead. Additionally, your motherboard manufacturer could be using other terms to denote CSM on your system depending on your manufacturing date. Here are some common settings that essentially refer to CSM on your motherboard. When you find either of these options, you need to select either ‘Off’, ‘Disabled’, ‘UEFI’, ‘UEFI only’, or ‘No Legacy Support’ for them. Refer to the list below to find the desired CSM settings in your BIOS menu.
- Legacy Support
- Boot Device Control
- Legacy CSM
- Launch CSM
- CSM
- UEFI Boot
- Legacy Boot
- Boot mode
- Boot option filter
- UEFI Priority
- Legacy Boot Priority
We hope this guide easily helped you disable CSM on your system. If you face any issues, feel free to drop some comments below.
Why can’t I find CSM? What do I need?
You need to access your BIOS and have a compatible OS ready to install on your system to disable CSM. CSM usually has a convenient toggle in the BIOS settings which can help you turn it off. Once turned off, UEFI support will be enabled on your motherboard and you will need a compatible OS and BIOS version to manage your system. Additionally, ensure that you have gone through the following checks to ensure that you do not face any issues once you have disabled CSM.
Ensure that you have a compatible OS installed: If you are using a legacy OS then it is likely why you need CSM. We recommend you install a compatible OS ie: Windows Vista or higher on your system to ensure that you can exit the boot environment properly once CSM is disabled.
Ensure that you have compatible hardware: You could be using all modern components on your system and yet face issues when disabling your CSM. Peripherals matter a lot when POSTing your PC hence ensure that you aren’t using legacy components or peripherals with your system, If you’re using an older graphics card, monitor, CPU, mouse, or keyboard, then it could be also the reason why your PC is using CSM instead of UEFI despite being on Windows 10. You might need to upgrade your peripherals before you can disable CSM on your PC without breaking its functionality.
Ensure that your drives use the GPT partition table instead of MBR: UEFI and CSM go hand in hand. If either one is disabled, the other one is automatically enabled (with exceptions). This means that when you disable CSM, your BIOS will automatically resort to UEFI. However, UEFI is only compatible with GPT partition tables. This means that you will need to convert your hard drive to MBR if you wish to disable CSM. It won’t matter if you have a compatible OS installed on an MBR drive. You will need to format your drive in most cases when converting it hence we recommend you perform a full backup before proceeding with the guide.
Ensure that your drives are set up properly: If you are trying to install a new version of Windows to a different drive or wish to dual boot then ensure that you are installing the compatible OS on your drive with the ‘Bootloader’ partition. This will prevent your system from facing mismatched partition table issues where a drive is MBR and the other one is GPT.
Use the guides below to disable CSM on your system. This will help you prepare for the upcoming Windows 11 release.
RELATED:


