Home
» News
»
Cleaning an Air Fryer: Hand Wash, Dishwasher, or Deep Clean – How to Choose the Right Method
Cleaning an Air Fryer: Hand Wash, Dishwasher, or Deep Clean – How to Choose the Right Method
Cleaning an air fryer sounds simple, but there is one important detail that is often overlooked: the same method does not work for all models. Some baskets and drawers can go in the dishwasher, while others must be hand washed. A coated basket also needs to be treated differently than a loose stainless steel rack. Therefore, the best routine is not the most aggressive cleaning, but the method that removes grease and food residue without contradicting the manufacturer's instructions.
This guide helps you choose between hand washing, dishwasher use, soaking, and deep cleaning. The starting point is current instructions from brands including Philips, Ninja, and Instant Pot. When advice differs between models, always prioritize the manual for your specific air fryer.
Which cleaning method is best for your situation?
Situation
Practical First Choice
Important Trade-off
Light grease and crumbs after normal use
Hand wash with warm water, mild dish soap, and a soft sponge
Takes a few minutes but provides good control over coated surfaces
Parts explicitly marked as dishwasher safe
Dishwasher according to manual instructions
Convenient, but does not automatically apply to all baskets, drawers, or accessories
Dried-on food residue
Soaking before hand washing
Takes longer but reduces the need for hard scrubbing
Grease or food residue in the inner chamber
Damp soft cloth or non-abrasive sponge when the appliance is cool and unplugged
The main unit must not be submerged in water
Residue near the heating element
Soft to medium-bristle brush if the manual allows it
Requires caution because a hard brush or metal can damage the surface
Hand wash or dishwasher – which is safest?
If you have not checked the manual, hand washing is the cautious standard choice for loose, coated parts. Philips describes cleaning the pan and basket with warm water, dish soap, and a soft sponge, while also stating that many of their pans and baskets are dishwasher safe. See Philips official cleaning guide for Airfryer.
The difference between models is clear even within the same brand. Ninja states that the drawers for the AF300 series should be hand washed, while the crisper plates can be machine washed. For the AF400 series, however, Ninja states that both drawers and crisper plates can be washed in the dishwasher. Compare Ninja's official AF300 information with Ninja's official AF400 information.
This means it is not enough to ask, "Is an air fryer basket dishwasher safe?" The right question is: "Is the basket for my exact model dishwasher safe, and are there conditions such as placement in the top rack or a specific cycle?" For example, Instant Pot states for certain Vortex models that the basket is safe in the dishwasher's top rack. See Instant Pot's official FAQ.
How to clean your air fryer in 8 steps
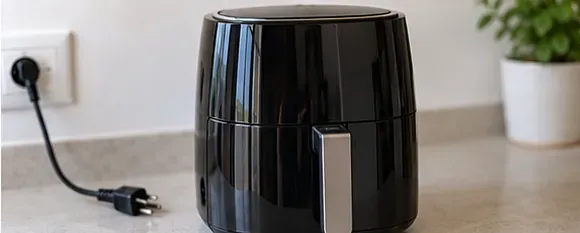
1. Unplug and let the air fryer cool down
Always start by disconnecting the power. Do not clean a hot air fryer. Philips specifies approximately 30 minutes of cooling time in its cleaning guide. The time may vary depending on the model and how long the appliance has been used, so do not touch the heating element to check the temperature.
Step 1: Unplug the air fryer and let it cool completely before you start cleaning.
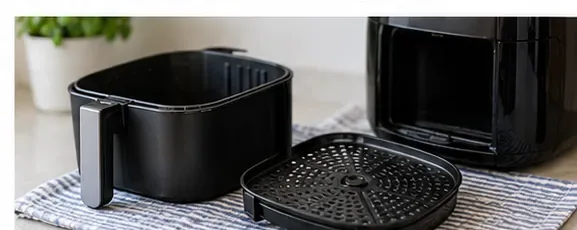
2. Remove the basket, rack, and other loose parts
Take out the basket, drawer, crisper plate, or other removable parts according to the manual. This makes it easier to see where grease and crumbs have accumulated. Avoid disassembling fixed parts that the manufacturer does not describe as user-removable.
Step 2: Only remove the parts intended to be taken out by the user.
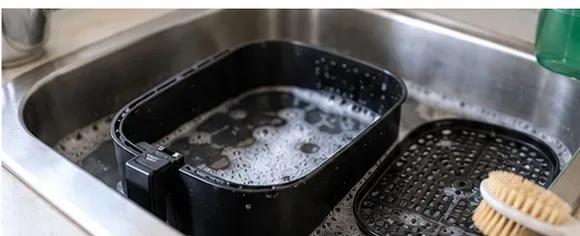
3. Soak when residue is stuck
If food has dried on, soaking is often better than hard scrubbing. Philips recommends warm water and dish soap and describes a five to ten minute soak for stuck-on residue. The advantage is that dirt loosens with less mechanical impact on a non-stick coating. The disadvantage is that cleaning takes a bit longer.
Step 3: Soak stuck-on residue in warm water with dish soap instead of starting with hard scrubbing.
4. Hand wash or rinse the loose parts
Use warm water and regular dish soap. On coated surfaces, you should use a soft sponge or soft dish brush and avoid metal utensils and abrasive cleaning materials. If your manual explicitly allows dishwasher use, you can choose that route instead. Hand washing gives more control; the dishwasher saves time.
Step 4: Thoroughly rinse off dish soap and loose residue from the basket and loose parts.
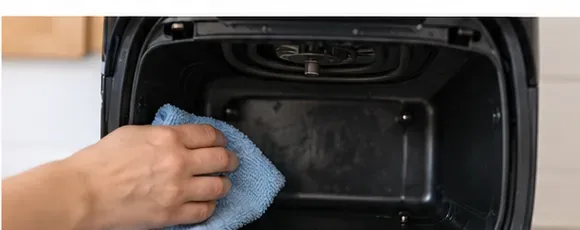
5. Wipe the inner chamber – but never submerge the main unit
The main unit contains electronics and should not be placed in water. When the appliance is cool and unplugged, the inner chamber can be wiped with a damp soft cloth or a non-abrasive sponge. The control panel and exterior are wiped in the same way with a lightly dampened cloth and then dried.
Step 5: Gently wipe the inner chamber when the appliance is cool and disconnected.
6. Does the heating element need cleaning?
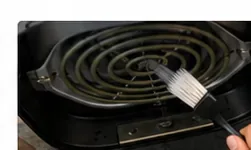
Yes, if there is visible food residue or grease on or around the element – but the method must be gentle. Philips describes a soft to medium-bristle brush for stuck-on residue and advises against steel brushes and hard brushes because the surface can be damaged. On some models, it may be easier to access by turning the appliance over according to the manufacturer's instructions and placing it on a soft surface.
Step 6: Use only a soft or medium-bristle brush at the heating element if the model's manual allows it.
7. Let all parts dry completely
After rinsing, loose parts should air dry or be wiped with a clean towel. Also wipe away moisture from the control panel and contact surfaces. Reassembling everything while water remains in seams and corners is unnecessary; a few extra minutes of drying time provides better control before the next use.
Step 7: Let the basket, insert, and other loose parts become completely dry before putting them back.
8. Reassemble the air fryer and check the result
Reassemble the parts according to the manual. Check that no food residue remains around the basket edges or in the inner chamber and that the parts fit correctly. If the manufacturer explicitly recommends a short empty run after cleaning the heating element, you can follow that instruction; do not do it as a universal rule for all models.
Step 8: When everything is clean, dry, and correctly assembled, the air fryer is ready to be used again.
What do you do with really stubborn grease stains?
Start with the least aggressive method: warm water, degreasing dish soap, and soaking. Philips states that a stronger liquid degreaser can be used on the pan or basket if regular dish soap is not enough, but you must follow the instructions on the product and your manual. This is a better next step than immediately going in with steel wool, scouring powder, or metal tools.
If you have a non-stick coating, the practical trade-off is simple: more mechanical force can remove dirt faster, but it also increases the risk of scratching or damaging the surface. Softer cleaning sometimes takes longer, but is closer to the methods that manufacturers themselves describe.
Baking soda, vinegar, or lemon – good home remedy or unnecessary risk?
There is no single home remedy that can be recommended for all air fryers. Some manufacturers describe specific methods for certain models, while others primarily specify dish soap and soft cleaning. Therefore, it is wise not to pour acids, alkaline mixtures, or other cleaning agents into the appliance just because the method works on a baking sheet or sink.
If the manual explicitly allows a certain method, you can follow it. Otherwise, warm water, regular dish soap, soaking, and a non-abrasive sponge are the more predictable first choice. This applies especially to coated baskets and parts where the material is not always clearly indicated.
Can parchment paper or air fryer liners reduce the need for cleaning?
They can catch some crumbs and grease, but they are not a universal solution and do not replace cleaning. Philips advises against parchment paper and aluminum foil in many of its Airfryer models because covering the bottom of the basket can impair airflow. Loose paper without food on top can also be sucked toward the heating element and pose a fire risk. See Philips Swedish support information on parchment paper and aluminum foil, published on October 16, 2024.
If your own model has an approved liner accessory, it can be a practical choice. Otherwise, regular cleaning of the basket and pan is a safer basic setup than blocking airflow with an accessory that is not approved.
How often should an air fryer be cleaned?
For the basket, pan, and loose parts, cleaning after every use is the clearest recommendation in the official instructions from both Philips and Ninja. This reduces the amount of dried-on grease that must be removed later. Philips also states that grease in the pan can contribute to white smoke during later cooking. See Philips Swedish troubleshooting information on white smoke.
A deeper cleaning of the inner chamber and heating element, however, needs to be guided by what you actually see and by the model's manual. If you cook fatty foods often, residue can build up faster. If the inside is clean, there is no point in scrubbing a sensitive area just to follow an arbitrary weekly schedule.
Which mistakes are most important to avoid?
Assuming all parts are dishwasher safe. Check the model number and the manual.
Using steel wool, metal utensils, or hard brushes on coated surfaces. This can damage the surface layer.
Cleaning the appliance while it is still hot or plugged in. Let it cool down and unplug it first.
Submerging the main unit in water. Instead, wipe it with a damp cloth.
Using liners that block airflow. Follow the manufacturer's rules for your specific model.
Ignoring grease around the heating element. Visible residue may need to be removed gently with a method approved by the manual.
A simple routine that suits most users
After regular cooking, it is often enough to let the appliance cool, take out the basket and insert, empty crumbs and grease, and then hand wash the loose parts. If the manual explicitly says the parts are dishwasher safe, you can choose machine washing when convenience is more important. When residue is stuck, choose soaking before harder cleaning. Visible dirt in the inner chamber or around the heating element justifies a more thorough cleaning, but still with soft tools and according to the model.
So there is no universal "best" method for cleaning an air fryer. The best choice is the one that matches the dirt level, the material, and your exact model. With this principle, you get a cleaner appliance without making the cleaning more complicated or more aggressive than it needs to be.