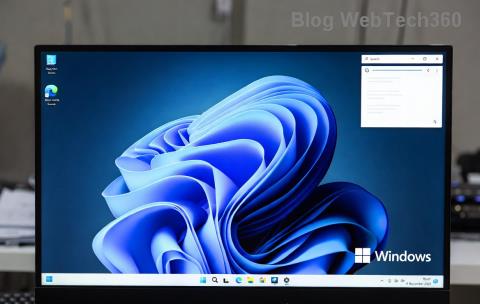
Виндовс 11 је прилично популаран откако је најављен пре неколико месеци. Инсајдери и бета тестери имају много позитивних ствари за рећи, а нови кориснички интерфејс и функције изгледа добро одговарају свима. Као такав, Виндовс 11 долази са многим променама постојећих функција у ОС-у међу којима је и нова Виндовс претрага. Претрага је сада свеобухватнија, бржа и ефикаснија. Ако желите да користите Виндовс Сеарцх, ево свега што треба да знате о томе. Хајде да почнемо.
Садржај
Шта је ново у Виндовс 11 претрази?
Виндовс 11 долази са мноштвом побољшања у оквиру претраге, међутим, нема много приметних промена у спољашњем раду Виндовс претраге. Ипак, можете се радовати следећим новим променама са Виндовс Сеарцх-ом.
- Нова икона на траци задатака
- Претрага наменског типа датотеке
- Подешавања претраге доступна из менија Старт
- Подршка за претрагу у облаку у комбинацији са услугама складиштења у облаку
- Свеобухватне опције индексирања
- Бржи резултати
- Ефикасно индексирање са малом потрошњом батерије на мобилним уређајима
И још. Док будете истраживали Виндовс Сеарцх у оперативном систему Виндовс 11, наћи ћете ситне нове детаље у сваком аспекту ове функције.
Повезано: Како делити датотеке и фасцикле на Виндовс 11
Виндовс 11 Пречица на тастатури за претрагу
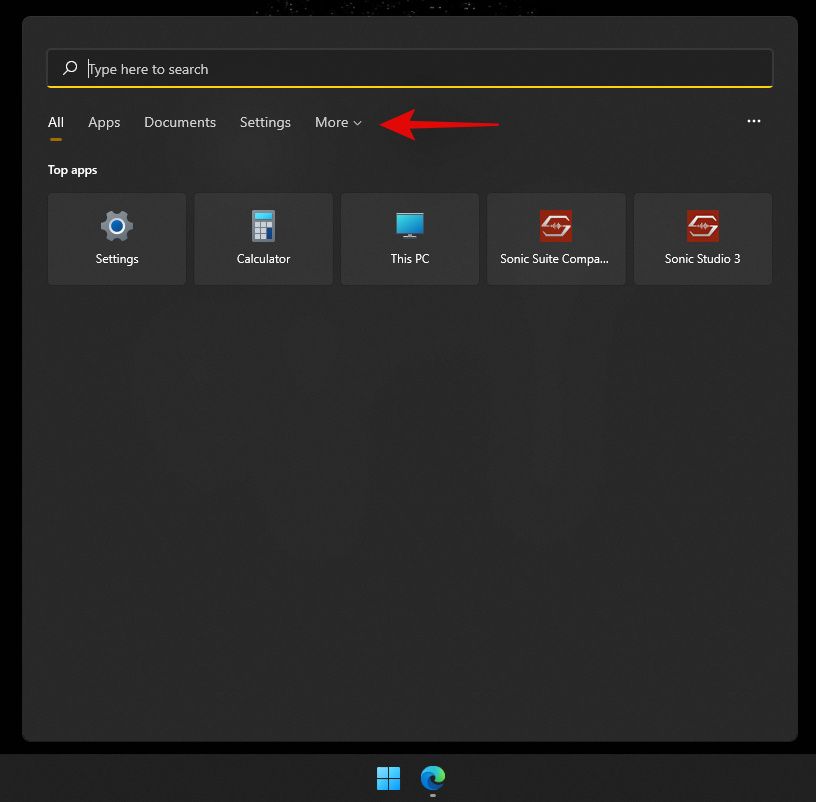
Можете да користите Windows + Sна тастатури да покренете Виндовс претрагу директно на вашем систему. Можете да наставите да куцате да бисте започели претрагу у систему за релевантне апликације, датотеке и фасцикле. Поред тога, притиском на Ентер на тастатури отвориће се први резултат претраге на рачунару.
Повезано: Како омогућити виртуелизацију у БИОС-у на Виндовс 11 или 10
Како се користи Виндовс претрага
Можете да користите Виндовс претрагу користећи следеће методе у наставку. Сваки метод има своје предности и предности, тако да у зависности од датотеке коју тражите, можете користити једну од метода у наставку.
Притисните тастер Виндовс на тастатури да бисте отворили мени Старт. Такође можете кликнути на икону на траци задатака.
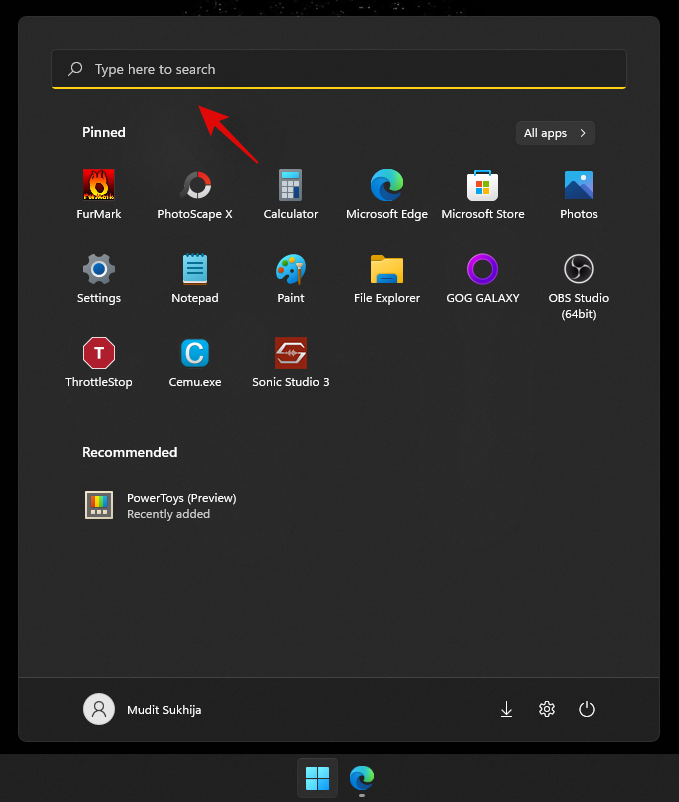
Када отворите, почните да куцате име датотеке/програма који тражите, датотека/фолдер/програм би се аутоматски требао појавити у резултатима претраге. Ако не видите своју датотеку на врху, покушајте да кликнете на једну од категорија у наставку да бисте проширили резултате претраге.
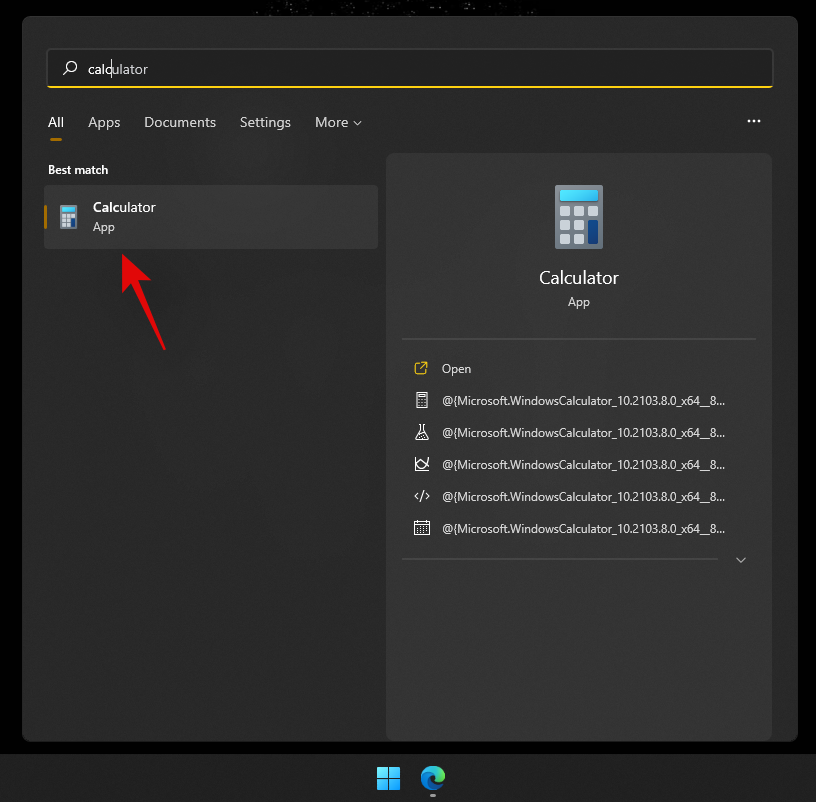
Када пронађете, кликните на резултат претраге да бисте га отворили. Такође можете кликнути на стрелицу да видите више детаља о томе. И то је то! Сада ћете користити Виндовс претрагу из менија Старт.
Повезано: Како ажурирати управљачке програме на Виндовс 11
Коришћење пречице на тастатури
Притисните Windows + Sна тастатури да отворите Претрага. Сада пређите на жељени тип датотеке ако је потребно.
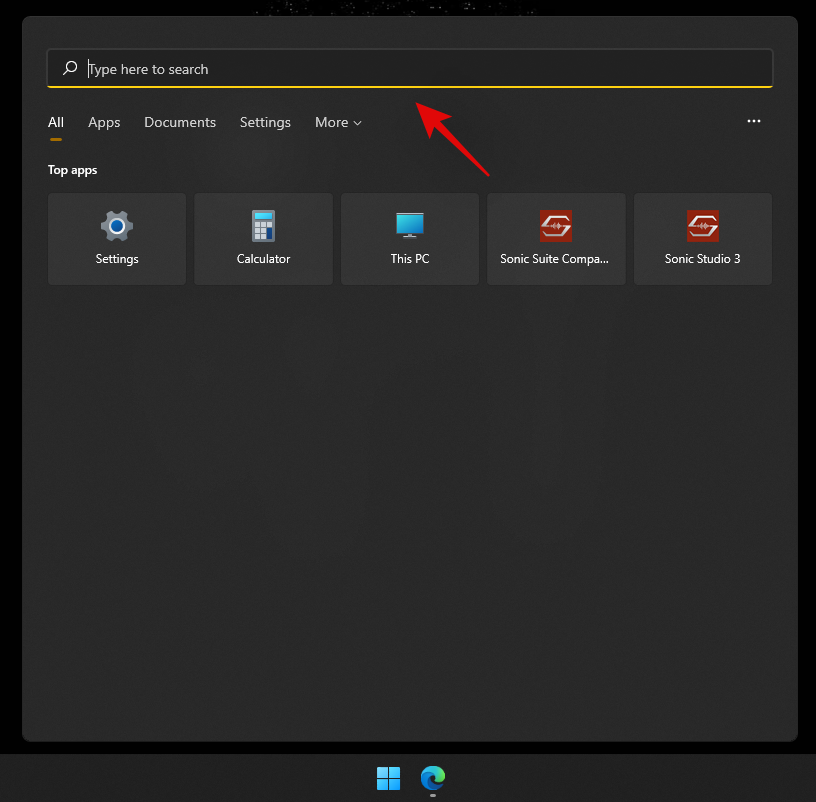
Унесите термин за претрагу. Кликните на оквир за текст ако је потребно.
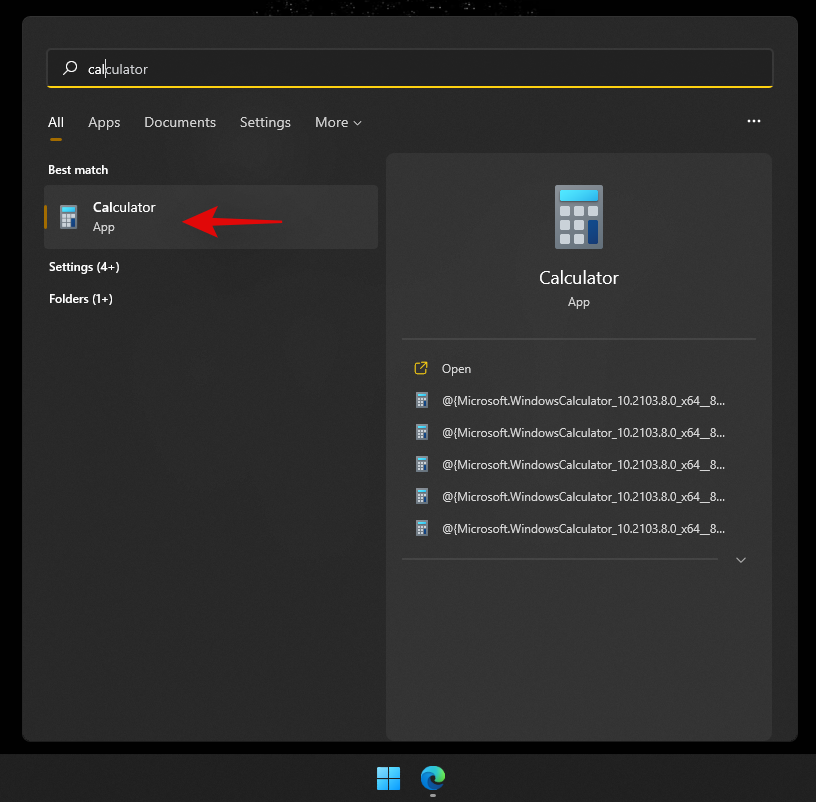
Виндовс ће сада тражити вашу датотеку/фасциклу и резултати ће бити приказани на вашем екрану. Можете да кликнете и проширите категорије испод да бисте видели више резултата.
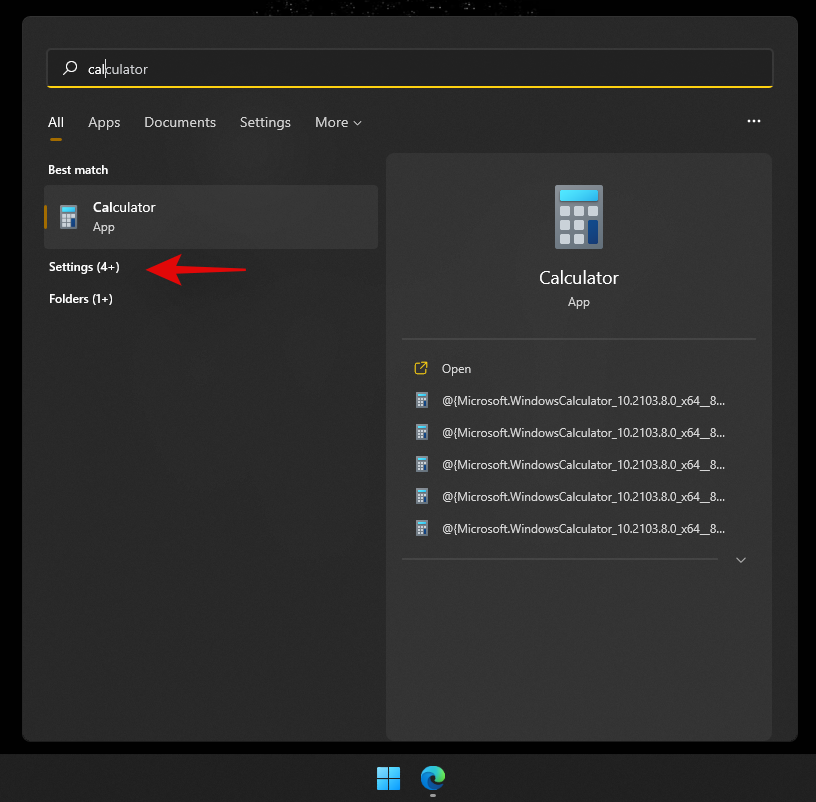
Поред тога, ако желите да видите више детаља о датотеци или програму, можете кликнути на стрелицу поред њега. Сада ћете користити Виндовс претрагу користећи пречицу на тастатури.
Користећи Филе екплорер
Притисните Windows + Eна тастатури да отворите Филе Екплорер. Идите до диск јединице/директоријума/фасцикле коју желите да претражите. Када отворите, кликните на поље за претрагу у горњем десном углу екрана.
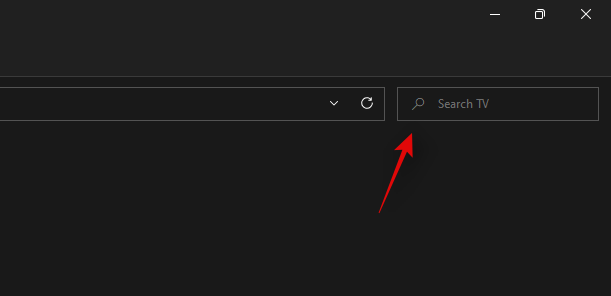
Сада унесите термин за претрагу и притисните Ентер на тастатури.
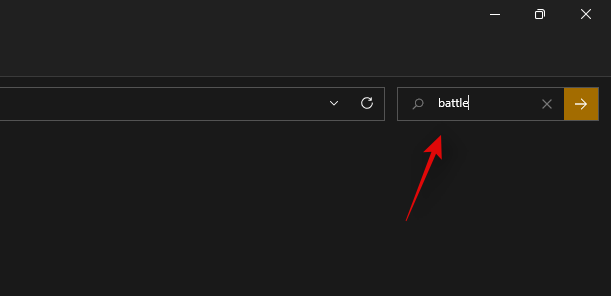
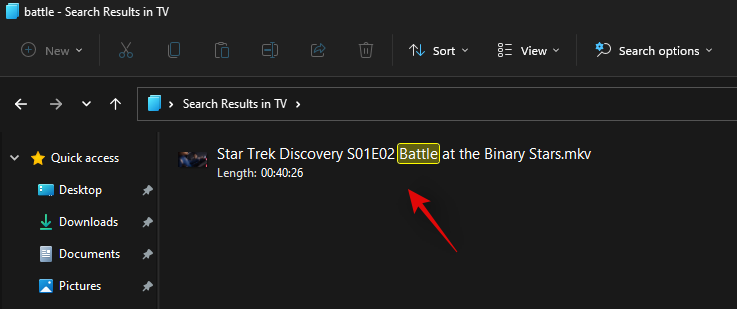
Виндовс ће сада претражити тренутни директоријум за ваш термин за претрагу, а затим ће приказати све резултате на екрану. Сада можете кликнути и покренути датотеку.
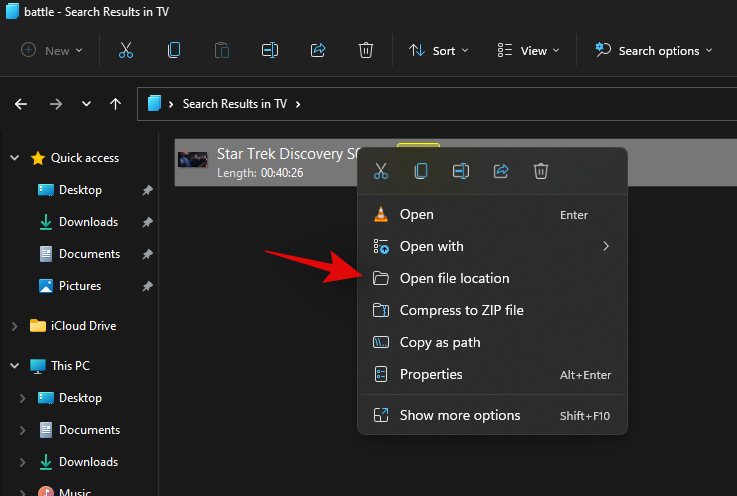
Такође можете да кликнете десним тастером миша на њу и изаберете „Отвори локацију датотеке“ да бисте посетили њен тренутни директоријум на вашем локалном складишту.
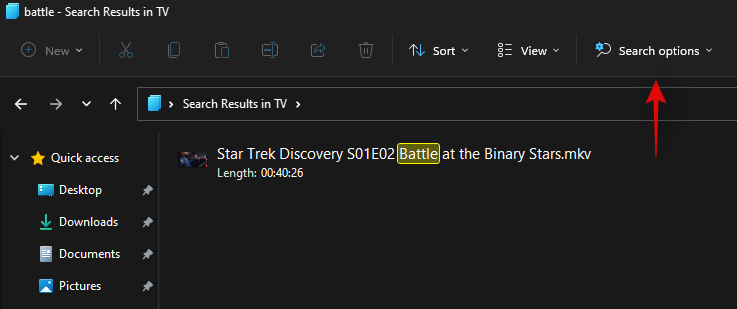
Поред тога, можете користити падајуће стрелице на врху да сортирате резултате претраге како бисте лакше пронашли датотеку/фасциклу/програм.
И то је то! Сада ћете користити Виндовс претрагу преко Филе Екплорер-а.
Како повећати индексирање за Виндовс Сеарцх
Виндовс претрага ће подразумевано тражити само датотеке и термине за претрагу у изабраним директоријумима и путањама. Ове подразумеване путање покривају најчешће директоријуме у оперативном систему Виндовс као што су мени Старт, документи, музика, слике и још много тога. Ако желите да повећате обим индексирања у оперативном систему Виндовс 11, можете користити водич у наставку да бисте започели.
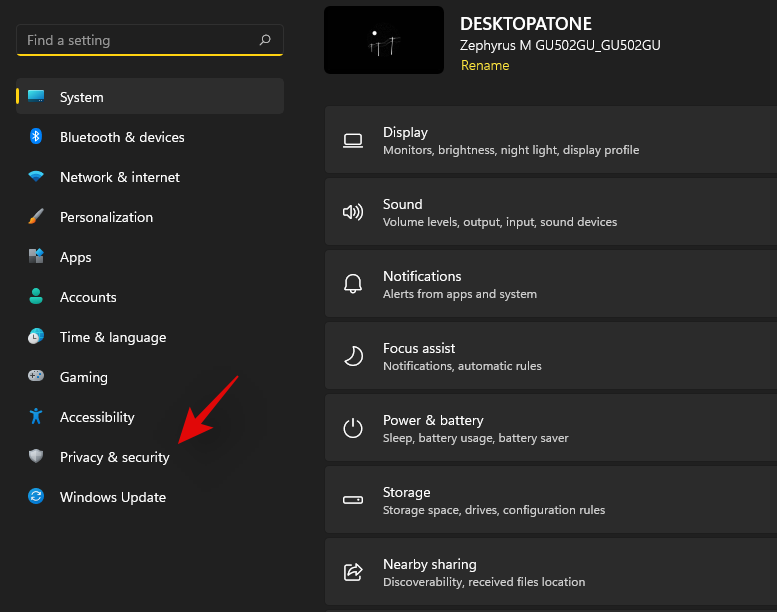
Притисните Windows + iна тастатури да бисте отворили апликацију Подешавања. Сада кликните на „Приватност и безбедност“ са леве стране.
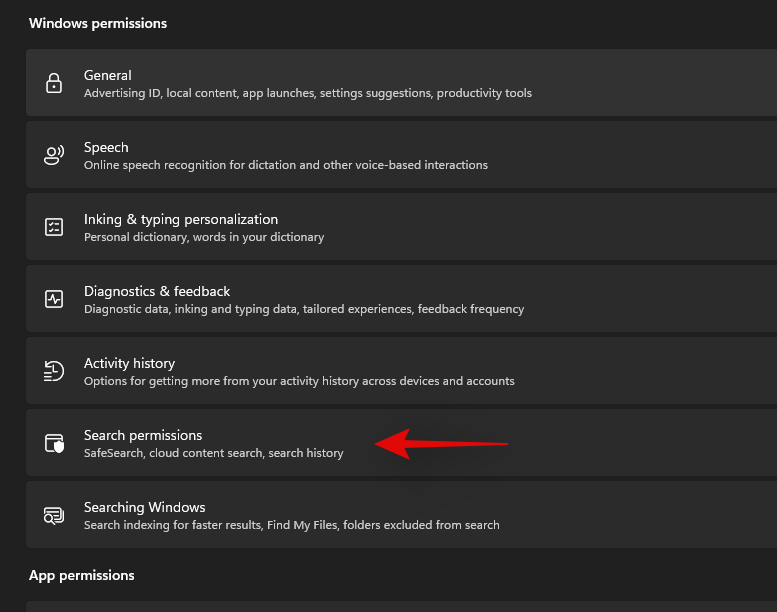
Кликните на 'Сеарцхинг Виндовс' на десној страни.
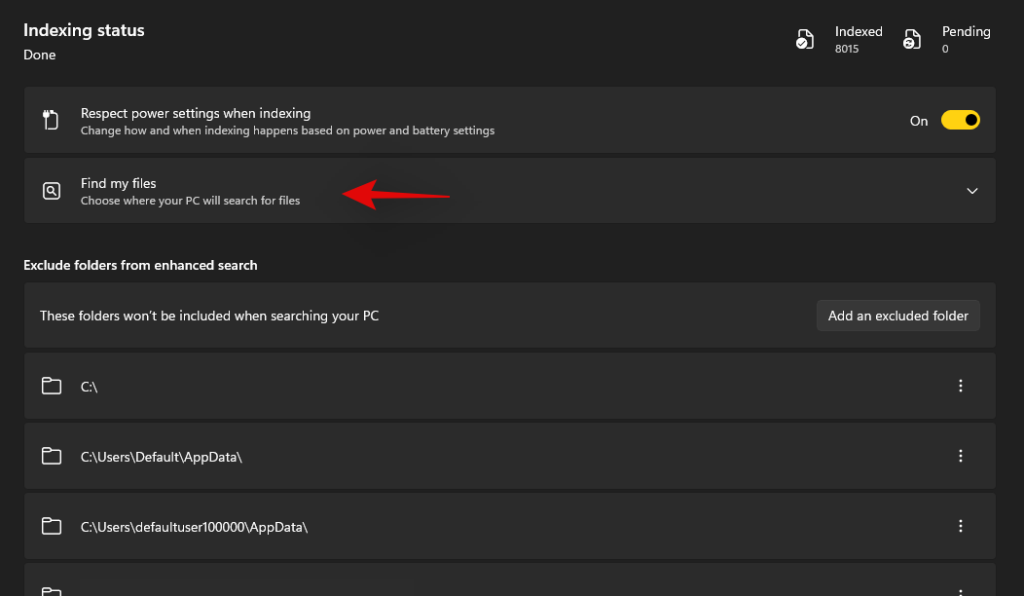
Кликните и проширите „Пронађи моје датотеке“.
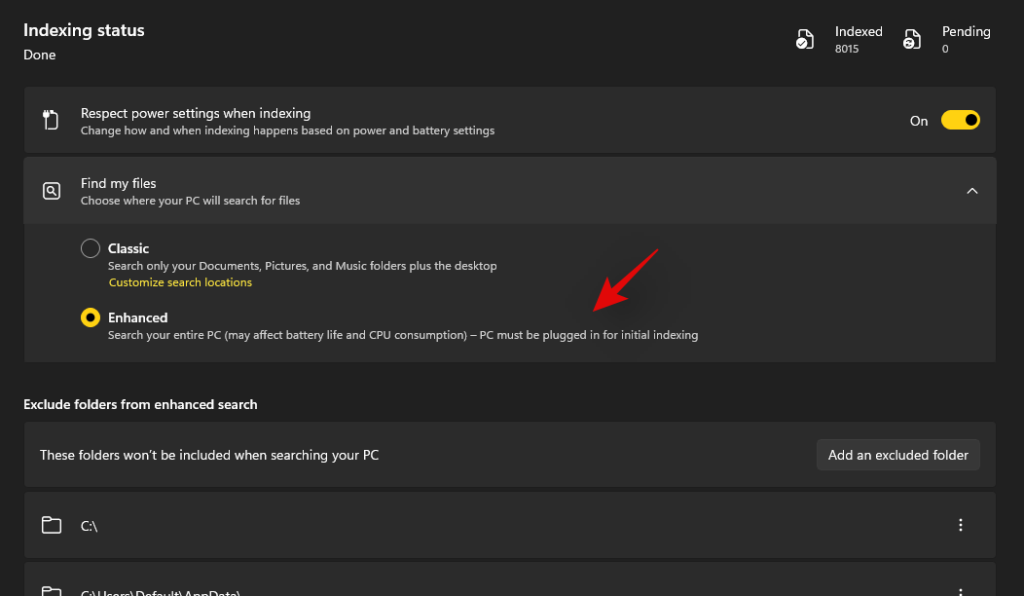
Изаберите „Побољшано“.
Сада, ако желите да искључите било коју фасциклу из индексирања, кликните на 'Додај изузету фасциклу'.
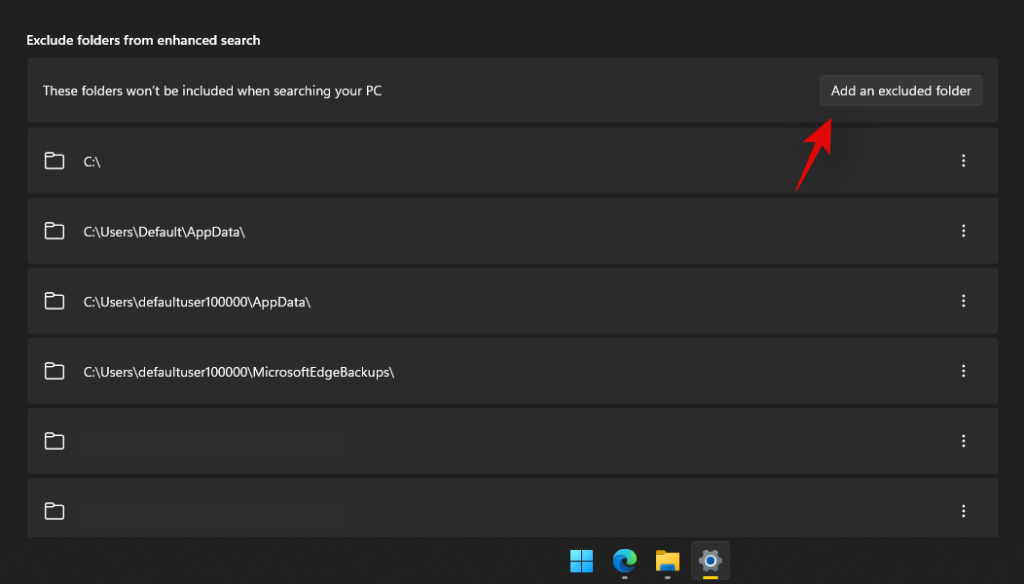
Напомена: Виндовс ће подразумевано додати неке фасцикле. Препоручујемо да наставите да искључујете ове фасцикле како бисте избегли непотребно коришћење ресурса за индексирање системских датотека.
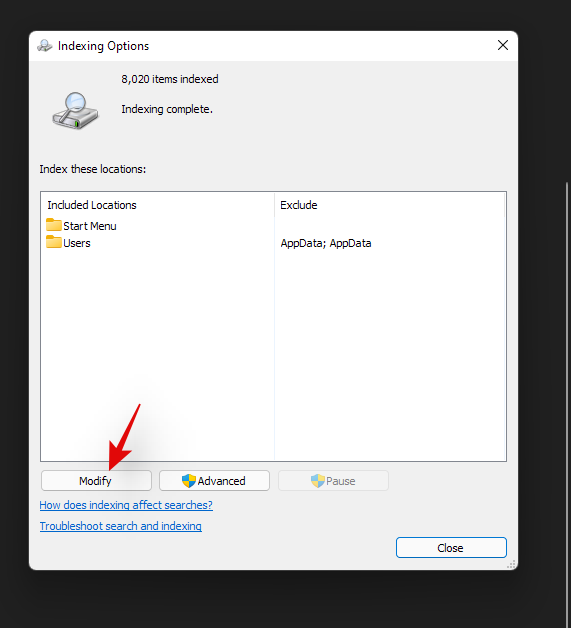
Када искључите све фасцикле, сада можемо да почнемо да индексирамо све ваше дискове. Кликните на „Напредне опције индексирања“ на дну.

Кликните на 'Измени'.
Означите поља за своје дискове сада.
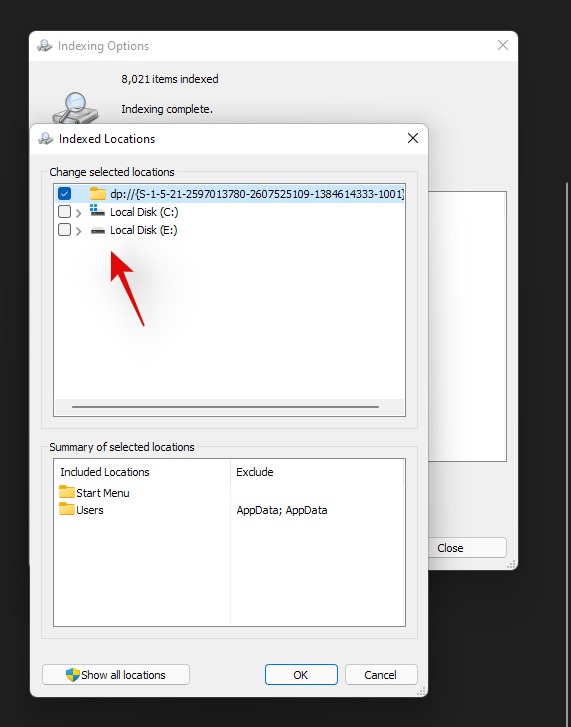
Кликните на 'У реду' када завршите.
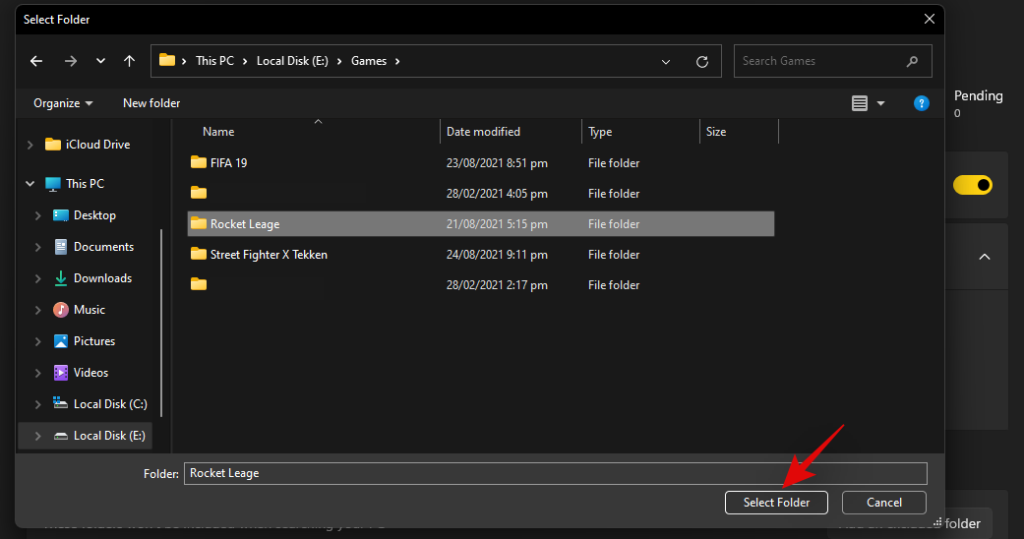
Кликните на 'Затвори'. И то је то! Сада ћете повећати своје локације за индексирање у оквиру Виндовс Сеарцх-а. Ако користите лаптоп, ваше нове локације ће бити индексиране када се јединица повеже на напајање.
Повезано: Како креирати тачку враћања у Виндовс 11
Користите опције претраге
Алати за претрагу већ неко време постоје у Филе екплорер-у и омогућавају вам да много ефикасније управљате резултатима претраге. Ово вам може помоћи да пронађете датотеке чији се назив не сећате и запамтите само неколико детаља о њима. Алатке за претрагу су сада преименоване у „Опције претраге“ у оперативном систему Виндовс 11 и уместо тога добијате падајући мени за своје опције. Почните тако што ћете истражити своје опције и потражити термин у Филе Екплорер-у као што бисте иначе радили. Када се резултати претраге прикажу, требало би да пронађете „Опције претраге“ на врху екрана. Сада користите следеће опције да бисте у складу са тим филтрирали резултате претраге.
- Све фасцикле: Претражите све фасцикле на тренутној диск јединици/партицији за ваш термин за претрагу.
- Тренутни фолдер: Претражујте само тренутни фолдер за свој термин за претрагу.
Такође можете да диктирате како ће се ваши резултати претраге сортирати. Ово вам може помоћи да пронађете велике датотеке или датотеке на основу типова датотека. Користите једну од опција у наставку
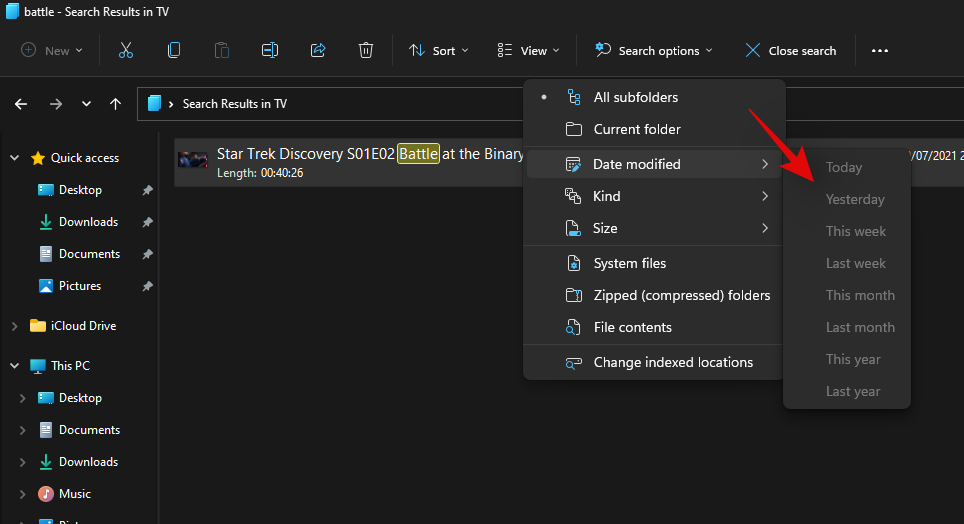
- Датум измене: Користите ову опцију да сортирате своје резултате на основу времена када су направљени у вашем локалном складишту.
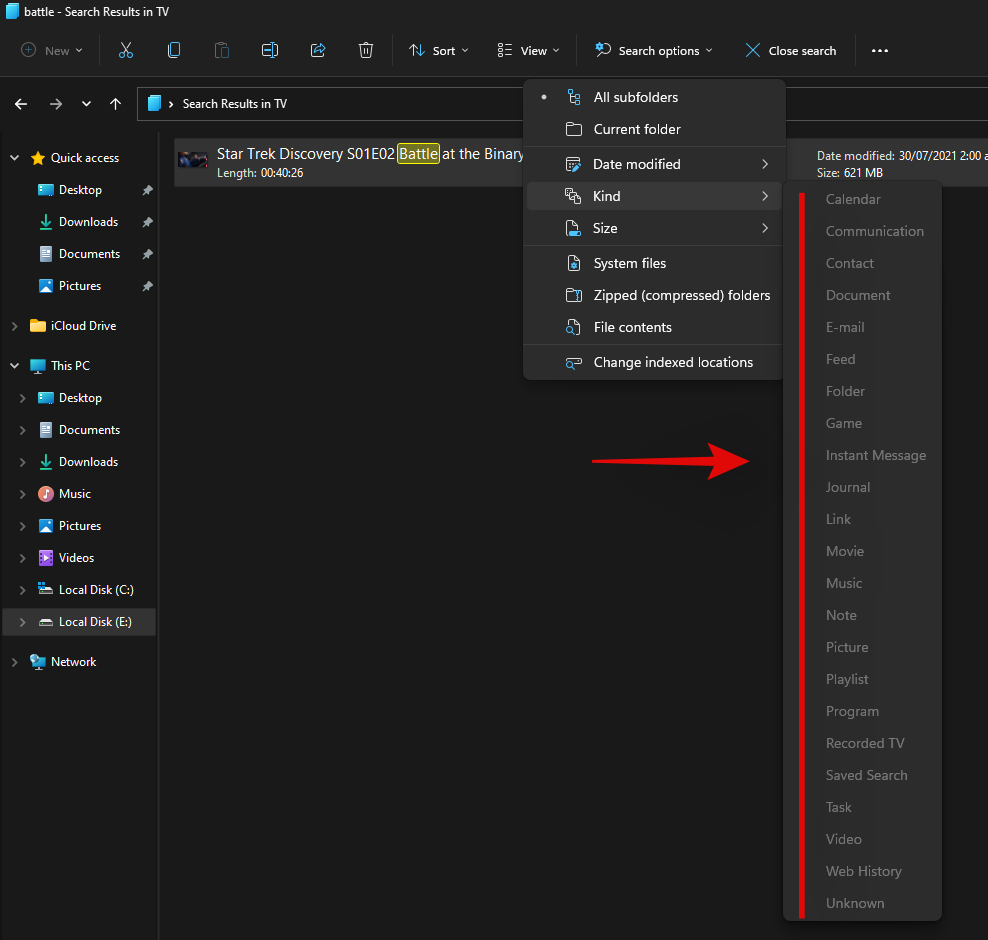
- Врста: Ову опцију можете користити да сортирате датотеке по врсти. Можете тражити датотеке календара, фасцикле, игре, слике, музику и још много тога. Можете бирати између преко 23 различите врсте датотека да бисте сортирали резултате претраге.
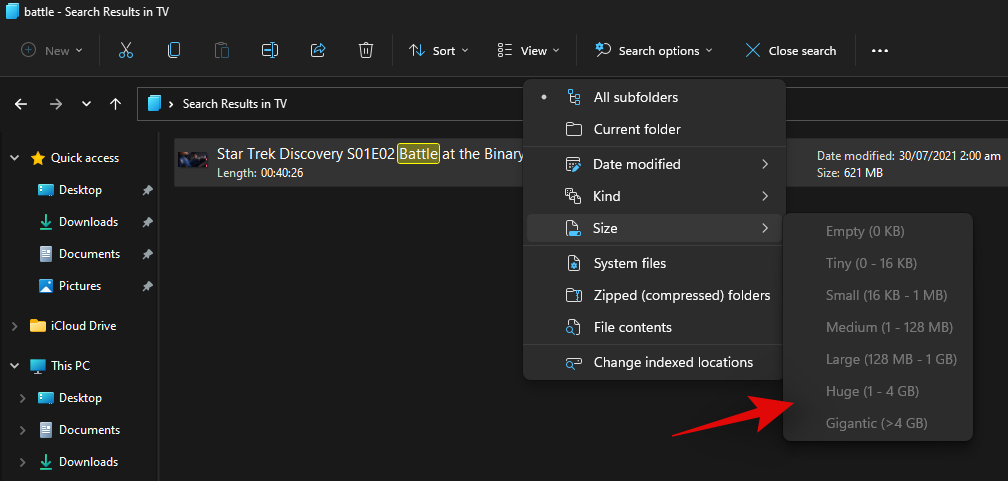
- Величина: Користите ову опцију за филтрирање датотека на основу њихове величине. Добићете следеће опције за избор.
-
- Празно: 0кб
- Мали: 0 кб до 16 кб
- Мала: 16 кб до 1 МБ
- Средњи: 1МБ до 128МБ
- Велики: 128МБ до 1ГБ
- Huge: 1GB to 4GB
- Gigantic: Files greater than 4GB in size
Additionally, you get the following more options to filter your search results. These options will dictate where and which files will be searched by Windows. Simply click on the option to activate or deactivate it.
- System files
- Zipped (compressed) folders
- File contents
And that’s how you can use Search Options in Windows 11 to your advantage. We have a few more tips to help you make the most of Windows Search in Windows 11. You can use the section below to get started.
Related: How to Uninstall Apps on Windows 11
Tips to use Windows Search to your advantage
Windows Search has a few certain hidden shortcuts and key terms that can directly help you filter or sort your search results depending on your preferences. Here are a few tips to help you get the most out of Windows Search on Windows 11.
Find large files
You can find large files on a drive or in a folder easily by using the command ‘size:’. You can then use one of the terms from your Search Options to filter your files and display them based on their size. For example, if you wish to search for files larger than 4GB in size in the current directory then you can use the following command.
size:gigantic
Similarly, you can further filter your search results using Search Options to identify large movies, pictures, calendar files, games, or more taking up space on your PC.
Find file types
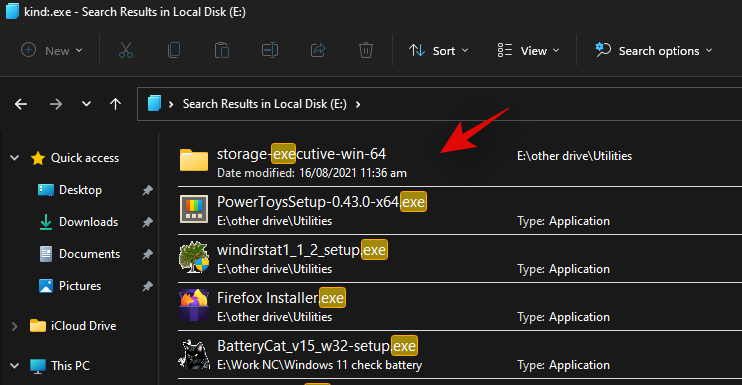
Similar to the command above, you can use the ‘kind:’ parameter to find certain files in the current directory. The ‘kind’ parameter will allow you to look for calendar files, text documents, pictures, videos games, and more. When using the kind parameter this way you are not restricted to Windows’s predefined categories, instead you can define specific file extensions as well to find them on your PC as shown below.
kind:.exe
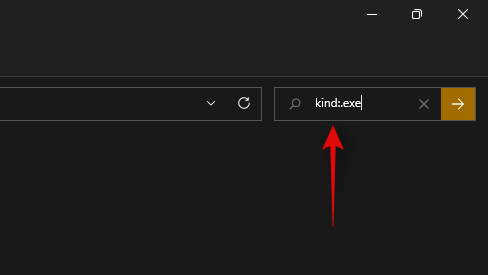
The command above will help you look for executables in the current directory.
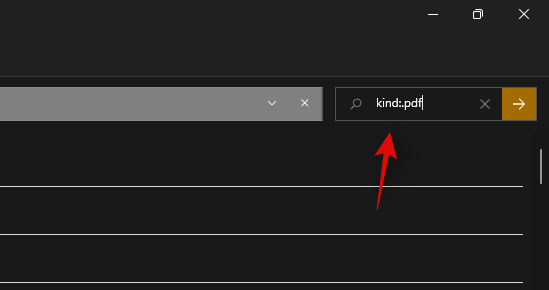
Similarly using the command below will help you find PDF files in the selected directory.
kind:.pdf
And that’s it! You can use these commands to find certain files on your PC using Windows Search.
Related: How to Hide Badges on Taskbar Icons on Windows 11
Find files by date
You can also use the ‘date:’ parameter to look for files created on a certain date. Additionally, this command can be used in conjunction with Boolean filters below to find files created or modified before or after a certain date on your PC. For example, if looking for a file created on the 1st of January 2020, then you can use the following command below.
date: 1/1/2020
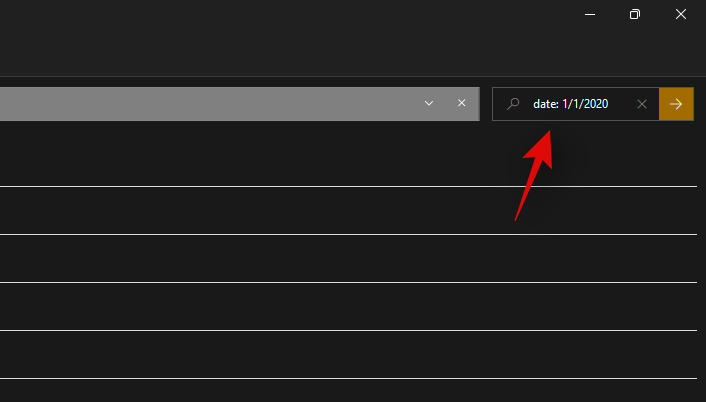
Similarly if looking for a file created on the 1st January 2021, then you can use the following command.
date: 1/1/2021
Use Boolean Filters
Boolean filters can help you search multiple terms simultaneously or in conjunction with each other when using Windows Search. Here are the following Boolean filters that you can use to your advantage.
The ‘AND’ parameter
You can use the AND parameter to search for two search terms together. This way you can look for a file containing both the terms and not either one of them which should help you filter out unwanted results containing either of the terms. For example, if looking for a file containing the words ‘Samsung and ‘galaxy’ in its name then I can use the following term to search for your file.
Samsung AND galaxy
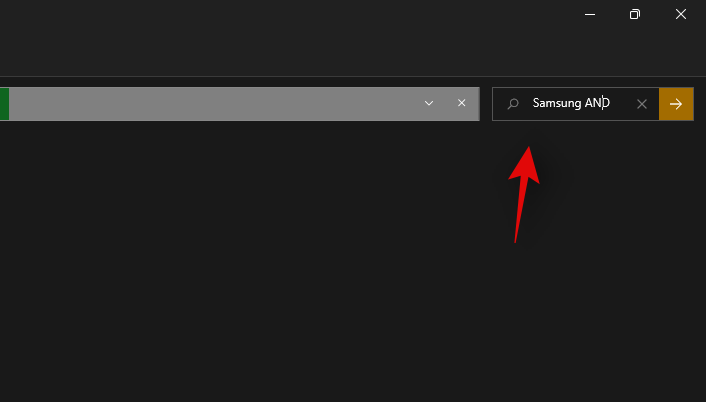
This will filter out files with only ‘Samsung’ and ‘Galaxy’ in their name. Files with either term will be filtered out.
The ‘OR’ parameter
The OR parameter is opposite to the AND parameter and allows you to search for files containing either of the terms in your search term. For example, if I wish to search for files with either ‘Apple’ or ‘Airpods’ in their name, then I can use the following search term.
apple OR airpods
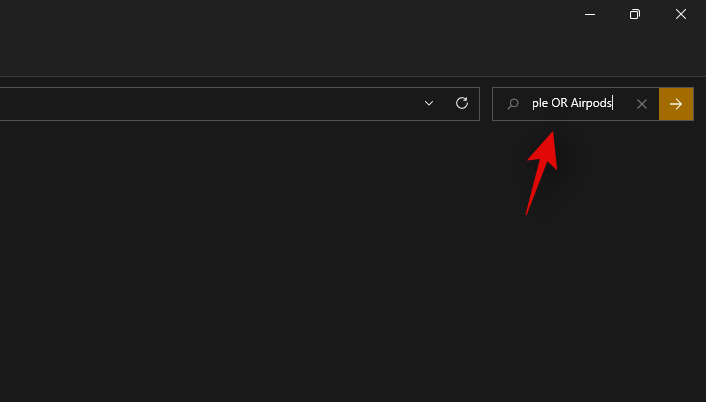
Similarly, if I am looking for PDF and EXE files in a particular directory, then I can use the following command below.
kind:.exe OR .pdf
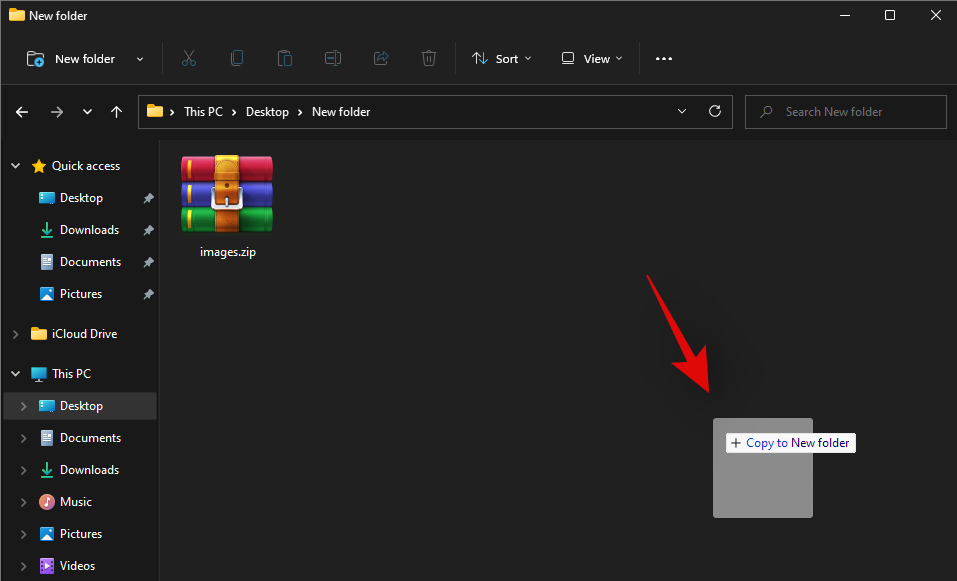
And that’s how you can use the OR parameter to look for multiple search terms in a single file name.
The ‘NOT’ parameter
If you are looking to filter out a certain search term or a filet type then you can use the NOT parameter. The NOT parameter will exclude the desired file type, kind, size, or name depending on your choice. For example, if in a folder full of .docx files you are looking for other file types and wish to filter them all out, then you can use the following command.
kind: NOT .docx
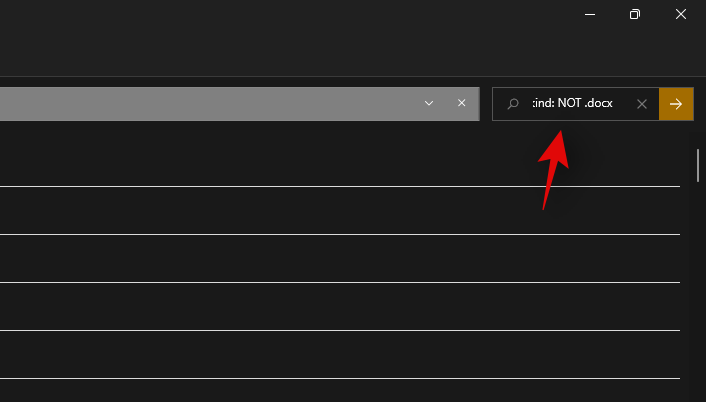
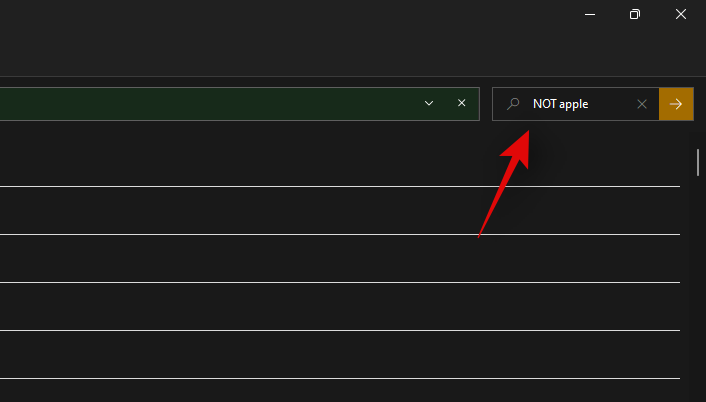
Similarly, if I am looking for a file that does not have ‘Apple” in its name then I can use the following search term.
NOT apple
Double Quotes
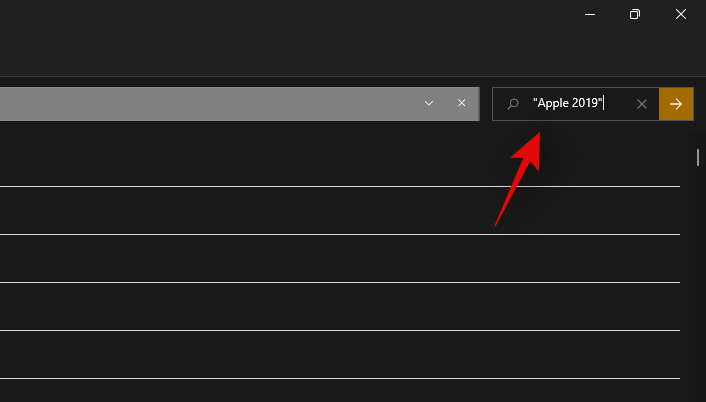
If you remember an exact term for the file that you are searching for then you can use double-quotes. This will force Windows Search to look for the exact search term with the specific formatting and case to find the file that you are looking for. For example, if looking for a file with ‘Apple 2019′ in its title then you can use the following command below.
“Apple 2019”
Parentheses
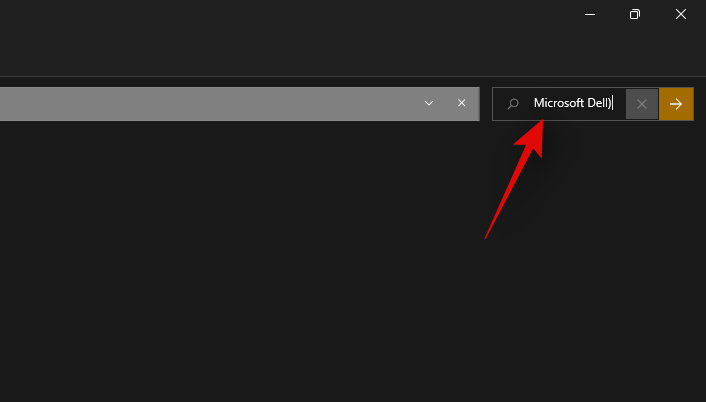
Parentheses is a Boolean filter that is usually used when you are searching file contents as well. Anything included between the parentheses () is searched for and files with either or all of the terms are displayed on your screen. For example, if looking for a file containing either ‘Apple, Samsung, Mi, Microsoft, and Dell’ or all of these terms, then you can use the following term.
(Apple Samsung Mi Microsoft Dell)
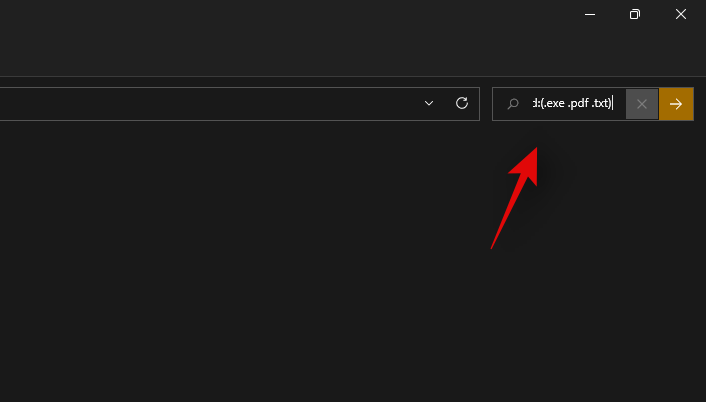
Similarly, you can use the following command if looking for multiple file types.
kind:(.exe .pdf .txt)
And that’s it! You will now have used parentheses to your advantage to look for multiple search terms in a particular file.
‘>’ and ‘<‘>
These two Boolean filters are usually used when looking for file types or when sorting your results based on a parameter. The greater than and less than parameters can be used to filter your results based on a number. For example, if looking for files dated after 1st January 2021 then you can use the following command.
date: >1/1/2021
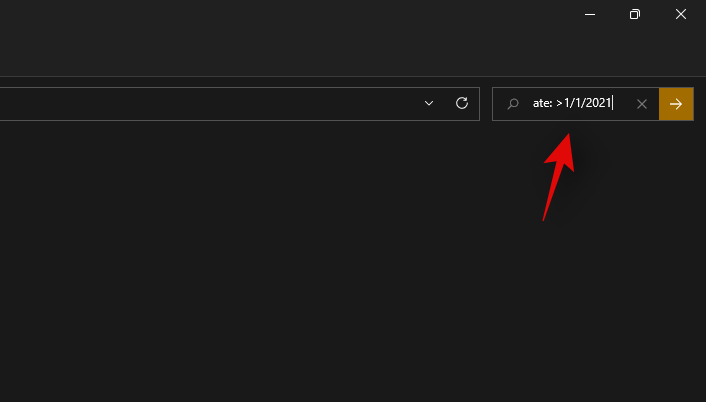
Similarly, if looking for files less than 10GB then you can use the following command.
size: <>
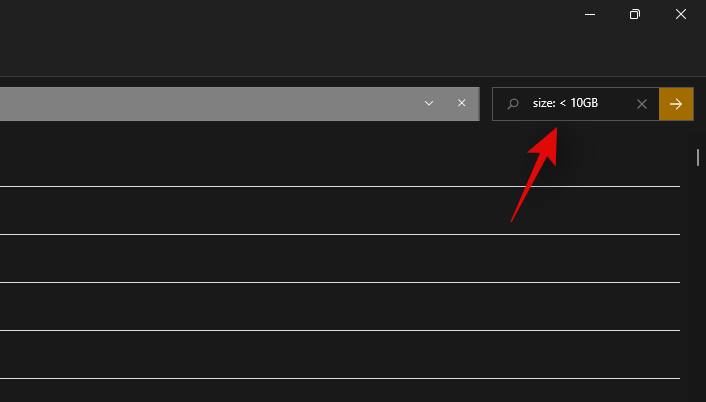
You can use the greater than and less than parameters to your advantage this way and find the desired files on your system.
Related: How to Type Accents on Windows 11
Are there any Windows search alternatives?
Yes, there are a few Windows search alternatives out there developed by third parties that offer competitive indexing options and promise higher working efficiency when it comes to using your system’s resources. Windows Search, however, would still be our recommended tool for you as it has been installed natively on your system. Using a third-party tool will add additional workload to your PC unless Windows Search has been completely disabled. Hence, we recommend that you try PowerToys by Microsoft first to get a native utility on your PC that uses and enhances Windows Search instead. If that does not work out for you, you can then opt for any one of the third-party utilities listed below.
PowerToys
PowerToys is a collection of enhanced tools by Microsoft that offer you utilities like PowerToys Run (Windows Search), Color Picker, Power Renamer, and more to help increase your productivity and enhance your workflow. PowerToys Run is a spotlight-like search feature in PowerToys that uses Windows Search to index and display files on your PC. PowerToys Run gives you a more elegant way of using Search on your PC. Use the guide below to get you started.
Download and install PowerToys on your PC using the link above. Once installed, launch PowerToys from the taskbar as shown below.

Once PowerToys is launched, we recommend you click on each feature on your left and disable the ones that you don’t wish to use. PowerToys have comprehensive tools that can cause your system to behave unexpectedly if you do not know about them. Hence, disable all the features that you do not need or wish to use on your PC.
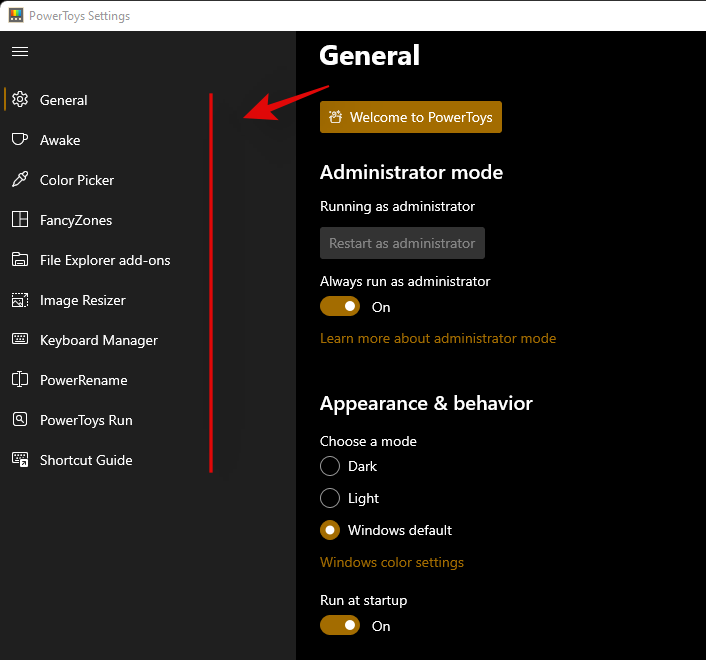
Click on ‘PowerToys Run’ on your left.
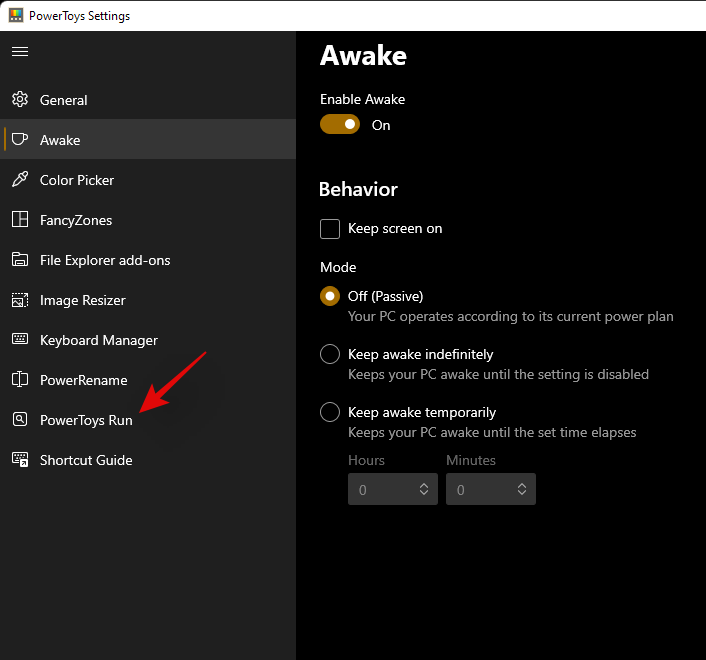
Enable the toggle at the top.
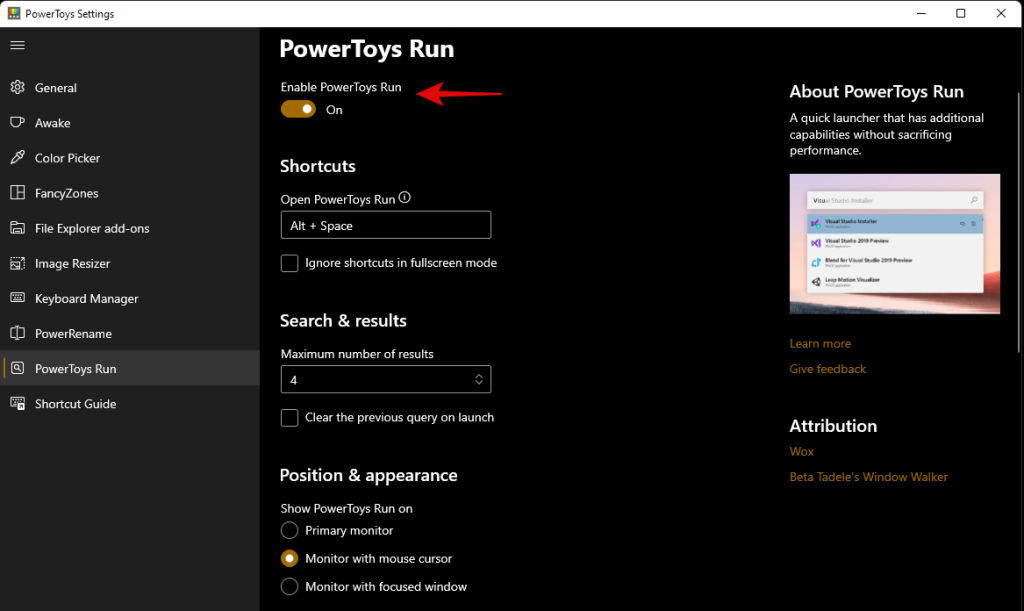
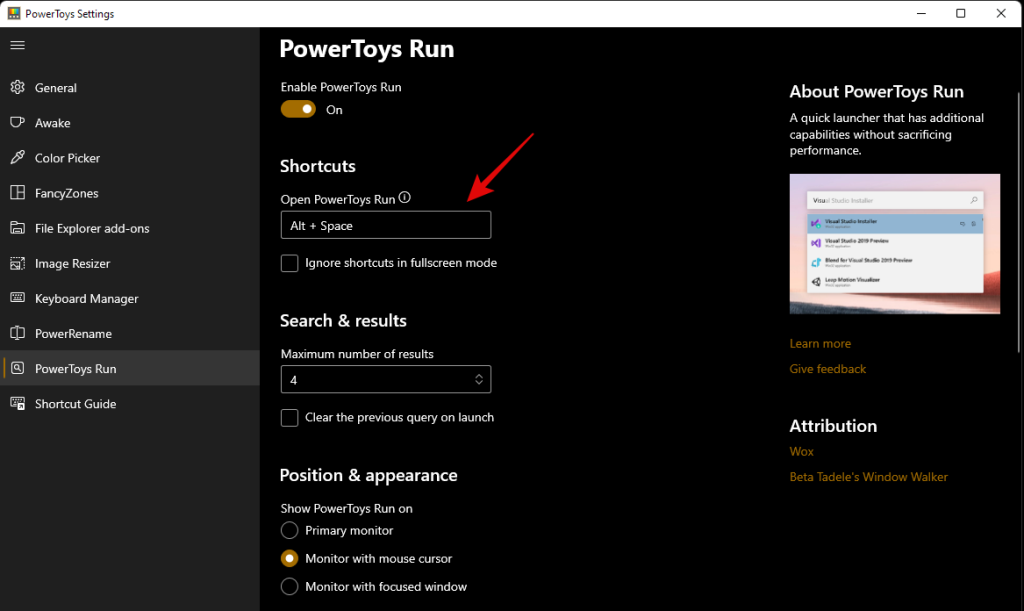
Set a custom shortcut if needed. By default, you can use Alt + Space to activate PowerToys Run.
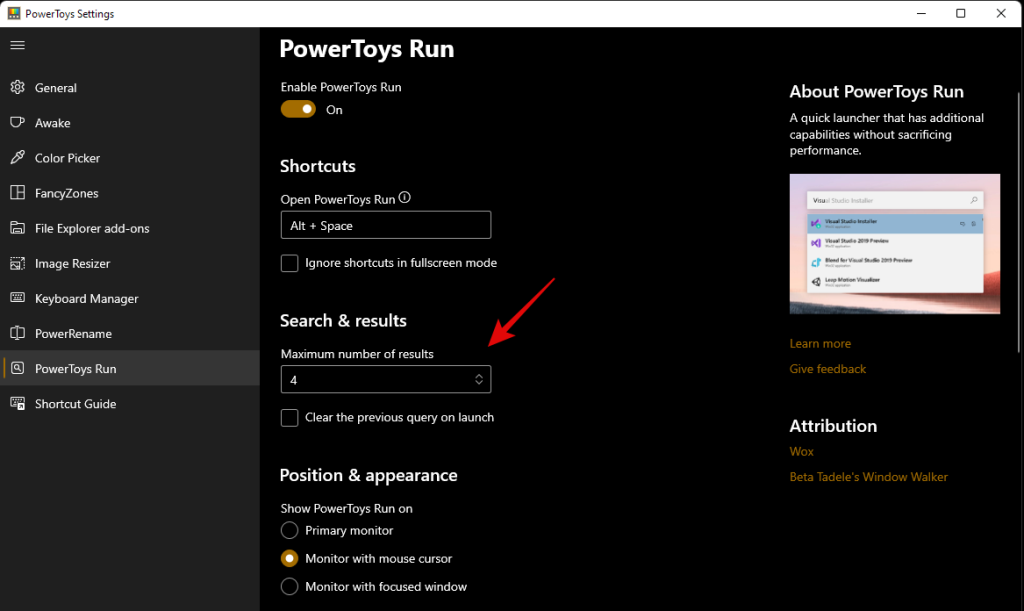
Increase the number of search results you wish to view if needed.
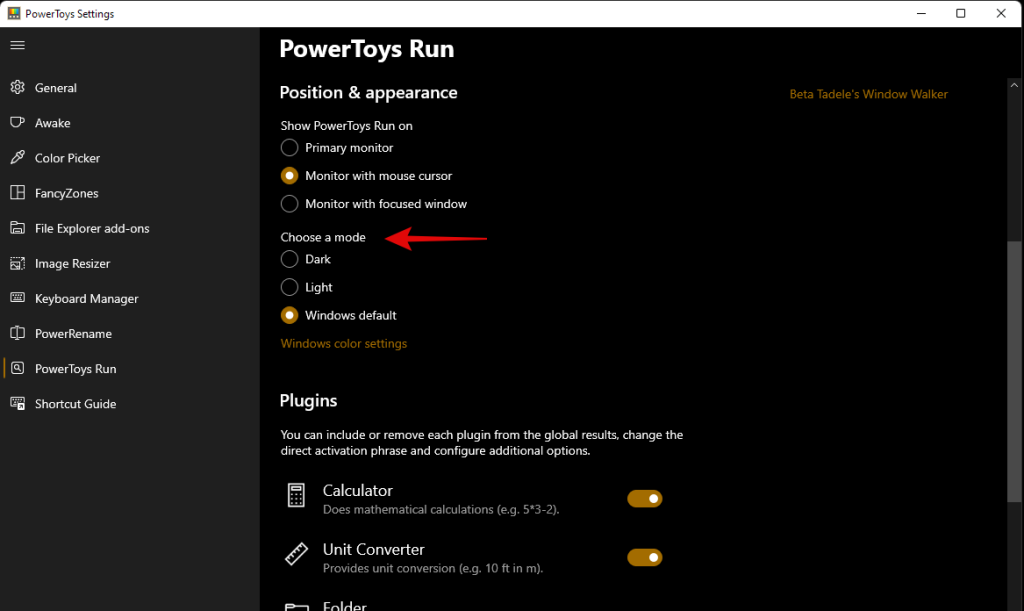
Set a position for the search box if you have a multi-monitor setup.
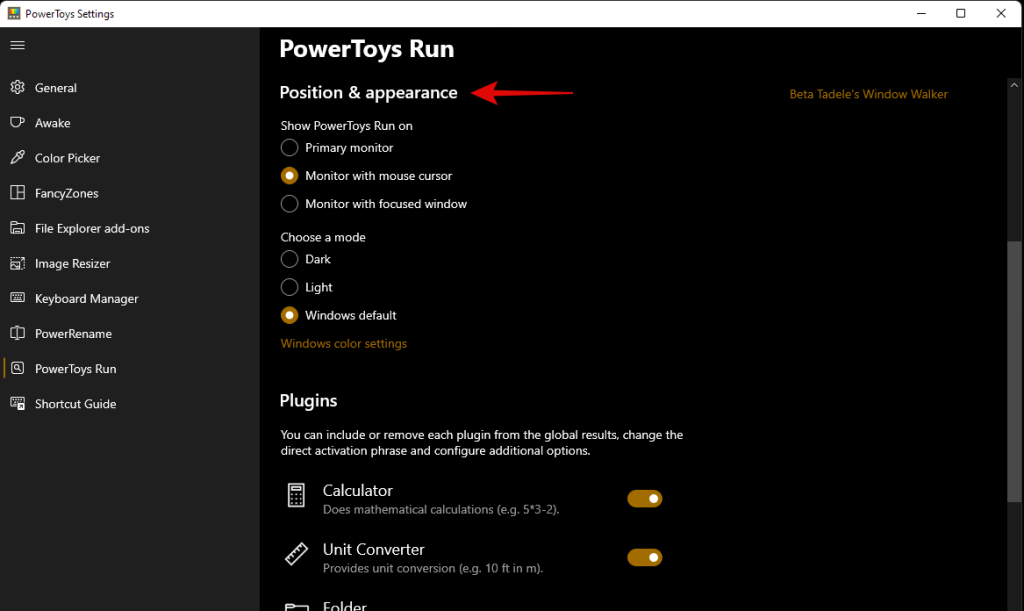
Choose a custom theme if needed.
Additionally, PoweToys Run is highly capable and can help you access apps from within the search box itself. For example, you can enter equations in the search box, and you will automatically get a result from the calculator app as a search result as shown below.

Similarly, you can also execute commands from the search box itself. Ping is a good example that shows up in the search results as shown below.
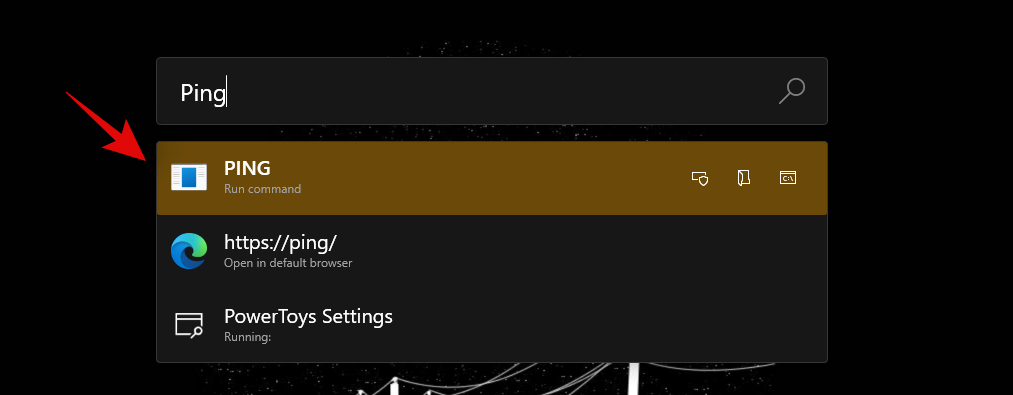
However, if you are not going to be using these features then there is no point in having them enabled on your PC. Simply disabled the plugins in the PowerToys window as shown below.
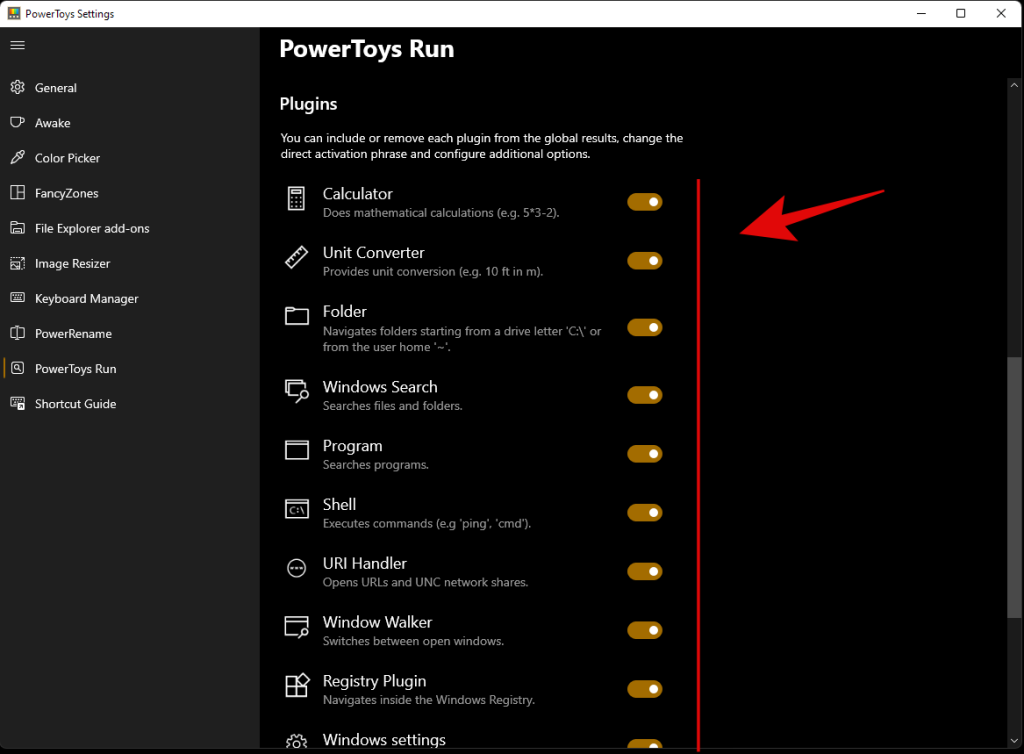
And that’s it! You will now have configured PowerToys Run on your system as a Windows Search alternative.
Third-party apps
If PowerToys is not up to mark for you and you are looking for something a bit more comprehensive then you can check out the following Windows Search alternatives below.
We hope you were able to get familiar with Windows Search in Windows 11 using the guide above. If you face any errors or have any questions for us, feel free to reach out using the comments section below.
Can you disable Windows search in Windows 11?
No and yes. Windows does not offer a native way to disable Windows Search. However, this could be detrimental to older systems where Search could end up taking vital resources in the background that would in turn slow your system down. In such cases, and more, you can use a few workarounds to disable Windows Search in the background on Windows 11. You can use the guide below to disable Windows Search on Windows 11.
How to disable Windows search
If you wish to disable Windows Search then disabling the service is the easiest way. Follow the guide below to get you started.
Press Windows + R on your keyboard and type in the following. Press Enter on your keyboard once you are done.
services.msc
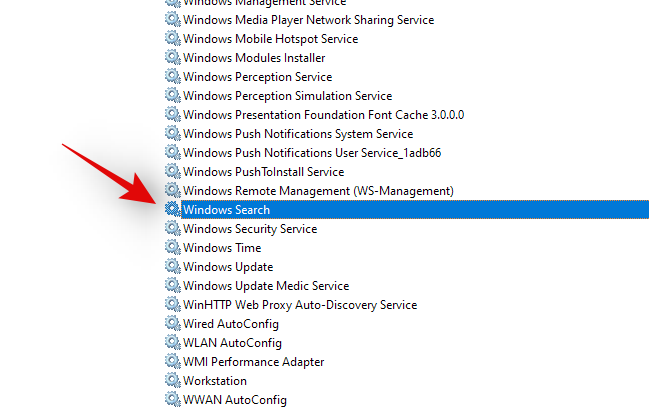
Search for a service named ‘Windows Search’ and right-click on it.
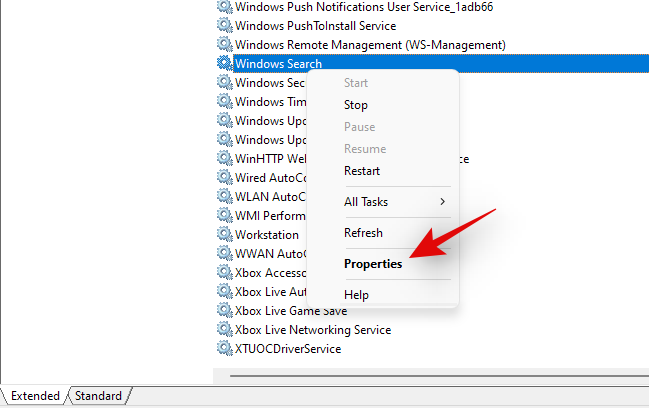
Select ‘Properties’.
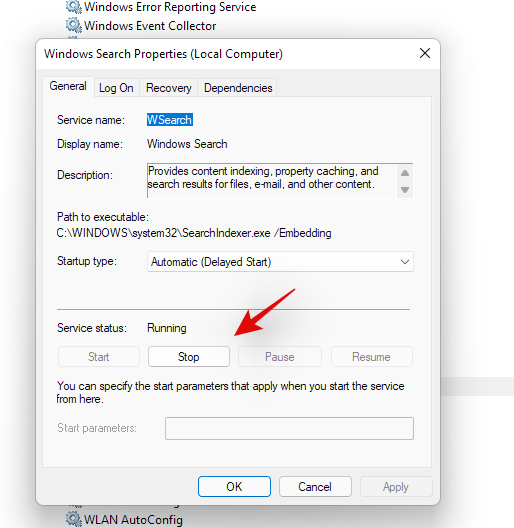
Click on ‘Stop’.
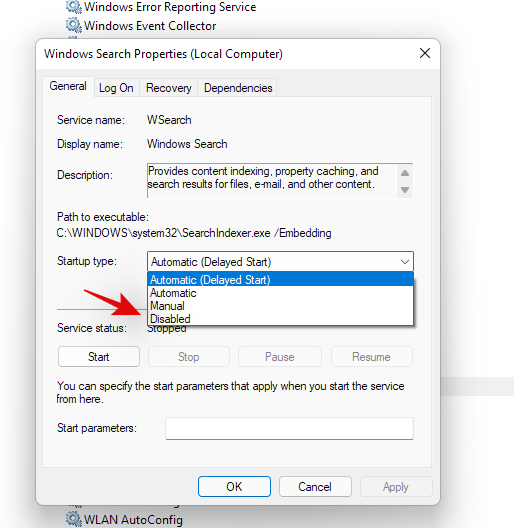
Click on the drop-down menu and select ‘Disabled’.
Кликните на 'ОК'.
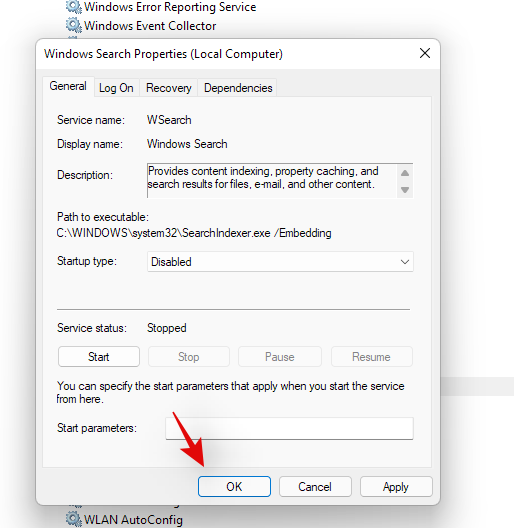
Поново покрените систем и Виндовс претрага би сада требало да буде онемогућена на вашем систему.
Повезан:


