Kui Windows 11 teatas Androidi rakenduste installimise ja kasutamise võimalusest, olid kõik üle kuu. Inimesed olid põnevil, et said otse arvutist sotsiaalmeediarakendusi, mänge ja muud käitada. Kahjuks see põnevus katkes, kui Microsoft avaldas, et nad kasutavad Google Play poe asemel Amazoni App Store'i.
Võrdluseks, Amazoni rakenduste poes on ainult umbes 460 000 rakendust, samas kui Google'i alternatiivil on kokku 3,48 miljonit rakendust. See on üks põhjusi, miks paljud kasutajad on soovinud Google Play teenuseid ja poodi käsitsi installida. Kas olete samas paadis? Siis on meil teile ideaalne juhend!
Kasutage allolevaid meetodeid Google Play poe ja Gappsi hankimiseks ja kasutamiseks oma Windows 11 arvutis.
Seotud: Kuidas lahti rühmitada ikoone Windows 11 tegumiribal registrihäkkimise abil
Sisu
1. meetod: installige kohandatud WSA, mille Gapps ja Play pood on eelinstallitud
Lihtsam viis WSA-ga Google Appsi ja Google Play poe hankimiseks on kasutada eelmodifitseeritud WSA-d, kuhu on eelinstallitud Gapps. Seda WSA-d jagas Redditor nimega Rageman666 ( vt siit ). Pärast allalaadimist saate kasutada allolevat modi, et oma Google'i kontoga Google Play poodi sisse logida. (Kui aga soovite installida WSA ainult ametlikult ja seejärel ise Gappsi installimise keeruka meetodi kasutada, vaadake allpool olevat meetodit 2.)
Mida sul vaja on
- Muudetud WSA | Laadi alla link ( Peegel | Peegel 2 )
- ADBT-tööriistakomplekt | Lae alla link
- Tähtis. Enne selle juhendiga jätkamist peate algse WSA oma süsteemist desinstallima, juhuks kui olete selle installinud.
Samm-sammuline juhend
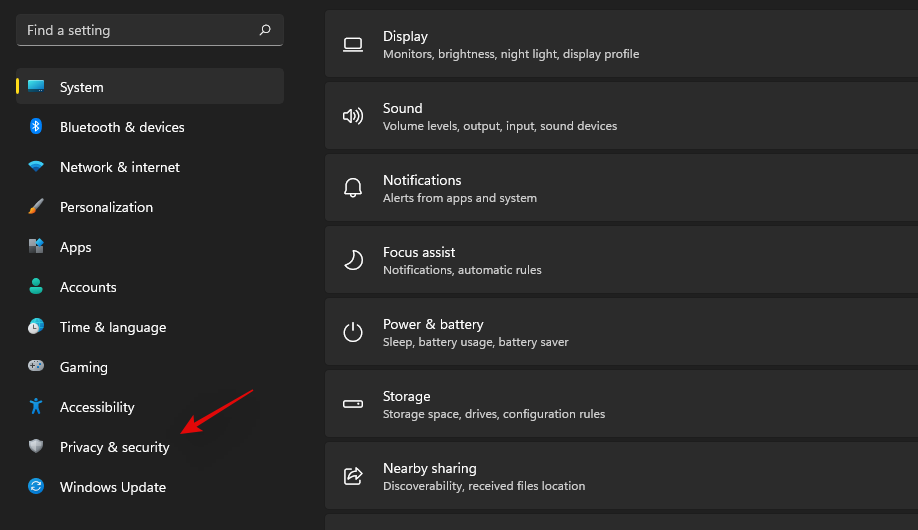
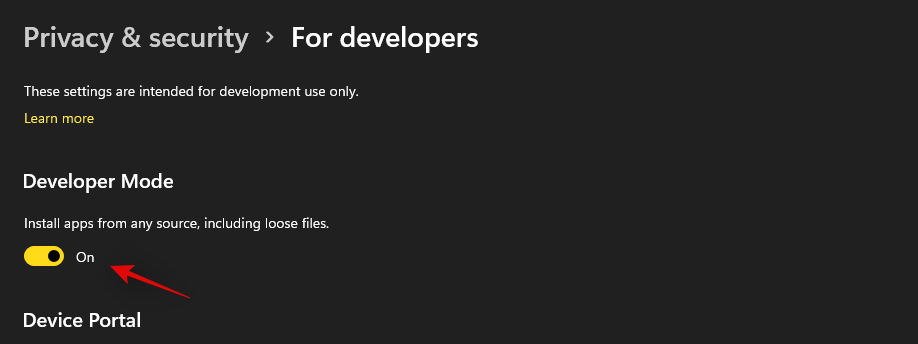
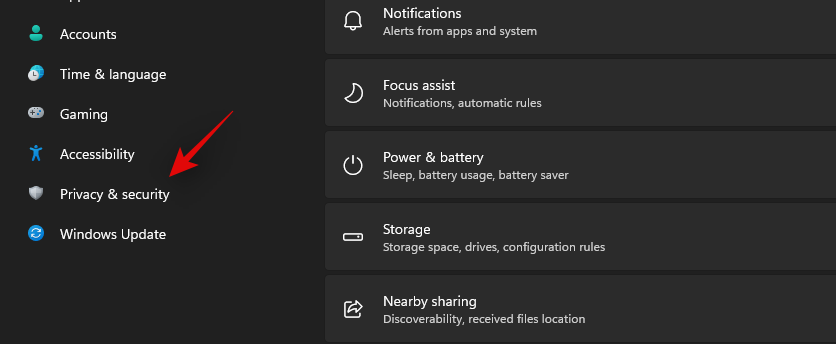
Peame esmalt lubama teie Windows 11 installimisel arendaja režiimi. Vajutage Windows + iklaviatuuril ja valige vasakpoolselt külgribal "Privaatsus ja turvalisus".
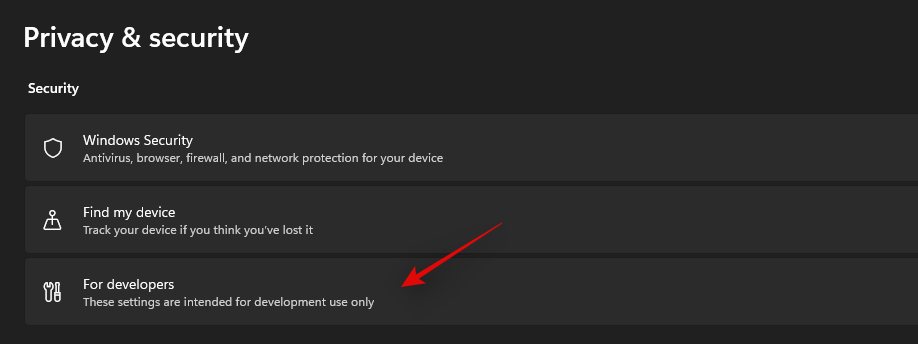
Klõpsake paremal valikul "Arendajatele".
Klõpsake ja lülitage sisse Arendaja režiimi lüliti. Oma valiku kinnitamiseks klõpsake "Jah".
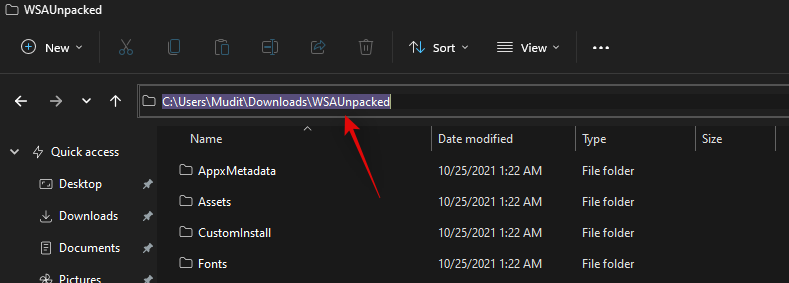
Nüüd laadige ülaltoodud WSA alla oma kohalikus salvestusruumis sobivasse kohta. Pakkige failid lahti uude kausta nimega WSAUnpacked. Klõpsake kausta WSAUnpacked aadressiribal ja kopeerige tee lõikepuhvrisse.
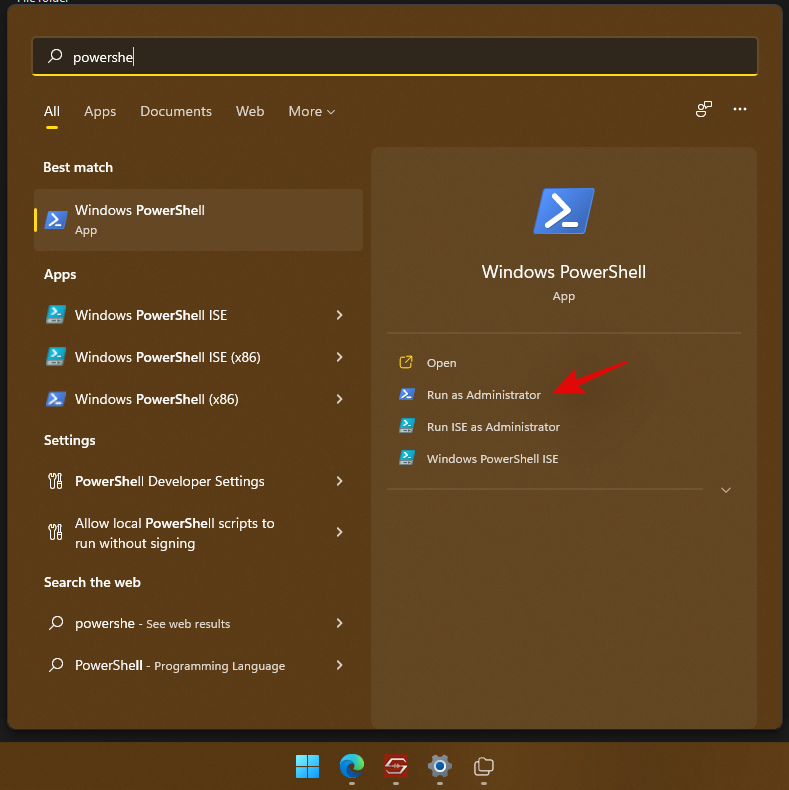
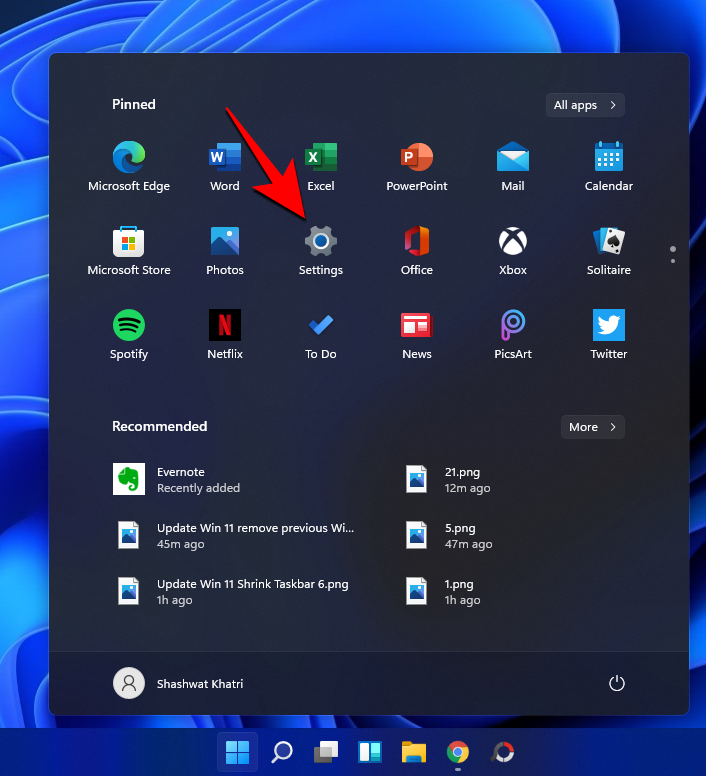
Vajutage Windows + Soma klaviatuuril, otsige "Powershell" ja klõpsake "Käivita administraatorina", kui see teie otsingutulemustes kuvatakse.
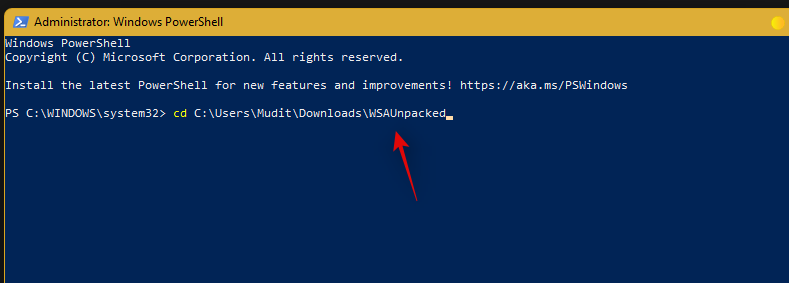
Sisestage järgmine käsk ja asendage PATH teega, mille kopeerisime teie lõikelauale. Veenduge, et eemaldaksite kleebitud teelt jutumärgid.
cd PATH
Nüüd tippige ja käivitage järgmine käsk.
Add-AppxPackage -Register .\AppxManifest.xml

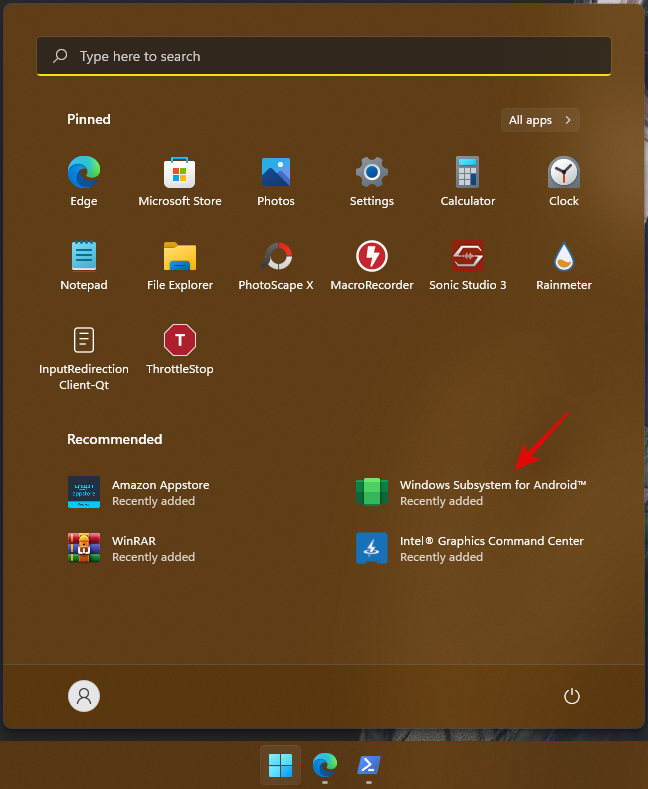
Muudetud WSA installitakse nüüd teie süsteemi. Vajutage Windowsi klahvi ja käivitage sama menüüst Start.
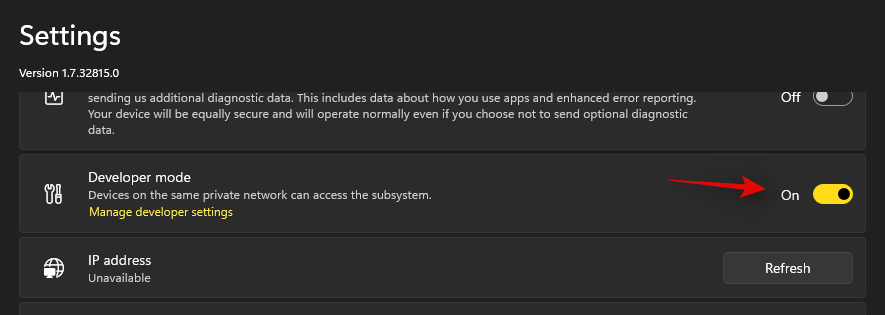
Kui alamsüsteem käivitub, klõpsake ja lubage "Arendaja režiim".
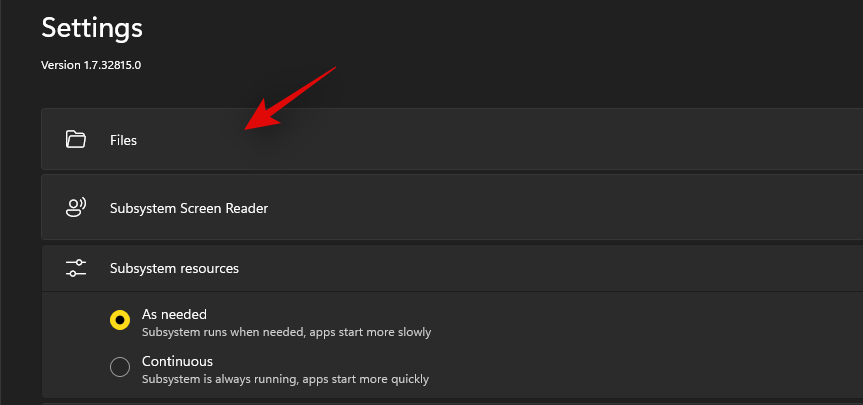
Nüüd klõpsake ülaosas nuppu Failid, et see käivitaks teie süsteemis Windowsi alamsüsteemi Androidile.
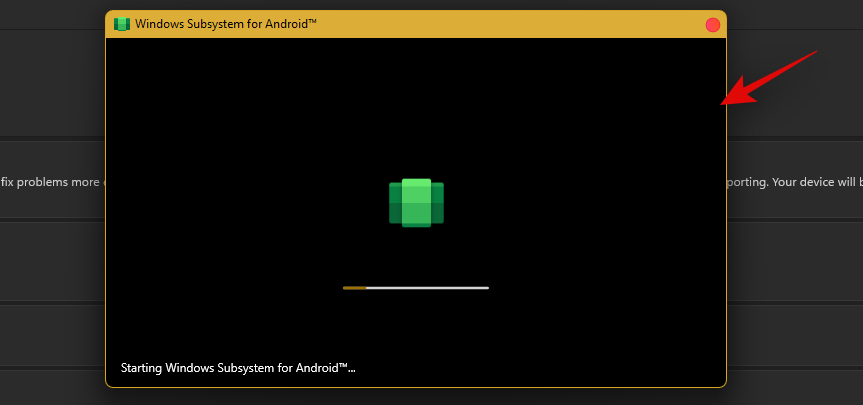
Sulgege rakendus Failid. Peame nüüd Play poodi sisselogimiseks kasutama lahendust.
Laadige alla ülaltoodud lingiga ADBToolkit ja eraldage see oma töölaual uude kausta nimega "ADBToolkit". Pärast ekstraktimist klõpsake ülaosas oleval aadressiribal ja kopeerige aadress lõikelauale.
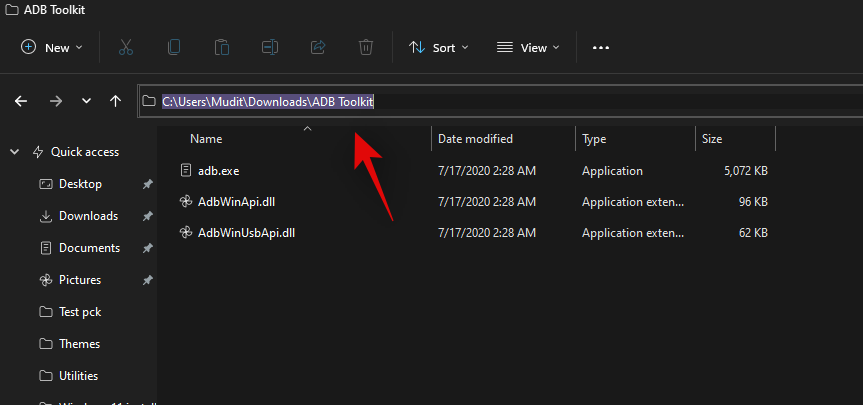
Vajutage Windows + Sklaviatuuril ja otsige Powershelli. Kui Powershell teie otsingutulemustes kuvatakse, klõpsake käsul Käivita administraatorina.

Sisestage järgmine käsk ja asendage PATH varem kopeeritud ADBToolkiti teega.
cd PATH

Märkus. Veenduge, et eemaldate ADBToolkiti kleebitud teelt jutumärgid.
Nüüd lülituge tagasi alamsüsteemi aknasse ja kopeerige allpool „Arendaja režiim” antud aadress.
ADB käivitamiseks ja ühendamiseks täitke alltoodud käsk. Asendage "ADDRESS" lõikepuhvrisse (ülevalt) kopeeritud aadressiga.
.\adb.exe connect ADDRESS

Sisestage ADB-kesta käivitamiseks järgmine käsk.
.\adb.exe shell
Nüüd kasutage juurjuurdepääsu saamiseks järgmist käsku.
su

Nüüd tippige järgmine käsk.
setenforce 0
PowerShelist väljumiseks tippige käsk „Välju”.

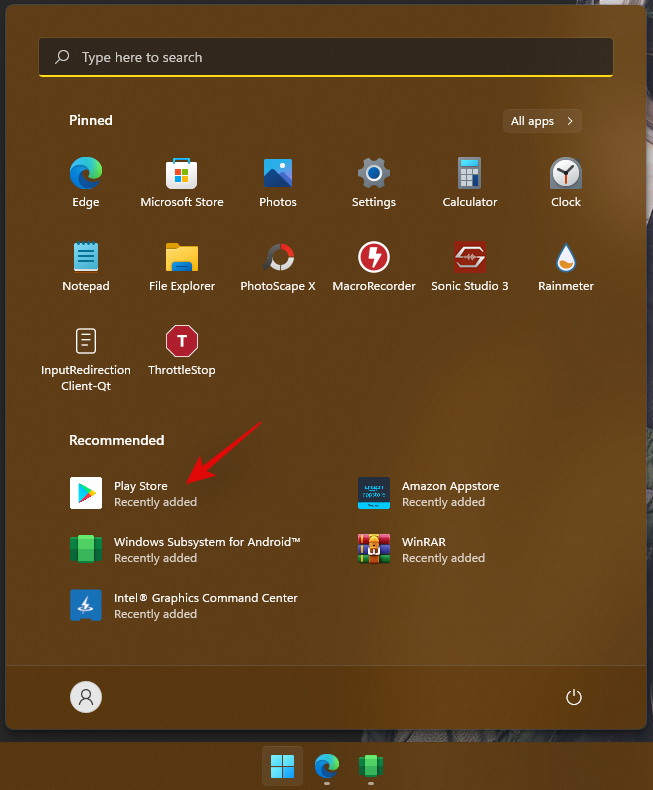
Nüüd saate sulgeda kõik töölaual avatud aknad. Vajutage Windows + Sja otsige kohe „Play pood”. Klõpsake ja käivitage rakendus, kui see teie otsingutulemustes kuvatakse.
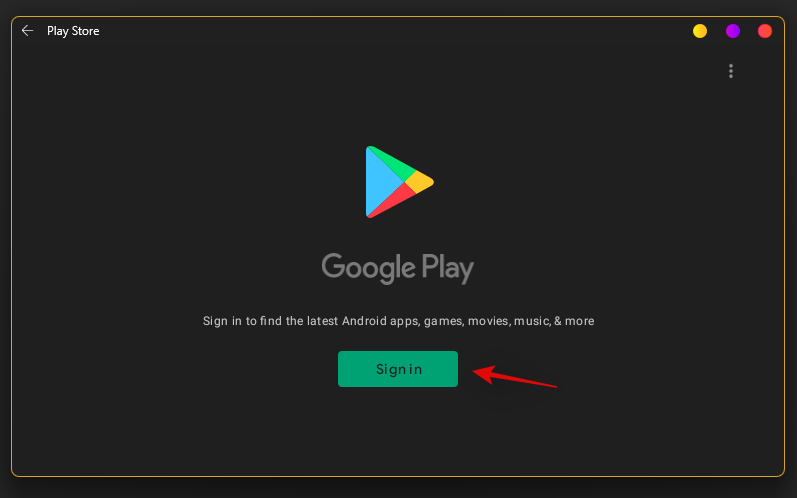
Nüüd klõpsake "Logi sisse" ja logige sisse oma Google'i kontoga.
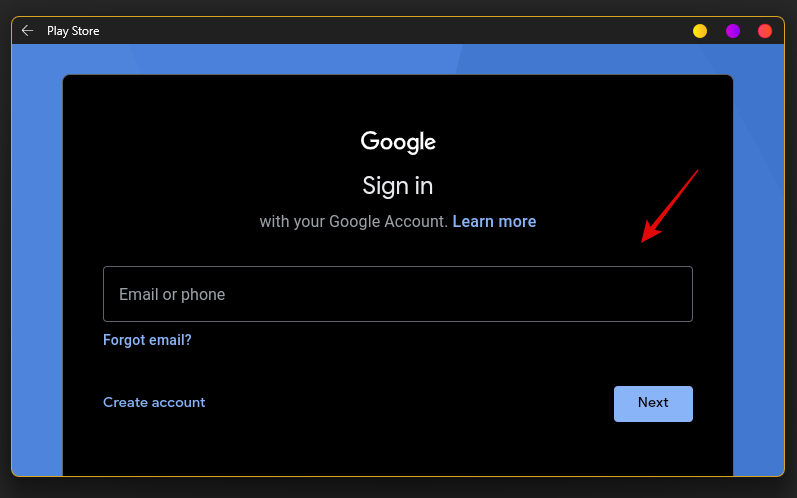
Nüüd logitakse teid sisse oma Google'i kontoga ja peaksite nüüd saama oma Windows 11 arvutis kasutada Google Play poodi.
Ja see ongi kõik! Nüüd saate soovitud Androidi rakendused oma süsteemi alla laadida ja installida otse Google Play poest.
Seotud: Sideload APK opsüsteemis Windows 11, kasutades ADB-d käsitsi | Automaatselt skriptiga
2. meetod: installige WSA ja seejärel installige Gapps ise
Ülaltoodud meetod on palju lihtsam ja seega hõlpsasti kasutatav, kuigi see pole täpselt soovitatav, kuna see on eelnevalt muudetud (kohandatud) WSA pakett. Kuid kui soovite Microsoftilt ametlikku WSA paketti ja soovite Gappsi selle kaudu ise installida, on see meetod teie jaoks. See on üsna keeruline, nii et võib sageli tekkida küsimus, kas lihtsalt kohandatud WSA paketi installimine, mis on eelinstallitud Gappsiga, on seda väärt, mis meie arvates on seda väärt.
Soovitatav on hankida Google Apps ja Play Store oma arvutisse ametlikus WSA-s , installides ise Gappsi paketi, kuna te ei vaja eelmodifitseeritud WSA-d, mis aitab, kui tunnete muret kohandatud WSA-paketi turvalisuse pärast 1. meetodi kohaselt.
Mida sul vaja on
- WSGA skript | Allalaadimislink (Gappsi skript Androidi Windowsi alamsüsteemi jaoks)
- Windowsi alamsüsteem Androidile | Link
- Store Adguard | Link
- OpenGApps | Link
- ADBT-tööriistakomplekt | Lae alla link
- WinRAR | Lae alla link
- WSL: Windowsi alamsüsteem Linuxile
- Ubuntu: allalaadimislink
- Tähtis. Enne selle juhendiga jätkamist desinstallige algne Windowsi alamsüsteem Androidile, kui see on juba arvutisse installitud.
Samm-sammuline juhend
Külastage ülaltoodud WSA linki ning kopeerige ja kleepige tekstikasti järgmine allpool või ülaltoodud link.
Link

Nüüd klõpsake tekstikasti kõrval olevat rippmenüüd ja klõpsake nuppu "Aeglane".
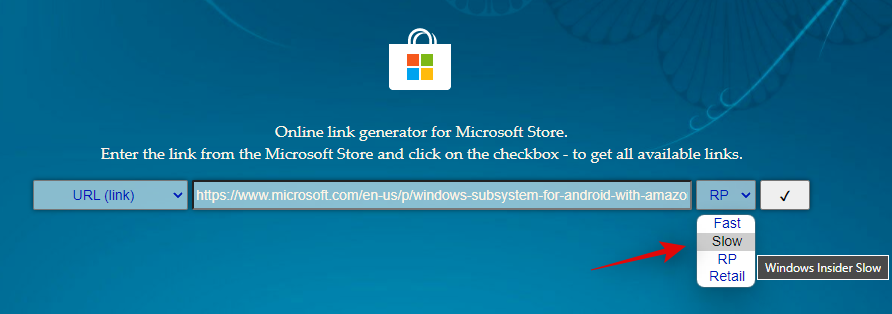
Antud lingi töötlemiseks klõpsake nuppu "Märgi".
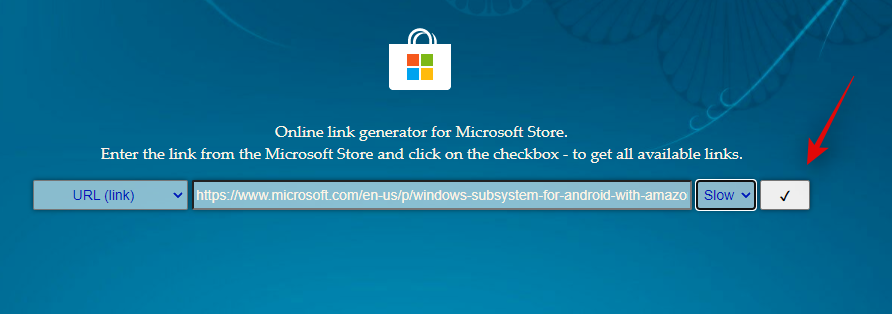
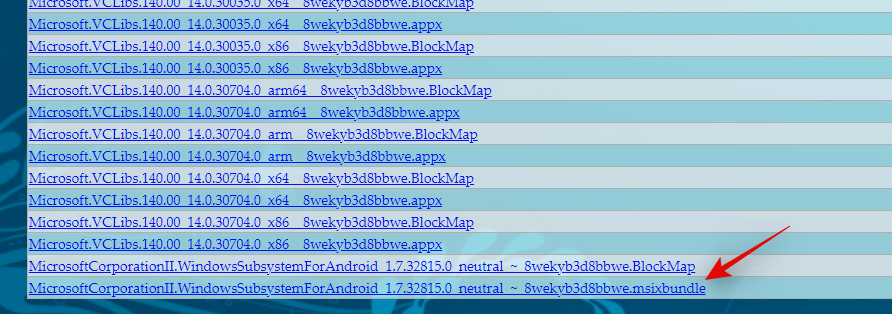
Pärast töötlemist on kõik lingitud allalaadimisfailid nüüd teie ekraanil saadaval. Kerige alla ja klõpsake allosas oleval .msix-paketil ning laadige see alla oma kohalikus salvestusruumis sobivasse kohta.
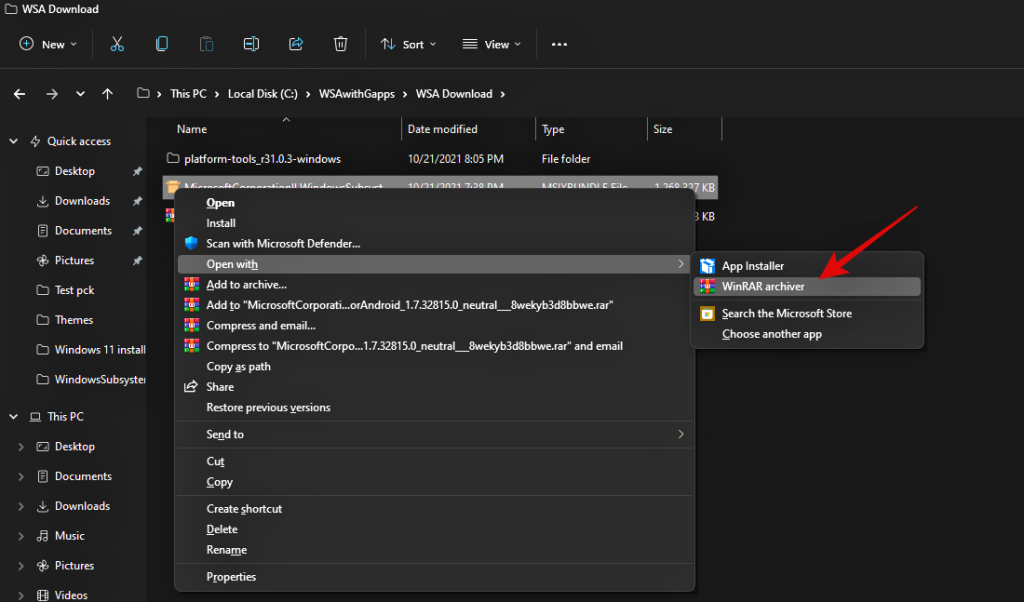
Nüüd minge allalaaditud failile, paremklõpsake sellel ja avage see WinRAR-iga. Kui teie arvutis pole WinRAR-i, kasutage selle allalaadimiseks ja installimiseks ülaltoodud linki.
Kui pakett on WinRAR-is avatud, kerige alla ja kontrollige .msix-paketi arhitektuuri. See peaks vastama teie protsessori arhitektuurile, kui mitte, saate valida loendist soovitud versiooni ja jätkata juhendiga.

Topeltklõpsake ja avage sama pakett WinRAR-is. Kui olete lõpetanud, minge oma C/boot-draivi ja looge uus kaust nimega "WindowsSubsystemForAndroid".

Lülitage tagasi Winrarile ja valige kõik failid, välja arvatud järgmised kaustad ja failid.
- AppxMetadata (kaust)
- AppxBlockMap.xml (fail)
- AppxSignature.p7x (fail)
- [Sisutüübid].xml (fail)
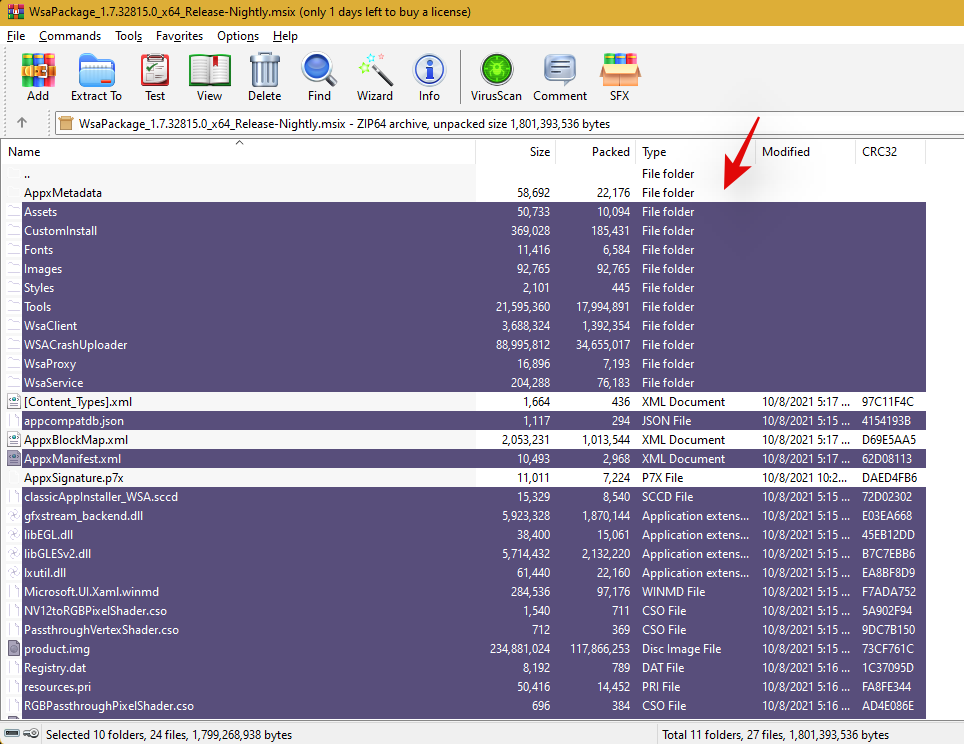
Kopeerige kõik valitud failid uude kausta "WindowsSubsystemForAndroid", mille me varem lõime.
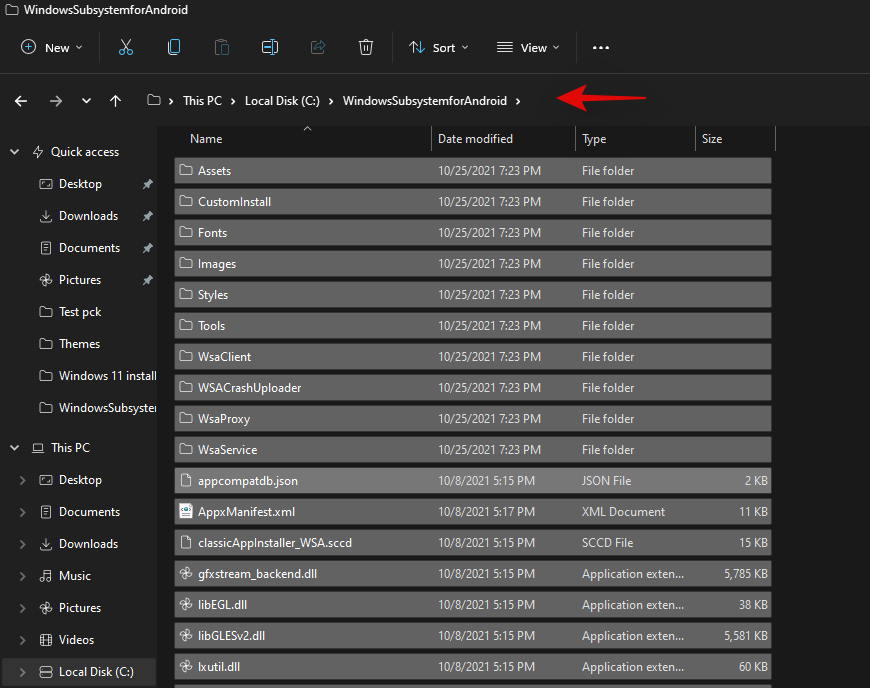
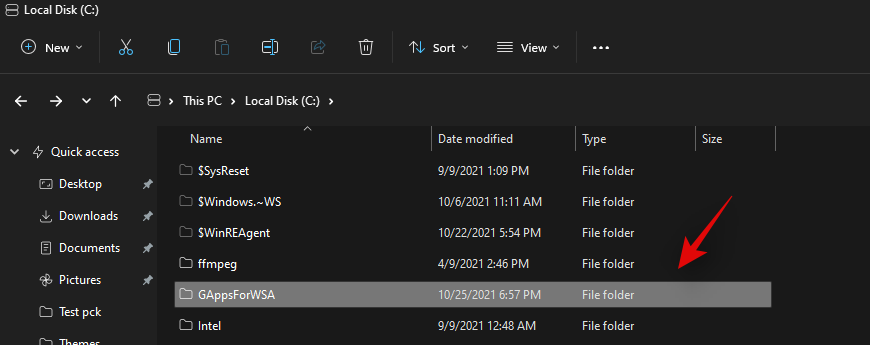
Pärast kopeerimist looge alglaadimiskettale uus kaust nimega GAppsForWSA.
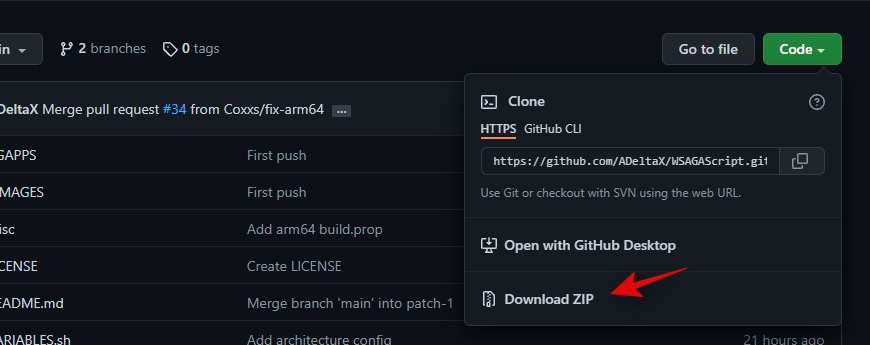
Avage ülaosas WSGA skripti link ja laadige see ZIP-failina oma kohalikku salvestusruumi.
Pakkige ZIP-fail välja uude kausta „GAppsForWSA”, mille lõime teie alglaadimiskettale.
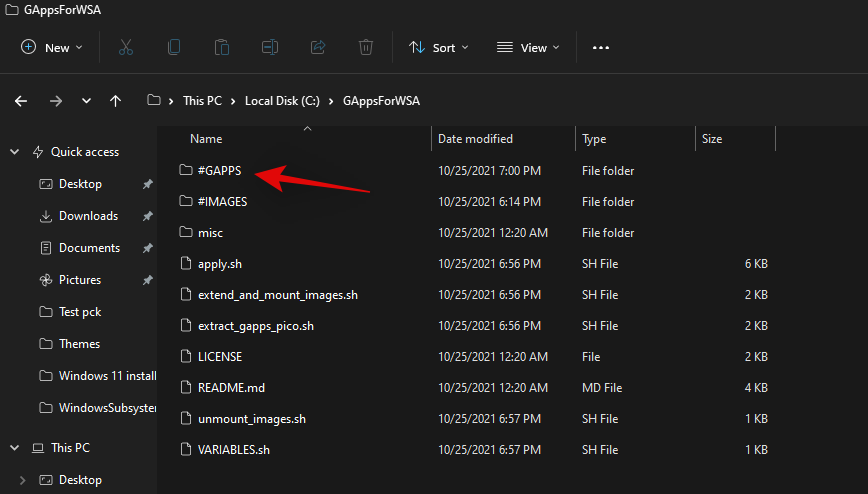
Märkus. Pakkige arhiivis välja kausta WSGAScript-main sisu.
Kui sisu on arhiveeritud, paremklõpsake failil VARIABLEs.sh ja avage see Notepadiga.

Asendage "GAppsWSA" sõnaga "GAppsForWSA".
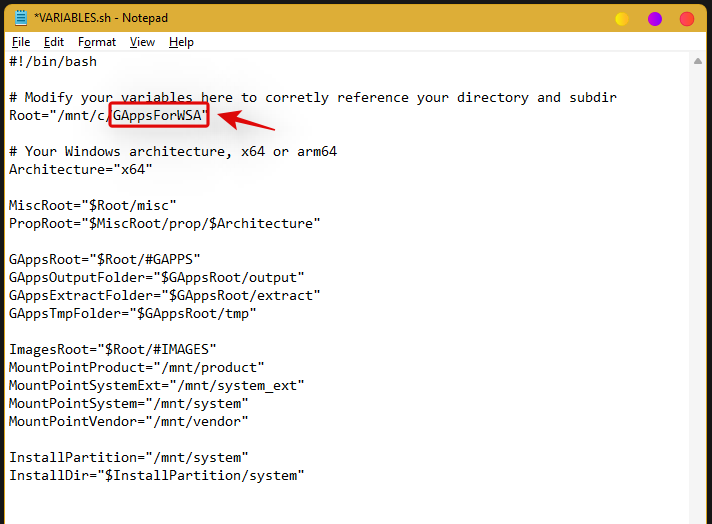
Press Ctrl + S on your keyboard to save the changes. We will now download GApps for your WSA installation. Visit the link for OpenGApps at the top and select the following options given below.
- Platform: x86_64
- Android: 11.0
- Variant: pico
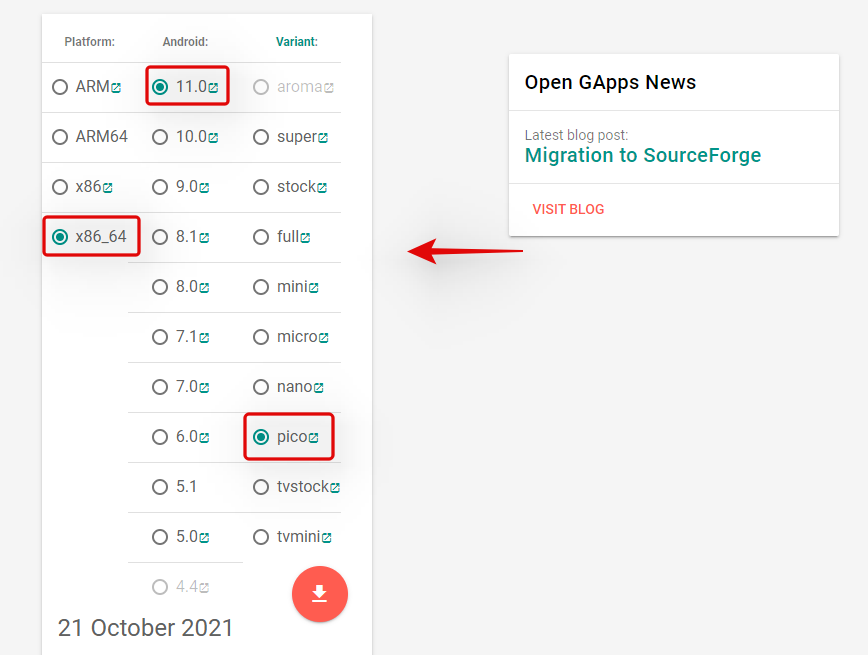
Click on the ‘Download icon’.
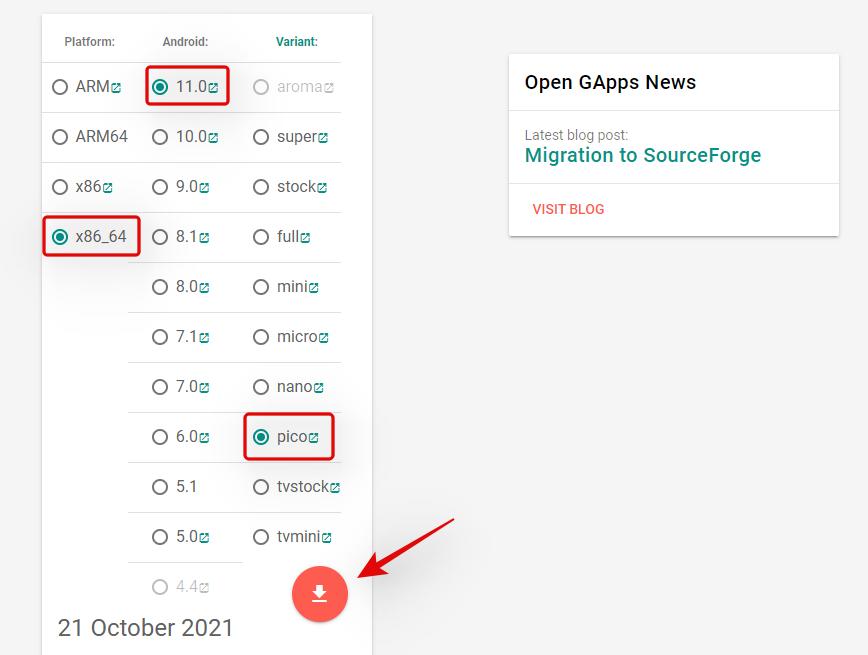
You will now be redirected to Sourceforge, wait a few seconds and the download should automatically be initiated for you.

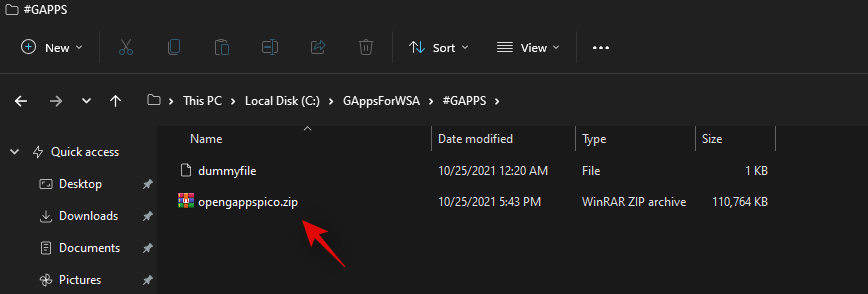
Download and store the archive in the following location in the ‘GAppsForWSA’ folder on your boot drive.
Boot Drive\GAppsForWSA\#GAPPS
Now go back to your boot drive and open the ‘WindowsSubsystemForAndroid’. Copy the following 4 files.
- vendor.img
- system_ext.img
- system.img
- product.img
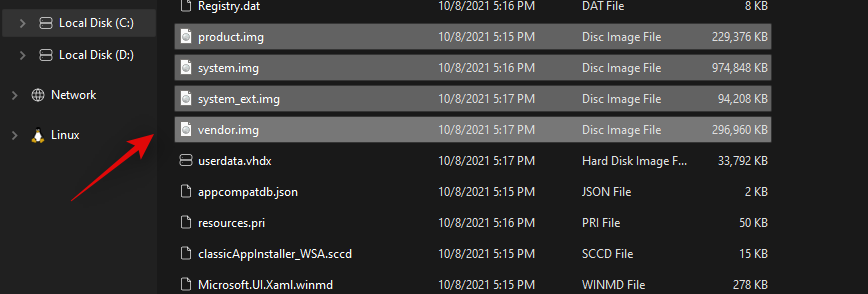
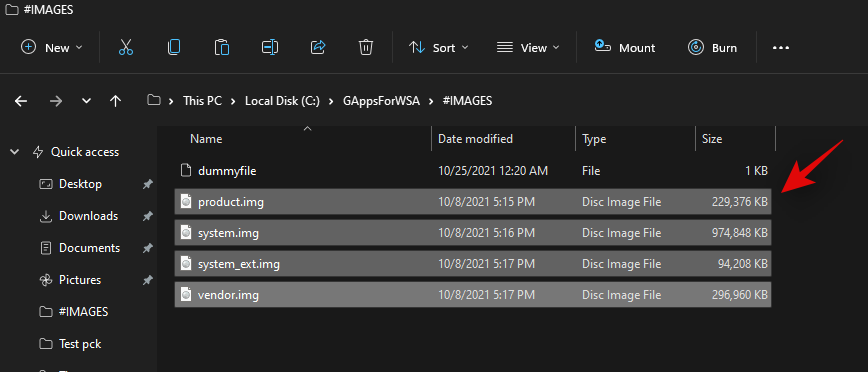
Navigate to the following location and paste all your copied files.
Boot Drive\GAppsForWSA\#IMAGES
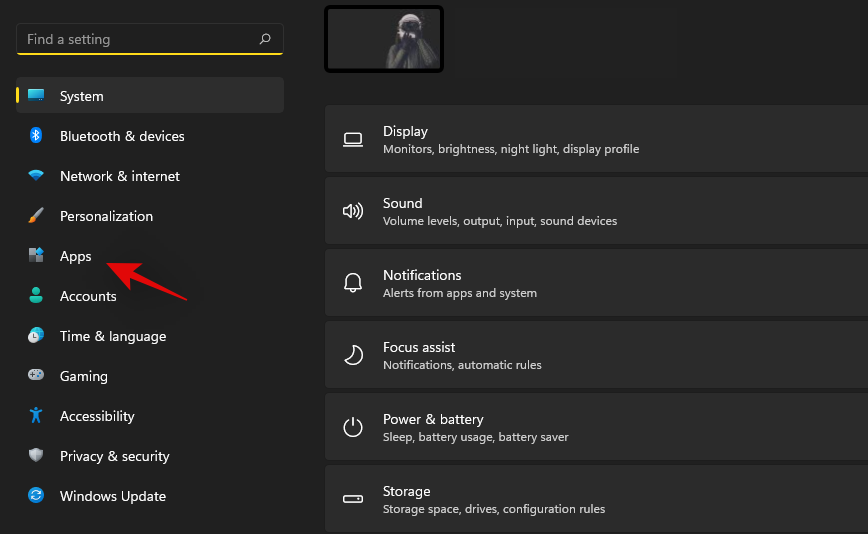
We will now install WSL for your system. WSL is a Linux Subsystem that will allow you to use executables and scripts developed for Linux. Press Windows + i on your keyboard to open the Settings app and then click on ‘Apps’ on your left.
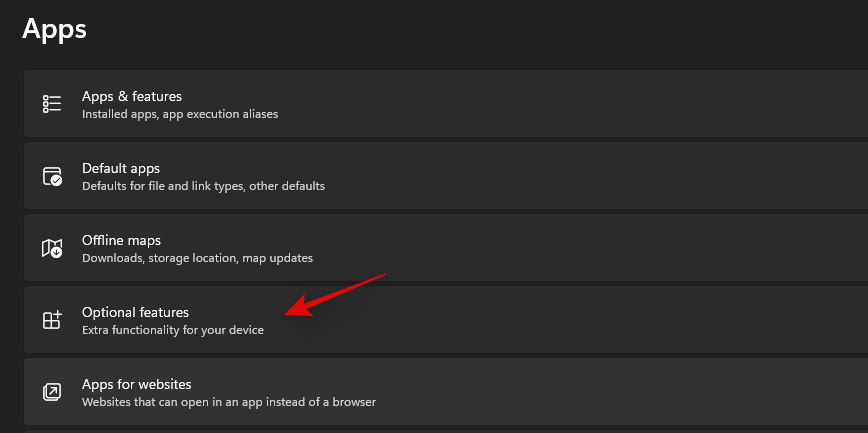
Now click on ‘Optional Features’.
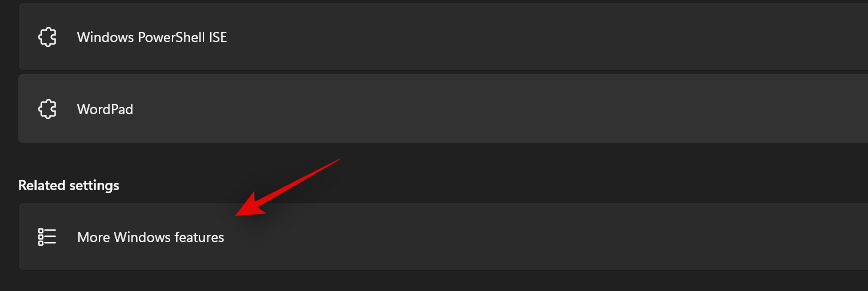
Scroll down and click on ‘More Windows features’.
A new window for available features will now open on your screen. Scroll to the bottom and check the box for ‘Windows Subsystem for Linux’.
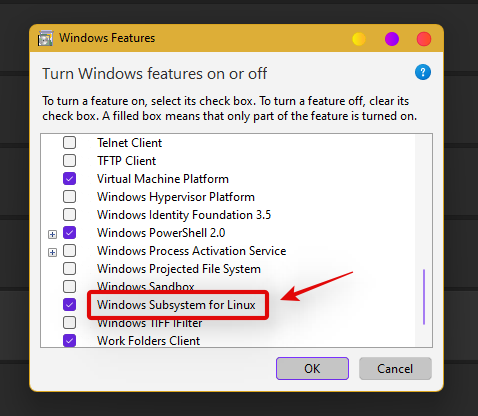
Click on ‘Ok’ once you are done. The Linux Subsystem will now be installed on your PC. You will now be prompted to restart your PC. We recommend you restart your PC at this point even if you are not prompted.
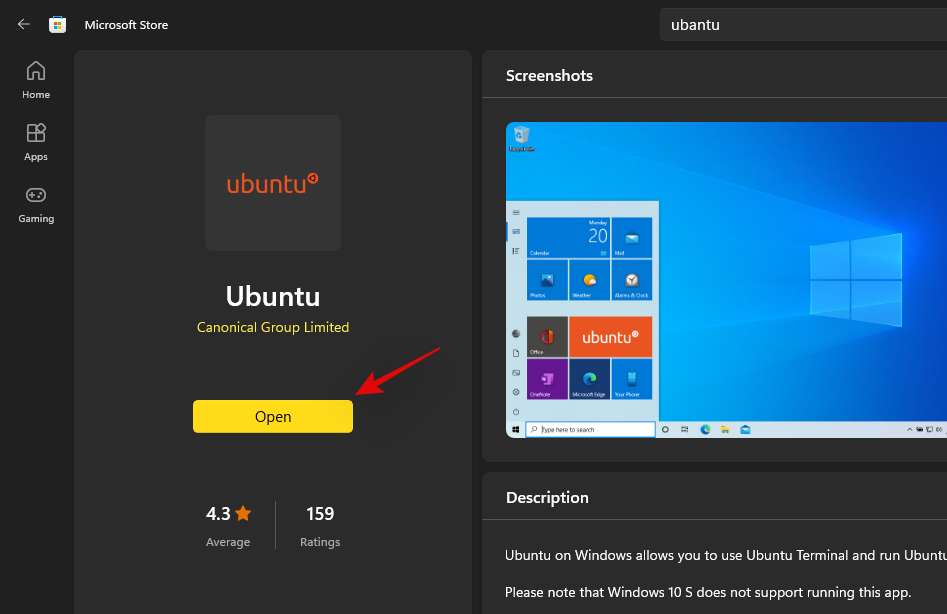
We will now install a distro that will help us during this setup. We recommend you use Ubuntu available on the Microsoft Store as it is easily downloaded and removed from your system. Use the link below to visit and download Ubuntu in the Microsoft Store.
Click on ‘Open’ once the app is installed to configure your installation. You can also launch the app from your Start menu depending on your preference.
Ubuntu will now be installed on your system. Once installed, proceed to set a Username to protect your installation. Subsequently, enter a password to protect root access on your system.
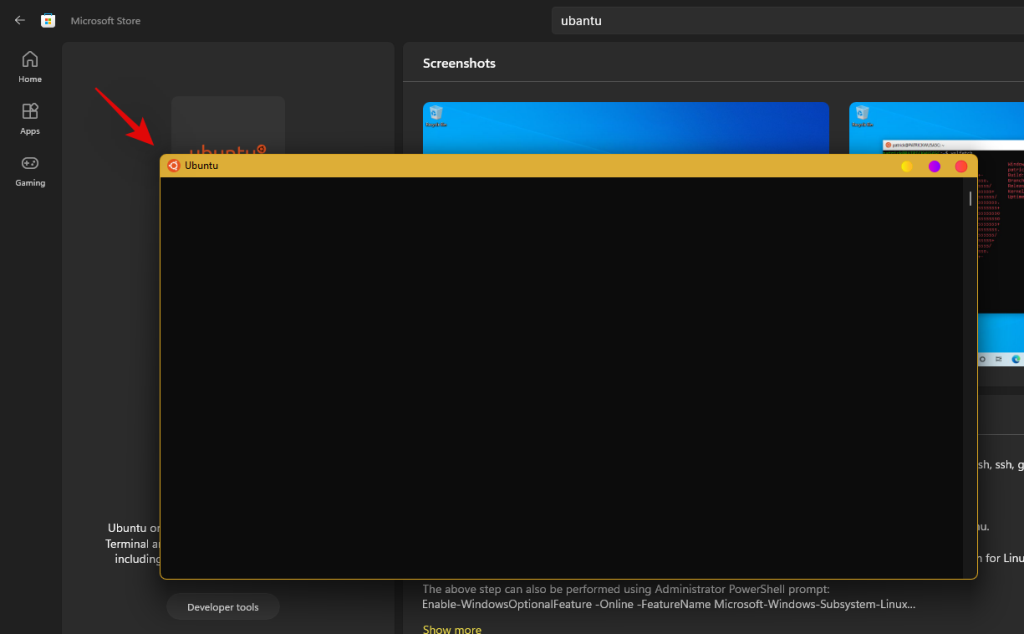
The Distro has now been setup on your system, you can close the current window and press Windows + X instead. Select ‘Windows Terminal (admin)’.
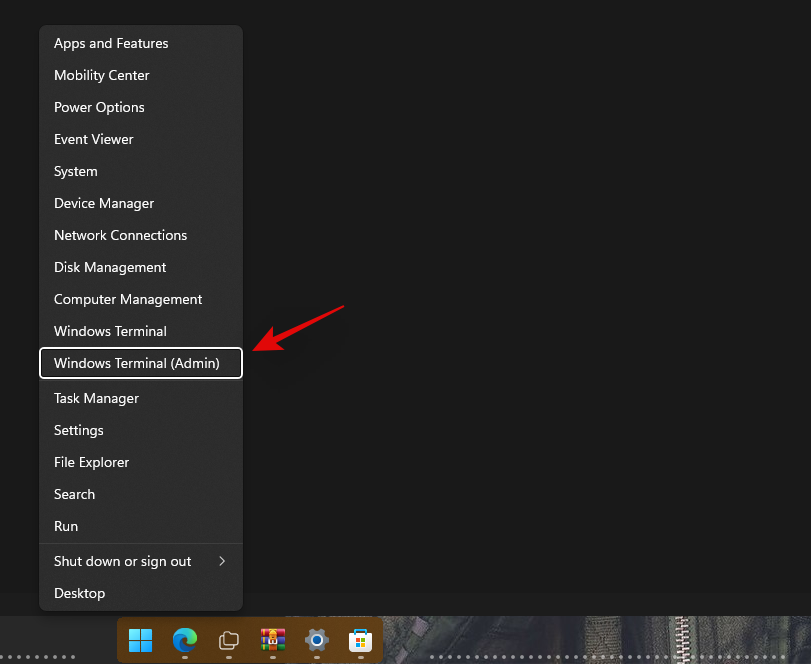
Click on the drop-down arrow at the top and select the same to launch a WSL terminal in the new tab. We’ll now need root access to modify your WSA with GApps. Type in the following command and press Enter on your keyboard. If you did not set a username or password then you should already have root access in the terminal. You can skip this step and move to the next one instead.
sudo su
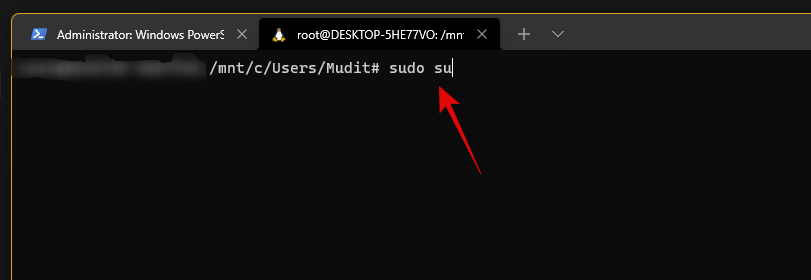
Enter your password to grant root access (if applicable). Now type in the following commands one by one.
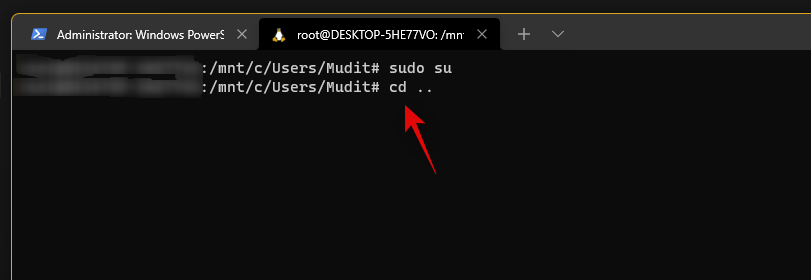
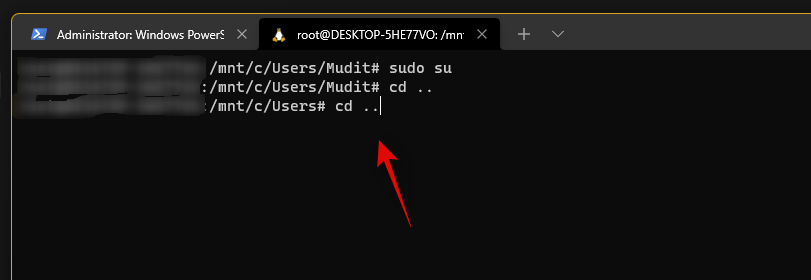
Finally use the command below to navigate to ‘GAppsForWSA’.
cd GAppsForWSA/
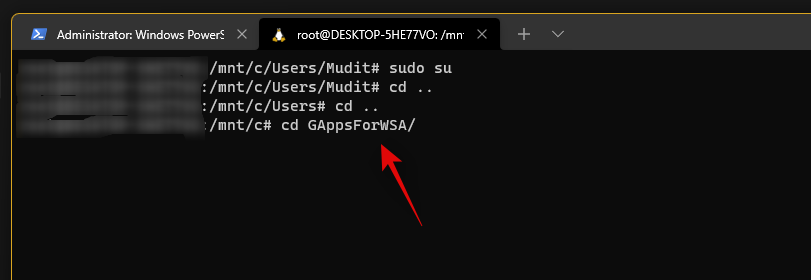
Now type in the following command to install ‘lzip’ and ‘unzip’ which will be needed for this process.
apt install lzip unzip
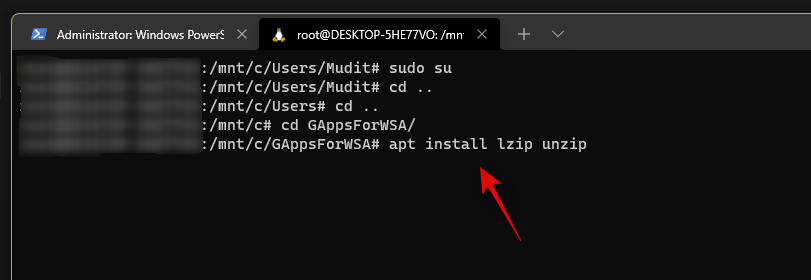
Note: If you are unable to get lzip or unzip setup, then run apt-get update -y to update your repositories and packages.
Confirm your choice by typing in ‘Y‘.
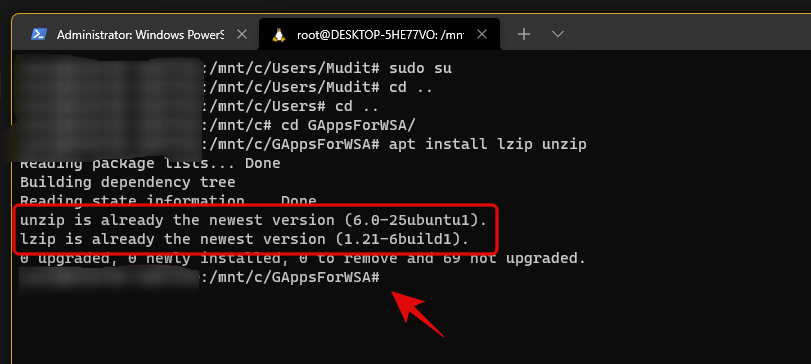
We will now install ‘dos2unix’ which will also be needed for this modification. Use the command below to install the same on your PC.
apt install dos2unix
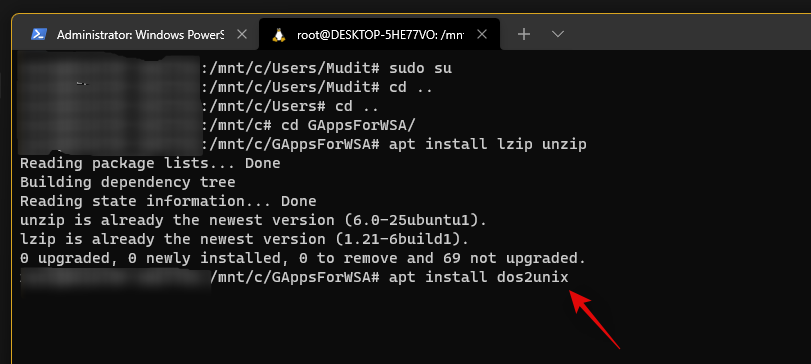
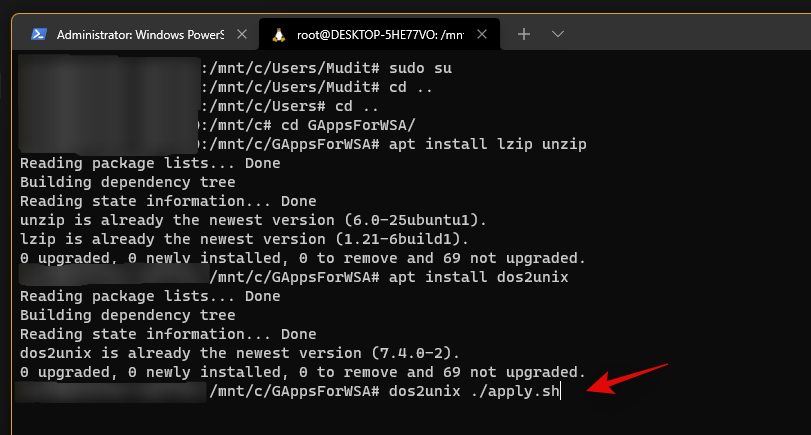
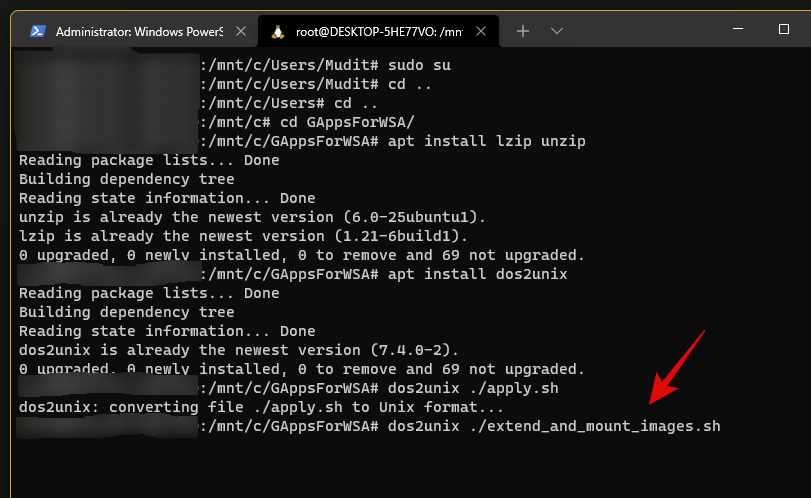
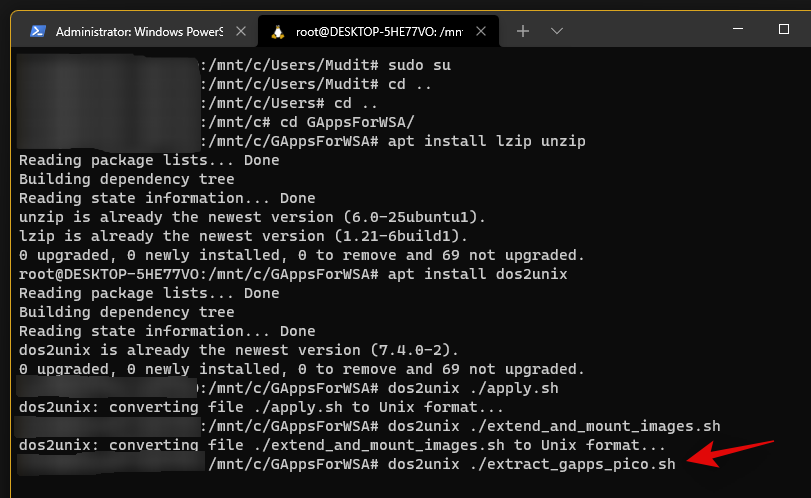
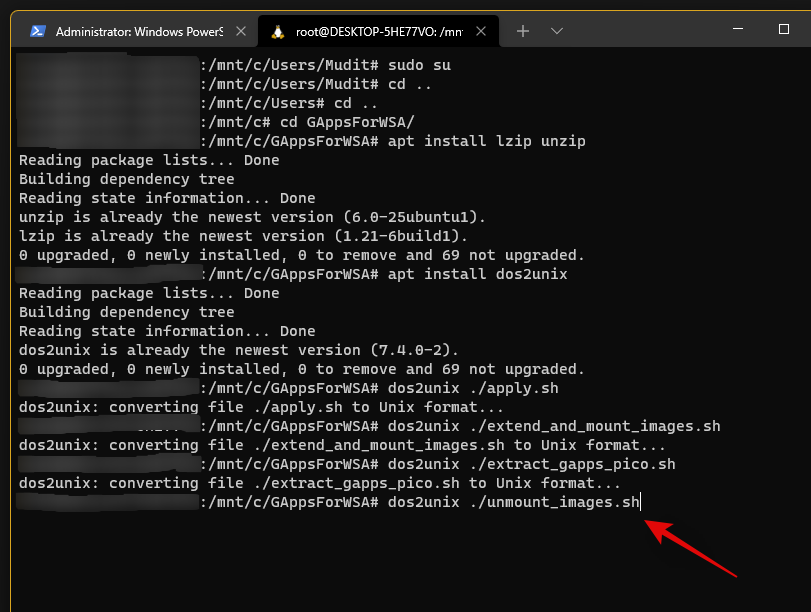
Now it’s time to modify your WSA image. Type in and execute the following commands in the terminal one by one in the same order.
- Command 1:
dos2unix ./apply.sh
- Command 2:
dos2unix ./extend_and_mount_images.sh
- Command 3:
dos2unix ./extract_gapps_pico.sh
- Command 4:
dos2unix ./unmount_images.sh
- Command 5:
dos2unix ./VARIABLES.sh
Once the process completes, type in the following to clear up your terminal for better management.
clear
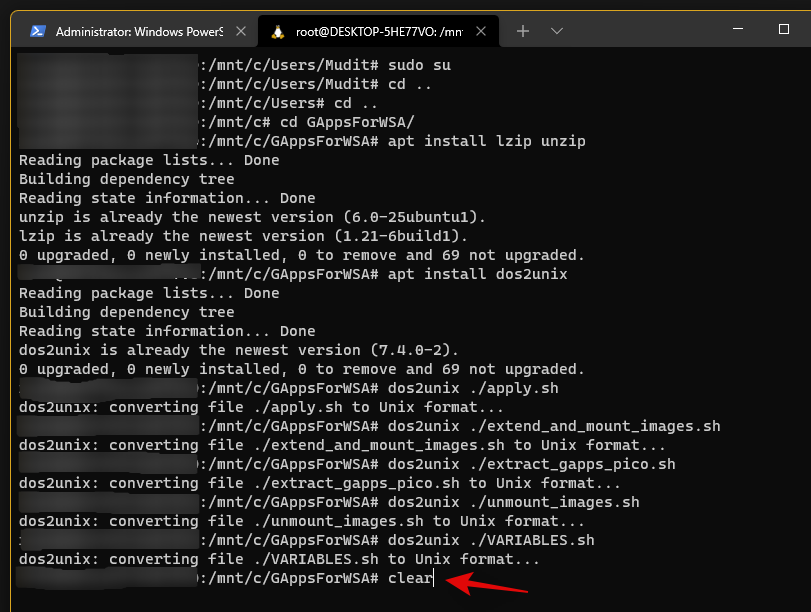
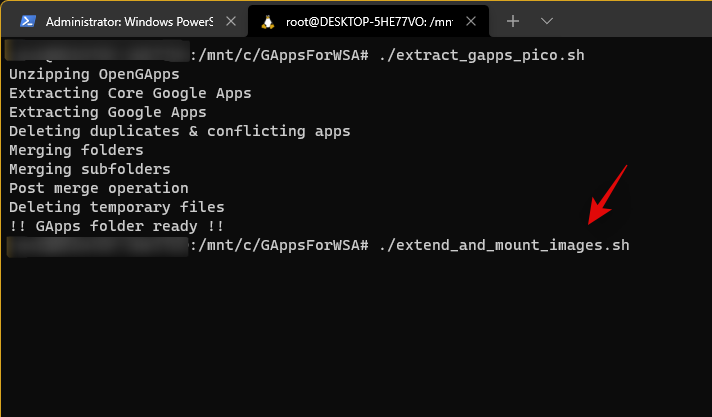
Now that we have our scripts, let’s execute them. Type in and execute the commands given below one by one in the same order.
- Command 1:
./extract_gapps_pico.sh

- Command 2:
./extend_and_mount_images.sh
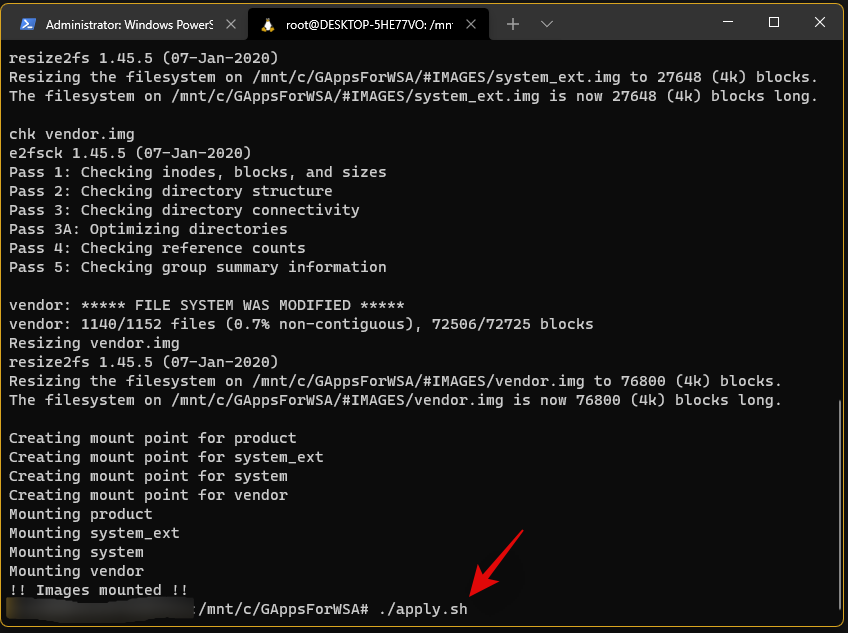
- Command 4:
./unmount_images.sh
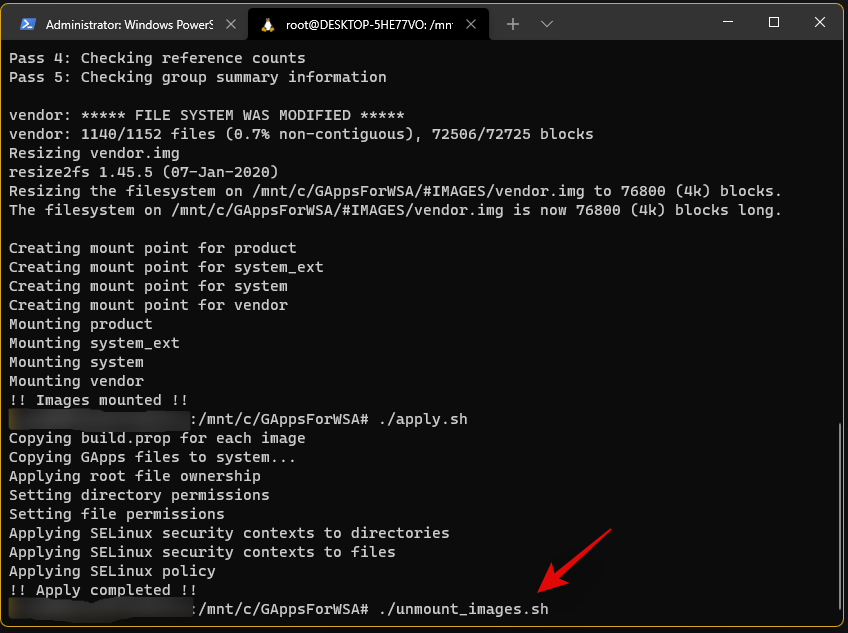
We are now done with the console, for now, you can close the same. Go to your boot drive and navigate to the following location.
\GAppsForWSA\#IMAGES
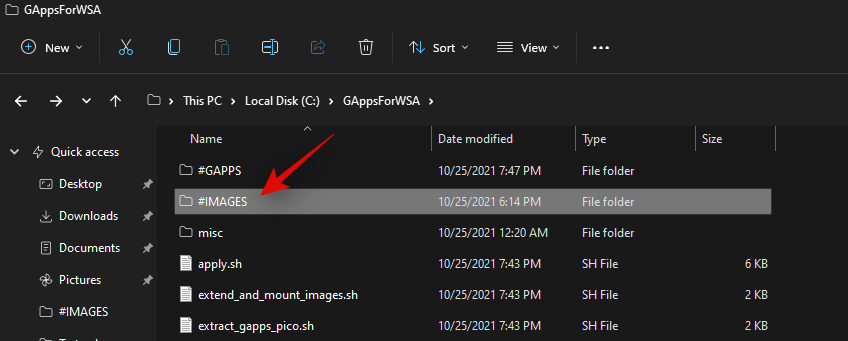
Copy the following files to your clipboard.
- product.img
- system.img
- system_ext.img
- vendor.img
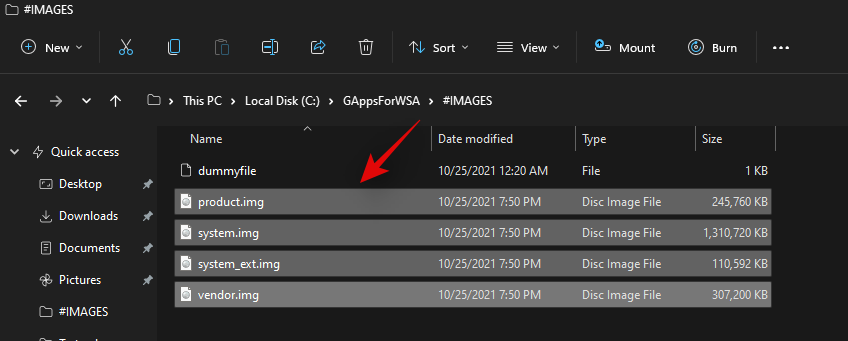
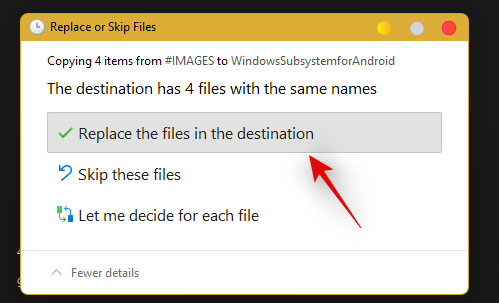
Now navigate to the ‘WindowsSubsystemForAndroid’ folder on your boot drive and paste all the copied images in the same location. Choose to replace the files when prompted.
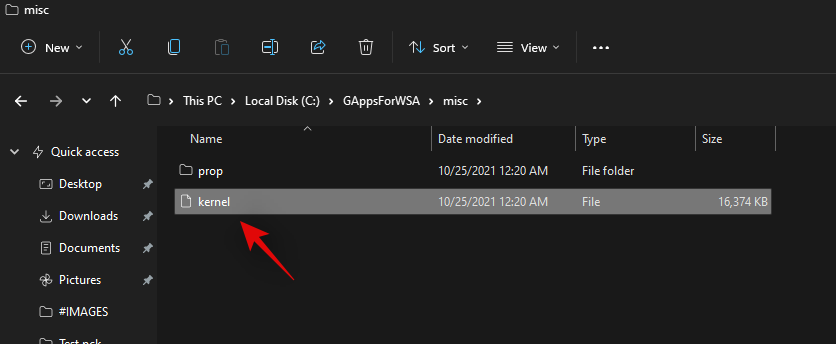
We’re almost done with the modification now. Navigate to your ‘GAppsForWSA’ folder on your boot drive and double click and open the ‘misc’ folder.
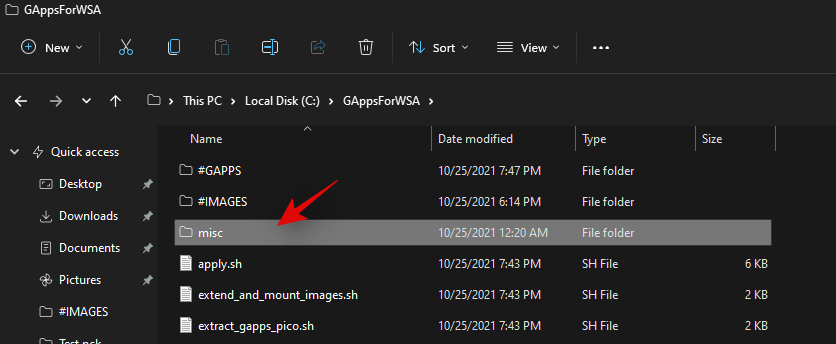
Copy ‘kernel’ to your clipboard.
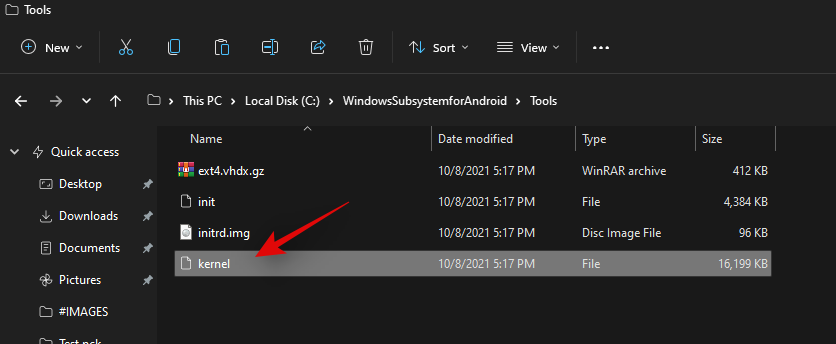
Navigate to the following location.
Boot drive\WindowsSubsystemForAndroid\Tools
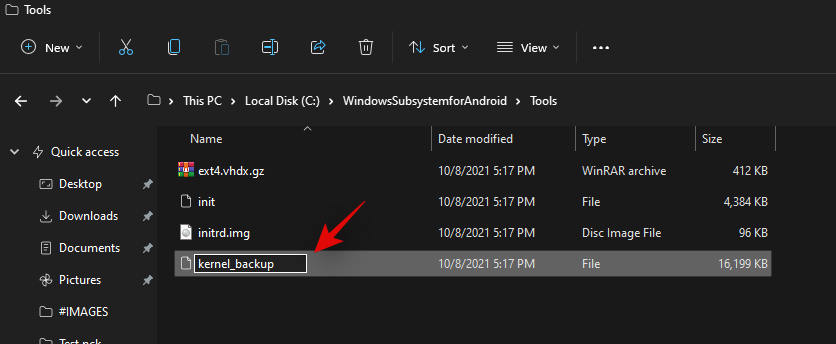
Rename ‘kernel’ to ‘kernel_backup’.
Now paste the kernel file we copied to your clipboard earlier in the same location.
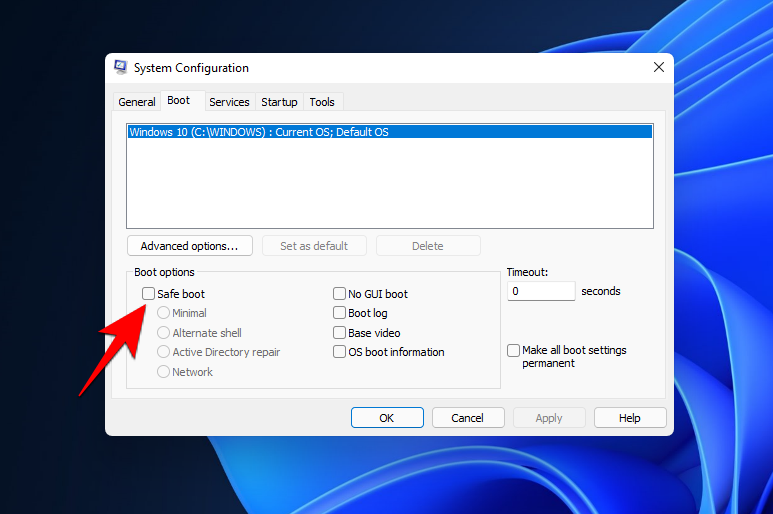
We will now need to enable developer mode for your installation of Windows 11. Press Windows + i to open the Settings app and then click on ‘Privacy and Security’ on your right.
Click on ‘For developers’.
Enable the toggle for ‘Developer Mode’ at the top.
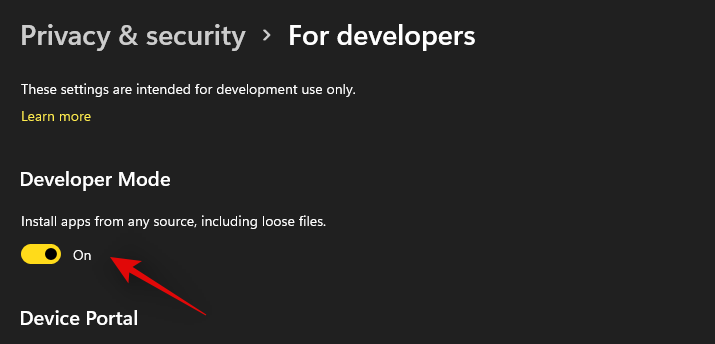
Click on ‘Yes’ to confirm your choice. Now press Windows + X and select ‘Windows Terminal (admin)’.
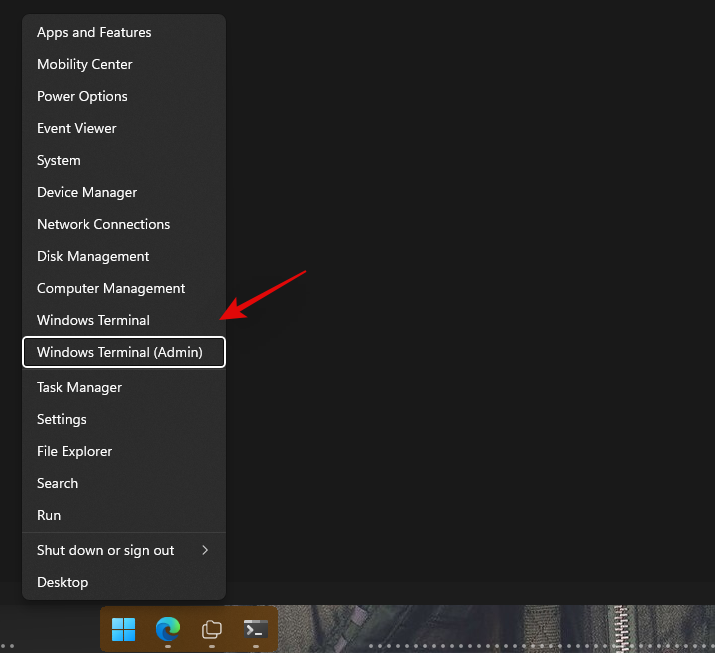
Click on the drop-down arrow at the top and select ‘Windows Powershell’.
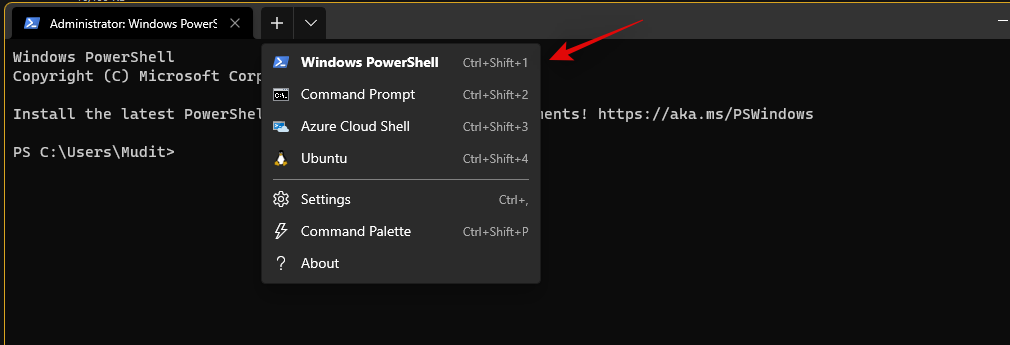
Note: Do not select ‘Powershell’, ensure that you select ‘Windows Powershell’.
Now run the following command.
Add-AppxPackage -Register C:\WindowsSubsystemForAndroid\AppxManifest.xml
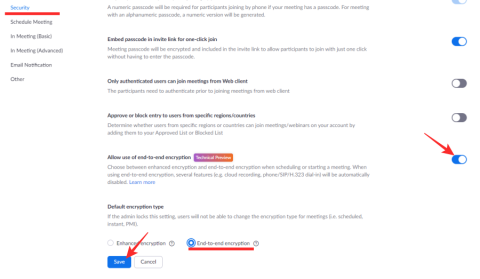
The modified subsystem will now be installed on your PC.

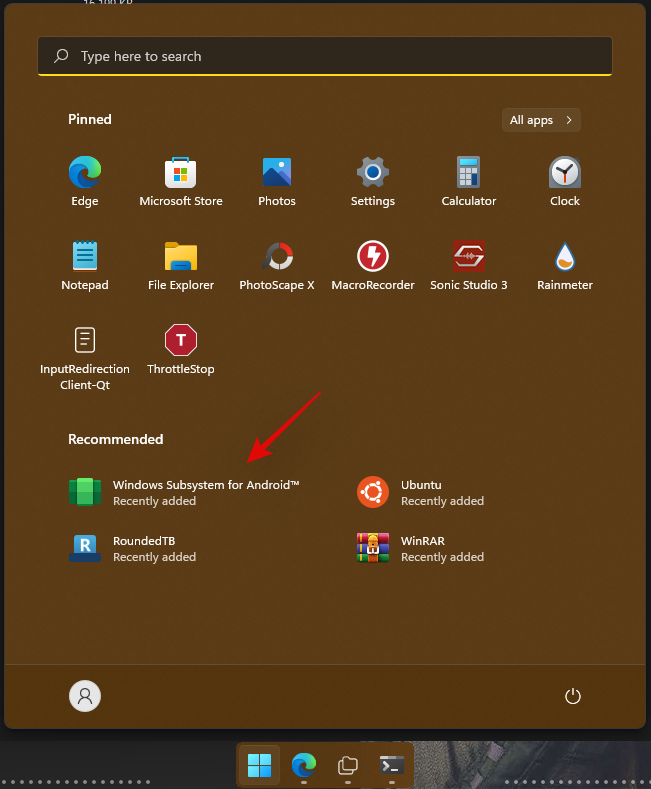
Press the Windows key and launch the same once the process completes.
Enable the toggle for ‘Developer mode’ in the Android Subsystem.
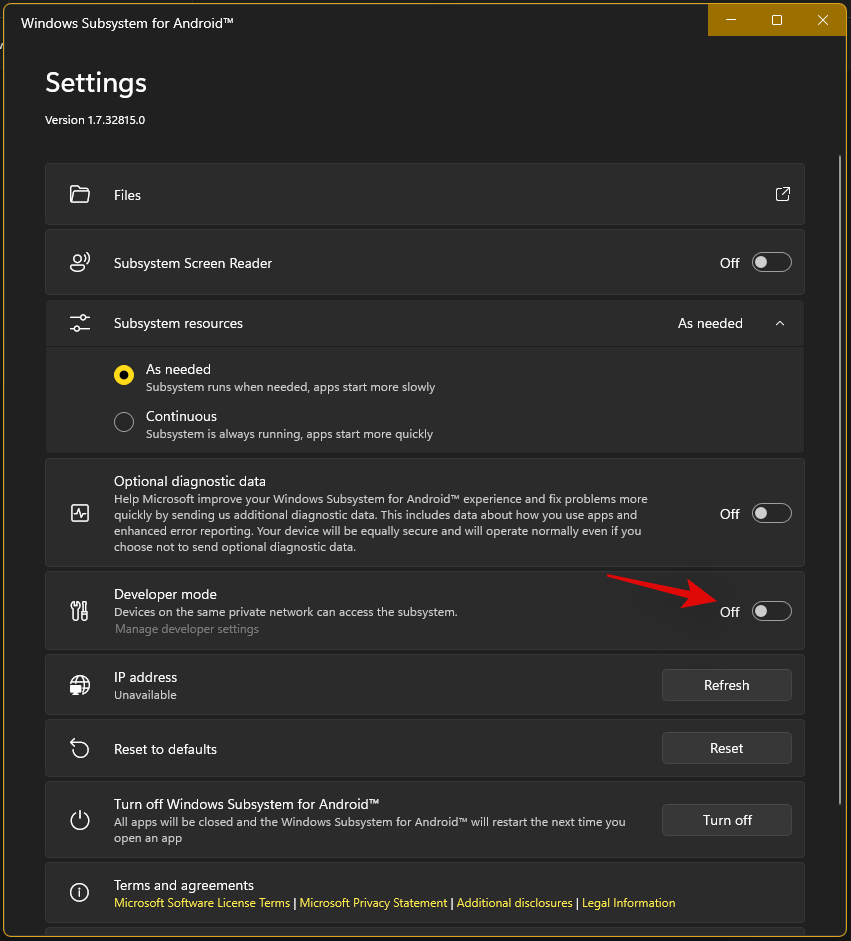
Click on ‘Files’ at the top to launch the Subsystem on your PC. You might have to wait a few minutes now depending on your PC.
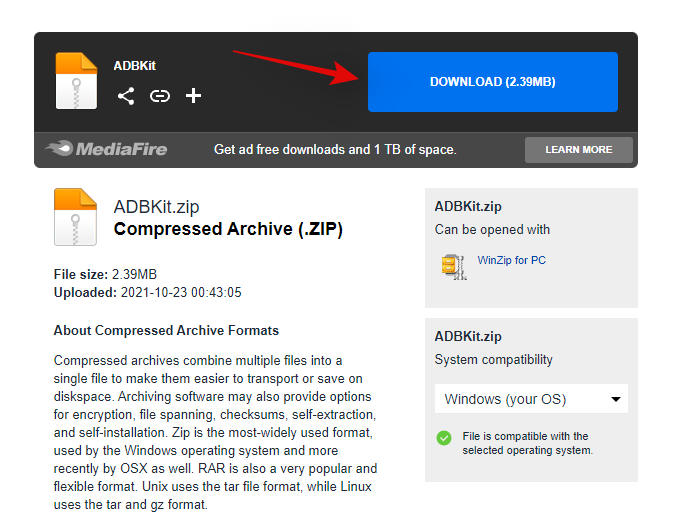
Close the Files app once it opens and download the ADBToolkit linked above.
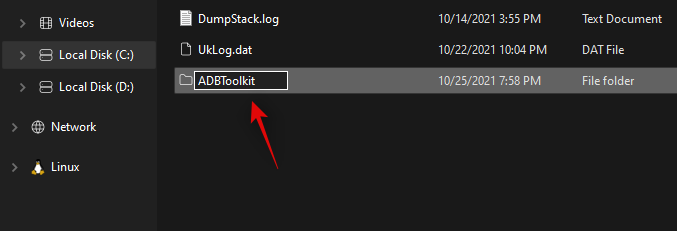
Now create a new folder on your boot drive and name it ‘ADBToolkit’.
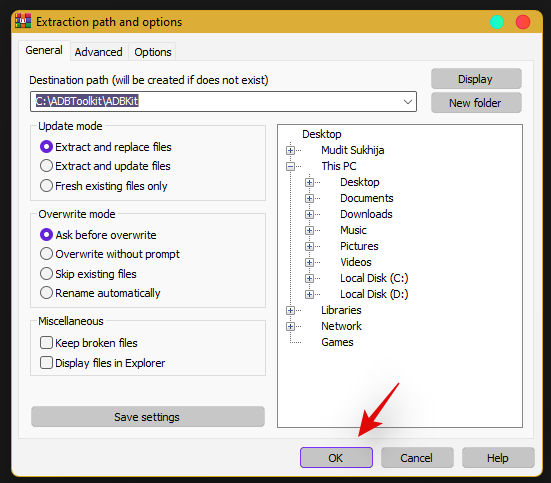
Extract the archive in the same location, and delete the archive and the original folder.
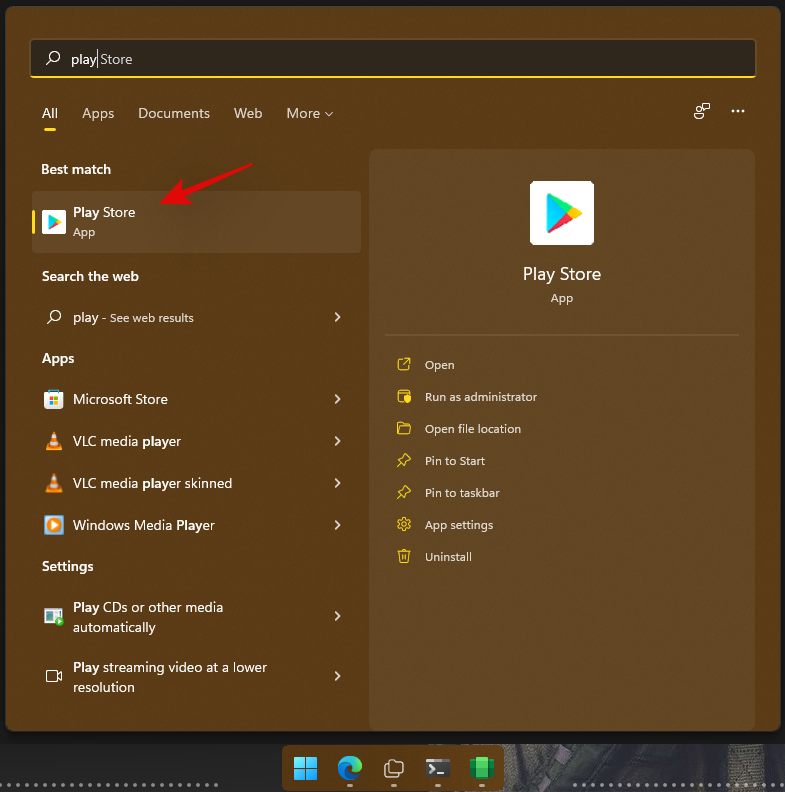
Press the Windows key, search for Play Store and launch it on your system. Do not click ‘Sign-in’ yet.
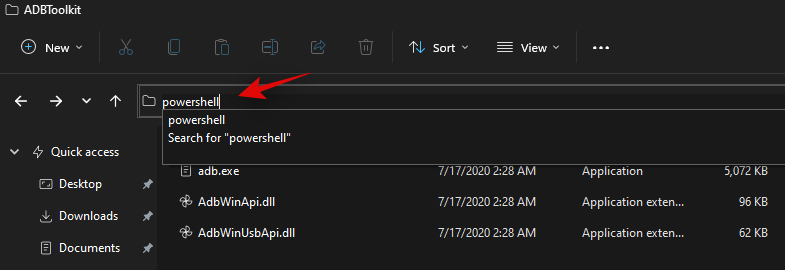
Go back to the ‘ADBToolkit’ folder and click on the address bar at the top, type in ‘Powershell’ and press Enter on your keyboard.
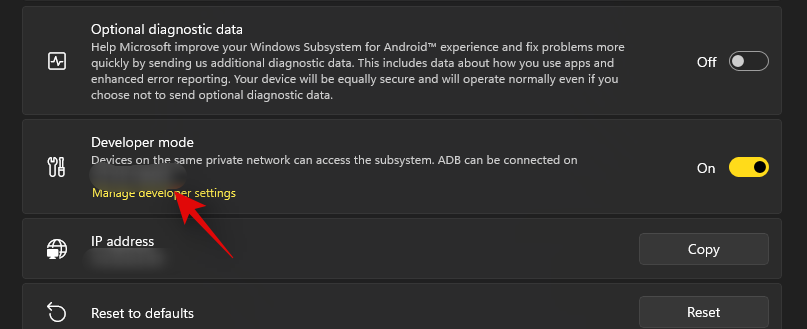
Go back to the Android Subsystem and note down the address shown below ‘Developer Mode’.
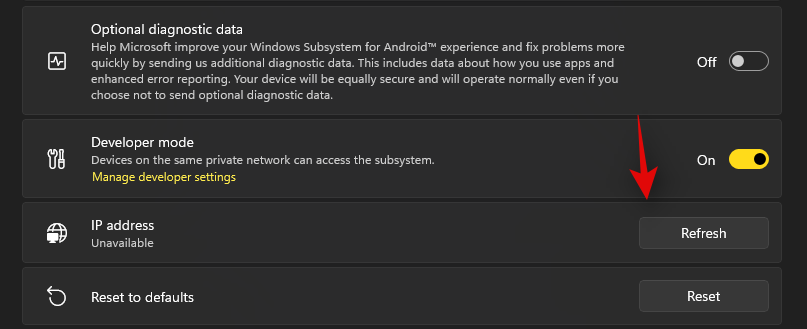
Note: If the address does not show up, simply click on ‘Refresh’ beside IP address.
Type in and execute the following command. Replace ADDRESS with the address shown in the ‘Developer Mode’ section in the Android Subsystem.
.\adb.exe connect ADDRESS
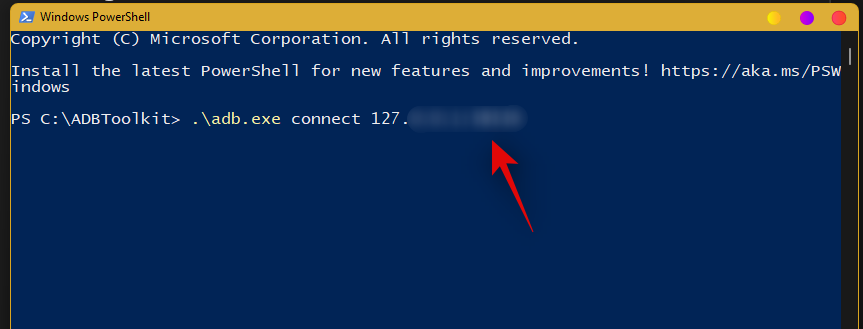
Once you are connected, execute the following command.
.\adb.exe shell
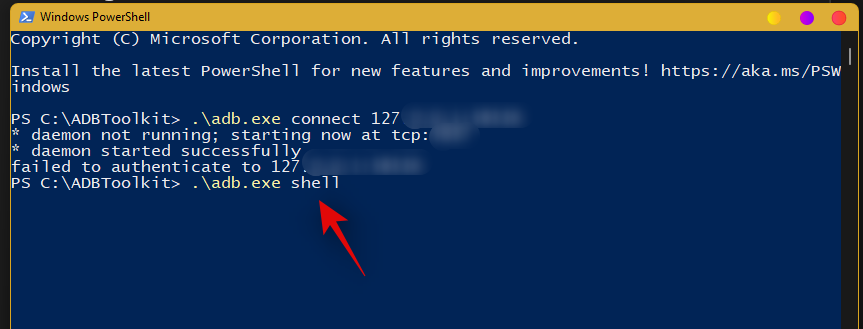
Type in the following command to gain root access.
su
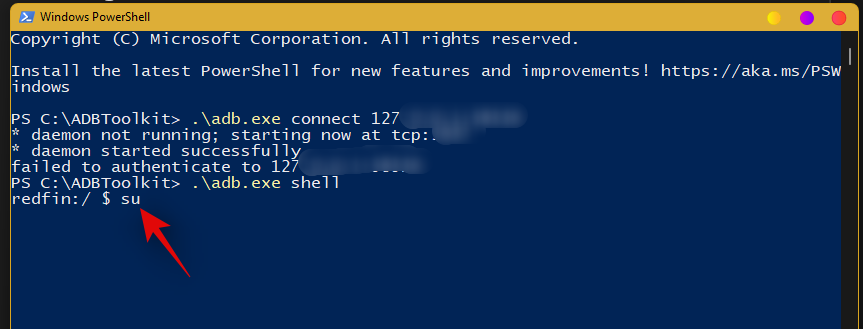
Execute the following command next.
setenforce 0
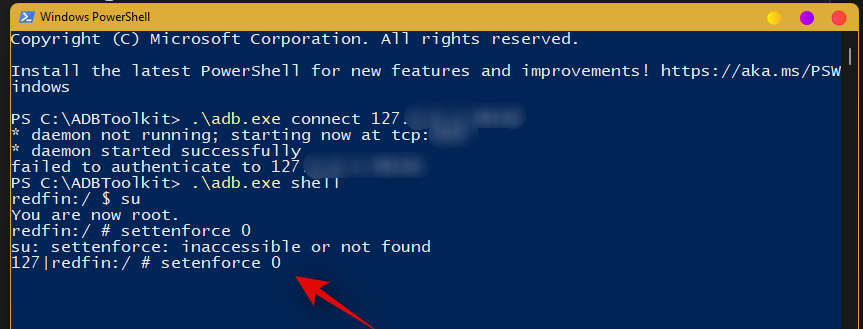
Now go back to the Play Store and click on ‘Sign-in’.
Sign in with your desired Google account now.
Note: This will also enable Google Sync, which by default will sync your Google data to Windows including things like Contacts, Calendar events, Browser history, and more.
Once you are signed in, close the Play Store. We now need to restore your original kernel. Open the Windows Subsystem for Android window and click on ‘Turn off’.

The Subsystem will now stop running in the background on your PC. Navigate to the ‘WindowsSubsystemForAndroid’ folder on your boot drive and open the ‘Tools’ folder.

Rename the ‘kernel’ file to ‘kernel_Root_mod’.
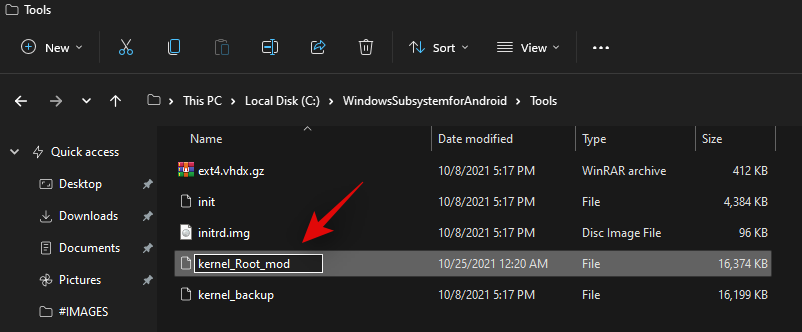
Similarly, rename ‘kernel_backup’ to ‘kernel’.
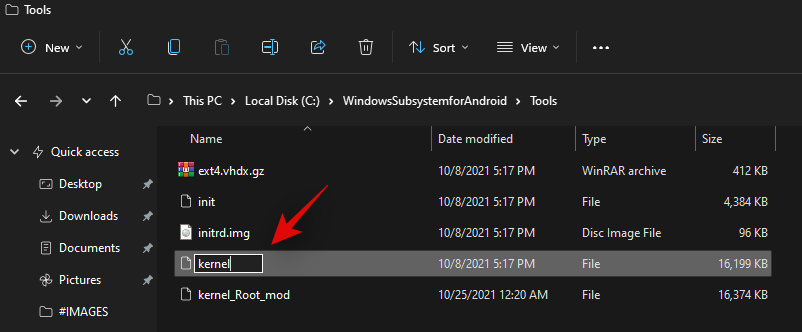
You can now close everything. We recommend you restart your system at this point. Once restarted, you should now be able to use the Play Store on your system while signed in with your Google account.
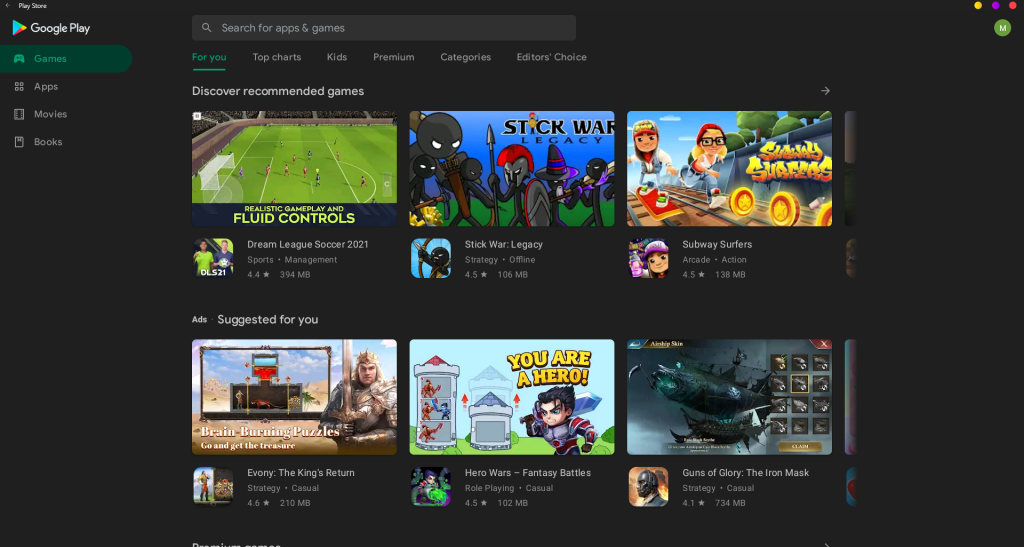
We hope you were able to easily set up and use GApps and Play Store on your PC using the guide above. If you face any issues or have any questions, feel free to reach out using the comments section below.
Related:


