Windows 11 on alates mõne kuu tagusest väljakuulutamisest teinud üsna suurt uudishimu. Insideritel ja beetatestijatel on öelda palju positiivset ning tundub, et uus kasutajaliides ja funktsioonid sobivad kõigile hästi. Sellisena sisaldab Windows 11 palju muudatusi OS-i olemasolevates funktsioonides, sealhulgas uus Windowsi otsing. Otsing on nüüd põhjalikum, kiirem ja tõhusam. Kui soovite kasutada Windowsi otsingut, siis siin on kõik, mida peate selle kohta teadma. Alustame.
Sisu
Mis on uut Windows 11 otsingus?
Windows 11-l on otsingus palju kapotialuseid täiustusi, kuid Windows Searchi välises töös pole palju märgatavaid muudatusi. Siiski võite Windows Searchiga oodata järgmisi uusi muudatusi.
- Uus tegumiriba ikoon
- Spetsiaalse failitüübi otsing
- Juurdepääsetavad otsinguseaded menüüst Start
- Pilveotsingu tugi koos pilvesalvestusteenustega
- Põhjalikud indekseerimisvalikud
- Kiiremad tulemused
- Tõhus indekseerimine madala aku kasutamisega mobiilseadmetes
Ja veel. Windows 11-s Windowsi otsingut uurides leiate funktsiooni iga aspekti kohta väikseid uusi üksikasju.
Seotud: failide ja kaustade jagamine opsüsteemis Windows 11
Windows 11 otsingu kiirklahv
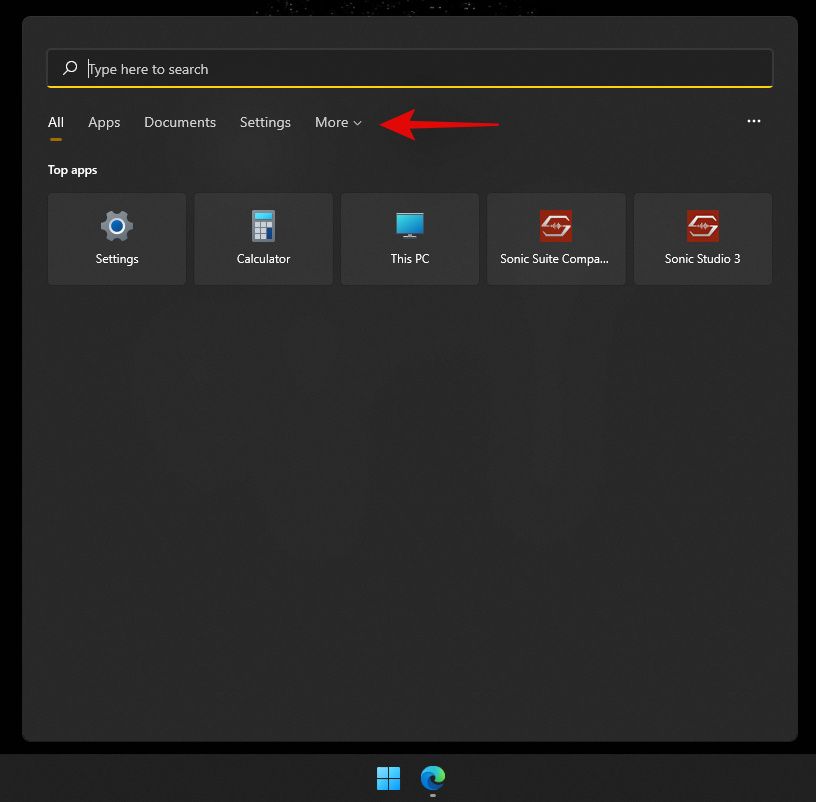
Saate seda kasutada Windows + S
klaviatuuril, et kuvada Windows Search otse oma süsteemis. Võite jätkata tippimist, et alustada oma süsteemist asjakohaste rakenduste, failide ja kaustade otsimist. Lisaks avab klaviatuuril sisestusklahvi vajutamine teie arvutis esimese otsingutulemuse.
Seotud: Virtualiseerimise lubamine BIOS-is opsüsteemis Windows 11 või 10
Kuidas kasutada Windowsi otsingut
Windowsi otsingut saate kasutada järgmistel viisidel. Igal meetodil on oma eelised ja eelised, nii et olenevalt otsitavast failist saate kasutada ühte allolevatest meetoditest.
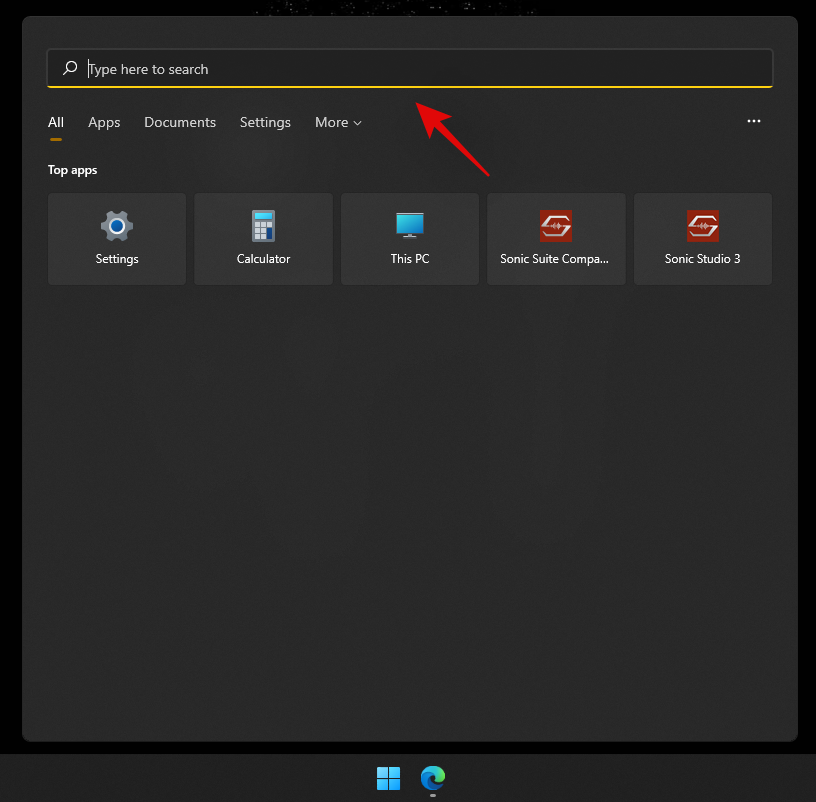
Menüü Start avamiseks vajutage klaviatuuril Windowsi klahvi. Võite klõpsata ka tegumiribal ikooni.
Pärast avamist alustage otsitava faili/programmi nime tippimist, fail/kaust/programm peaks automaatselt otsingutulemustes ilmuma. Kui te oma faili ülaosas ei näe, proovige otsingutulemuste laiendamiseks klõpsata ühel allolevatest kategooriatest.
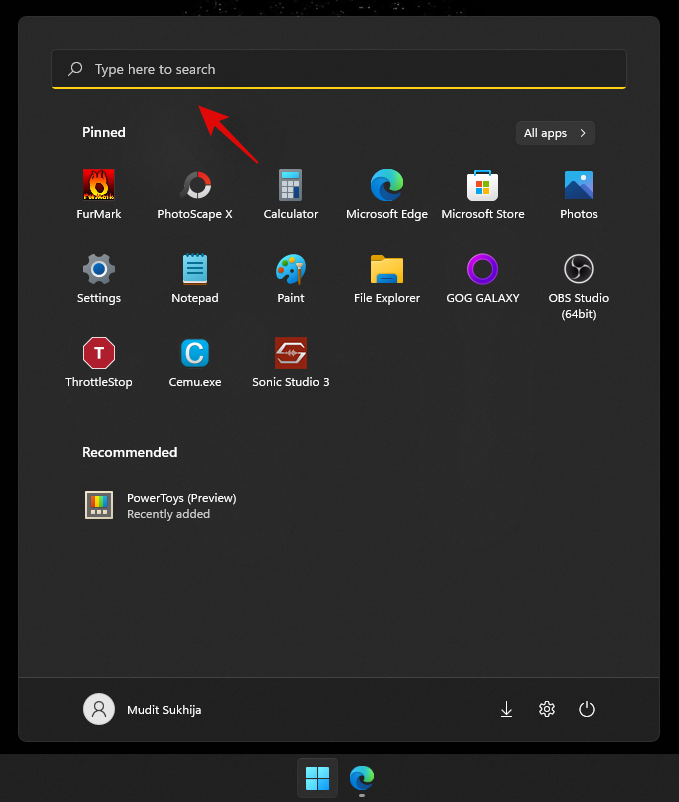
Kui otsingutulemus on leitud, klõpsake selle avamiseks. Selle kohta lisateabe vaatamiseks võite klõpsata ka noolel. Ja see ongi kõik! Nüüd olete kasutanud Windowsi otsingut menüüst Start.
Seotud: Draiverite värskendamine Windows 11-s
Klaviatuuri otsetee kasutamine
Windows + S
Otsingu avamiseks vajutage klaviatuuril. Nüüd lülitage vajadusel soovitud failitüübile.
Sisestage oma otsingusõna. Vajadusel klõpsake tekstikasti.
Windows otsib nüüd teie faili/kausta ja tulemused kuvatakse teie ekraanil. Rohkemate tulemuste vaatamiseks võite klõpsata ja laiendada allolevaid kategooriaid.
Lisaks, kui soovite vaadata faili või programmi kohta rohkem üksikasju, võite klõpsata selle kõrval oleval noolel. Nüüd olete kasutanud Windowsi otsingut kiirklahvi abil.
File Exploreri kasutamine
Windows + E
File Exploreri avamiseks vajutage klaviatuuril. Liikuge draivi/kataloogi/kausta, mida soovite otsida. Pärast avamist klõpsake ekraani paremas ülanurgas otsingukastil.

Sisestage kohe oma otsingusõna ja vajutage klaviatuuril sisestusklahvi.
Windows otsib nüüd teie otsinguterminit praegusest kataloogist ja kuvab seejärel kõik tulemused teie ekraanil. Nüüd saate faili klõpsata ja käivitada.
Samuti võite sellel paremklõpsata ja valida "Ava faili asukoht", et külastada selle praegust kataloogi oma kohalikus salvestusruumis.
Lisaks saate oma faili/kausta/programmi hõlpsamaks leidmiseks kasutada otsingutulemuste sortimiseks ülaosas olevaid rippmenüü nooli.
Ja see ongi kõik! Nüüd olete kasutanud Windowsi otsingut File Exploreri kaudu.
Kuidas suurendada Windowsi otsingu indekseerimist
Vaikimisi otsib Windows Search faile ja otsingutermineid ainult valitud kataloogidest ja teedest. Need vaiketeed hõlmavad Windowsi kõige levinumaid katalooge, nagu menüü Start, dokumendid, muusika, pildid ja palju muud. Kui soovite Windows 11 indekseerimise ulatust suurendada, saate alustamiseks kasutada allolevat juhendit.
Windows + i
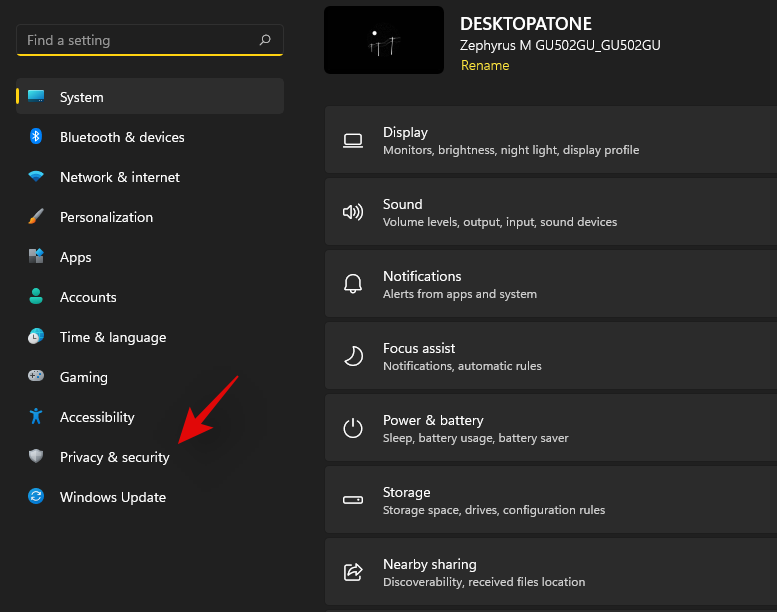
Rakenduse Seaded avamiseks vajutage klaviatuuril. Nüüd klõpsake vasakul asuval valikul „Privaatsus ja turvalisus”.
Klõpsake paremal asuval valikul „Otsin Windowsist”.
Klõpsake ja laiendage valikut „Leia minu failid”.
Valige "Täiustatud".
Kui soovite nüüd mõne kausta indekseerimisest välja jätta, klõpsake nuppu "Lisa välistatud kaust".
Märkus. Windows lisab vaikimisi mõned kaustad. Soovitame jätkata nende kaustade välistamist, et vältida tarbetut ressursside kasutamist süsteemifailide indekseerimiseks.
Kui olete kõik kaustad välja jätnud, saame nüüd hakata kõiki teie draive indekseerima. Klõpsake allosas 'Täpsemad indekseerimisvalikud'.
Klõpsake nuppu "Muuda".
Märkige kohe oma draivide ruudud.
Kui olete lõpetanud, klõpsake nuppu "OK".
Klõpsake nuppu "Sule". Ja see ongi kõik! Olete nüüd suurendanud oma indekseerimiskohti Windowsi otsingus. Kui kasutate sülearvutit, indekseeritakse teie uued asukohad, kui teie seade on vooluvõrku ühendatud.
Seotud: Windows 11-s taastepunkti loomine
Kasutage otsingusuvandeid
Otsingutööriistad on File Exploreris juba mõnda aega eksisteerinud ja võimaldavad teil otsingutulemusi palju tõhusamalt hallata. See võib aidata teil leida faile, mille nime te ei mäleta, ja meelde jätta vaid mõned üksikasjad. Otsingutööriistad on nüüd Windows 11-s ümber nimetatud otsingusuvanditeks ja nüüd saate selle asemel oma valikute jaoks rippmenüü. Alustuseks uurige oma valikuid ja otsige File Explorerist terminit nagu tavaliselt. Kui teie otsingutulemused kuvatakse, peaksite oma ekraani ülaosas leidma valiku „Otsinguvalikud”. Nüüd kasutage otsingutulemuste vastavalt filtreerimiseks järgmisi valikuid.
- Kõik kaustad: otsige oma otsinguterminit kõigist praegusel draivil/partitsioonil olevatest kaustadest.
- Praegune kaust: otsige oma otsinguterminit ainult praegusest kaustast.
Samuti saate määrata, kuidas teie otsingutulemusi sorteeritakse. See võib aidata teil leida suuri faile või failitüüpidel põhinevaid faile. Kasutage ühte allolevatest valikutest
- Muutmise kuupäev: kasutage seda suvandit tulemuste sortimiseks nende kohalikus salvestusruumis loomise aja järgi.
- Tüüp: saate kasutada seda valikut failide sortimiseks nende liigi järgi. Saate otsida kalendrifaile, kaustu, mänge, pilte, muusikat ja muud. Otsingutulemuste sortimiseks saate valida enam kui 23 erineva failitüübi hulgast.
- Suurus: kasutage seda valikut failide filtreerimiseks nende suuruse alusel. Saate valida järgmiste valikute hulgast.
-
- Tühi: 0 kb
- Pisike: 0 kb kuni 16 kb
- Väike: 16 kb kuni 1 MB
- Keskmine: 1 MB kuni 128 MB
- Suur: 128 MB kuni 1 GB
- Suur: 1 GB kuni 4 GB
- Hiiglaslik: failid, mille suurus on suurem kui 4 GB
Lisaks on teil otsingutulemuste filtreerimiseks järgmised valikud. Need valikud määravad, kus ja milliseid faile Windows otsib. Selle aktiveerimiseks või deaktiveerimiseks klõpsake lihtsalt valikul.
- Süsteemi failid
- Pakitud (tihendatud) kaustad
- Faili sisu
Ja nii saate Windows 11 otsingusuvandeid enda huvides kasutada. Meil on veel mõned näpunäited, mis aitavad teil Windows 11-s Windows Searchist maksimumi võtta. Alustamiseks võite kasutada allolevat jaotist.
Seotud: Rakenduste desinstallimine opsüsteemis Windows 11
Näpunäiteid Windows Searchi enda eeliseks kasutamiseks
Windows Searchis on mõned peidetud otseteed ja võtmeterminid, mis aitavad teil otsingutulemusi vastavalt eelistustele otse filtreerida või sortida. Siin on mõned näpunäited, mis aitavad teil Windows 11-s Windows Searchist maksimumi võtta.
Otsige suuri faile
Suured failid leiate draivilt või kaustast hõlpsalt, kasutades käsku "size:". Seejärel saate failide filtreerimiseks ja suuruse alusel kuvamiseks kasutada ühte otsingusuvandite terminit. Näiteks kui soovite praegusest kataloogist otsida faile, mille suurus on suurem kui 4 GB, saate kasutada järgmist käsku.
size:gigantic
Samamoodi saate otsingutulemusi täiendavalt filtreerida, kasutades otsingusuvandeid, et tuvastada suuri filme, pilte, kalendrifaile, mänge või muud, mis võtavad teie arvutis ruumi.
Otsige failitüüpe
Similar to the command above, you can use the ‘kind:’ parameter to find certain files in the current directory. The ‘kind’ parameter will allow you to look for calendar files, text documents, pictures, videos games, and more. When using the kind parameter this way you are not restricted to Windows’s predefined categories, instead you can define specific file extensions as well to find them on your PC as shown below.
kind:.exe
The command above will help you look for executables in the current directory.
Similarly using the command below will help you find PDF files in the selected directory.
kind:.pdf
And that’s it! You can use these commands to find certain files on your PC using Windows Search.
Related: How to Hide Badges on Taskbar Icons on Windows 11
Find files by date
You can also use the ‘date:’ parameter to look for files created on a certain date. Additionally, this command can be used in conjunction with Boolean filters below to find files created or modified before or after a certain date on your PC. For example, if looking for a file created on the 1st of January 2020, then you can use the following command below.
date: 1/1/2020
Similarly if looking for a file created on the 1st January 2021, then you can use the following command.
date: 1/1/2021
Use Boolean Filters
Boolean filters can help you search multiple terms simultaneously or in conjunction with each other when using Windows Search. Here are the following Boolean filters that you can use to your advantage.
The ‘AND’ parameter
You can use the AND parameter to search for two search terms together. This way you can look for a file containing both the terms and not either one of them which should help you filter out unwanted results containing either of the terms. For example, if looking for a file containing the words ‘Samsung and ‘galaxy’ in its name then I can use the following term to search for your file.
Samsung AND galaxy
This will filter out files with only ‘Samsung’ and ‘Galaxy’ in their name. Files with either term will be filtered out.
The ‘OR’ parameter
The OR parameter is opposite to the AND parameter and allows you to search for files containing either of the terms in your search term. For example, if I wish to search for files with either ‘Apple’ or ‘Airpods’ in their name, then I can use the following search term.
apple OR airpods
Similarly, if I am looking for PDF and EXE files in a particular directory, then I can use the following command below.
kind:.exe OR .pdf
And that’s how you can use the OR parameter to look for multiple search terms in a single file name.
The ‘NOT’ parameter
If you are looking to filter out a certain search term or a filet type then you can use the NOT parameter. The NOT parameter will exclude the desired file type, kind, size, or name depending on your choice. For example, if in a folder full of .docx files you are looking for other file types and wish to filter them all out, then you can use the following command.
kind: NOT .docx
Similarly, if I am looking for a file that does not have ‘Apple” in its name then I can use the following search term.
NOT apple
Double Quotes
If you remember an exact term for the file that you are searching for then you can use double-quotes. This will force Windows Search to look for the exact search term with the specific formatting and case to find the file that you are looking for. For example, if looking for a file with ‘Apple 2019′ in its title then you can use the following command below.
“Apple 2019”
Parentheses
Parentheses is a Boolean filter that is usually used when you are searching file contents as well. Anything included between the parentheses () is searched for and files with either or all of the terms are displayed on your screen. For example, if looking for a file containing either ‘Apple, Samsung, Mi, Microsoft, and Dell’ or all of these terms, then you can use the following term.
(Apple Samsung Mi Microsoft Dell)
Similarly, you can use the following command if looking for multiple file types.
kind:(.exe .pdf .txt)
And that’s it! You will now have used parentheses to your advantage to look for multiple search terms in a particular file.
‘>’ and ‘<‘>
These two Boolean filters are usually used when looking for file types or when sorting your results based on a parameter. The greater than and less than parameters can be used to filter your results based on a number. For example, if looking for files dated after 1st January 2021 then you can use the following command.
date: >1/1/2021
Similarly, if looking for files less than 10GB then you can use the following command.
size: <>
You can use the greater than and less than parameters to your advantage this way and find the desired files on your system.
Related: How to Type Accents on Windows 11
Are there any Windows search alternatives?
Yes, there are a few Windows search alternatives out there developed by third parties that offer competitive indexing options and promise higher working efficiency when it comes to using your system’s resources. Windows Search, however, would still be our recommended tool for you as it has been installed natively on your system. Using a third-party tool will add additional workload to your PC unless Windows Search has been completely disabled. Hence, we recommend that you try PowerToys by Microsoft first to get a native utility on your PC that uses and enhances Windows Search instead. If that does not work out for you, you can then opt for any one of the third-party utilities listed below.
PowerToys
PowerToys is a collection of enhanced tools by Microsoft that offer you utilities like PowerToys Run (Windows Search), Color Picker, Power Renamer, and more to help increase your productivity and enhance your workflow. PowerToys Run is a spotlight-like search feature in PowerToys that uses Windows Search to index and display files on your PC. PowerToys Run gives you a more elegant way of using Search on your PC. Use the guide below to get you started.
Download and install PowerToys on your PC using the link above. Once installed, launch PowerToys from the taskbar as shown below.
Once PowerToys is launched, we recommend you click on each feature on your left and disable the ones that you don’t wish to use. PowerToys have comprehensive tools that can cause your system to behave unexpectedly if you do not know about them. Hence, disable all the features that you do not need or wish to use on your PC.
Click on ‘PowerToys Run’ on your left.
Enable the toggle at the top.
Set a custom shortcut if needed. By default, you can use Alt + Space to activate PowerToys Run.
Increase the number of search results you wish to view if needed.
Set a position for the search box if you have a multi-monitor setup.
Choose a custom theme if needed.
Additionally, PoweToys Run is highly capable and can help you access apps from within the search box itself. For example, you can enter equations in the search box, and you will automatically get a result from the calculator app as a search result as shown below.
Similarly, you can also execute commands from the search box itself. Ping is a good example that shows up in the search results as shown below.
However, if you are not going to be using these features then there is no point in having them enabled on your PC. Simply disabled the plugins in the PowerToys window as shown below.
And that’s it! You will now have configured PowerToys Run on your system as a Windows Search alternative.
Third-party apps
If PowerToys is not up to mark for you and you are looking for something a bit more comprehensive then you can check out the following Windows Search alternatives below.
We hope you were able to get familiar with Windows Search in Windows 11 using the guide above. If you face any errors or have any questions for us, feel free to reach out using the comments section below.
Can you disable Windows search in Windows 11?
No and yes. Windows does not offer a native way to disable Windows Search. However, this could be detrimental to older systems where Search could end up taking vital resources in the background that would in turn slow your system down. In such cases, and more, you can use a few workarounds to disable Windows Search in the background on Windows 11. You can use the guide below to disable Windows Search on Windows 11.
How to disable Windows search
If you wish to disable Windows Search then disabling the service is the easiest way. Follow the guide below to get you started.
Press Windows + R
on your keyboard and type in the following. Press Enter on your keyboard once you are done.
services.msc
Search for a service named ‘Windows Search’ and right-click on it.
Select ‘Properties’.
Click on ‘Stop’.
Click on the drop-down menu and select ‘Disabled’.
Klõpsake 'OK'.
Taaskäivitage süsteem ja Windows Search peaks nüüd teie süsteemis olema keelatud.
Seotud: