Windows 11: Destinatario de correo Falta no menú Enviar a.
Busca a opción Destinatario de correo no menú Enviar a en Microsoft Windows 11.
Se o teu ordenador interfire co uso elevado da CPU das interrupcións do sistema, é posible que teñas un problema de hardware ou controlador. Nesta publicación, explicamos que son as interrupcións do sistema e como podes atopar e corrixir a causa subxacente do uso elevado da CPU das interrupcións do sistema.
Contidos
Que son as interrupcións do sistema?
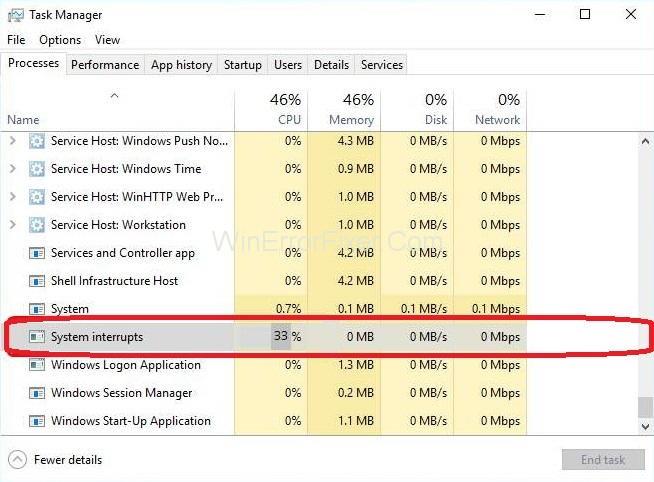
O sistema interrompe unha parte importante de Windows e, aínda que parece ser un proceso no Xestor de tarefas, non é un proceso se o miras no sentido tradicional. Pola contra, é un marcador de posición agregado que se usa para mostrar os recursos do sistema que son utilizados por todas as interrupcións de hardware que se producen no seu sistema informático.
As interrupcións de hardware constitúen a parte central de calquera PC. Tamén se usan para a execución e xestión efectiva de moitas actividades ao mesmo tempo. Numerosos procesos están a executarse continuamente nas interrupcións do ordenador que se usan como mecanismo para executar algunhas instrucións importantes, como a suspensión da actividade de calquera outro proceso, ou úsanse para alertar a CPU mediante procesos de que están listos para ser executados. .
Non obstante, é o uso principal na súa máquina e, no sistema operativo, as interrupcións do sistema de procesamento non deben superar o 2-3% en calquera situación normal. Aínda que haberá un problema se o proceso aumentará ao redor do 20% e permanecerá alí, estes problemas pódense rastrexar facilmente a algún dispositivo externo, un controlador mal configurado e un arranque rápido, etc.
Como corrixir as interrupcións do sistema con alto uso da CPU
Esta guía contén todas as posibles solucións ao problema das interrupcións do sistema alta da CPU. Comeza dende o primeiro e baixa ata que un dos métodos funcione para ti. A complexidade dos métodos aumenta a medida que baixas. Imos comezar!
Solución 1: Solucionar problemas de dispositivos e controladores
Primeiro de todo, debes diagnosticar onde se atopa exactamente o problema. Os dispositivos xeralmente impulsan interrupcións do sistema con algunhas excepcións de software (todas as que se tratan na sección anterior) ou por controladores defectuosos. Comecemos desconectando todos os dispositivos externos e despois pasaremos aos dispositivos internos. Tamén terás que actualizar os controladores do dispositivo cada vez.
Desconecte todos os dispositivos externos, incluído o teclado, o rato, as tarxetas WiFi estranxeiras, os dispositivos Bluetooth externos, etc. Desconecte os dispositivos un por un e vixiando o uso da CPU todo o tempo. Se segue igual, podes continuar desconectando o resto dos dispositivos, pero se o uso da CPU diminúe moito (aprox. 2-3%), significa que atopaches o culpable.
Pero no caso de que non fose capaz de detectar o dispositivo externo defectuoso, pode ir aos dispositivos internos e ver se o problema radica neles. Hai que ter en conta que este paso é un pouco máis complicado que o anterior xa que non inclúe só desconectar os dispositivos. Para este paso, tes que desconectar os dispositivos un por un usando o xestor de dispositivos. Para completar este paso, siga as instrucións que se indican a continuación:
Paso 1: preme a combinación de teclas Windows + R para abrir o cadro de diálogo Executar .
Paso 2: escriba devmgmt.msc no cadro de diálogo e prema a tecla Intro .
Unha vez no xestor de dispositivos, inicie a Desactivación de dispositivos e comprobe o uso da CPU polas interrupcións do sistema despois de desactivar cada dispositivo. Se o uso da CPU non cambia e permanece estable nun 20-30%, entón é un sinal de que o dispositivo desactivado non é a causa do problema e podes seguir facendo o mesmo con outros dispositivos.
Nota: Evite desactivar os dispositivos importantes do seu sistema, por exemplo, controlador de disco, procesador, adaptadores de pantalla, calquera cousa nas categorías Ordenador ou dispositivo do sistema.
Agora, actualiza os controladores de todos os dispositivos conectados ao teu ordenador. De novo, este paso é complicado, ademais de lento. Este paso é necesario porque non se debe confiar nas actualizacións automáticas dos controladores, polo que é fundamental actualizalas manualmente.
Hai unha forma de asegurarse de que un dispositivo en particular non é a causa do problema: actualizar o controlador á versión máis recente dispoñible e ver se ves algunha diferenza.
Nota: Descarga a última versión do controlador só desde o sitio web oficial do fabricante.
Os pasos para actualizar o controlador son:
Paso 1: Fai clic co botón dereito do rato no dispositivo que queres actualizar e despois fai clic na opción Actualizar controlador de dispositivo.
Paso 2: Agora, escolla a segunda opción de Explorar o meu ordenador para o software de controlador .
Solución 2: desactivar os concentradores raíz USB
Os concentradores raíz USB non están conectados a un periférico USB como un dispositivo físico. En cambio, é un dispositivo de software que che permite conectar varios periféricos USB ao teu PC. A maioría dos ordenadores teñen varios concentradores raíz USB para que poida compartir o bus de datos en varios dispositivos.
Para desactivar os concentradores raíz USB que non están en uso polo rato e o teclado, primeiro debes determinar cales concentradores raíz USB se están a utilizar. En primeiro lugar, determinarás que, e despois diso, desactivarás todo o hub raíz extra para que corrixa o uso elevado da CPU das interrupcións do sistema.
Os pasos para facer o mesmo son:
Paso 1: preme a combinación de teclas Windows + R para abrir a aplicación Executar.
Paso 2: Agora, escriba devmgmt.msc na xanela que apareceu e, a continuación, prema a tecla Intro.
Step 3: Now, expand the Universal Serial Bus Controllers category and then locate all of the root hubs enlisted there.
Step 4: Then, right-click on the root hub.
Step 5: Now, click on Properties.
Step 6: After the properties open up, open the Power tab and then see if your devices are attached there. Your keyboard and mouse will show up there if they are using that particular root hub. If it is so, you can disable all of the other root hubs with this one as the exception.
Step 7: Once the root hub used by your keyboard and mouse has been identified, disable all of the other root hubs by simply right-clicking on them and then choosing Disable option.
Step 8: Restart your Computer system and then check if the issue has resolved. If it hasn’t disappeared, then you are free to revert all the changes.
Do Not Miss:
Solution 3: Disable Audio Enhancements
Some sound drivers use enhancements to improve sound quality. If these properties do not synchronise with the Computer or are not compatible, it will lead to some serious issues like the System Interrupts high CPU usage that you are currently experiencing. You can try to disable the audio enhancement and then see if the CPU usage improves.
It is to be noted that all of the sound drivers do not perform this function. These sound drivers have the Enhancement tab renamed to sound blaster. In this case, you have to try to disable all of the effects of the audio.
Some of the sound drivers also seem to have an issue with the option of “Exclusive mode” that allows other apps to take full control of the sound card although it is likely that this is not the issue, there is no harm in checking if this fixes the problem.
Step 1: Press the Windows + R key combination to open the Run dialogue box.
Step 2: Type Control Panel in the dialogue box that appeared to open Control Panel.
Step 3: Once the Control Panel opens, you will see a search bar at the top right side of your screen. Type sound on it.
Step 4: After the sound option opens, click on the audio device that is connected to the PC and right-click and then click on Properties.
Step 5: Then move to the Enhancement tab and then Uncheck all the enhancements that are enabled.
Note: You can also check the box that says “Disable all enhancements”.
Step 6: Finally, click the Advanced tab and then Uncheck the exclusive mode where applications are enabled to override the settings. Then save the made changes and exit.
Note: If this method didn’t work feel free to undo all the changes you made.
Solution 4: Disable the Wake on Magic Packet Settings
Windows comes with a feature where the network adapter has the privilege to awake your Computer system upon transmission of data. The Computer system calls it the data packet “Wake on Magic Packet”.
It is to be noted that this feature is known for causing System Interrupts high CPU usage issues because it seems that a lot of Interrupts are generated and the Computer system corresponds to each of them. You can try to disable this option from the settings. In case this step doesn’t give any good results in your situation, you can disable it any time later on.
Step 1: Press the Windows + R key combination to open the Run app on the system.
Step 2: Type devmgmt.msc in the Run dialogue box and then press the enter key.
Step 3: Your Computer’s device manager will open. In the device manager, you will see a list of all the devices connected to your computer according to the categories. Now, click on the option of Network Adapters to open the drop-down menu that contains further devices.
Step 4: Select your Ethernet and WiFi device and then right-click on it and finally click on Properties from the options available.
Step 5: Then go to the Advanced tab. You will find a lot of options there. Move to the end of the list where you will find the option of Wake on Magic Packet. Its value will be enabled. Choose Disabled, save the changes and then exit.
Step 6: Reboot your system and see if the System Interrupts High CPU problem has been fixed.
Solution 5: Installing Intel Rapid Storage Technology
Intel Rapid Storage Technology provides improved reliability and performance for systems that are equipped with SATA disks for mobile, desktop and server platforms. It is a Windows-based application.
While using one or more SATA disk drivers, you can take advantage of it’s lower power consumption and enhanced performance. While using more than one disk, the user can increase protection against any data loss in the event of disk failure. Some users observed that installing the Intel Rapid Storage Technology module resolved their issue of System Interrupts high CPU usage.
Its installation is a simple process. However, it is to be noted that it will replace the SATA controller driver on the Computer. If you are familiar with the mechanics, you can install the module from the official website of Intel. Once the product is successfully installed, you will see its icon in the taskbar.
Solution 6: Turn off Fast Startup
The Fast boot or Windows 10’s Fast startup works like the hybrid sleep mode of the earlier versions of Windows. It brings together the elements of the hibernate feature and a cold shutdown. When the user shut down the Computer, Windows logs off all of the users and also closes all of the apps similar to the cold boot.
At this point, the state of the Windows is similar to earn it is freshly booted up (all the apps closed and all of the users logged off). Although the kernel is loaded up already and the system session is running.
After this window sends a notification to the device drivers for preparing for hibernation to save the current system state to hibernation and the Computer is turned off. When the user restarts the system, Windows won’t reload the kernel, the drivers or system state. It will just refresh the RAM with the loaded image in the hibernation file and then navigate you to the Startup screen.
You can try to disable this feature because it does not shut down the Computer entirely in the normal way as one would expect. Many users found out Disabling this feature resolved the problem of System Interrupts high CPU immediately.
Step 1: Press the Windows + R key combination to open the Run app.
Step 2: Type Control Panel in the dialogue box.
Step 3: Once the Control Panel opens, click on the Power Options.
Step 4: After the Power Options open, select the Choose what the Power buttons do option present at the left side of your screen.
Step 5: Then, you will see an option that requires administrative privileges. This option is named as Change Settings that are currently available. Click on this option.
Step 6: Now, Uncheck the box that says Turn on fast startup, at the bottom of your screen. Save the made changes and then exit.
Step 7: Reboot the Computer system and see if the problem has been resolved.
Similar Posts:
Conclusion
System Interrupts High CPU usage could be the result of various situations. You must diagnose the root of the problem correctly. Go through the guide with an alert mind as even a small mistake can lead to various serious problems.
Take proper care while Disabling Hardware as well Software. Make sure you undo the changes if they didn’t rectify the situation. Hope this guide proved useful and removed the System Interrupts High CPU usage issue for you.
Busca a opción Destinatario de correo no menú Enviar a en Microsoft Windows 11.
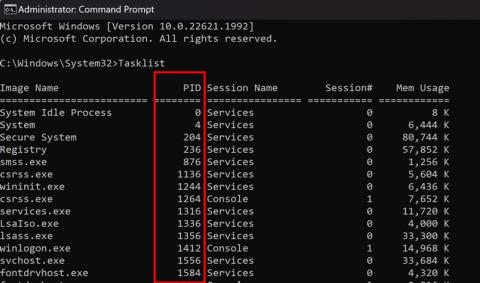
Atopa facilmente un ID de proceso de aplicación para Windows 11 usando varios dos métodos mencionados neste artigo. Aquí como obter resultados instantáneos.
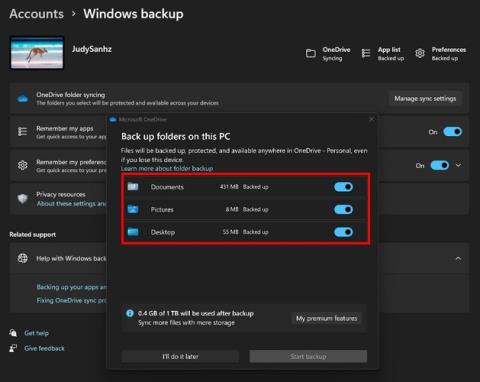
Vexa o rápido que pode restablecer o seu ordenador con Windows 11 para dar un novo comezo a eliminar eses molestos problemas. Aquí están os pasos para principiantes.
Crea e personaliza escritorios virtuais en Windows 11 seguindo estes pasos para principiantes para separar o teu traballo e as cousas persoais.
Descobre as diferentes formas en que podes comprobar a intensidade do teu sinal wifi. Vexa como ver tamén a porcentaxe exacta do sinal.
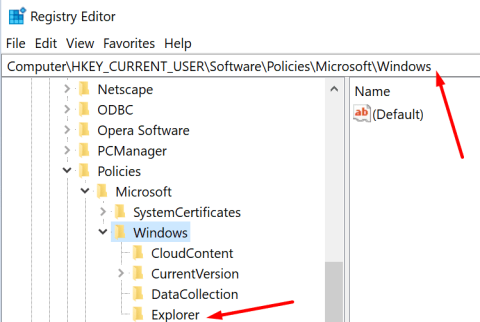
Desactivar a busca de Bing debería ser suficiente para desfacerse das buscas rápidas. Podes facelo a través do Editor de rexistro de Windows 11s.
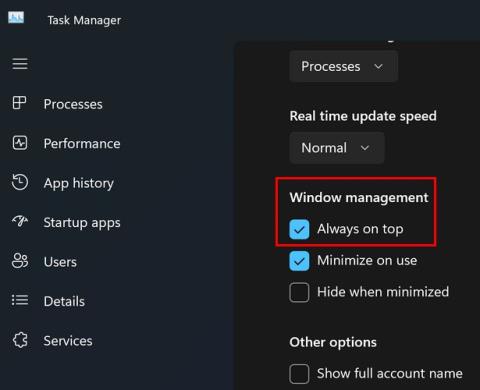
Manteña o Xestor de tarefas sempre en primeiro lugar en Windows 11 para que sexa fácil de atopar cando necesites ler a aplicación. Aquí están os pasos a seguir.
Corrixa a tecla ESC que non funciona en Windows 11 para que poidas usar o teu teclado como sempre o fixeches seguindo estes consellos sinxelos.
Os ficheiros baleiros do escritorio adoitan ser restos de antigas instalacións de Microsoft Office. Elimina a clave do rexistro de NameSpace para solucionar o problema.
Descobre como podes comprimir facilmente ficheiros en Windows 11 sen necesidade de software de terceiros. aquí están os pasos amigables para principiantes.
