Windows 11: Destinatario de correo Falta no menú Enviar a.
Busca a opción Destinatario de correo no menú Enviar a en Microsoft Windows 11.
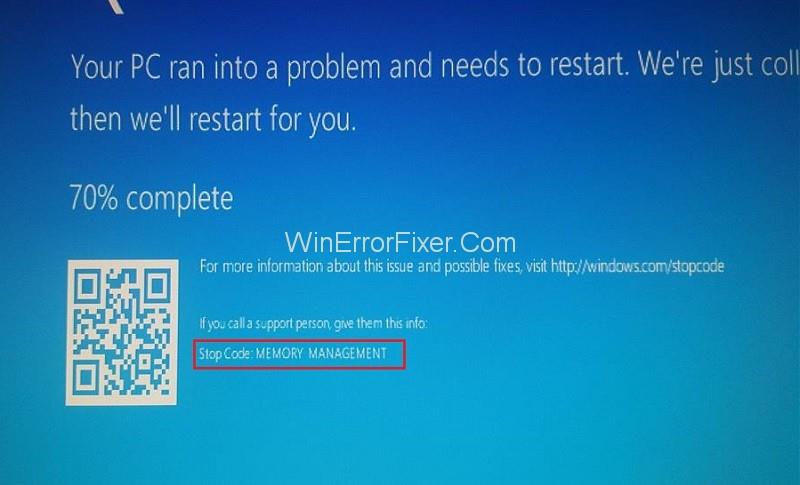
Este artigo trata sobre o código de erro BSOD: Memory_Management e as formas de solucionalo. A pantalla azul da morte (BSoD) é un problema recorrente ao que se enfrontan os usuarios de Windows. Prodúcese ao reiniciar o ordenador cando o sistema atopa un erro durante un proceso en segundo plano. Aparece unha pantalla azul coa mensaxe: "O teu PC tivo un problema e ten que reiniciarse. Estamos a recompilar información de erros e despois reiniciaremos por ti”.
Pode ser un erro único e resolverse despois dun reinicio, pero moitas veces pode seguir producindo. Entre os innumerables erros que causan o BSoD, un é o erro de xestión da memoria. O seu código de parada ou código de erro é 0x0000001A .
Contidos
Que é a xestión da memoria de Windows?
A xestión_memoria dun ordenador é o proceso que xestiona ou regula o uso da memoria do dispositivo. Monitoriza cada transmisión de memoria entre a RAM e a memoria física para a súa execución. Regula cada byte de memoria asignado a calquera dos procesos. Cando o usuario pecha calquera programa, a memoria realízase a outro proceso.
Tamén libera calquera cantidade de memoria que non estea en uso. Os procesos en segundo plano do sistema usan constantemente moita memoria, que tamén está regulada. En resumo, a xestión da memoria é unha característica crucial do sistema para o seu funcionamento normal.
Que causa o erro da pantalla azul de Memory_Management
O proceso de xestión da memoria pode atopar a miúdo un problema, provocando así a pantalla azul da morte. Non hai ningunha razón fixa para o erro da pantalla azul da xestión da memoria. Algunhas das causas comúns deste erro pódense resumir do seguinte xeito:
Estes problemas poden ser, á súa vez, causados por unha serie de factores. Poden xurdir problemas cos controladores despois dunha actualización do sistema operativo Windows debido á incompatibilidade. Os ficheiros do sistema poden estar danados debido ao malware. Os factores mencionados anteriormente provocan entón unha serie de erros, incluído o da pantalla azul de Memory_Management.
Como corrixir o erro de Memory_Management (pantalla azul da morte).
Dado que hai unha serie de posibles causas do erro, hai solucións baseadas nesas causas. Se estás ante a pantalla azul debido á xestión da memoria, proba as solucións a continuación.
Solución 1: Actualiza Windows 10
Actualizar o seu sistema operativo Windows a miúdo axuda a resolver a maioría dos problemas. Para comprobar se hai algunha actualización pendente, siga o seguinte:
Paso 1: vai a Configuración no menú Inicio ou preme a tecla Windows + I.
Paso 2: Seleccione a opción Actualización e seguridade
Paso 3: na sección Actualización de Windows, comprobe se hai actualizacións dispoñibles. Instálao se está dispoñible.
Dado que o sistema reiniciarase durante o proceso de actualización, asegúrate de gardar todas as tarefas e ficheiros previamente.
Solución 2: executa a ferramenta de diagnóstico de memoria de Windows 10
É moi probable que o erro de xestión da memoria fose causado por un problema de RAM. Para detectar tal problema, execute o programa de diagnóstico de memoria de Windows. A continuación móstranse os pasos para executar esta ferramenta:
Paso 1: Abre o diagnóstico de memoria de Windows buscándoo directamente na barra de busca de Windows. Alternativamente, ábreo escribindo "mdsched.exe" no cadro de diálogo Executar (ábreo premendo Windows + R ).
Step 2: In the small Windows Memory Diagnostic window, select the option “Restart Now and check for problems.” Save all your pending tasks and files before proceeding.
Alternatively, select the other option “Check for problems the next time I start my computer” if you are not ready to restart at the moment. Then restart later.
Step 3: Once the diagnostic tool has concluded its process, any error in the RAM will be detected.
Step 4: Since the log file is not easily visible, it has to be viewed separately. For this purpose, first press Windows + X, then select Event Viewer on the menu.
Step 5: Next, navigate to Event Viewer (Local) → Windows Logs → System
Step 6: Click on Find from the left panel. A box will appear, write “MemoryDiagnostic” in it. Now, this will display the diagnostic results.
We can use the Memory Diagnostic tool only for finding the error in the RAM. Furthermore, to fix the error, take note of the error codes detected, and take the help of Google for solutions.
Solution 3: Update Your Drivers
The memory management error may also be due to the outdated system drivers. Updating your drivers may thus fix the error. To check the status of the drivers and update them if necessary, follow the steps below:
Step 1: Press Windows key + X and go to select Device Manager in the menu.
Step 2: In the Device Manager window, locate the drivers and check if there is any yellow error symbol. If there is, they need updates. If there is no error symbol, the drivers are not the cause of the Memory Management error.
Step 3: To install driver updates, it is best to use a Driver Update tool or software. You can download such software from various online sources for free. They will automatically install updates to all the drivers.
After the update installation is complete, restart the system and check whether the Memory_Management error is solved.
Solution 4: Run MemTest86
In case Windows Memory Diagnostic fails to detect any RAM error, but you still suspect some problem with the RAM, there exists another tool. You can use the MemTest86 for a deeper memory test to detect any error in the RAM of x86 computers. Following are the steps to conduct this test:
Step 1: Download the MemTest86 tool (in ISO format) from its official site.
Step 2: Create a bootable flash drive (many free tools are available online to create one). Then write the MemTest86 tool to the flash drive.
Step 3: Reboot into your system using the bootable flash drive to launch MemTest86.
Step 4: Wait until the process is complete. It may take a few hours, depending on the RAM size.
As in the previous method, note down the errors displayed after the MemTest86, if any. Then search them on Google to find further solutions to them.
Solution 5: Run CHKDSK
A problem in the hard disk may be another possible cause of the issue. To scan for any disk problem and repair it, follow the instructions below:
Step 1: Open Command Prompt as administrator. Search “cmd” in the Windows search bar, then click “Run as administrator.”
Step 2: Write the command given below and hit Enter:
chkdsk c: /f /r
If the system file is in any other drive, mention that drive instead of.
Step 3: The scan may not be possible immediately if the system file is in C, the primary drive, as it is in use. You will be asked if you want to schedule the scan for the next system reboot: type y to answer yes, and press Enter.
Step 4: Restart the system. The scan will then start automatically. Once complete, check whether the Memory_Management error has been rectified.
Solution 6: Run SFC
Another way to resolve this issue is to conduct a System File Checker (SFC) scan. If any corrupted system file is the cause of the problem, it may be detected. Following are the steps to conduct an SFC scan:
Step 1: Search “Command Prompt” in the Windows search bar, then right-click on the Command Prompt option and select “Run as administrator.” Also, you can press Windows + X to open it. Then select Command Prompt (Admin) on the menu.
Step 2: In the Command Prompt window, type the command “sfc /scannow” and hit Enter to run. This process will continue for about 15 to 30 minutes.
Step 3: It will detect and repair the corrupted files in the system and then, restart the system.
Solution 7: Check Device’s Hardware
There is a chance of physical damage to the hardware in case of any recent movement of the device. Manually checking the hardware for such damage is an option. Place it properly in the CPU. It may be easy in case of a desktop device, but more complicated if it’s a laptop. Take the help of a technician if necessary.
Solution 8: Reset Windows 10
If somehow none of the above methods yield any result, there is the last option – to reset the Windows OS. This should rectify any issue with the system files. While this process will involve a loss of certain data, your personal files will be retained. Follow the steps below for a system reset:
Step 1: Open Settings from the Start menu or by pressing Windows + I.
Step 2: In Settings, go to Update and Security.
Step 3: In the left panel, select Recovery.
Step 4: In the Recovery section, click on “Get Started” under “Reset this PC.”
Step 5: Select “Keep my files” option. Windows OS will then go through the reset process.
Recommended:
Conclusion
Thus, we have discussed the various techniques to fix the Blue Screen of Death caused by Memory_Management. It can occur due to several reasons. Depending on the exact cause of the error, any of the above methods should yield results. Remember to try the option of resetting the Windows OS only as a last resort. Ideally, at least one of the simpler techniques should work.
Busca a opción Destinatario de correo no menú Enviar a en Microsoft Windows 11.
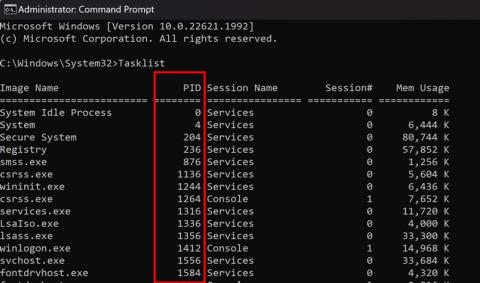
Atopa facilmente un ID de proceso de aplicación para Windows 11 usando varios dos métodos mencionados neste artigo. Aquí como obter resultados instantáneos.
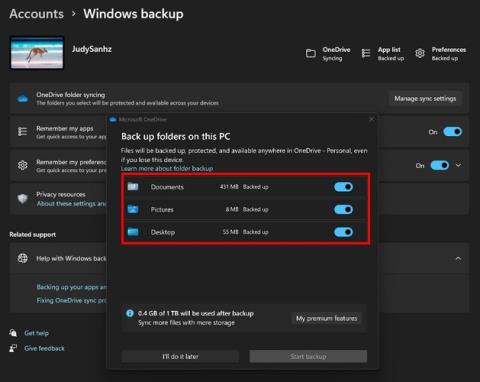
Vexa o rápido que pode restablecer o seu ordenador con Windows 11 para dar un novo comezo a eliminar eses molestos problemas. Aquí están os pasos para principiantes.
Crea e personaliza escritorios virtuais en Windows 11 seguindo estes pasos para principiantes para separar o teu traballo e as cousas persoais.
Descobre as diferentes formas en que podes comprobar a intensidade do teu sinal wifi. Vexa como ver tamén a porcentaxe exacta do sinal.
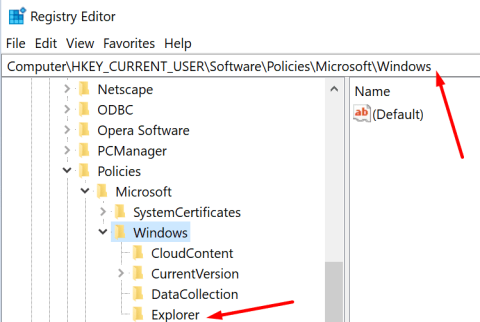
Desactivar a busca de Bing debería ser suficiente para desfacerse das buscas rápidas. Podes facelo a través do Editor de rexistro de Windows 11s.
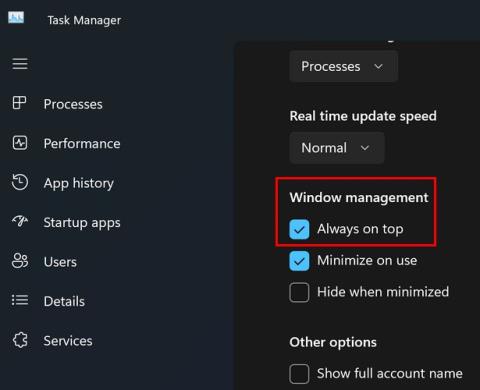
Manteña o Xestor de tarefas sempre en primeiro lugar en Windows 11 para que sexa fácil de atopar cando necesites ler a aplicación. Aquí están os pasos a seguir.
Corrixa a tecla ESC que non funciona en Windows 11 para que poidas usar o teu teclado como sempre o fixeches seguindo estes consellos sinxelos.
Os ficheiros baleiros do escritorio adoitan ser restos de antigas instalacións de Microsoft Office. Elimina a clave do rexistro de NameSpace para solucionar o problema.
Descobre como podes comprimir facilmente ficheiros en Windows 11 sen necesidade de software de terceiros. aquí están os pasos amigables para principiantes.
