Windows 11: Destinatario de correo Falta no menú Enviar a.
Busca a opción Destinatario de correo no menú Enviar a en Microsoft Windows 11.
O erro de actualización de Windows pode ocorrer ao actualizar o sistema Windows ou ao instalar programas. O código de erro 0x80070643 vén cunha mensaxe " Actualización 2018-11 para Windows 10 Versión 1803 para sistemas baseados en x64 (KB4023057) - Erro 0x80070643 ". Ou algo así.
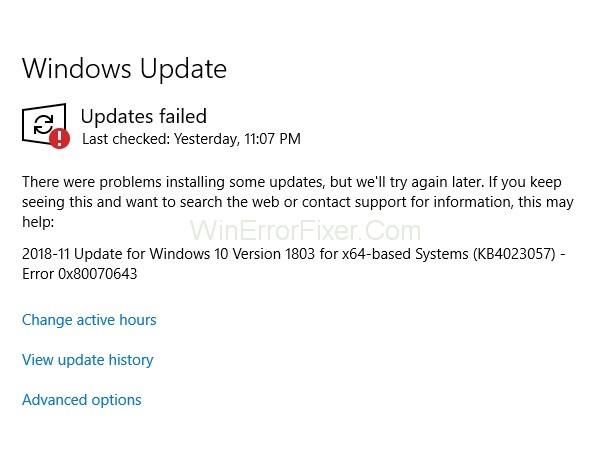
O código de erro 0x80070643 é un erro xenérico, o que significa que pode ocorrer en diferentes programas de software como Microsoft Security Essentials, Microsoft Office, Windows Update, etc. A descarga da actualización ocorre sen problemas, pero a instalación da mesma vese obstaculizada por este erro. Este erro pode ocorrer debido a varias razóns como:
Temos algunhas solucións para tratar o código de erro 0x80070643. Algúns poden funcionar ou non para ti xa que o código de erro 0x80070643 ocorre por diferentes motivos. Entón, tes que comprobalos todos para descubrir cal funciona para ti.
Contidos
Solución 1: reinicie o ordenador
Tan sinxelo parece, pero moitos problemas, incluído o código de erro 0x80070643, só se poden resolver reiniciando o ordenador. Reinicie o seu PC e, a continuación, intente instalar o programa de novo, xa que quizais a instalación anterior requirise un reinicio rápido e sinxelo.
Solución 2: Desactive o programa antivirus
Ás veces, o software antivirus do teu PC e a actualización de Windows poden ter conflitos que poden producir un erro 0x80070643. Neste caso, pode desactivar o seu software antivirus temporalmente e comprobar se pode actualizar o seu sistema ou non. Os pasos para desactivar o antivirus son:
Paso 1: Fai clic co botón dereito na icona do teu software antivirus e, entre as opcións indicadas, selecciona Desactivar.
Paso 2: Ademais, seleccione o período de tempo para o que desexa desactivar o programa. Recoméndase escoller o tempo mínimo dispoñible, como 15 ou 30 minutos.
A continuación, comprobe se a actualización de definicións para Windows Defender: o erro 0x80070643 desaparece ao executar o Windows Defender.
Solución 3: reinicie o servizo de instalación de Windows no seu PC
Algunhas configuracións defectuosas do servizo de instalación de Windows do seu sistema poden provocar que este código de erro 0x80070643 apareza nas pantallas. Polo tanto, reiniciar o servizo Windows Installer pode resolver este erro. Para facelo, siga as instrucións que se indican a continuación:
Paso 1: preme "tecla Windows + R" no teu teclado.
Paso 2: escriba "services.msc" nel e prema "Intro" para abrir a xanela Servizos.
Paso 3: Agora, fai clic na opción Windows Installer e fai clic en "Reiniciar".
Agora tenta instalar as actualizacións de Windows e mira se o problema desaparece ou non.
Solución 4: actualice Windows Defender no PC
Podes tentar instalar as actualizacións pola túa conta manualmente. Para instalar manualmente as actualizacións do sistema:
Paso 1: preme "tecla Windows + Q" á vez e busca "Windows Defender".
Paso 2: A continuación, fai clic en "Protección contra virus e ameazas" en "Áreas de protección".
Paso 3: A continuación, busque "Actualizacións de protección contra virus e ameazas" e prema nel.
Paso 4: Despois diso, vai ao botón "Comprobar actualizacións" e fai clic nel.
Paso 5: isto tardará uns minutos en descargar as últimas actualizacións. Finalmente, reinicia o teu PC e garda os cambios.
Tamén podes usar o símbolo do sistema para actualizar Windows Defender no teu sistema. Para iso:
Paso 1: prema "Windows + X" para abrir unha lista de opcións entre as que escolla "Símbolo do sistema (Administrador)".
Paso 2: agora escriba cada un dos comandos indicados en cmd e prema "Intro" despois de escribir cada un deles:
"%PROGRAMFILES%\Windows Defender\MpCmdRun.exe" - Eliminar definicións -Todo
"%PROGRAMFILES%\Windows Defender\MpCmdRun.exe" – SignatureUpdate
Step 3: After you have entered the commands, it will take a few moments to process it.
Step 4: As it is done close it and reboot your system.
Solution 5: Install the Latest Version of .NET Framework
.Net Framework is important for installing the system updates. So, if the .Net framework on your PC is corrupted or missing then there will be a huge problem in installing the system updates. So, it is very essential to download the latest version of the .Net framework from Microsoft and installing it on your PC. The steps to download and install it are:
Step 1: First go to Microsoft.Net framework’s official website.
Step 2: Then find the latest version of .Net Framework.
Step 3: Click on the download button.
Step 4: Open the downloaded file and follow the on-screen instructions to install it.
As you complete the installation, run Windows update and see if it installs the system updates or not.
Solution 6: Run a scan now or SFC on your PC
Step 1: Press ‘Windows + X’ to open a drop-down menu from which select “Command Prompt (Admin)”.
Step 2: In the Command Prompt, type “sfc/scannow” and press the ‘Enter’ key.
Step 3: Wait till your PC completes the scan.
Step 4: Now try to install the updates.
The corrupted files present in your PC can be responsible for the hindrance of your Windows in getting updated. You can easy filter these corrupted files in your system through a SFC scan and then replace it.
Solution 7: Perform a clean boot of your PC
Third-party software and programs can arise disagreements with your Windows in your system which can cause this error. So, you need to perform a clean boot of your system and then try to install the Windows updates.
Solution 8: Use Troubleshooting
Step 1: Open the ‘Start menu’ and type “Troubleshoot” in the search box and click on the search box “Troubleshoot” option.
Step 2: Click on the “Run the Troubleshooter” option after extending the Windows Update option.
Step 3: Now, follow the instructions given on-screen and run the Windows Update Troubleshoot.
Step 4: At last, restart your PC and check if it resolves the problem or not.
Solution 9: Use System Restore feature
You can create a system restore point if you are facing this error in your PC. It restores your Windows Operating system back to the time when it was error-free and stable. This will not harm your data or personal information. But all the drivers and applications that you have installed after that restore point may get vanished.
Solution 10: Reset the Components of Windows Updates to Fix the Issue
Step 1: Press ‘Windows + X’ and then click on “Command Prompt (Admin) from the options given.
Step 2: Type the commands given below and hit ‘Enter’ after typing each one of them. This will stop Windows Update Services:
net stop wuauserv
net stop cryptSvc
net stop bits
net stop msiserver
Step 3: After this, to rename the Software Distribution Folder type the following commands and press ‘Enter’ after typing each one of them.
Ren C:\Windows\SoftwareDistribution SoftwareDistribution.old
Ren C:\Windows\System32\Catroot2 catroot2.old
Step 4: Then type the given commands to start the update services and don’t forget to press ‘Enter’ after typing each command.
net start wuauserv
net start cryptScv
net start bits
net start msiserver
Step 5: Then, reboot your system and check if the error code 0x80070643 goes away or not.
Solution 11: Uninstall the Windows Defender Update
Tracking restore point on Windows 10 Operating system can be difficult because the restore point in it doesn’t exist. But still, if you want to get back to the early state of Windows and remove Windows Defender Update, follow these simple steps:
Step 1: Press ‘Windows + R’ simultaneously which will open the Run window.
Step 2: Now, Type “appwiz.cpl” and press ‘Enter’ to open “Programs and Features”.
Step 3: Then click on the “View Installed Updates” icon displayed on the left side of the screen.
Step 4: In the Microsoft Windows scroll down to search the “Windows Defender or KB4054517 Update” which is the root of this error and click on it.
Step 5: At the last step, click on “Uninstall” and restart your PC. Finally, check if the error goes away or not.
Solution 12: Update using Administrative Permissions
If you haven’t signed-up in your PC and are using it as a guest or from a less privileged account then you should sign in to your system. It is because sometimes, the configuration of the administrative permissions is required for the updates to get installed. And if your computer belongs to a domain of which you have no details of, call the system administrator for help.
Solution 13: Run SubInACL Tool
There is a bug called .NET Framework 2.0 which happens due to wrong access control list permissions on registry hives which can result in an obstacle for installing some applications. This bug is usually found in old Windows Operating systems like Windows Vista and Windows XP.
To fix this you can use the SubInACL tool which will repair the defected file and registry permissions that are required to install MSI based setups. Follow the steps to do the same:
Step 1: Download the “SubInACL” tool and install it on your PC. The location of this tool will be: C:\ProgramFiles\Windows Resource Kits\Tools
Step 2: Copy and Paste the given code in a Notepad file.
@echo off
setlocal
echo.
echo Determine whether we are on an 32 or 64 bit machine
echo.
if "%PROCESSOR_ARCHITECTURE%"=="x86" if "%PROCESSOR_ARCHITEW6432%"=="" goto x86
set ProgramFilesPath=%ProgramFiles(x86)%
goto startResetting
:x86
set ProgramFilesPath=%ProgramFiles%
:startResetting
echo.
if exist "%ProgramFilesPath%\Windows Resource Kits\Tools\subinacl.exe" goto filesExist
echo ***ERROR*** - Could not find file %ProgramFilesPath%\Windows Resource Kits\Tools\subinacl.exe. Double-check that SubInAcl is correctly installed and re-run this script.
goto END
:filesExist
pushd "%ProgramFilesPath%\Windows Resource Kits\Tools"
subinacl.exe /subkeyreg HKEY_LOCAL_MACHINE /grant=administrators=f /grant=system=f
subinacl.exe /subkeyreg HKEY_CURRENT_USER /grant=administrators=f /grant=system=f
subinacl.exe /subkeyreg HKEY_CLASSES_ROOT /grant=administrators=f /grant=system=f
subinacl.exe /subdirectories %windir% /grant=administrators=f /grant=system=f
echo FINISHED.
echo.
echo Press any key to exit . . .
pause >NUL
popd
:END
endlocal
Paso 3: A continuación, vai a " Ficheiro " e escolla a opción " Gardar como ".
Paso 4: escriba o nome como " reset.cmd ". Finalmente, cambie o tipo de ficheiro a " Todos os ficheiros ".
Paso 5: A continuación, fai clic co botón dereito no script e fai clic en " Executar como administrador ".
Agora, agarde ata que se complete o script reset.cmd e despois intente instalar de novo as actualizacións de Windows.
Publicacións similares:
Conclusión
As solucións anteriores son probadas e son adecuadas para todas as diferentes formas en que este erro pode molestarche. Utilízao dependendo da forma en que este código de erro 0x80070643 ocorre no teu PC, espero que axude.
Busca a opción Destinatario de correo no menú Enviar a en Microsoft Windows 11.
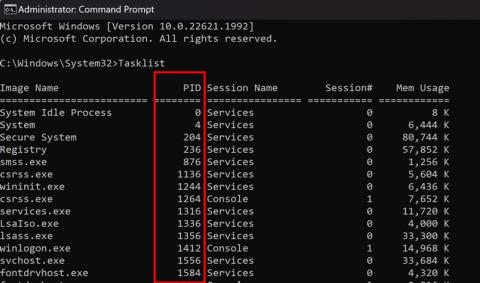
Atopa facilmente un ID de proceso de aplicación para Windows 11 usando varios dos métodos mencionados neste artigo. Aquí como obter resultados instantáneos.
Vexa o rápido que pode restablecer o seu ordenador con Windows 11 para dar un novo comezo a eliminar eses molestos problemas. Aquí están os pasos para principiantes.
Crea e personaliza escritorios virtuais en Windows 11 seguindo estes pasos para principiantes para separar o teu traballo e as cousas persoais.
Descobre as diferentes formas en que podes comprobar a intensidade do teu sinal wifi. Vexa como ver tamén a porcentaxe exacta do sinal.
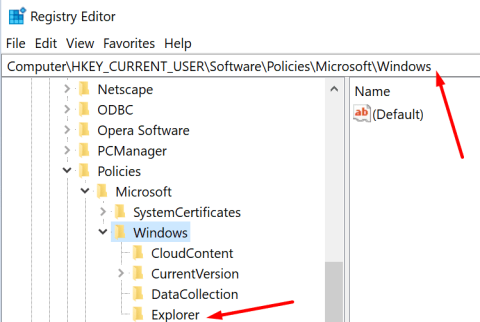
Desactivar a busca de Bing debería ser suficiente para desfacerse das buscas rápidas. Podes facelo a través do Editor de rexistro de Windows 11s.
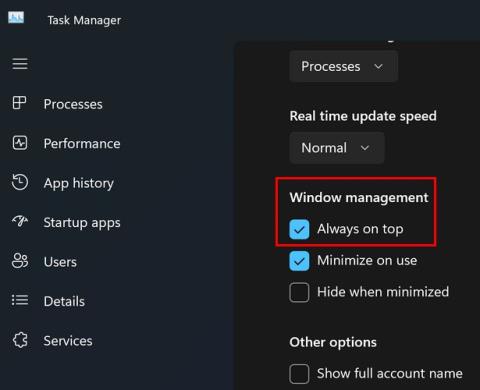
Manteña o Xestor de tarefas sempre en primeiro lugar en Windows 11 para que sexa fácil de atopar cando necesites ler a aplicación. Aquí están os pasos a seguir.
Corrixa a tecla ESC que non funciona en Windows 11 para que poidas usar o teu teclado como sempre o fixeches seguindo estes consellos sinxelos.
Os ficheiros baleiros do escritorio adoitan ser restos de antigas instalacións de Microsoft Office. Elimina a clave do rexistro de NameSpace para solucionar o problema.
Descobre como podes comprimir facilmente ficheiros en Windows 11 sen necesidade de software de terceiros. aquí están os pasos amigables para principiantes.
