Windows 11: Destinatario de correo Falta no menú Enviar a.
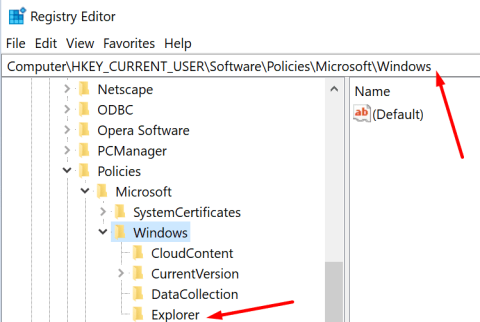
Busca a opción Destinatario de correo no menú Enviar a en Microsoft Windows 11.
Cando intentes instalar ou actualizar o teu sistema operativo a Windows 10 , podes atopar varios problemas. Estes son probablemente erros do controlador. Cando se produce este erro na túa pantalla, tamén che mostra unha mensaxe de erro con consellos para resolver ou corrixir o código de erro 0xC1900101 .
O erro 0xC1900101 pode deberse a varios motivos, principalmente motivos relacionados co controlador. Estes motivos poden incluír controladores obsoletos que non se actualizaron ás súas últimas versións, o controlador instalado é incompatible con Windows 10, etc.
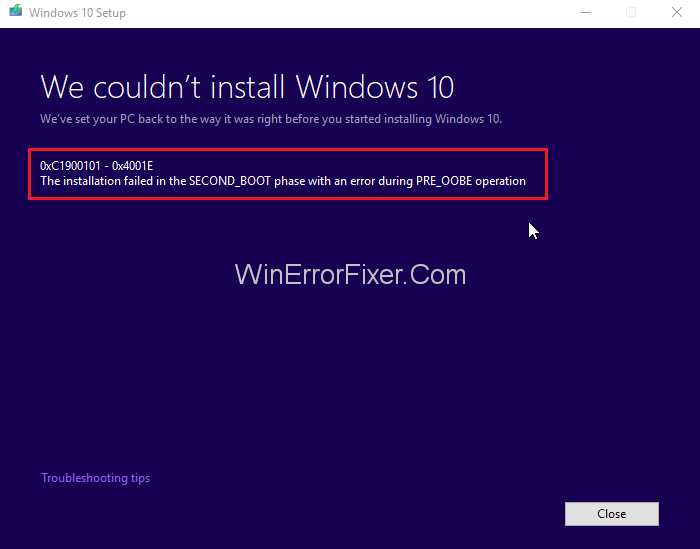
Moitos Windows queixáronse do erro 0xC1900101 ao actualizar a Windows 10 e que non puideron completar a actualización. Existen códigos de erro categoricamente diferentes para diferentes tipos de erros do controlador.
Os diferentes códigos de erro que podes atopar ao actualizar a Windows 10 son:
0xc1900101 - 0x2000c , 0xc1900101 - 0x20017 , 0xc1900101 - 0x30018 , 0xc1900101 - 0x3000d , 0xc1900101 - 0x4000d, 0xc1900101 - 0x40017 ,, 0xc1900101 - 0x20004
Os erros 0xC1900101 poden solucionarse e neste artigo cubriremos todas as formas. Usando isto, podes tentar solucionar este problema.
Contidos
Como corrixir o erro do controlador 0xC1900101 en Windows 10
Algunhas das solucións mencionadas poden requirir o permiso do administrador antes da execución. As seguintes solucións mencionadas explícanse detalladamente paso a paso despois do cal poderás executalas.
Solución 1: actualice ou desinstale controladores danados
Un controlador antigo e obsoleto pode ser a causa de varios erros do sistema. Tamén pode causar un erro 0xC1900101 . Podes tentar detectar e eliminar controladores defectuosos probando estes métodos diferentes.
Solución 1.1: actualice ou desinstale manualmente os controladores danados
Para detectar manualmente controladores danados ou obsoletos, siga os pasos seguintes:
Paso 1 : primeiro, abra o cartafol O meu PC, Este PC ou O meu ordenador .
Paso 2 : A continuación, abra o C: Drive .
Paso 3 : busca o cartafol Panther na Unidade C: e unha vez que o atopes, ábreo
Paso 4 : agora abra Setuperr.log ou Setupact.log para atopar o controlador defectuoso.
Paso 5 : Despois de localizar os ficheiros ou cartafoles danados, desinstáleos un por un
Solución 1.2: Actualiza os controladores automaticamente
Se non tes o coñecemento ou a habilidade para corrixir/actualizar os controladores danados manualmente, podes empregar outras ferramentas que axudarán a corrixir estes controladores defectuosos automaticamente. Podes usar estas ferramentas de actualización de controladores .
Este software recomendado tanto por Norton Anti-virus como por Microsoft. Considérase un dos mellores para solucionar automaticamente calquera problema relacionado co controlador.
Siga os seguintes pasos para actualizar os controladores manualmente:
Paso 1 : Descarga calquera ferramenta de actualización de controladores e instálaa.
Paso 2 : Despois de instalar o software, a ferramenta comezará a buscar un controlador obsoleto.
Paso 3 : agarde ata que se complete a exploración.
Paso 4 : Despois de completar a exploración, verá a lista de todos os controladores obsoletos
Paso 5 : agora podes actualizalos un por un. Fai clic co botón dereito no controlador que queres actualizar e selecciona Actualizar controlador.
Paso 6 : Tamén pode actualizar todos os controladores á vez facendo clic na opción Actualizar todo
Solution 1.3: Detect and Fix Drivers Using Device Manager
The device manager tool is a Windows tool that helps you to keep track of all your drivers, folders, and files.
To find the defective drivers follow the given steps –
Step 1: First, go to the Start Menu.
Step 2: Type in Device Manager in the search bar. After that, open the first result.
Step 3: A list of the drivers on the device will appear in a window.
Step 4: Any Driver that might be causing the 0xC1900101 error will be marked in yellow
Step 5: Now right-click on these defective drivers one by one. Then, select Update Driver Software or Select Uninstall, if you want to remove these drivers.
After removing or updating all the corrupted drivers from your PC, the error should be solved. And now, you will be able to upgrade your system to Windows 10 without any further issues. The Windows Device Manager also can be used to detect corrupted or outdated drivers and fix them automatically, and to do so, all you have to make some changes in your settings.
Solution 2: Unplug All Peripherals
Sometimes significant issues can be solved by using simple measures. Many users who have complained about the 0xC1900101 error confirmed that they were able to upgrade their operating system to Windows 10 after they unplugged all of their peripherals from their PC.
This might not look like an effective way to solve the issue, but there is no harm to try this method if it can fix the problem in hand. This method has been claimed to be useful by many Windows users.
First, you should unplug all the plugged-in peripheral devices. After that, start your PC. After the PC is started, you should be able to upgrade the operating system to Windows 10.
Solution 3: Remove Additional RAM or Your Network Card
If the methods mentioned above haven’t worked yet, then the issue behind the error wasn’t a faulty driver or peripheral device. Your additional RAM module device might sometimes cause this error. The extra RAM specifically causes the 0XC1900101-0x20017error. To solve this problem, you have to conduct some simple changes.
First, remove the extra RAM module. Then try to restart your PC. Now you can upgrade to Windows 10. You can also try to fix the problem by removing your network card from your computer. If you are still unable to fix the 0XC1900101 error, then try the other methods mentioned below.
Solution 4: Use the Media Creation Tool
If you are still unable to fix the 0XC1900101 error, then you can give the Media Creation Tool a try to complete the upgrade to Windows 10. You can download the Media Creation Tool from the Windows Store of the Windows Upgrade Page.
Along with the tool, you will also find the step-by-side guide to complete the upgrade process.
Solution 5: Run an SFC Scan
Sometimes your windows registry could be corrupted with damaged or virus-infected files. Independent tools and software such as Microsoft’s system file checker or CCleaner help you to check for the registry for damaged or corrupted files, and it also verifies the integrity of all the files in your system. These tools don’t just scan for the file/files causing the issue but also helps you to repair them.
To repair your registry, you can follow the given steps:-
Step 1: First, to open the Quick Access Menu press on Windows Key + X.
Step 2: Now select the Command Prompt (Admin) option OR the PowerShell (Admin) option.
Step 3: Type snannow/sfc command and Hit Enter.
Step 4: After this, the SFC scan will be started. It might take some time. Do not interfere in the process.
After the scan is over, check the bug is fixed or not. If you are unable to access the command Prompt as the admin, then try to find other ways to access the Command prompt as admin, on the internet.
If the problem is not solved yet, then you can try and remove or repair damaged system files by using the Microsoft Windows Development Image Servicing and Management (DISM)tool.
To fix the problem using DISM follow the below steps –
Step 1: First go to the Start Menu.
Step 2: Type in Command Prompt or cmd.exe in the search bar. Following this, open the first result.
Step 3: Type DISM.exe/Online/Cleanup-image/Restorehealth command and press Enter.
Step 4: This process will take more time to complete than the SFC scan. Do not interfere in the process.
Solution 6: Check your Available Upgrade Space
To install the Windows 10 operating system on your computer, you need at least 16 GB of memory. But if there isn’t this much space in the PC, then you will be unable to fix the issue and install Windows 10. So you need free some space on your computer to successfully upgrade to Windows 10.
If you to clean up your hard drive’s memory without losing any important file or folder, then you can use different disk Cleanup tools to wipe out the unnecessary junk data and file hogging up your computer’s memory.
You can follow the below instructions to clean out junk files from your computer:-
Step 1: First to open the File Explorer press the Windows keys and E at the same time.
Step 2: Now the list of all the drives will open.
Step 3: Then right-click on each drive and select Properties from the drop-down menu.
Step 4: From the Properties window, select Disk Cleanup.
Step 5: After that select the junk files to be removed and click on OK.
Step 6: Lastly click on the Clean up system files button.
There are few tools available on the internet that can help you remove junk files regularly automatically. Auslogics BoostSpeed is one of the most well-known software for this task.
If this doesn’t help to free up much space on your hard drive, then you can disable the Hibernation mode. Doing this, you can save the state and save power at the same time. And this doesn’t affect the other files or programs.
There might be some programs on your computer that you don’t use anymore. To free more space, you can uninstall the programs that you don’t use anymore. These programs might be taking up a lot of space, and uninstalling them can solve your problem.
To uninstall these programs you can follow the below steps:-
Step 1: First, go to Windows or start menu.
Step 2: Then type in Control Panel in the search bar and then hit Enter.
Step 3: Open the first one in the search result.
Step 4: From under the Programs category, select Uninstall a Program.
Step 5: Select the programs that you do not use anymore and right-click on them.
Step 6: Lastly, click on Uninstall from the list.
Solution 7: Remove your Antivirus
The 0xC1900101 error might be caused by your installed antivirus tool. In this case, it is best to uninstall the antivirus tool and install the antivirus again after you have upgraded to the Windows 10 OS. Learn how to disable the Avast Antivirus.
A 3rd Party anti-virus can also be the reason behind this error. For that, you should also do the same, uninstall and re-install this after the upgrade is completed.
If you are using tools like the Norton anti-virus or the McAffe anti-virus, then you’ll find the guide to uninstall these tools from your computer within the programs itself.
You can follow the below-given steps to turn off any 3rd party anti-virus on Windows:-
Step 1: Search the Windows notification area to locate the anti-virus program icon.
Step 2: After you have located the icon right-click on the same.
Step 3: A small list of options will appear on the screen.
Step 4: Now select disable/shut down or any similar option available on the list.
There are also some tools available on the internet that helps you to uninstall tools or software from your PC. It is advisable to download and use these tools if you are unable to uninstall the anti-virus by yourself.
Solution 8: Disable your LAN card in BIOS
We have already discussed that external peripheral devices cause 0xC1900101 error. Sometimes the Ethernet Adapter also causes this problem. Mostly the wireless adaptor that you are using on your computer is the leading cause.
When the error is a result of your Ethernet Adapter, then you can disable your Local Area Network or LAN from the BIOs.
Follow the below instructions to disable your LAN card in BIOS:-
Step 1: First, go to the Start menu.
Step 2: Then, open Settings from the menu.
Step 3: After that, open the Control Panel.
Step 4: From Control Panel, open System window.
Step 5: Select the Hardware option from the System Window.
Step 6: Now open the Device Manager.
Step 7: Select the Network line you want to manage.
Step 8: Right-click on the Wireless Network line.
Step 9: Lastly, select the remove/disable option.
Solution 9: Upgrade your BIOS
Outdated BIOS is the main reason behind this issue. Many users reported that the BIOS interferes with the Windows 10 upgrading process, after updates. You can update the BIOS to fix your 0xC1900101 error.
Follow this process correctly. Otherwise, it can turn out to be very dangerous for your computer system. So, try do follow proper steps to complete the process or take guidance from someone while Upgrading your BIOS.
0xC1900101error is a very serious issue. It should not be taken lightly or left as it is. Doing so will prevent you from upgrading your Windows PC to any newer versions.
Solution 10: Uninstall the 3rd Party Applications
Many Windows users have complained some 3rd party applications can be the cause behind the 0xC1900101 error. Especially applications like Trusteer Rapport and Acronis True Image stand as the significant interference in the Windows 10 upgrading process.
You can uninstall these programs and all other similar programs to make sure you can complete the upgrading process error-free. Hopefully, after trying this method, your problem will be solved. And if this does not fix the bug, then give the rest two methods a try.
Similar Posts:
Conclusion
The solutions that have been listed above are constructive. You can fix the 0xc1900101 error by trying these. It is advisable to try the methods one-by-one and check after every attempt if it solved the issue or not.
If, even after trying all the methods, you are unable to fix the 0xc1900101 error. Then, we highly recommend you to seek guidance from an expert or just from someone with more knowledge on the matter.
Busca a opción Destinatario de correo no menú Enviar a en Microsoft Windows 11.
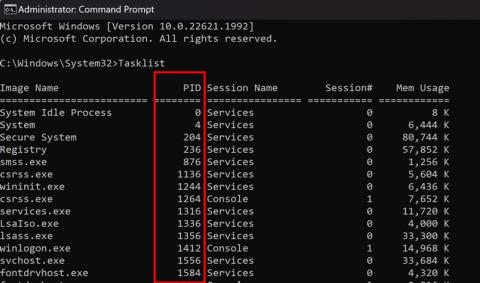
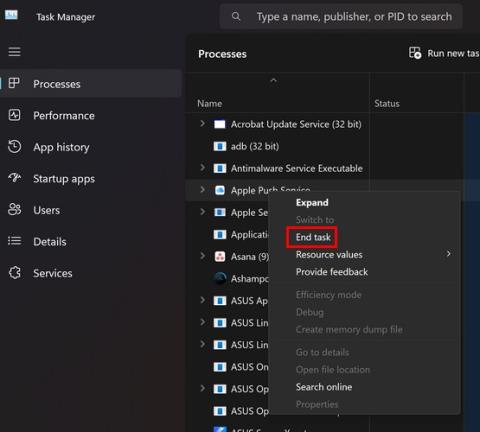
Atopa facilmente un ID de proceso de aplicación para Windows 11 usando varios dos métodos mencionados neste artigo. Aquí como obter resultados instantáneos.
Vexa o rápido que pode restablecer o seu ordenador con Windows 11 para dar un novo comezo a eliminar eses molestos problemas. Aquí están os pasos para principiantes.
Crea e personaliza escritorios virtuais en Windows 11 seguindo estes pasos para principiantes para separar o teu traballo e as cousas persoais.
Descobre as diferentes formas en que podes comprobar a intensidade do teu sinal wifi. Vexa como ver tamén a porcentaxe exacta do sinal.
Desactivar a busca de Bing debería ser suficiente para desfacerse das buscas rápidas. Podes facelo a través do Editor de rexistro de Windows 11s.
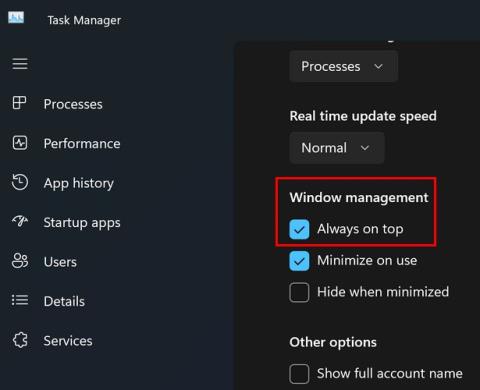
Manteña o Xestor de tarefas sempre en primeiro lugar en Windows 11 para que sexa fácil de atopar cando necesites ler a aplicación. Aquí están os pasos a seguir.
Corrixa a tecla ESC que non funciona en Windows 11 para que poidas usar o teu teclado como sempre o fixeches seguindo estes consellos sinxelos.
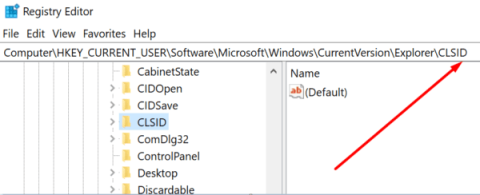
Os ficheiros baleiros do escritorio adoitan ser restos de antigas instalacións de Microsoft Office. Elimina a clave do rexistro de NameSpace para solucionar o problema.
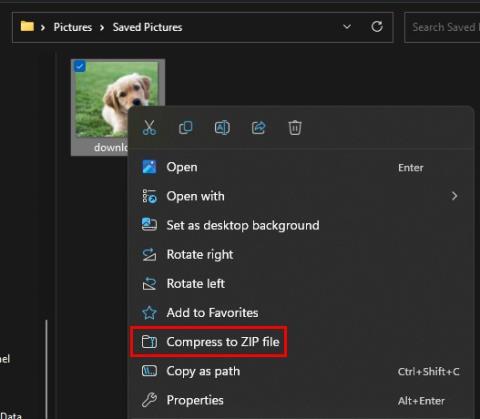
Descobre como podes comprimir facilmente ficheiros en Windows 11 sen necesidade de software de terceiros. aquí están os pasos amigables para principiantes.
