MacOS: Volve á pantalla a xanela fóra da pantalla
Unha lista de posibles solucións para un problema no que quizais perdeu unha xanela da aplicación da pantalla en macOS.
Hai varias formas nas que pode tentar facer capturas de pantalla no dispositivo Mac a partir da máis básica Comando + Maiúsculas + 3. Ademais disto, existen outras formas/opciós que pode tentar facer unha captura de pantalla nun dispositivo Mac.
![Como facer unha captura de pantalla en Mac [Guía rápida] Como facer unha captura de pantalla en Mac [Guía rápida]](https://img2.webtech360.com/resources8/images11/image-4850-0213193357093.jpg)
Entón, neste artigo fixemos unha lista de opcións que podes tentar facer unha captura de pantalla da pantalla do teu dispositivo Mac, despois editalas e gardalas con coidado no teu dispositivo. A lista de métodos que se comenta neste artigo pode funcionar con todas as versións de Mac OS X ou Mac OS.
Antes de discutir eses métodos, hai que saber algunhas cousas importantes, como cando fas unha captura de pantalla no teu dispositivo, gárdase no escritorio por defecto, pero podes cambiar a configuración e gardar todas as túas capturas de pantalla nun cartafol en particular.
Outra cousa importante a ter en conta é que cando fas unha captura de pantalla gárdase como . png, que podes abrir aínda máis en Vista previa ou en calquera aplicación similar que che permita ver a captura de pantalla, logo editala e tamén podes cambiar a localización onde queres gardar a captura de pantalla.
Contidos
Como facer unha captura de pantalla no teu Mac
Solución 1: como capturar toda a pantalla
Se hai dúas pantallas no teu escritorio e queres facer unha captura de pantalla das dúas xuntos, este método axudarache. Só tes que seguir os pasos indicados a continuación:
Paso 1 : Manteña premido Comando + Maiús + 3.
Paso 2: Este é o método máis básico para facer unha captura de pantalla da pantalla do teu dispositivo Mac. Despois de ter feito o paso indicado anteriormente, pode escoitar un son como o son dun obturador nunha cámara que confirma que a captura de pantalla está feita.
Paso 3 : a captura de pantalla gardarase no escritorio por defecto; podes velo alí.
De todos os xeitos, a moita xente non lle gusta facer unha captura de pantalla de toda a pantalla, á maioría da xente gústalle capturar unha parte ou cousa específica para compartir con outras persoas que poidan resultar divertidas ou interesantes. Ou pode que só queiras resaltar unha cousa en particular na pantalla e, polo tanto, o seguinte método é perfecto para ti.
Solución 2: como capturar parte da pantalla
Se queres facer unha captura de pantalla dunha determinada pantalla en lugar de toda a pantalla do escritorio, siga os pasos que se indican a continuación:
Paso 1 : Manteña premidas as teclas Comando + Maiúsculas + 4
Paso 2 : A continuación, o punteiro do rato converterase nun punto de mira, pode usalo para seleccionar a área ou parte da pantalla que desexa capturar.
Paso 3 : pode premer o botón do rato ou tocar dúas veces no panel táctil e, a continuación, arrastrar o punto de mira en diagonal para seleccionar a área.
Paso 4 : Unha vez que cubriu a zona con éxito, solta o botón do rato ou o panel táctil; a túa captura de pantalla capturarase de forma eficaz.
Paso 5 : podes atopar facilmente a túa captura de pantalla capturada no escritorio e editala e gardala onde queiras.
Mentres utilizas este método para facer unha captura de pantalla unha vez que o punto de mira aparece na pantalla, toca dúas veces no teu trackpad ou manteña premido o botón do rato; mentres arrastras o punto de mira podes premer a tecla da barra espaciadora que che permitirá mover a pantalla pola área seleccionada ao redor da pantalla.
Podes probar a premer a tecla Maiúsculas, tamén che permitirá mover a área seleccionada horizontalmente. Non obstante, se seleccionaches a área incorrecta, podes premer o botón de escapar e non se capturará ningunha captura de pantalla.
Solución 3: como facer capturas de pantalla dun tamaño particular
Podes facer capturas de pantalla dun tamaño determinado da túa pantalla con moita facilidade, do mesmo xeito que podes facer capturas de pantalla dunha rexión ou área determinada na túa pantalla. Cando manteñas premidas as teclas Comando + Maiúsculas + 4 aparece un punto de mira na pantalla, podes notar que ao arrastrar o punto de mira en diagonal, contará e mostrará un número de píxeles que estás capturando nunha captura de pantalla.
As you can see in the picture the crosshair has been dragged diagonally to take a screenshot, and along with crosshair the number of pixels is also showing which can help you to take a screenshot of a particular size; particular as in with required width and length.
You can take a screenshot of particular size by the steps given below:
Step 1: Press and hold down Command + Shift + 4 keys simultaneously.
Step 2: A crosshair will appear on the screen, drag it by holding down your mouse button or by double tapping on the trackpad.
Step 3: Hold and drag the crosshair to cover the area on the screen with the same width and length of pixels, e.g., 320 widths and 320 lengths in terms of pixels.
Step 4: Once you have covered the area with same width and length, before you let go of the mouse button or trackpad; don’t forget to press Space Bar key, it will allow you to move the box around the screen until you have successfully covered the area you want to.
Step 5: Finally, you can let go of any buttons you might be holding if you are satisfied with your selection of the area to be captured in the screenshot.
Solution 4: How to Screenshot Multiple Images that are of the Same Sizes
This method is useful for people who like or need to take a screenshot on mac frequently and that too of same sizes such as people who vlog, blog and for tutorial videos.
For example, if you want to take screenshots of 900 * 720 images, you can take it as a default size and then set up the crosshair by using Command + Shift + 5. The steps below will help you to understand this better:
Step 1: Press and hold down Command + Shift + 5 keys all together,
Step 2: Next, the crosshair will appear on your desktop screen, press mouse button or double tap trackpad and drag the crosshair and make sure you cover the area of the screen which is equal to the width and length you want for your screenshots.
Step 3: Once you have covered the area similar to the size you want to press the Space bar and grab the cover box which you can move around on the screen till you have selected the area you want to capture as a screenshot.
Step 4: Lastly, when you have selected the area of your choice release the button or trackpad; screenshot will be captured and saved on desktop as per default.
Solution 5: How to Screenshot a Window
So, in case you want to take a screenshot of the entire window or as I can say you want to grab the entire screen/window.
You might be wondering what would you do then, you follow the steps provided below, and you will be able to take a screenshot of a single screen.
Step 1: Press and hold down Command + Shift + 4 keys simultaneously.
Step 2: Next, you will see a cross-hair on the screen of your desktop now, press Space Bar.
Step 3: Then, carefully position the cross-hair or cursor (either of what you see on your screen) on the respected window (it will be highlighted) and then click your mouse button or can double tap on the track-pad also.
Step 4: Then, a camera icon will appear on the screen, and you will notice the foremost window turning grey.
Step 5: Choose the window of your like and then click on mouse or tap on the trackpad.
Step 6: Finally, a screenshot of the window you selected will be shown on your desktop and note that the screenshot of the window will appear with shadow.
Solution 6: How to Screenshot a Window without Shadow
We have already discussed how you can take a screenshot of a window, but the drawback is that it would be captured along with the shadow.
So, what to do when we want to take a screenshot of a window but without shadow… follow the steps given below if you want to take a screenshot of a window without shadow:
Step 1: Press and hold down the keys Command + Shift + 4
Step 2: Next, the cross-hair appears on the screen, hold the Alt/Option and press Space + Alt.
Step 3: Then, position your cursor carefully over the window, you might notice it highlighted in blue and then click.
Step 4: Screenshot of the window you selected that is without shadow will appear on your desktop as default in .png format.
Step 5: Adding the Option or Alt key helps to see and give you a final result of the window you want without shadow.
Solution 7: How to Screenshot a Dropdown Menu (or Other Screen Furniture)
Many users often like to take a screenshot of the menus or pop-up menus, or we can say drop-down menus, etc. such as bloggers, vloggers or for making tutorials videos. To take a screenshot of any menu, you can use the same technique you use to take a screenshot of any kind.
Step 1: You can use the steps given below to take a screenshot of a menu:
Step 2: First of all, you need to open the menu you want to capture.
Step 3: Then, press the keys Command + Shift + 4 simultaneously the crosshair will appear on the screen.
Step 4: Next, press the Space Bar key and carefully position the crosshair on the drop-down menu you want to capture in the screenshot.
Step 6: After carefully positioning of the cursor on the drop-down press the left button of mouse or trackpad, i.e., left-click.
Step 7: The taken screenshot of the drop-down menu will, by default appear on your desktop.
Note: you might not be able to screenshot the title of the menu although you will be able to take a screenshot of rest of the menu successfully. Anyway, if you want to screenshot menu along with with its title, then you will have to judge the selection if the menu by eye after pressing Command + Shift + 4.
However, the discussion does not stop there only, to take the neat screenshot of any other screens furniture by using the same set of commands, i.e., Command + Shift + 4 followed by the Space bar.
Solution 8: How to take Timed Screenshots
If you are using Mojave and want to take a screenshot using a timer, then follow the steps provided herewith:
Step 1: Press and hold down keys Command + Shift + 5
Step 2: Next, click on the options where you will see a timer feature.
Step 3: Click on it and under timer option choose for seconds such as 5 seconds or 10 seconds, after which screenshot will be auto-captured.
Step 4: Next, select for the type of screenshot or area of the screen you want to capture either the entire screen or a selected window or portion of the screen.
Step 5: Finally, a timer or countdown will start at the end of which the screenshot will get captured.
This method is useful when you are required to take a screenshot of something which needs to be controlled manually first and since it can be a little problematic to do two things together at the same time.
So, as a solution you set the timer according to time you would require to do something, and then the screenshot will be taken easily. However, you can also use Grab to take a timed screenshot which a default screenshot application of mac which you might find in older versions of macOS or Mac OS X.
So, Grab enables you to take a timed screenshot on older versions using the following steps:
Step 1: Press and hold down keys Command + Space and next, start typing Grab or you can also search for it through the utilities.
Step 2: Once, you get hands-on Grab open it.
Step 3: Then, click on the Capture > Timed Screen then click to start the timer.
Step 4: A red dial will appear on the screen to let you know how much you have left with to do anything on the screen before the screen is grabbed.
This feature will allow you to take a screenshot of the entire screen only which means you can’t select the portion or area or window, but you can easily edit the screenshot afterward.
Solution 9: How to Take Screenshot as JPEG or TIFF in Mojave
We mentioned earlier that in Mac devices captured screenshots are saved in .png format as the default, and the reason behind is that Grab has been removed by Apple with the update to Mojave along with the easy way which you could have used to save a screenshot in JPEG or TIFF format easily.
You can change the format of your screenshots after they have been captured by using any photo editing application such as Photos or Photoshop and save it afterwards or you can make a change in Terminal so that the screenshots will be captured & saved in .JPEG or .TIFF format by default.
You can use the steps given below to make changes in the Terminal:
Step 1: Press and hold down keys Space Bar + Command and type Terminal > Open Terminal.
Step 2: Next, type this default write apple.screen capture type JPEG.
Step 3: Next, press return after that, you will be required to turn off your device.
Step 4: Restart your Mac device so that changes will be saved and come into action/effect.
If you are using an older version of Mac, then you can easily change the format of screenshots and save them as JPEG instead of .PNG files.
Step 1: Open your device and go to Grab > Open Grab.
Step 2: Next, from the option, click on Capture.
Step 3: After that, you will be required to make a selection from such as like Window, or Timed, or Entire Screen, etc.
Step 4: Click on the Window if you want to take a screenshot of a window.
Step 5: The device will make a camera shutter sound to let you know that your screenshot has been captured successfully.
Step 6: The screengrab will appear on the screen so that; if you like to, you can name the image and decide where you want to save it on your device.
Where are Screenshots Saved on Mac?
Mostly the screenshots you take on your Mac device gets saved to the desktop by default; however, if your device has Mojave, then you can easily choose from the variety of folders where you want to save your screenshots.
For users who are using older versions of Mac that means the default application on your device to take a screenshot is Grab. The drawback of using Grab is that your screenshot might be saved in documents folders on your device or in some cases your screenshots will be saved as untitled if you don’t change their name before saving them.
You can follow the steps given below to change the destination of screenshots you take in Mojave:
Step 1: Press and hold down keys Command + Shift + 5
Step 2: Open save to section and then find & select the folder where you want to save your screenshots.
Step 3: You can choose any location, for example; if you want to save your screenshots/image elsewhere, then you can choose another location.
How to Edit a Captured Screen on Mac
With a lot features Mojave provides the ability to edit your Screenshot on Mac is one of them, and it is one of the most useful features I must add. Following steps will help in order to edit your screenshot:
Step 1: When you capture a screenshot on Mojave, a thumbnail of that screenshot appears on the right corner of your screen.
Step 2: Open that thumbnail after which you will be required to open the Markup Tools for drawing, highlighting, adding shapes, text boxes, and you can even add your signature to the screenshot.
Step 3: You can also crop the image or rotate it or flip it.
Step 4: You can share the edited screenshot by clicking on the Share Button > choose from the available options such as Mail, Message, or add to Photos.
F.A.Q.
Question 1. Screenshots are Blank
Sometimes it happens when you take a screenshot, and nothing get saved, and this is not an uncommon thing to happen.
Anyway, if you follow the steps how to take screenshots carefully and you are very sure about your selection of screenshot, either window or selected region, then the chances of your screenshot being saved as blank are very less.
However, if you are still facing the problems then you might need to change the software you are using right now to take screenshots; you can opt for another software that provides you all the features you are looking for.
Question 2. Screenshot on Mac, Not Working
Another problem that people might face while taking screenshots is that non-appearance of the screenshot. The possible reason behind this can be that you are pressing Ctrl button at the same time, i.e., it copies your screenshot to your pasteboard.
You can also check into System Preferences > Keyboard > Shortcuts and can check for the screenshots which might be activated under Screenshots.
More Guides:
Conclusion
The article is about the methods you can try and follow to take screenshots on your device easily. Methods to edit your Screenshot on Mac, you can change the destination of your screenshots, etc. on your Mac device whether you are using Mojave or Grab.
Unha lista de posibles solucións para un problema no que quizais perdeu unha xanela da aplicación da pantalla en macOS.
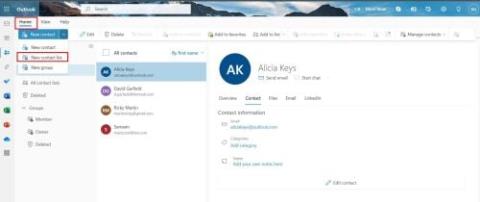
Queres enviar un correo electrónico a moitos destinatarios? Non sabes como crear unha lista de distribución en Outlook? Aquí tes como facelo sen esforzo!
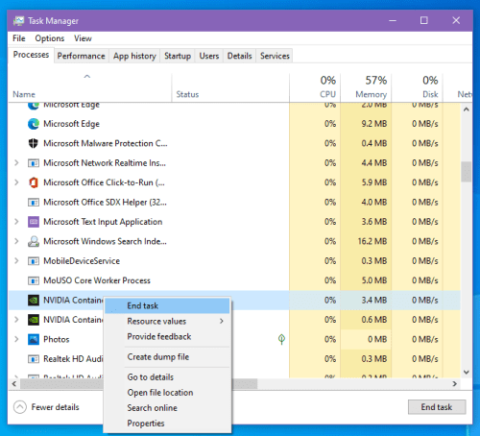
Saiba como reiniciar o controlador de gráficos en Windows 10, 11 e Mac para solucionar os problemas. Proba estes mellores métodos para restablecer o controlador de gráficos.
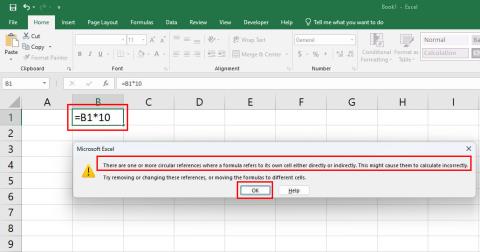
Se as referencias circulares na folla de cálculo de Excel son problemáticas, aquí aprende a atopar referencias circulares en Excel e eliminalas.
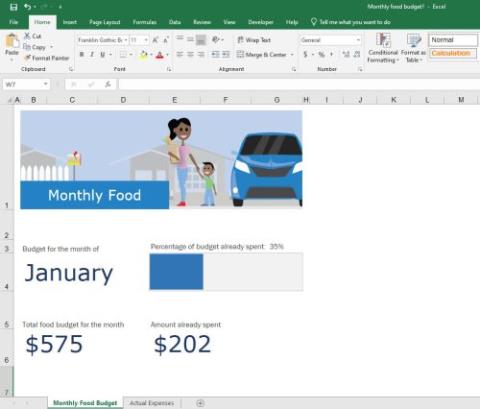
Buscas modelos de orzamento de Excel gratuítos ou de pago? Le este artigo para explorar algúns dos mellores modelos de orzamento para Excel en liña e fóra de liña.
Se ves que este ficheiro non é compatible con QuickTime Player, le agora este artigo. Sombrea a luz sobre algunhas das mellores solucións.
Se queres facer que as tarefas de entrada de datos sexan perfectas e rápidas, debes aprender a facer unha lista despregable en Excel.
Estás enfrontando as teclas de frecha que non funcionan no problema de Excel? Lea este artigo agora e descubra como pode solucionar isto en menos de 5 minutos.
Se algúns ou todos os vídeos descargados ou editados non se reproducen en Mac, le esta guía definitiva para obter as mellores e sinxelas ideas para solucionar problemas.
A aplicación Atallos de Mac é unha poderosa ferramenta para executar macros. Cun só clic, a aplicación Atallos de macOS pode completar tarefas que doutro xeito levarían horas.
