Koneiden nousu: tekoälyn todelliset sovellukset
Tekoäly ei ole tulevaisuudessa, se tässä nykyisyydessä Tässä blogissa Lue kuinka tekoälysovellukset ovat vaikuttaneet eri sektoreihin.
Syyskuussa 2017 Caddyn käyttöoikeussopimusta muutettiin, ja kaikki kauppaa harjoittavien yritysten ja henkilökohtaisten verkkosivustojen ylläpitämät Caddy-esiintymät vaativat kaupallisen lisenssin Caddyn ladatulle binaarille. Tämä opetusohjelma auttaa asiakkaita, jotka haluavat asentaa Caddy-verkkopalvelimen uuden käyttöoikeussopimuksen mukaisesti. Kirjoitushetkellä, kun käännät Caddya lähdekoodista ja luot oman binaarisi, maksullista lisenssiä ei vaadita riippumatta siitä, harjoitatko liiketoimintaa tai käytätkö kauppaa henkilökohtaisella verkkosivustollasi. On tärkeää tarkistaa viimeisimmän EULA:n vaatimustenmukaisuus ennen tämän opetusohjelman vaiheiden suorittamista.
Ominaisuudet:
Kirjaudu sisään tavallisena käyttäjänä, jolla on oikeus käyttää sudo-komentoa. Päivitä järjestelmä seuraavasti.
sudo apt update && sudo apt upgrade -y && sudo apt autoremove -y
Lataa Caddy-verkkopalvelimen lähdekoodin uusin versio. Tämä ei sisällä kolmannen osapuolen lisäosia Caddylle.
go get -u github.com/mholt/caddy/caddy && go get -u github.com/caddyserver/builds && cd go/src/github.com/mholt/caddy/caddy
Valinnainen: Jos tarvitset kolmannen osapuolen tls.dns.vultrdnsproviders-laajennuksen, kopioi seuraava. Tämä lataa sekä tls.dns.vultrCaddyn lähdekoodin että kolmannen osapuolen dnsproviders-laajennuksen, jos haluat käyttää sitä.
go get -u github.com/mholt/caddy/caddy && go get -u github.com/caddyserver/builds && go get -u github.com/caddyserver/dnsproviders/vultr && cd go/src/github.com/mholt/caddy/caddy && sed -i '38i\\t_ "github.com/caddyserver/dnsproviders/vultr"' caddymain/run.go
Kääntää caddybinaari. Tämän kokoamiseen menee alle minuutti.
go run build.go
Tarkista caddybinaarin versio ja laajennusluettelo .
./caddy -version && ./caddy -plugins
Kopioi Caddy binary sijaitsevat ~/go/src/github.com/mholt/caddy/caddy/sen /usr/binhakemistoon ja muuttaa hakemiston takaisin juureen käyttäjäkansiota.
sudo cp caddy /usr/bin/ && cd
Luo caddy.servicesystemd-tiedosto /etc/systemd/system/hakemistoon echokomennolla.
sudo su -c "echo -e '[Unit]\nAfter=network-online.target\nDescription=Caddy HTTP/2 web server\nDocumentation=https://caddyserver.com/docs\nWants=network.target\n\n[Service]\nAmbientCapabilities=CAP_NET_BIND_SERVICE\nCapabilityBoundingSet=CAP_NET_BIND_SERVICE\nEnvironment=CADDYPATH=/etc/ssl/caddy\n## Environment=VULTR_API_KEY=XXXXXXXX ##Uncomment and add your Vultr API (API tab on the Settings page) if using the Vultr DNS Manager to handle DNS for your VPS instance.\nExecReload=/bin/kill -USR1 $MAINPID\nExecStart=/usr/bin/caddy -agree=true -conf=/etc/caddy/caddy.conf -quic -root=/var/tmp\nGroup=www-data\nKillMode=mixed\nKillSignal=SIGQUIT\nLimitNOFILE=1048576\nLimitNPROC=512\nNoNewPrivileges=true\nPrivateDevices=true\nPrivateTmp=true\nProtectHome=true\nProtectSystem=full\nReadWriteDirectories=/etc/ssl/caddy\nRestart=on-abnormal\nTimeoutStopSec=5s\nUser=www-data\n\n[Install]\nWantedBy=multi-user.target' > /etc/systemd/system/caddy.service"
Luo /etc/caddy/hakemisto, joka sisältää Caddy-verkkopalvelimen määritystiedoston; /etc/ssl/caddy/hakemiston, joka sisältää Let Salaa todistukset; /usr/share/caddy/hakemiston, joka sisältää näytteen html-tiedosto; ja /var/log/caddy/hakemisto, joka sisältää Caddy-verkkopalvelimen lokit mkdirkomennolla. Muuta ryhmän omistajuus www-dataryhmään chownkomennolla /etc/ssl/caddy/ja /var/log/caddy/hakemistot. Poista maailman suoritettavat, luku- ja kirjoitusoikeudet käyttämällä chmodkomentoa /etc/ssl/caddy/hakemiston suojaamiseen .
sudo mkdir -p {/etc/{caddy/conf.d,ssl/caddy},/usr/share/caddy,/var/log/caddy} && sudo chown www-data /etc/ssl/caddy/ /var/log/caddy/ && sudo chmod 750 /etc/ssl/caddy/
Ota Caddy-verkkopalvelin käyttöön.
sudo systemctl daemon-reload && sudo systemctl enable caddy
Jokainen alla oleva osa selittää, kuinka Caddy määritetään eri skenaarioihin. Voit käyttää näitä viitteenä ja siirtyä tarpeitasi vastaavaan osaan.
Luo perus, juuritasolle kokoonpano mallitiedosto nimetty caddy.confvuonna /etc/caddy/hakemiston, joka käyttää tuonti todellinen vhost konfigurointitiedostoa näytteen staattisia HTML kotisivuilta nimetty example.com.confvuonna /etc/caddy/conf.d/hakemistoon käyttämällä echokomentoa.
sudo su -c 'echo -e "import conf.d/*.conf" > /etc/caddy/caddy.conf' && sudo su -c 'echo -e "example.com:80 {\n\tredir http://www.example.com{url}\n}\nwww.example.com:80 {\n\terrors /var/log/caddy/example.com-error.log\n\timport header.protection\n\tlog /var/log/caddy/example.com-access.log\n\troot /var/www/html/\n}" > /etc/caddy/conf.d/example.com.conf' && sudo su -c 'echo -e "header / {\n\tX-XSS-Protection \"1; mode=block\"\n\tX-Content-Type-Options \"nosniff\"\n\tX-Frame-Options \"SAMEORIGIN\"\n}" > /etc/caddy/conf.d/header.protection'
Luo /var/www/htmlhakemisto ja luo yksinkertainen index.htmlsisäosa echokomennolla.
sudo mkdir -p /var/www/html && sudo su -c 'echo -e "<!DOCTYPE html>"\\n"<head>"\\n\\t"<meta charset="utf-8">"\\n\\t"<meta http-equiv="X-UA-Compatible" content="IE=edge,chrome=1">"\\n\\t"<title>Static HTML Page"\\n\\t"</title>"\\n\\t"<meta name="description" content="">"\\n\\t"<meta name="viewport" content="width=device-width, initial-scale=1">"\\n"</head>"\\n"<body>"\\n\\t"<p>Caddy is working."\\n\\t"</p>"\\n"</body>"\\n"</html>" > /var/www/html/index.html'
Käynnistä Caddy-verkkopalvelin.
sudo systemctl start caddy
Avaa verkkoselaimesi example.comVPS-instanssisi FQDN:ään ( ).
Luo perus, juuritasolle kokoonpano mallitiedosto nimetty caddy.confvuonna /etc/caddy/hakemistoon joka käyttää tuonnin todellinen vhost konfigurointitiedostoa näytteen staattisia HTML kotisivuilta nimetty example.com.confvuonna /etc/caddy/conf.d/hakemistoon käyttämällä echokomentoa.
sudo su -c 'echo -e "import conf.d/*.conf" > /etc/caddy/caddy.conf' && sudo su -c 'echo -e "example.com {\n\tredir https://www.example.com{url}\n}\nwww.example.com {\n\terrors /var/log/caddy/example.com-error.log\n\timport header.protection\n\tlog /var/log/caddy/example.com-access.log\n\troot /var/www/html/\n\ttls joe.q.public@example.com\n}" > /etc/caddy/conf.d/example.com.conf' && sudo su -c 'echo -e "header / {\n\tX-XSS-Protection \"1; mode=block\"\n\tX-Content-Type-Options \"nosniff\"\n\tX-Frame-Options \"SAMEORIGIN\"\n}" > /etc/caddy/conf.d/header.protection'
Luo /var/www/htmlhakemisto ja luo yksinkertainen index.htmlsisäosa echokomennolla.
sudo mkdir -p /var/www/html && sudo su -c 'echo -e "<!DOCTYPE html>"\\n"<head>"\\n\\t"<meta charset="utf-8">"\\n\\t"<meta http-equiv="X-UA-Compatible" content="IE=edge,chrome=1">"\\n\\t"<title>Static HTML Page"\\n\\t"</title>"\\n\\t"<meta name="description" content="">"\\n\\t"<meta name="viewport" content="width=device-width, initial-scale=1">"\\n"</head>"\\n"<body>"\\n\\t"<p>Caddy is working."\\n\\t"</p>"\\n"</body>"\\n"</html>" > /var/www/html/index.html'
Käynnistä Caddy-verkkopalvelin.
sudo systemctl start caddy
Avaa verkkoselaimesi example.comVPS-instanssisi FQDN:ään ( ).
Luo perus, juuritasolle kokoonpano mallitiedosto nimetty caddy.confvuonna /etc/caddy/hakemistoon joka käyttää tuonnin todellinen vhost konfigurointitiedostoa näytteen phpinfo sivun nimellä example.com.confvuonna /etc/caddy/conf.d/hakemistoon käyttämällä echokomentoa.
sudo su -c 'echo -e "import conf.d/*.conf" > /etc/caddy/caddy.conf' && sudo su -c 'echo -e "example.com:80 {\n\tredir http://www.example.com{url}\n}\nwww.example.com:80 {\n\terrors /var/log/caddy/example.com-error.log\n\tfastcgi / /var/run/php/php7.0-fpm.sock php\n\timport header.protection\n\tlog /var/log/caddy/example.com-access.log\n\troot /var/www/html/\n}" > /etc/caddy/conf.d/example.com.conf' && sudo su -c 'echo -e "header / {\n\tX-XSS-Protection \"1; mode=block\"\n\tX-Content-Type-Options \"nosniff\"\n\tX-Frame-Options \"SAMEORIGIN\"\n}" > /etc/caddy/conf.d/header.protection'
Create a simple index.php in the /var/www/html directory using the echo command.
sudo su -c 'echo -e "<?php\nphpinfo();\n?>" > /var/www/html/index.php'
Install the PHP-FPM server to process PHP files.
sudo apt install php-fpm -y
Start the Caddy web server.
sudo systemctl start caddy
Open your web browser to the FQDN (example.com) of your VPS instance.
Create a basic, root level configuration template file named caddy.conf in the /etc/caddy/ directory which uses an import for the actual vhost configuration file for a sample dynamic test web site named example.com.conf in the /etc/caddy/conf.d/ directory using the echo command.
sudo su -c 'echo -e "import conf.d/*.conf" > /etc/caddy/caddy.conf' && sudo su -c 'echo -e "example.com {\n\tredir https://www.example.com{url}\n}\nwww.example.com {\n\terrors /var/log/caddy/example.com-error.log\n\tfastcgi / /var/run/php/php7.0-fpm.sock php\n\timport header.protection\n\tlog /var/log/caddy/example.com-access.log\n\troot /var/www/html/\n\ttls joe.q.public@example.com\n}" > /etc/caddy/conf.d/example.com.conf' && sudo su -c 'echo -e "header / {\n\tX-XSS-Protection \"1; mode=block\"\n\tX-Content-Type-Options \"nosniff\"\n\tX-Frame-Options \"SAMEORIGIN\"\n}" > /etc/caddy/conf.d/header.protection'
Create a simple index.php in the /var/www/html directory using the echo command.
sudo su -c 'echo -e "<?php\nphpinfo();\n?>" > /var/www/html/index.php'
Install the PHP-FPM server to process PHP files.
sudo apt install php-fpm -y
Start the Caddy web server.
sudo systemctl start caddy
Open your web browser to the FQDN (example.com) of your VPS instance.
Create a basic, root level configuration template file named caddy.conf in the /etc/caddy/ directory which uses an import for the actual vhost configuration file for a sample Wordpress test web site named example.com.conf in the /etc/caddy/conf.d/ directory using the echo command.
sudo su -c 'echo -e "import conf.d/*.conf" > /etc/caddy/caddy.conf' && sudo su -c 'echo -e "example.com:80 {\n\tredir http://www.example.com{url}\n}\nwww.example.com:80 {\n\terrors /var/log/caddy/example.com-error.log\n\tfastcgi / /var/run/php/php7.0-fpm.sock php\n\timport header.protection\n\tlog /var/log/caddy/example.com-access.log\n\trewrite {\n\t\tif {path} not_starts_with /wp-admin\n\t\tif {path} not_starts_with /wp-content\n\t\tif {path} not_starts_with /wp-includes\n\t\tto {path} {path}/ /index.php\n\t}\n\troot /var/www/html/\n}" > /etc/caddy/conf.d/example.com.conf' && sudo su -c 'echo -e "header / {\n\tX-XSS-Protection \"1; mode=block\"\n\tX-Content-Type-Options \"nosniff\"\n\tX-Frame-Options \"SAMEORIGIN\"\n}" > /etc/caddy/conf.d/header.protection'
Install the unzip program in order to extract the Wordpress tar-gzipped file (latest.tar.gz).
sudo apt install unzip
Download the latest.tar.gz file into the /tmp/ directory, change the user and group permissions of the /var/www/html directory to the user www-data and group www-data and extract the contents of the latest.tar.gz file into the /var/www/html/ directory.
sudo su - www-data -c "wget -N -P /tmp/ -q https://wordpress.org/latest.tar.gz" -s /bin/bash && sudo chown -R www-data.www-data /var/www/html && sudo su - www-data -c "tar -C /var/www/html/ -zxf /tmp/latest.tar.gz --strip-components=1" -s /bin/bash && sudo su - www-data -c "rm /tmp/latest.tar.gz" -s /bin/bash
Install the PHP-FPM server to process PHP files and the required PHP extensions required to interact with Wordpress.
sudo apt install php-curl php-fpm php-imagick php-mbstring php-mcrypt php-mysql php-pspell php-xmlrpc -y
Install the MariaDB database server to store data for Wordpress.
sudo apt install mariadb-server -y
Optional: Disable skip-name-resolve to avoid the DNS lookup penalty for client connections, turn off the database TCP/IP listener and use unix sockets only.
sudo sed -i '26iskip-name-resolve\nskip-networking' /etc/mysql/mariadb.conf.d/50-server.cnf
Restart the MariaDB database server to the new configuration changes.
sudo systemctl restart mysql
Secure the MariaDB database server. Replace the ******** holder below in the first command with a new root password.
sudo mysql -e "UPDATE mysql.user SET Password=PASSWORD('********') WHERE User='root'" && sudo mysql -e "DELETE FROM mysql.user WHERE User='root' AND Host NOT IN ('localhost', '127.0.0.1', '::1')" && sudo mysql -e "DELETE FROM mysql.user WHERE User=''" && sudo mysql -e "DELETE FROM mysql.db WHERE Db='test' OR Db='test\_%'" && sudo mysql -e "" && sudo mysql -e "FLUSH PRIVILEGES"
Create a database, wordpress_example_com, for Wordpress; a specific database user, wordpress_example_com_admin and the minimal database permissions necessary, (ALTER, CREATE, DELETE, DROP, INDEX, INSERT, SELECT, & UPDATE ), for Wordpress core and plugin installations' day to day functioning and core/plugin updates. Replace the example_com in wordpress_example_com with your actual domain name, example_com in wordpress_example_com_admin with your actual domain name and ******** with a new password specifically for the wordpress_example_com_admin user.
sudo mysql -e "CREATE DATABASE wordpress_example_com DEFAULT CHARACTER SET utf8mb4 COLLATE utf8mb4_unicode_ci" && sudo mysql -e "CREATE USER 'wordpress_example_com_admin'@'localhost' IDENTIFIED BY '********'; GRANT USAGE ON *.* TO 'wordpress_example_com_admin'@'localhost';" && sudo mysql -e "GRANT ALTER, CREATE, DELETE, DROP, INDEX, INSERT, SELECT, UPDATE ON wordpress_example_com.* TO 'wordpress_example_com_admin'@'localhost';" && sudo mysql -e "FLUSH PRIVILEGES"
Create the Wordpress configuration file, wp-config.php, in the /var/www/html directory. Replace the example_com in wordpress_example_com with your actual domain name, example_com in wordpress_example_com_admin with your actual domain name and ******** with a new password specifically for the wordpress_example_com_admin user.
sudo su - www-data -c 'echo -e "<?php\ndefine('\'DB_CHARSET''\'', '\'utf8''\'');\ndefine('\'DB_COLLATE''\'', '\'''\'');\ndefine('\'DB_HOST''\'', '\'localhost''\'');\ndefine('\'DB_NAME''\'', '\'wordpress_example_com''\'');\ndefine('\'DB_PASSWORD''\'', '\'********''\'');\ndefine('\'DB_USER''\'', '\'wordpress_example_com_admin''\'');\ndefine('\'FS_METHOD''\'', '\'direct''\'');\ndefine('\'WP_DEBUG''\'', false);" > /var/www/html/wp-config.php' -s /bin/bash && sudo su -c www-data -c "curl -s https://api.wordpress.org/secret-key/1.1/salt/ >> /var/www/html/wp-config.php" && sudo su - www-data -c 'echo -e "\$table_prefix = '\'wp_''\'';\nif ( !defined('\'ABSPATH''\'') )\n\tdefine('\'ABSPATH''\'', dirname(__FILE__) . '\'/''\'');\nrequire_once(ABSPATH . '\'wp-settings.php''\'');\nfunction _remove_script_version( \$src ){ if ( strpos( \$src, '\'ver=''\'' ) ) \$src = remove_query_arg( '\'ver''\'', \$src ); return \$src; }\nadd_filter( '\'script_loader_src''\'', '\'_remove_script_version''\'', 15, 1 );\nadd_filter( '\'style_loader_src''\'', '\'_remove_script_version''\'', 15, 1 );" >> /var/www/html/wp-config.php' -s /bin/bash
Start the Caddy web server.
sudo systemctl start caddy
Open your web browser to the FQDN (example.com) of your VPS instance. You will see a language selection page. After selecting the language, click the blue Continue button, on the bottom right, to go to the next step of the Wordpress installation.
On the next page, enter a title for your website in the Site Title field (1), an administrator's username in the Username field (2). Use the generated password or input your own password in the Password field (3). Enter a valid email address in the Your Email field (4) and enable or leave disabled the Search Engine Visibility option (5), depending on whether your site is in the building phase. When you are satisfied, click the gray Install Wordpress button (6) to complete the Wordpress setup.
You will arrive in the Wordpress administration area. The initial installation of Wordpress is now complete.
Create a basic, root level configuration template file named caddy.conf in the /etc/caddy/ directory which uses an import for the actual vhost configuration file for a sample Wordpress test web site named example.com.conf in the /etc/caddy/conf.d/ directory using the echo command.
sudo su -c 'echo -e "import conf.d/*.conf" > /etc/caddy/caddy.conf' && sudo su -c 'echo -e "example.com {\n\tredir https://www.example.com{url}\n}\nwww.example.com {\n\terrors /var/log/caddy/example.com-error.log\n\tfastcgi / /var/run/php/php7.0-fpm.sock php\n\timport header.protection\n\tlog /var/log/caddy/example.com-access.log\n\trewrite {\n\t\tif {path} not_starts_with /wp-admin\n\t\tif {path} not_starts_with /wp-content\n\t\tif {path} not_starts_with /wp-includes\n\t\tto {path} {path}/ /index.php\n\t}\n\troot /var/www/html/\n\ttls joe.q.public@example.com\n}" > /etc/caddy/conf.d/example.com.conf' && sudo su -c 'echo -e "header / {\n\tX-XSS-Protection \"1; mode=block\"\n\tX-Content-Type-Options \"nosniff\"\n\tX-Frame-Options \"SAMEORIGIN\"\n}" > /etc/caddy/conf.d/header.protection'
Install the unzip program in order to extract the Wordpress tar-gzipped file, (latest.tar.gz).
sudo apt install unzip
Download the latest.tar.gz file into the /tmp/ directory, change the user and group permissions of the /var/www/html directory to the user www-data and group www-data and extract the contents of the latest.tar.gz file into the /var/www/html/ directory.
sudo su - www-data -c "wget -N -P /tmp/ -q https://wordpress.org/latest.tar.gz" -s /bin/bash && sudo chown -R www-data.www-data /var/www/html && sudo su - www-data -c "tar -C /var/www/html/ -zxf /tmp/latest.tar.gz --strip-components=1" -s /bin/bash && sudo su - www-data -c "rm /tmp/latest.tar.gz" -s /bin/bash
Install the PHP-FPM server to process PHP files and the required PHP extensions required to interact with Wordpress.
sudo apt install php-curl php-fpm php-imagick php-mbstring php-mcrypt php-mysql php-pspell php-xmlrpc -y
Install the MariaDB database server to store data for Wordpress.
sudo apt install mariadb-server -y
Optional: Disable skip-name-resolve to avoid the DNS lookup penalty for client connections, turn off the database TCP/IP listener and use unix sockets only.
sudo sed -i '26iskip-name-resolve\nskip-networking' /etc/mysql/mariadb.conf.d/50-server.cnf
Restart the MariaDB database server to the new configuration changes.
sudo systemctl restart mysql
Secure the MariaDB database server. Replace the ******** holder below in the first command with a new root password.
sudo mysql -e "UPDATE mysql.user SET Password=PASSWORD('********') WHERE User='root'" && sudo mysql -e "DELETE FROM mysql.user WHERE User='root' AND Host NOT IN ('localhost', '127.0.0.1', '::1')" && sudo mysql -e "DELETE FROM mysql.user WHERE User=''" && sudo mysql -e "DELETE FROM mysql.db WHERE Db='test' OR Db='test\_%'" && sudo mysql -e "" && sudo mysql -e "FLUSH PRIVILEGES"
Create a database, wordpress_example_com, for Wordpress; a specific database user, wordpress_example_com_admin and the minimal database permissions necessary (ALTER, CREATE, DELETE, DROP, INDEX, INSERT, SELECT, & UPDATE )for Wordpress core and plugin installations' day to day functioning and core/plugin updates. Replace the example_com in wordpress_example_com with your actual domain name, example_com in wordpress_example_com_admin with your actual domain name and ******** with a new password specifically for the wordpress_example_com_admin user.
sudo mysql -e "CREATE DATABASE wordpress_example_com DEFAULT CHARACTER SET utf8mb4 COLLATE utf8mb4_unicode_ci" && sudo mysql -e "CREATE USER 'wordpress_example_com_admin'@'localhost' IDENTIFIED BY '********'; GRANT USAGE ON *.* TO 'wordpress_example_com_admin'@'localhost';" && sudo mysql -e "GRANT ALTER, CREATE, DELETE, DROP, INDEX, INSERT, SELECT, UPDATE ON wordpress_example_com.* TO 'wordpress_example_com_admin'@'localhost';" && sudo mysql -e "FLUSH PRIVILEGES"
Create the Wordpress configuration file, wp-config.php, in the /var/www/html directory. Replace the example_com in wordpress_example_com with your actual domain name, example_com in wordpress_example_com_admin with your actual domain name and ******** with a new password specifically for the wordpress_example_com_admin user.
sudo su - www-data -c 'echo -e "<?php\ndefine('\'DB_CHARSET''\'', '\'utf8''\'');\ndefine('\'DB_COLLATE''\'', '\'''\'');\ndefine('\'DB_HOST''\'', '\'localhost''\'');\ndefine('\'DB_NAME''\'', '\'wordpress_example_com''\'');\ndefine('\'DB_PASSWORD''\'', '\'********''\'');\ndefine('\'DB_USER''\'', '\'wordpress_example_com_admin''\'');\ndefine('\'FS_METHOD''\'', '\'direct''\'');\ndefine('\'WP_DEBUG''\'', false);" > /var/www/html/wp-config.php' -s /bin/bash && sudo su -c www-data -c "curl -s https://api.wordpress.org/secret-key/1.1/salt/ >> /var/www/html/wp-config.php" && sudo su - www-data -c 'echo -e "\$table_prefix = '\'wp_''\'';\nif ( !defined('\'ABSPATH''\'') )\n\tdefine('\'ABSPATH''\'', dirname(__FILE__) . '\'/''\'');\nrequire_once(ABSPATH . '\'wp-settings.php''\'');\nfunction _remove_script_version( \$src ){ if ( strpos( \$src, '\'ver=''\'' ) ) \$src = remove_query_arg( '\'ver''\'', \$src ); return \$src; }\nadd_filter( '\'script_loader_src''\'', '\'_remove_script_version''\'', 15, 1 );\nadd_filter( '\'style_loader_src''\'', '\'_remove_script_version''\'', 15, 1 );" >> /var/www/html/wp-config.php' -s /bin/bash
Start the Caddy web server.
sudo systemctl start caddy
Open your web browser to the FQDN (example.com) of your VPS instance. After selecting the language, click the blue Continue button, on the bottom right, to go to the next step of the Wordpress installation.
On the next page, enter a title for your website in the Site Title field (1), an administrator's username in the Username field (2). Use the generated password or input your own password in the Password field (3). Enter a valid email address in the Your Email field (4) and enable or leave disabled the Search Engine Visibility option (5), depending on whether your site is in the building phase. When you are satisfied, click the gray Install Wordpress button (6) to complete the Wordpress setup.
You will arrive in the Wordpress administration area. The initial installation of Wordpress is now complete.
Tekoäly ei ole tulevaisuudessa, se tässä nykyisyydessä Tässä blogissa Lue kuinka tekoälysovellukset ovat vaikuttaneet eri sektoreihin.
Oletko myös DDOS-hyökkäysten uhri ja hämmentynyt ehkäisymenetelmistä? Lue tämä artikkeli ratkaistaksesi kysymyksesi.
Olet ehkä kuullut, että hakkerit ansaitsevat paljon rahaa, mutta oletko koskaan miettinyt, kuinka he ansaitsevat tuollaista rahaa? keskustellaan.
Haluatko nähdä Googlen vallankumouksellisia keksintöjä ja kuinka nämä keksinnöt muuttivat jokaisen ihmisen elämää nykyään? Lue sitten blogia nähdäksesi Googlen keksinnöt.
Konsepti itseohjautuvista autoista lähteä tielle tekoälyn avulla on ollut haaveena jo jonkin aikaa. Mutta useista lupauksista huolimatta niitä ei näy missään. Lue tämä blogi saadaksesi lisätietoja…
Kun tiede kehittyy nopeasti ja ottaa haltuunsa suuren osan ponnisteluistamme, myös riskit altistaa itsemme selittämättömälle singulariteetille kasvavat. Lue, mitä singulaarisuus voisi tarkoittaa meille.
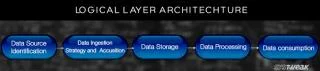
Blogista saat tietää Big Data -arkkitehtuurin eri kerroksista ja niiden toiminnoista yksinkertaisimmalla tavalla.
Tietojen säilytystavat ovat kehittyneet mahdollisesti Datan syntymästä lähtien. Tämä blogi käsittelee tiedon tallennuksen kehitystä infografian pohjalta.
Tässä digitaalisessa maailmassa kodin älylaitteista on tullut tärkeä osa elämää. Tässä on muutamia älykkäiden kodin laitteiden hämmästyttäviä etuja, joiden avulla ne tekevät elämästämme elämisen arvoista ja yksinkertaisempaa.
Apple julkaisi äskettäin macOS Catalina 10.15.4 -lisäpäivityksen ongelmien korjaamiseksi, mutta näyttää siltä, että päivitys aiheuttaa lisää ongelmia, jotka johtavat mac-koneiden tiilikaamiseen. Lue tämä artikkeli saadaksesi lisätietoja