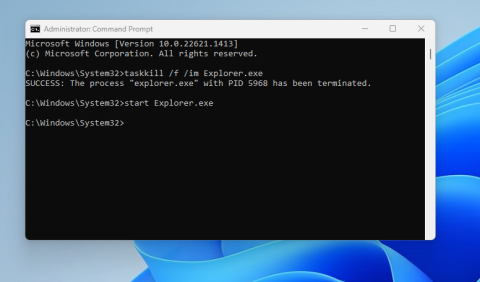
Windows 10 File Explorer ei tööta? Kuidas parandada
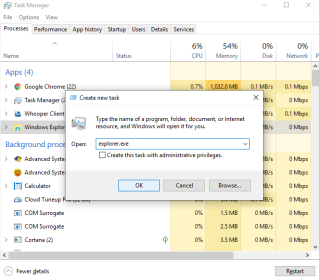
Kui teie Windows 10 explorer ei tööta, oleme teid kaitsnud. Lugege ajaveebi, et leida lahendus, kui failiuurija ei tööta.
Salvestusruum on teie süsteemi üks olulisi komponente ja meeldib see teile või mitte, kuid tõenäoliselt saab see tulevikus otsa. Hea viis salvestusruumi vabastamiseks on hallata oma suurimaid faile. Saate need teisaldada teisele kettale , pilvmällu või isegi kustutada, kui neid enam ei vajata.
Mõnel juhul saate faile isegi tihendada, kui te ei soovi neid niipea kasutada. Aga kuidas leida suuri faile? Iga kausta käsitsi läbimine võib olla tüütu ja puhastusvahendi kasutamine pole lihtsalt piisavalt tõhus. Õnneks on Windows 11-s oma süsteemist suurte failide leidmiseks mõned kenad viisid. Alustamiseks kasutage allolevaid juhendeid.
Sisu
Suurte failide leidmine opsüsteemis Windows 11: näpunäited
Suuri faile saab sortida tüübi, liigi, kuupäeva ja muu alusel. Parim viis seda teha on kasutada Windowsi otsingut failihalduris. Saate kasutada spetsiaalseid termineid otsitavate failide määratlemiseks ja nende suuruse alusel filtreerimiseks. Seejärel saate kasutada failiuurija sortimisvalikuid, et leida otsingutulemustest suurimad.
Järelikult, kui see ei vasta teie kriteeriumidele või te ei leia otsitavaid faile, võite kasutada mõnda muud selles juhendis loetletud meetoditest.
Seotud: Tegumiriba värvi muutmine Windows 11-s
Meetod nr 01: Otsingu kasutamine Exploreris (soovitatav)
Nüüd otsime teie kriteeriumide alusel suuri faile.
Failiuurija Windows + Eavamiseks vajutage klaviatuuril ja klõpsake paremas ülanurgas otsingukasti. Otsige järgmist terminit.
size:gigantic
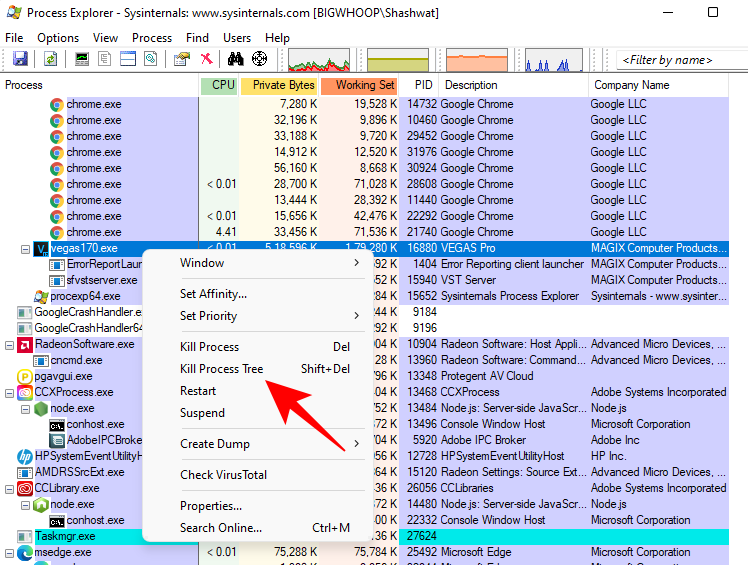
Tulemused filtreeritakse ja failid, mis on suuremad kui 4 GB, kuvatakse nüüd teie ekraanil. Valige oma arvutis mittevajalikud failid, mida te ei vaja, ja kustutage need ruumi vabastamiseks. Kui soovite kasutada väiksemat faili minimaalset suurust, asendage "gigantic" ühega allolevatest terminitest, olenevalt teie eelistatavast suurusest.
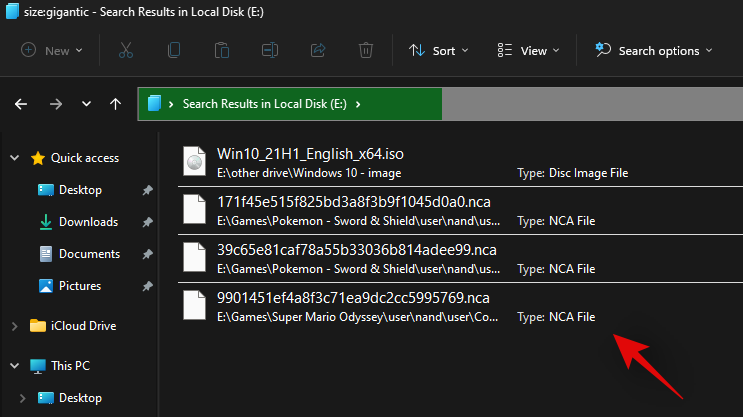
Ja see ongi kõik! Saate kasutada Windowsi otsingut, et filtreerida faile nende suuruse järgi ja leida suurimad, mis praegu teie arvutis on.
Märkus. Kui teie arvuti indekseerib ja kuvab ka süsteemifaile, soovitame failid enne nende kustutamist üle kontrollida, et vältida oluliste süsteemifailide kustutamist oma süsteemist.
Nüüd olete Windowsi otsingu abil leidnud oma arvutist suured failid.
1.1 Mida teha, kui otsing teie jaoks ei tööta: näpunäited, mida proovida
Kui 'size:gigantic' tippimine teie jaoks ei tööta, peate lülituma Windows 10 vanale failiuurijale. Kasutage alustamiseks allolevat juhendit.
Kui lülitute tagasi vanale failiuurijale, kasutage suurte failide otsimiseks ülaltoodud juhendit. Kui leiate, kasutage allolevat juhendit, et uus Windows 11 failiuurija oma süsteemi tagasi tuua.
1.1.1 Lülituge vanale failiuurijale
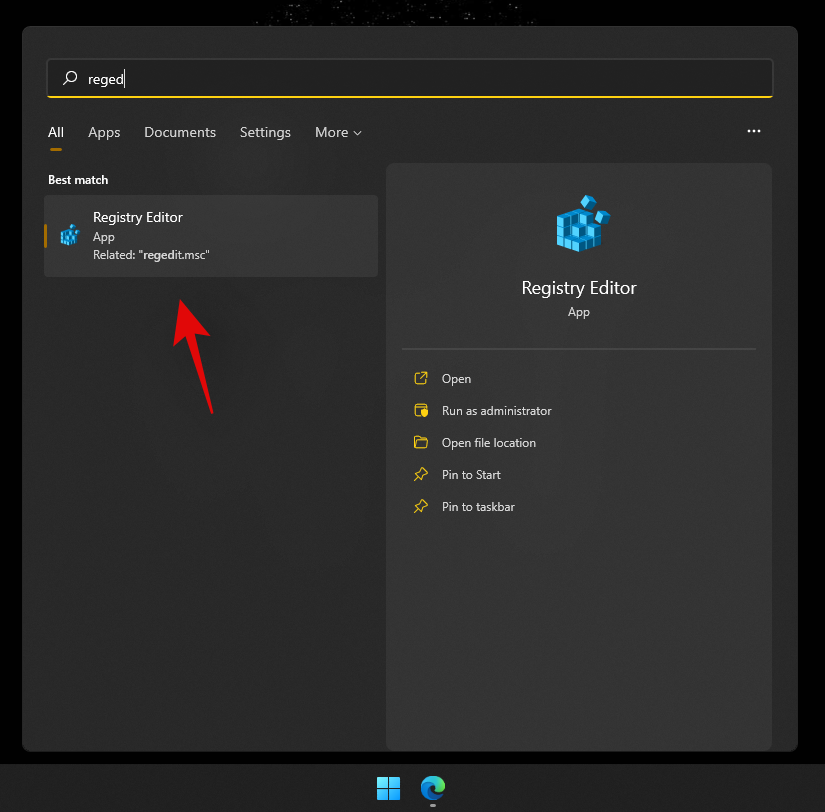
Vajutage Windows + Sklaviatuuril ja otsige "Regedit". Klõpsake ja käivitage rakendus otsingutulemustes.
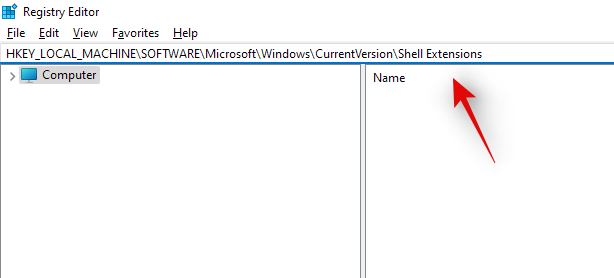
Liikuge järgmisse kataloogi või kopeerige ja kleepige allolev aadress oma aadressiribale.
HKEY_LOCAL_MACHINE\SOFTWARE\Microsoft\Windows\CurrentVersion\Shell Extensions
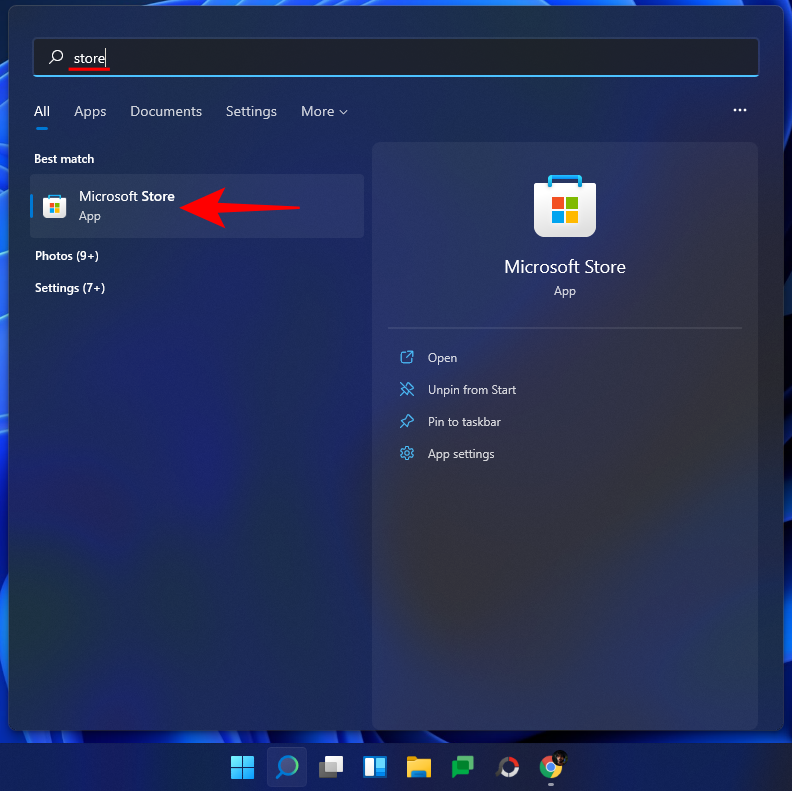
Klõpsake kausta nimega "Blokeeritud".
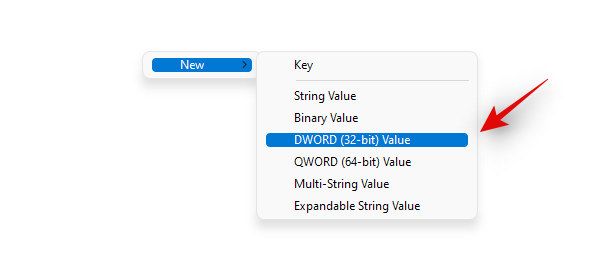
Paremklõpsake paremal asuval tühjal alal, valige "Uus" ja seejärel klõpsake "DWORD-i (32-bitine) väärtus".
Sisestage järgmine nimi ja vajutage klaviatuuril sisestusklahvi. Nimevigade vältimiseks soovitame teil sama kopeerida ja kleepida.
{e2bf9676-5f8f-435c-97eb-11607a5bedf7}
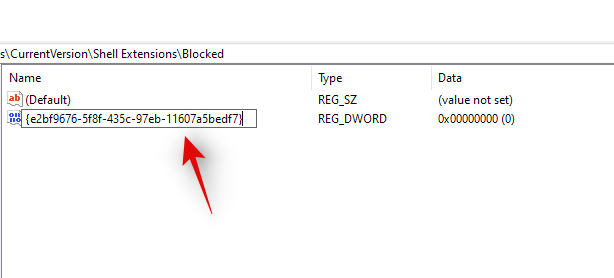
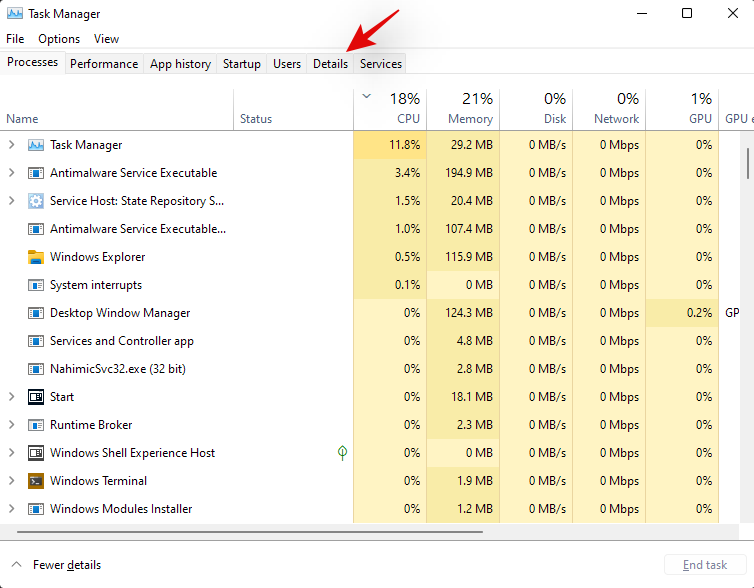
Sulgege registriredaktor ja vajutage tegumihalduri avamiseks klahvikombinatsiooni Ctrl + Shift + Esc. Lülituge vahekaardile „Üksikasjad”.
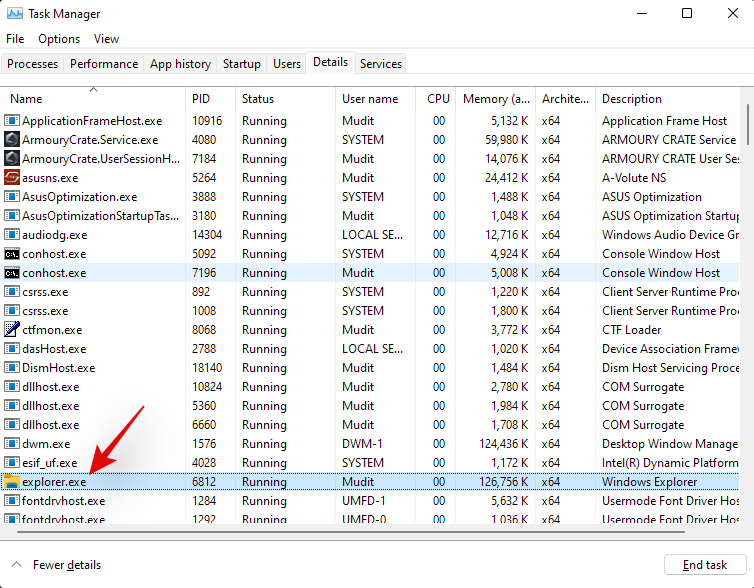
Klõpsake 'Explorer.exe' ja vajutage klaviatuuril Del.
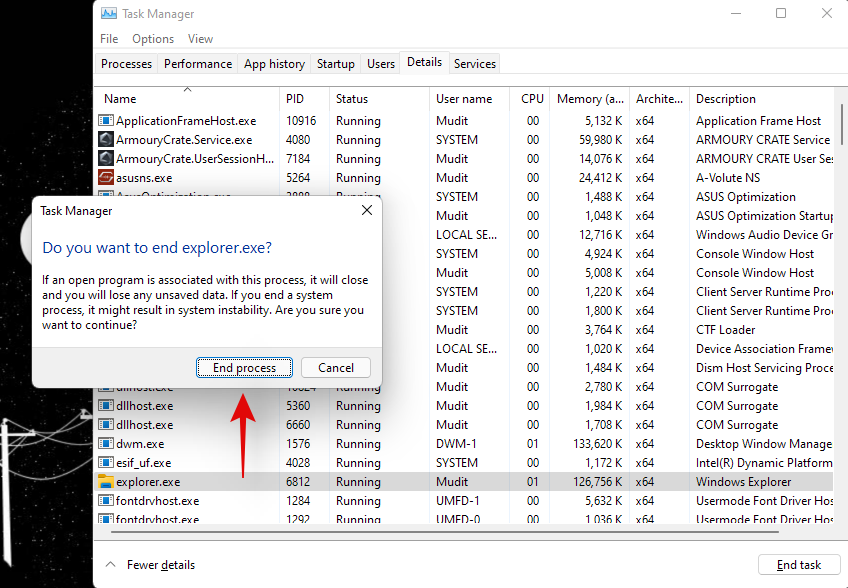
Oma valiku kinnitamiseks klõpsake nuppu "Lõpeta protsess".
Klõpsake "Fail" ja valige "Käivita uus ülesanne".
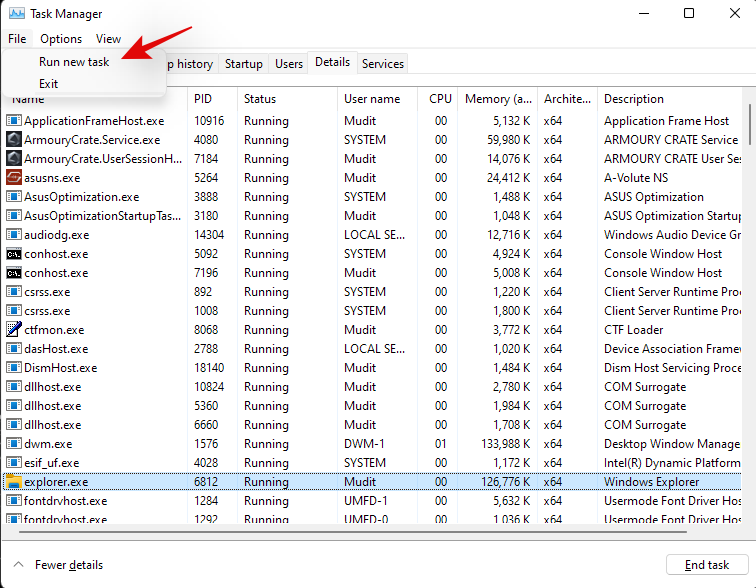
Sisestage tekstikasti järgmine teave ja klõpsake nuppu "OK".
explorer.exe
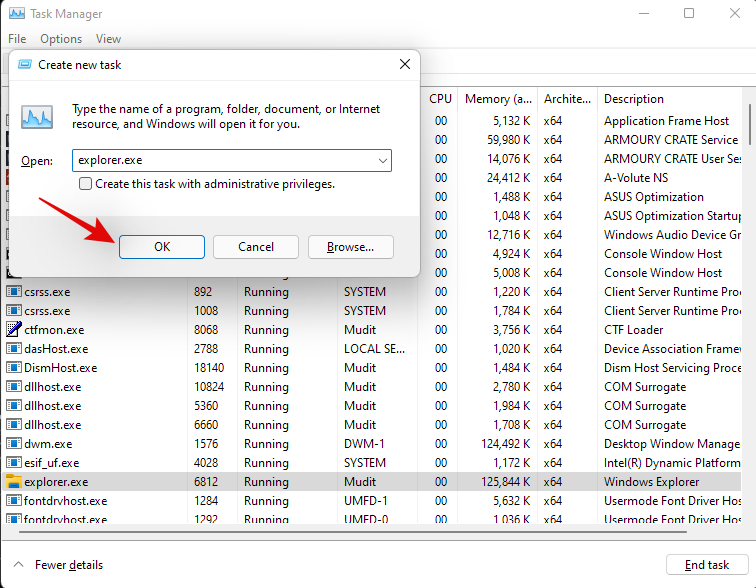
Windows File Explorer taaskäivitub teie süsteemis ja see tuleks taastada Windows 10 File Explorerisse. Sama kontrollimiseks võite avada juhusliku kausta. Kinnitage, et olete naasnud vana failiuurija juurde, ja kasutage ülaltoodud juhendit oma süsteemist suurte failide leidmiseks.
1.1.2 Lülituge tagasi uuele failiuurijale
Nüüd saame naasta vana failiuurija juurde. Alustamiseks järgige allolevat juhendit.
Vajutage Windows + Sklaviatuuril ja otsige Regedit. Klõpsake ja käivitage rakendus, kui see teie otsingutulemustes kuvatakse.

Liikuge järgmisele teele või kopeerige ja kleepige see oma aadressiribale.
HKEY_LOCAL_MACHINE\SOFTWARE\Microsoft\Windows\CurrentVersion\Shell Extensions

Klõpsake lihtsalt DWORD-i (32-bitise) väärtusel, mille oleme varem loonud, ja vajutage klaviatuuril Del. Oma valiku kinnitamiseks klõpsake "Jah".

Vajutage klaviatuuril klahvikombinatsiooni Ctrl + Shift + Esc ja lülituge vahekaardile „Üksikasjad”.

Klõpsake 'explorer.exe' ja vajutage klaviatuuril Del.

Klõpsake nuppu "Lõpeta protsess".

Klõpsake "Fail" ja valige "Käivita uus ülesanne".

Sisestage "explorer.exe" ja vajutage klaviatuuril sisestusklahvi.

Saate nüüd sulgeda arvutis tegumihalduri ja registriredaktori.
Ja see ongi kõik! Nüüd olete Windows 11-s naasnud uue File Exploreri juurde. Lisaks suuruse parameetrile saate kasutada ka allolevaid käske, et otsida arvutis erinevaid faile ja sortida need suuruse järgi. Nii leiate oma süsteemist suurimad.
1.2 Otsige failitüüpide järgi
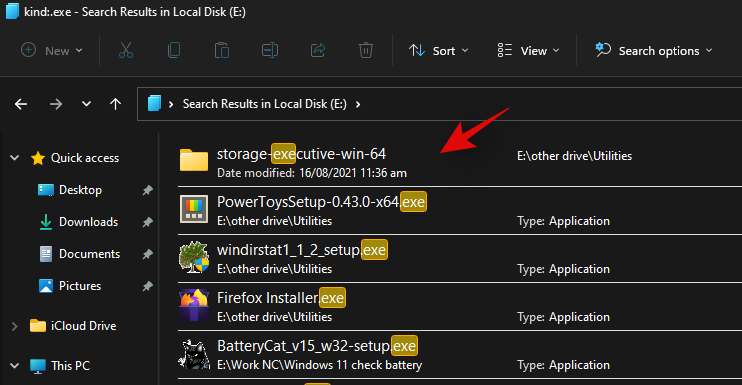
Sarnaselt ülaltoodud käsuga saate praegusest kataloogist teatud failide leidmiseks kasutada parameetrit "kind:". Parameeter „tüüp” võimaldab teil otsida kalendrifaile, tekstidokumente, pilte, videomänge ja muud.
Sel viisil tüüpi parameetri kasutamisel ei piirdu te Windowsi eelmääratletud kategooriatega, selle asemel saate määratleda ka konkreetsed faililaiendid, et need arvutist leida, nagu allpool näidatud.
kind:.exe
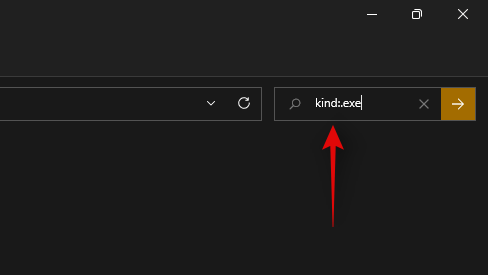
Ülaltoodud käsk aitab teil praeguses kataloogis käivitatavaid faile otsida.
Samamoodi aitab alloleva käsu kasutamine teil valitud kataloogist PDF-faile leida.
kind:.pdf
Ja see ongi kõik! Nende käskude abil saate Windowsi otsingu abil oma arvutist teatud faile leida.
1.3 Otsige faile kuupäeva järgi
Teatud kuupäeval loodud failide otsimiseks võite kasutada ka parameetrit 'date:'. Lisaks saab seda käsku kasutada koos allolevate Boole'i filtritega, et leida teie arvutis enne või pärast teatud kuupäeva loodud või muudetud faile. Näiteks kui otsite 1. jaanuaril 2020 loodud faili, saate kasutada allolevat käsku.
date: 1/1/2020
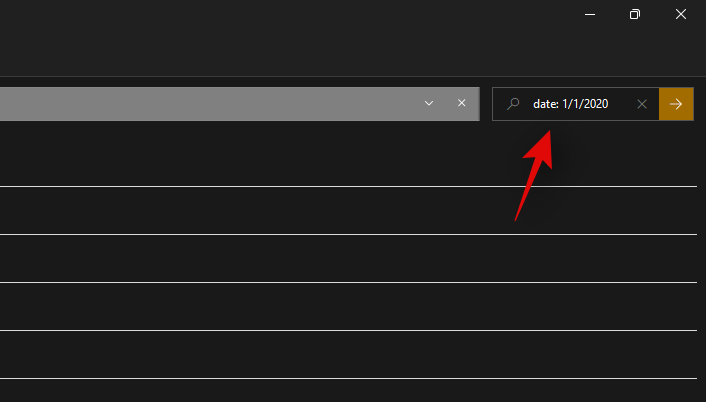
Samamoodi, kui otsite 1. jaanuaril 2021 loodud faili, saate kasutada järgmist käsku.
date: 1/1/2021
1.4 Kasutage Boole'i filtreid
Boole'i filtrid aitavad teil otsida mitut terminit samaaegselt või koos. Kasutage allolevaid filtreid, mis vastavad teie praegustele nõuetele kõige paremini.
1.4.1 Parameeter AND
Parameetri AND abil saate otsida kahte otsinguterminit koos. Nii saate otsida faili, mis sisaldab mõlemat terminit, mitte kumbagi, mis peaks aitama teil filtreerida välja soovimatud tulemused, mis sisaldavad üht või teist terminit.
Näiteks kui otsite faili, mille nimes on sõnad "Samsung ja galaxy", siis saan teie faili otsimiseks kasutada järgmist terminit.
Samsung AND galaxy
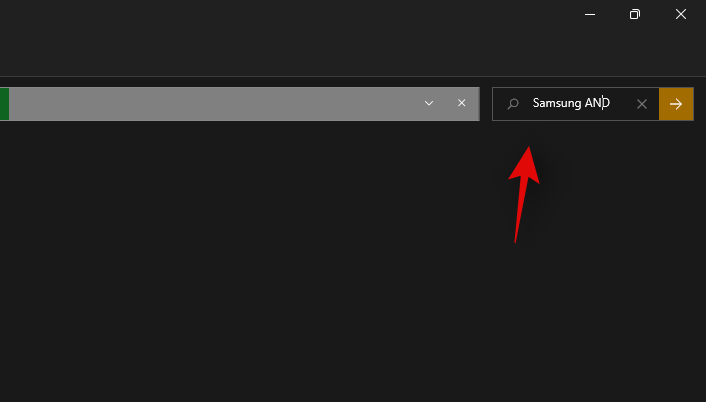
See filtreerib välja failid, mille nimes on ainult "Samsung" ja "Galaxy". Mõlema terminiga failid filtreeritakse välja.
Parameeter VÕI
Parameeter VÕI on AND-parameetri vastas ja võimaldab teil otsida faile, mis sisaldavad mõnda teie otsingutermini terminit. Näiteks kui ma soovin otsida faile, mille nimes on kas "Apple" või "Airpods", siis saan kasutada järgmist otsinguterminit.
apple OR airpods
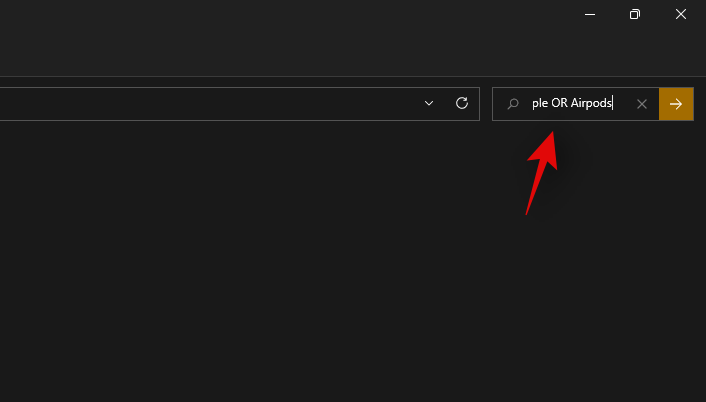
Samamoodi, kui ma otsin PDF- ja EXE-faile konkreetsest kataloogist, saan kasutada järgmist käsku.
kind:.exe OR .pdf
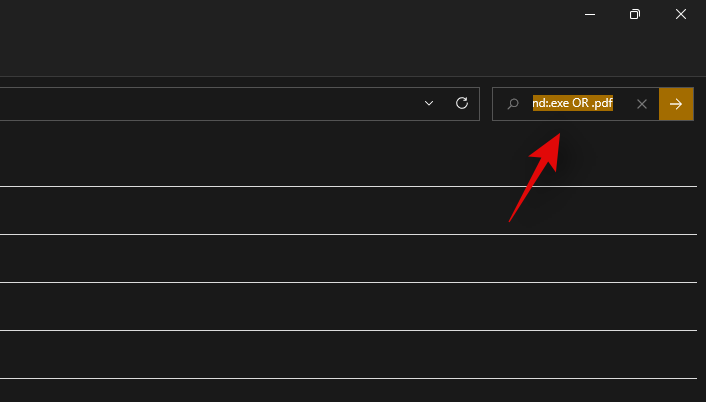
Ja nii saate kasutada parameetrit VÕI, et otsida ühest failinimest mitu otsinguterminit.
1.4.2 Parameeter 'NOT'
Kui soovite teatud otsinguterminit või failitüüpi välja filtreerida, võite kasutada parameetrit NOT. Parameeter NOT välistab teie valikust olenevalt soovitud failitüübi, liigi, suuruse või nime.
Näiteks kui otsite docx-faile täis kaustast muid failitüüpe ja soovite need kõik välja filtreerida, saate kasutada järgmist käsku.
kind: NOT .docx
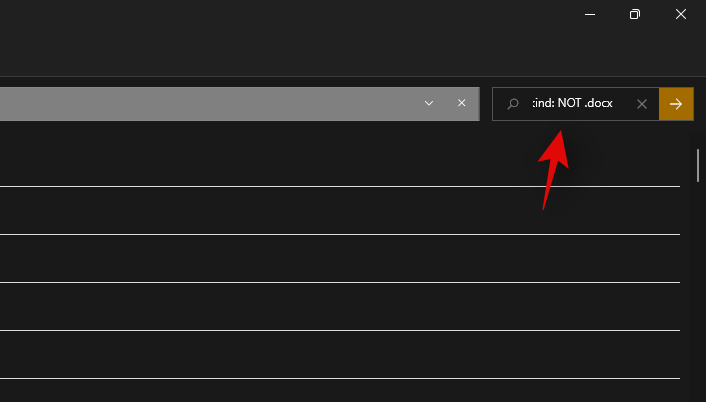
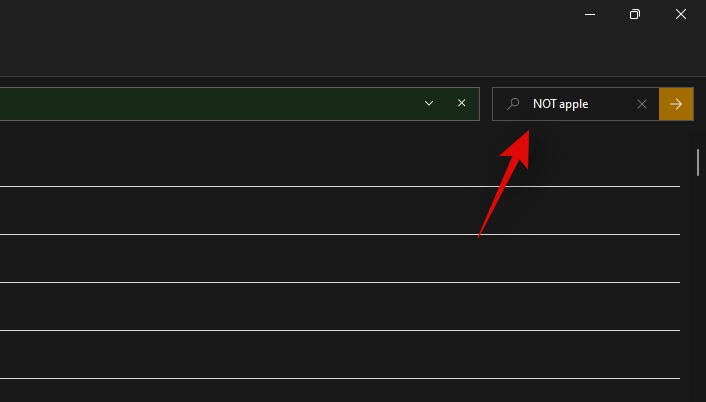
Samamoodi, kui otsin faili, mille nimes pole sõna Apple, saan kasutada järgmist otsinguterminit.
NOT apple
1.4.3 Sulud
Parentheses is a Boolean filter that is usually used when you are searching file contents as well. Anything included between the parentheses () is searched for and files with either or all of the terms are displayed on your screen.
For example, if looking for a file containing either ‘Apple, Samsung, Mi, Microsoft, and Dell’ or all of these terms, then you can use the following term.
(Apple Samsung Mi Microsoft Dell)
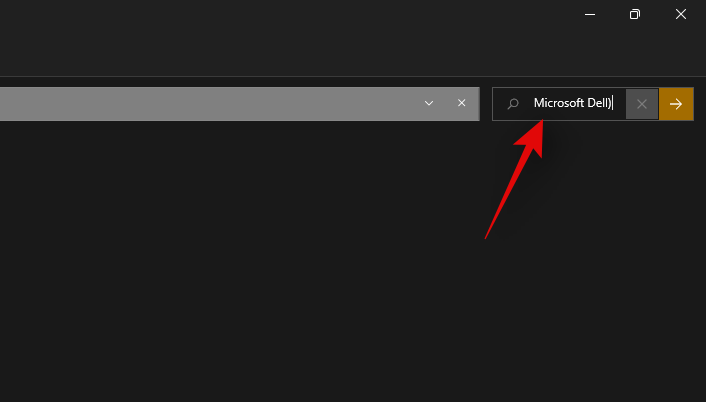
Similarly, you can use the following command if looking for multiple file types.
kind:(.exe .pdf .txt)
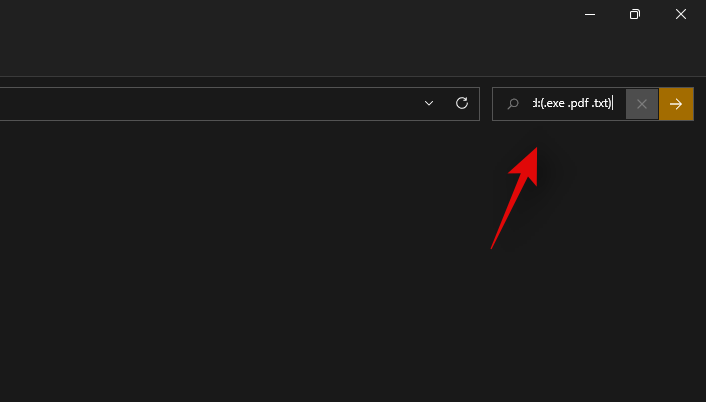
And that’s it! You will now have used parentheses to your advantage to look for multiple search terms in a particular file.
1.4.4 ‘>’ and ‘<‘>
These two Boolean filters are usually used when looking for file types or when sorting your results based on a parameter.
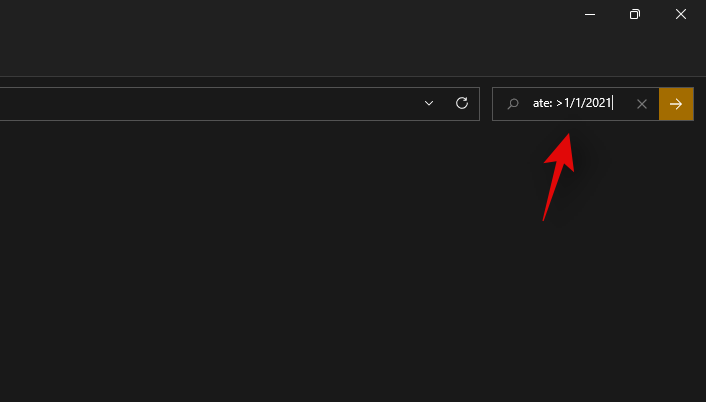
The greater than and less than parameters can be used to filter your results based on a number. For example, if looking for files dated after 1st January 2021 then you can use the following command.
date: >1/1/2021
Similarly, if looking for files less than 10GB then you can use the following command.
size: <>
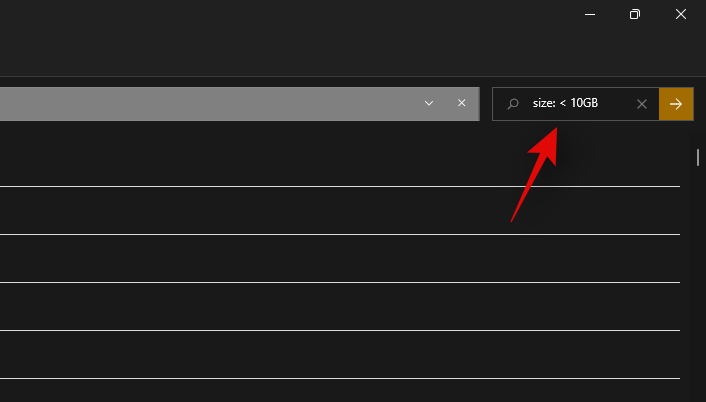
You can use the greater than and less than parameters to your advantage this way and find the desired files on your system.
Advanced methods to find large files on Windows
Some other ways in which you can find large files on your system have been listed below. Follow the guides to get you started.
Method #02: Using CMD
CMD can also help you find large files on your system. Use the guide below to get you started.
Press Windows + E on your keyboard and navigate to a location where you wish to search for large files and click on the address bar at the top.
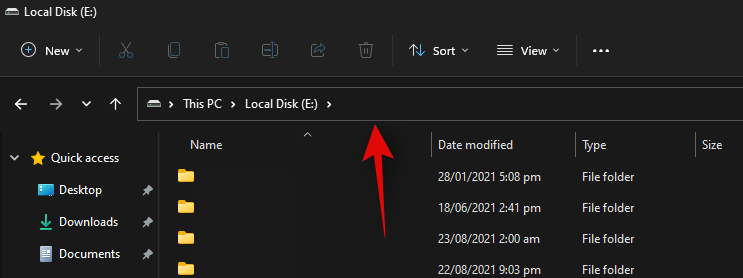
Type in CMD and press Enter on your keyboard.
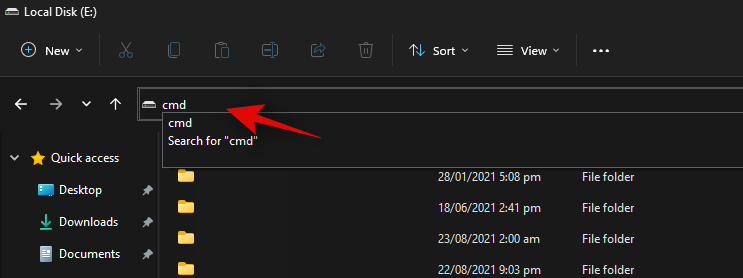
CMD will now be launched in the particular folder. Type in the following command and replace ‘PATH’ with the path we copied to your clipboard.
forfiles /S /M * /C “cmd /c if @fsize GEQ 1073741824 echo @path > largefiles.txt
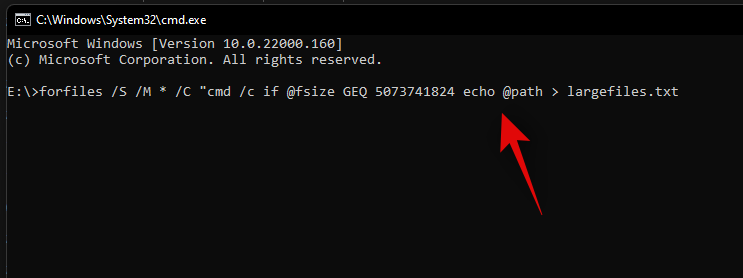
The above command will look for files larger than 1GB on your PC. If you wish to define a larger minimum size, then replace ‘1073741824’ with one of the following options below.
Execute the command with your desired variables and a text file will be created in the same location with a list of all the large files found on your system based on your criteria. You will also find the path for each file on your local storage in the text file.
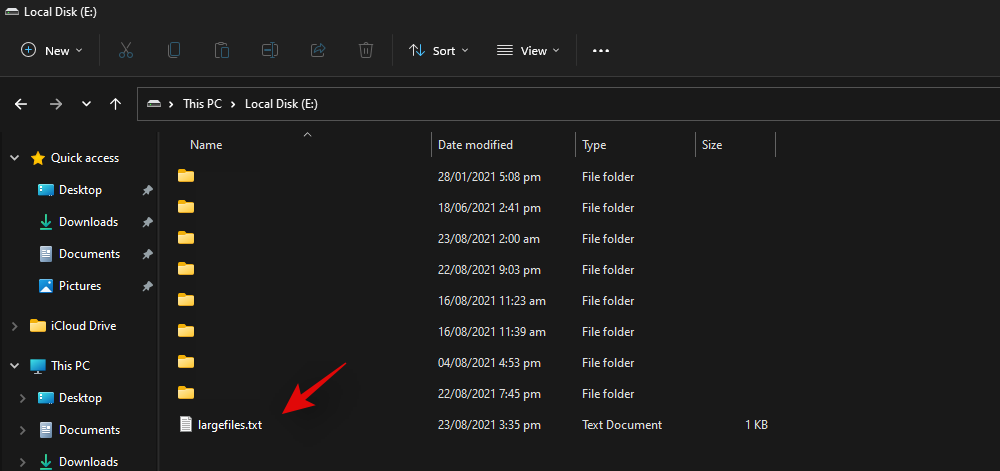
You can use this list to identify the largest files in the current location and then delete them at your discretion to free up some disk space on your system.
Method #03: Using PowerShell
You can also find large files on your system using PowerShell. Just like the command for CMD, PowerShell will scour your local files based on a minimum size and display all the files larger than it. Use the guide below to get you started.
Press Windows + E on your keyboard and navigate to the location where you wish to look for large files. Click on the address bar at the top and type in ‘PowerShell’. Press Enter on your keyboard once you are done.
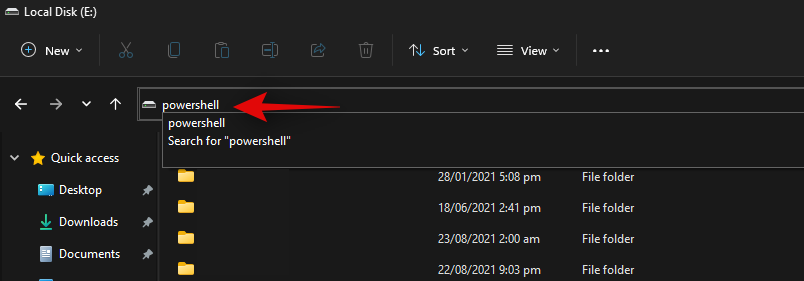
Copy-paste the command below in the PowerShell window and press Enter on your keyboard.
gci -r| sort -descending -property length | select -first 10 name, length

You will now get a list of the top 10 largest files currently taking the most disk space on your system. If you wish to view the top 20 files, then replace ‘select-first 10’ with ‘select-first 20’.
PowerShell will now find and display the 20 largest files on your system along with their size. The file size will be in bytes which can make it a bit difficult to judge the size of files in terms of gigabytes.
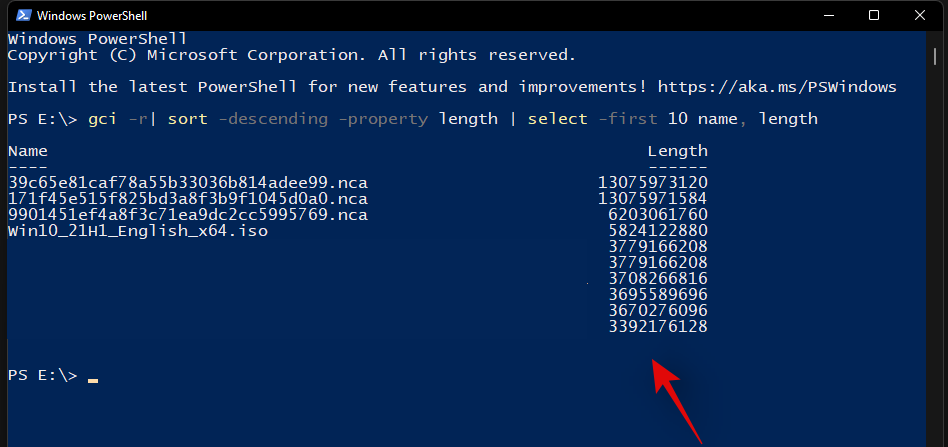
And that’s it! You will now have found the largest files on your PC using PowerShell in Windows 11.
2 Best apps to find large files on Windows
Many third-party tools allow you to view a visual representation of your PC’s disk usage.
This makes it much easier for you to identify large chunks of files taking significant space on your hard drive. Our recommended tools would be SpaceSniffer and WinDirStat. Use one of the guides below depending on the tool that you wish to use.
Method #04: Using SpaceSniffer
Space Sniffer is another popular third-party utility used to analyze disk space usage on Windows 11. SpaceSniffer can help you identify large files using huge amounts of space on your system. You can also find hidden files taking huge disk space on your PC using the SpaceSniffer. Use the guide below to get you started.
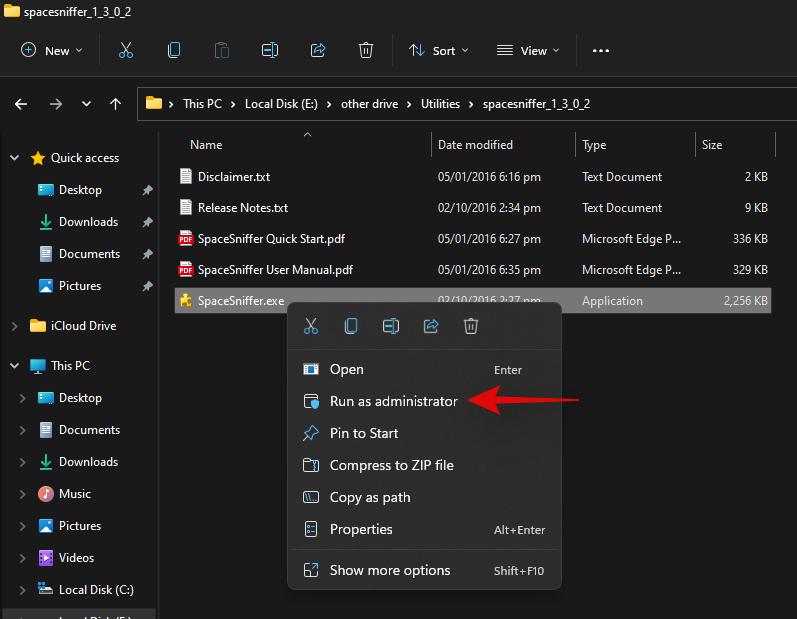
Download SpaceSniffer to your PC using the link above. A portable .exe will be downloaded to your system. Extract the archive and right-click on the .exe file.
Select ‘Run as administrator’.
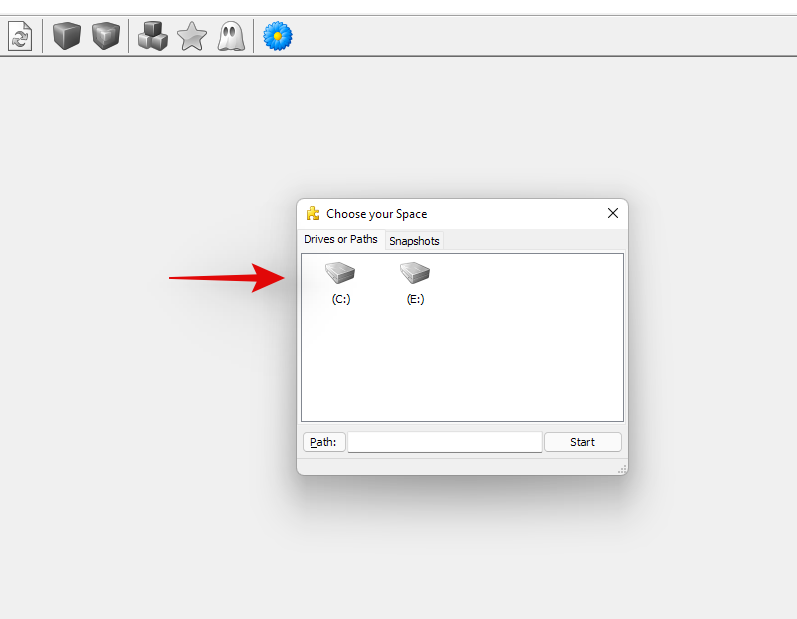
Now select the drive you wish to scan. If you wish to analyze and find large files in a particular directory, then you can enter its path in the text box below.
You will now be shown a graphical representation of your disk space usage on your screen. Simply hover over the largest chunk and you will be shown the name of the folder or file occupying that space.
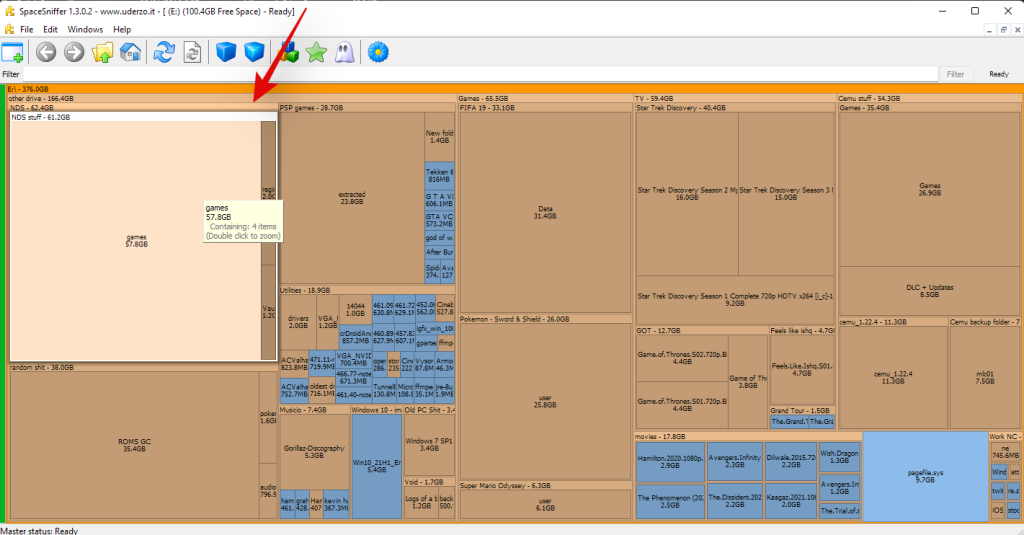
And that’s it! You can use SpaceSniffer this way to identify the largest files on your system by simply looking at the largest chunks on your screen.
Method #05: Using WinDirStat
WinDirStat is a popular open-source utility often used to generate a graphical representation of your local storage space in a user-friendly manner. This makes it easier to identify large chunks of your disk space occupied by a single file, folder, or archive, which in turn will make it easier for you to free up some space on your PC. Use the guide below to identify what is taking up space on your Windows 11 PC.
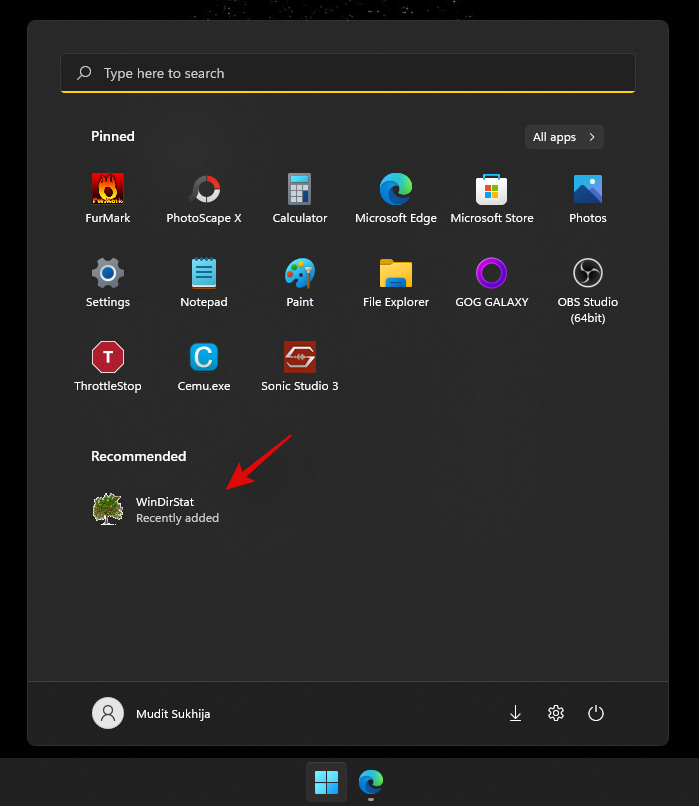
Download and install WinDirStat on your PC using the link above. Once installed, launch the app.
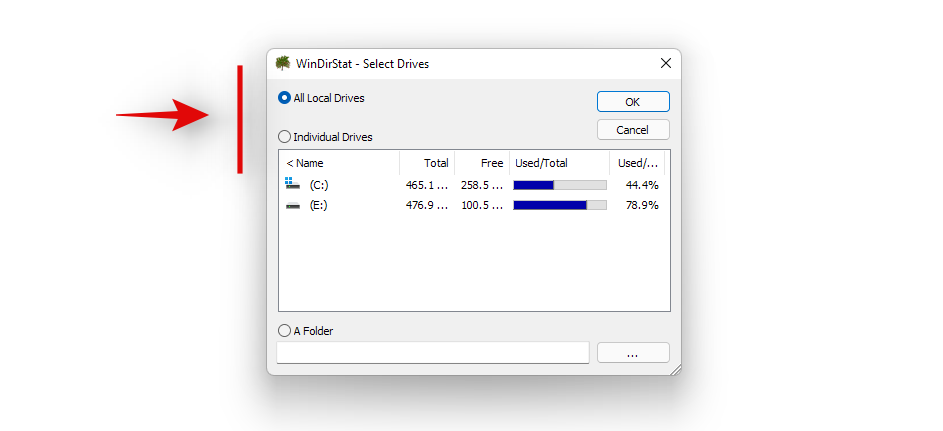
Now select one of the options that best suit your needs. If you only have a single drive installed on your system with a single partition, then you can skip this step. Click on ‘Ok’ once you are done.
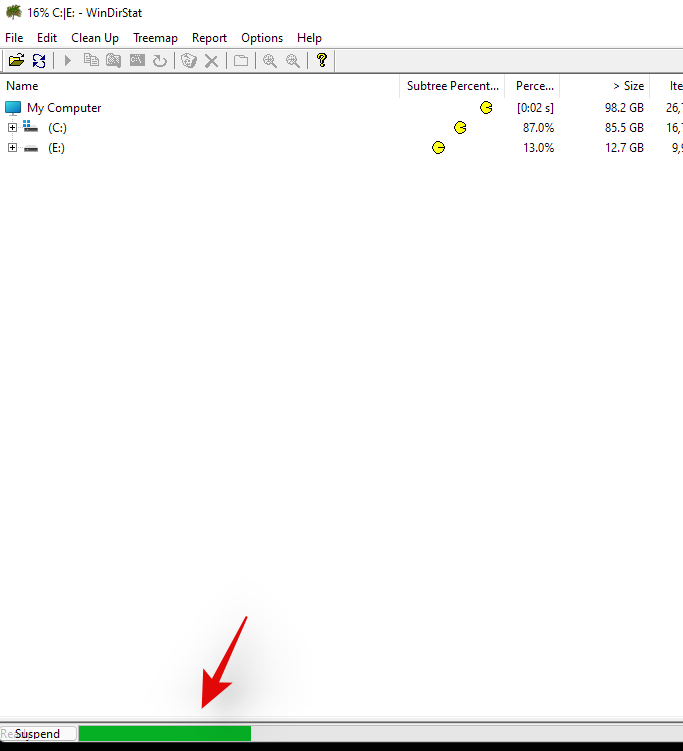
Your drives will now be analyzed and you can track the progress for the same at the bottom of the window.
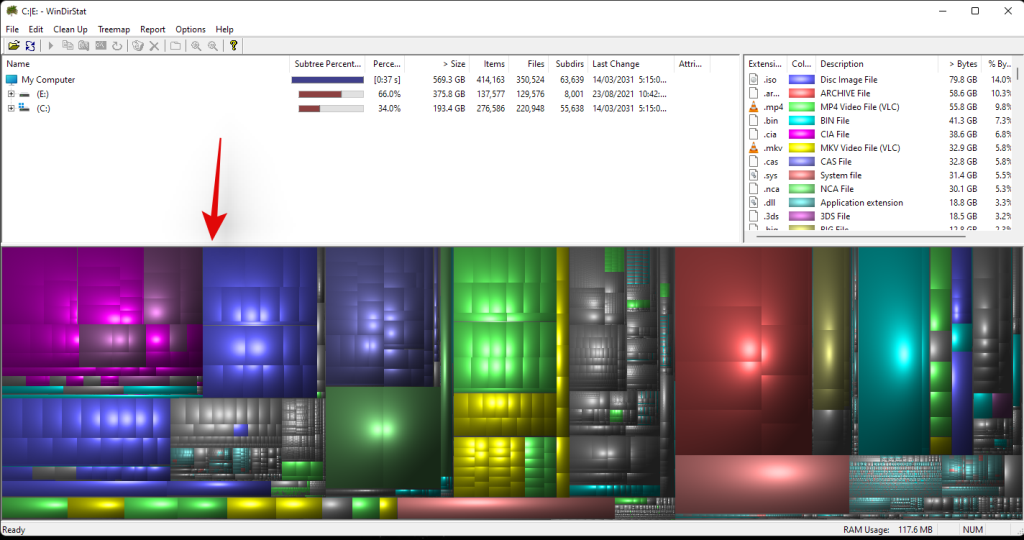
Once analyzed, a color-coded graphical representation of the disk space usage on the selected drive(s) will be shown on your screen. Simply click on the largest chunks to identify the largest files.
Press Del on your keyboard to delete the file. This will send it to your recycle bin and you can decide its fate when reviewing your recycle bin items. Alternatively, you can use Shift + Del to permanently delete the item from your system.
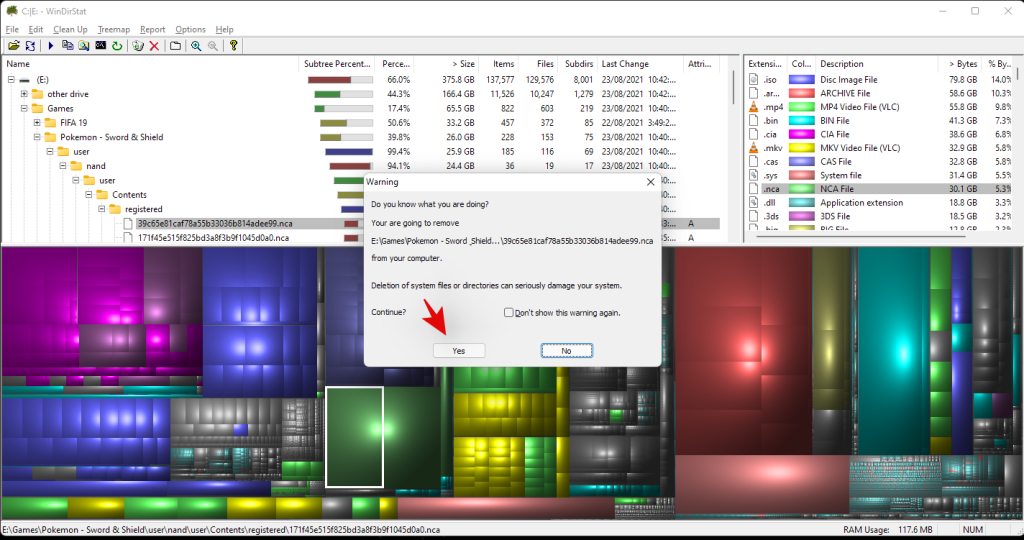
And that’s it! You can repeat the last steps to delete more of the largest files from your system.
Other Third-Party apps as alternative
The world of third-party alternatives is a huge one and thus, the above-mentioned tools are not the only ones that you can use to analyze your disk usage. Here are some alternatives with unique features that might be more suited for your current needs and requirements.
More ways to clear storage on Windows 11
If you’re looking to reclaim your storage space then there are tons of more things that you can do besides clearing or moving your largest files. You can clear caches, stop programs, reduce dedicated storage space, clear temporary files, remove leftover files, and much more. Refer to this dedicated guide by us that should help you clear space on Windows 11 in every way possible.
Should you use disk space analyzers?
Disk Space Analyzers have long been the ultimate utility to identify where exactly your disk space is being used. Most of them stem from long-standing communities while others have over decades of experience. If you’re divided on using disk space analyzers, then your best bet would be to opt for something that is open source.
The modern world of the internet is centered around data collection and like it or not, every service is gathering and collecting some type of data from your usage of their tool. Hence most disk analyzers nowadays, also have the option to share your usage data and more. Additionally, if you decide to opt for something new and untested then the risks are even higher.
Hence, we recommend you use disk space analyzers but do verify their origin and reputation before running them on your system. If you do not wish to go through the hassle of reading reviews, we recommend you simply try an open-source alternative from a trusted source.
We hope this guide helped you easily find the largest files using disk space on your system. If you face any issues or errors during the process, feel free to reach out to us using the comments section below.
Kui teie Windows 10 explorer ei tööta, oleme teid kaitsnud. Lugege ajaveebi, et leida lahendus, kui failiuurija ei tööta.
Kuidas värskendada draivereid Windows 11-s probleemide lahendamiseks ja seadmete ühilduvuse tagamiseks.
File Explorer on Windows 10 põhifunktsioon, mis võimaldab hõlpsasti leida ja hallata faile. Õppige, kuidas konfigureerida File Explorer avama "Seda arvutit" alates arvuti käivitamisest.
Kuidas kasutada Windows 11 otsingut tõhusalt ja kiiresti. Hanki kasulikud näpunäited ja parimad praktikad Windows 11 otsingufunktsiooni jaoks.
Iga arvutiga ühendatud seadet ja selle sees olevaid komponente haldavad seadmedraiverid. Draiverite värskendamine Windows 10-s on oluline mitmesuguste probleemide vältimiseks.
Kas näete File Explorer ei reageeri veateadet? Siit leiate tõhusad lahendused, et lahendada Windows 10 mittetöötava File Exploreri probleem.
Kuidas saada Windows 10-s abi - leidke parimad lahendused pea iga küsimusele, mis teil Microsoft Windows 10 kohta on.
Failiuurija ei reageeri tõrge Windows 10-s. File Explorer või Windows Exploreri protsess ei tööta operatsioonisüsteemis Windows 10. Hangi uued lahendused.
Uuri, kuidas tuua tagasi "Minu arvuti" ikoon Windows 11-s ja avada see lihtsalt, et pääseda oma failidele ja seadetele.
Kas te ei saa Windows 11 arvutis faile ja kaustu avada? Siit leiate teavet selle kohta, kuidas parandada, et Explorer.exe ei laadita käivitamisel ja tööle naasta.
