Mašinų augimas: AI pritaikymas realiame pasaulyje

Dirbtinis intelektas nėra ateityje, jis čia, dabartyje Šiame tinklaraštyje Skaitykite, kaip dirbtinio intelekto programos paveikė įvairius sektorius.
InvoicePlane is an open source e-Commerce application which can be used in to facilitate invoicing, client management, and payment tracking.
This article will cover the process of installing InvoicePlane on a CentOS 7 machine.
203.0.113.1.Log in from an SSH terminal console as a sudo user, and then update the system as follows:
sudo yum install epel-release -y
sudo yum update -y
sudo shutdown -r now
Log in back as the same sudo user after the system reboot.
Install the latest stable release of Apache using YUM:
sudo yum install httpd -y
Remove the pre-set Apache welcome page:
sudo sed -i 's/^/#&/g' /etc/httpd/conf.d/welcome.conf
Prevent Apache from listing web directory files to visitors:
sudo sed -i "s/Options Indexes FollowSymLinks/Options FollowSymLinks/" /etc/httpd/conf/httpd.conf
Start the Apache service and enable auto-start on system boot:
sudo systemctl start httpd.service
sudo systemctl enable httpd.service
When dealing with relationship database software on CentOS 7, you can choose MariaDB 10.x in order to experience better performance.
cat <<EOF | sudo tee -a /etc/yum.repos.d/MariaDB.repo
# MariaDB 10.1 CentOS repository list - created 2017-01-14 03:11 UTC
# http://downloads.mariadb.org/mariadb/repositories/
[mariadb]
name = MariaDB
baseurl = http://yum.mariadb.org/10.1/centos7-amd64
gpgkey=https://yum.mariadb.org/RPM-GPG-KEY-MariaDB
gpgcheck=1
EOF
sudo yum install MariaDB-server MariaDB-client -y
sudo systemctl start mariadb.service
sudo systemctl enable mariadb.service
sudo /usr/bin/mysql_secure_installation
Answer questions as below, and be sure to use your own MariaDB root password.
Enter current password for root (enter for none): Enter
Set root password? [Y/n]: Y
New password: <your-password>
Re-enter new password: <your-password>
Remove anonymous users? [Y/n]: Y
Disallow root login remotely? [Y/n]: Y
Remove test database and access to it? [Y/n]: Y
Reload privilege tables now? [Y/n]: Y
Log into the MySQL shell as root:
mysql -u root -p
Enter the MariaDB root password you set earlier in order to log in.
In the MySQL shell, create a database invoiceplane, a database user invoiceplaneuser, and its password yourpassword as follows.
Note: Remember to replace these sample parameters with your own ones.
CREATE DATABASE invoiceplane;
CREATE USER 'invoiceplaneuser'@'localhost' IDENTIFIED BY 'yourpassword';
GRANT ALL PRIVILEGES ON invoiceplane.* TO 'invoiceplaneuser'@'localhost' IDENTIFIED BY 'yourpassword' WITH GRANT OPTION;
FLUSH PRIVILEGES;
EXIT;
As required by InvoicePlane, install PHP 7.1 and necessary extensions using the Webtatic YUM repo as follows:
sudo rpm -Uvh https://mirror.webtatic.com/yum/el7/webtatic-release.rpm
sudo yum install mod_php71w php71w-gd php71w-common php71w-mbstring php71w-mcrypt php71w-mysqlnd php71w-recode php71w-xmlrpc -y
Next, you need to setup your preferred timezone for your machine:
sudo vi /etc/php.ini
Find the line:
;date.timezone =
Change it to:
date.timezone = America/New_York
Save and quit:
:wq!
Note: According to your specific location, you can determine the proper timezone value from the PHP official website.
Note: If you do not set the timezone in PHP.ini, PHP will use the System Timezone.
cd
wget https://invoiceplane.com/download/v1.4.10 -O v1.4.10.zip
sudo yum install unzip -y
sudo unzip v1.4.10.zip -d /var/www/html
Note: You can always find the latest stable release from official InvoicePlane download page.
1) Use the vi text editor to open the file /var/www/html/index.php:
sudo vi /var/www/html/index.php
Find the line:
define('IP_URL', '');
Replace it with:
define('IP_URL', 'http://203.0.113.1/');
Or:
define('IP_URL', 'http://example.com/');
Save and quit:
:wq!
2) Open another file /var/www/html/application/config/config.php:
sudo vi /var/www/html/application/config/config.php
Find the line:
$config['index_page'] = 'index.php';
Replace it with:
$config['index_page'] = '';
Save and quit:
:wq!
3) Rename the /var/www/html/htaccess file to /var/www/html/.htaccess:
sudo mv /var/www/html/htaccess /var/www/html/.htaccess
4) Use the vi text editor to open the file /etc/httpd/conf/httpd.conf:
sudo vi /etc/httpd/conf/httpd.conf
Go to the segment <Directory "/var/www/html">...</Directory>, and then find the line:
AllowOverride None
Replace it with:
AllowOverride All
Save and quit:
:wq!
5) Restart Apache in order to put your modifications into effect:
sudo systemctl restart httpd.service
sudo chown -R apache:apache /var/www/html
sudo firewall-cmd --zone=public --permanent --add-service=http
sudo firewall-cmd --reload
Point your web browser to http://203.0.103.1/setup, and you will be brought into the installation wizard.
1) On the Choose a Language page, choose the language you want, and then click the Continue button.
2) On the Prerequisites page, you will be prompted that ./uploads/customer_files is not writable. You need to create that directory as follows:
sudo mkdir /var/www/html/uploads/customer_files
sudo chown apache:apache /var/www/html/uploads/customer_files
Then click the Try again button to test your settings again. If passed, click the Continue button to move on.
3) On the Database Details page, input the database information you setup earlier:
localhostinvoiceplaneuseryourpasswordinvoiceplaneClick the Try again button to test your database settings. If passed, click the Continue button to move on.
4) On the Install Tables and Upgrade Tables pages, just click the Continue button.
5) On the Create User Account page, input necessary user information as follows, and then click the Continue button:
6) On the Installation Complete page, click the Login button to complete the installation.
However, for security purposes, you should forbid access to http://203.0.103.1/setup from now on by editing the .htaccess file as follows:
sudo vi /var/www/html/.htaccess
Find the line:
RewriteEngine On
Add a line right beneath it:
Redirect /setup http://203.0.103.1/`
Save and quit:
:wq!
This concludes our tutorial. Thanks for reading.
Dirbtinis intelektas nėra ateityje, jis čia, dabartyje Šiame tinklaraštyje Skaitykite, kaip dirbtinio intelekto programos paveikė įvairius sektorius.
Ar taip pat esate DDOS atakų auka ir esate sumišęs dėl prevencijos metodų? Perskaitykite šį straipsnį, kad išspręstumėte savo užklausas.
Galbūt girdėjote, kad įsilaužėliai uždirba daug pinigų, bet ar kada susimąstėte, kaip jie uždirba tokius pinigus? padiskutuokime.
Ar norite pamatyti revoliucinius „Google“ išradimus ir kaip šie išradimai pakeitė kiekvieno žmogaus gyvenimą šiandien? Tada skaitykite tinklaraštį, kad pamatytumėte „Google“ išradimus.
Savavaledžių automobilių koncepcija, kuri išvažiuotų į kelius su dirbtinio intelekto pagalba, yra svajonė, kurią jau kurį laiką svajojame. Tačiau nepaisant kelių pažadų, jų niekur nematyti. Skaitykite šį tinklaraštį, kad sužinotumėte daugiau…
Kadangi mokslas sparčiai vystosi, perimdamas daug mūsų pastangų, taip pat didėja rizika, kad pateksime į nepaaiškinamą singuliarumą. Skaitykite, ką mums gali reikšti išskirtinumas.
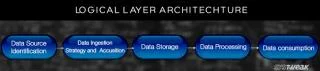
Skaitykite tinklaraštį, kad paprasčiausiai sužinotumėte apie skirtingus didžiųjų duomenų architektūros sluoksnius ir jų funkcijas.
Duomenų saugojimo metodai gali būti tobulinami nuo pat Duomenų gimimo. Šiame tinklaraštyje, remiantis infografika, aprašoma duomenų saugojimo raida.
Šiame skaitmeniniu būdu pagrįstame pasaulyje išmanieji namų įrenginiai tapo svarbia gyvenimo dalimi. Štai keletas nuostabių išmaniųjų namų įrenginių privalumų, kaip jie daro mūsų gyvenimą vertą gyventi ir paprastesnį.
Neseniai „Apple“ išleido „macOS Catalina 10.15.4“ priedą, skirtą problemoms išspręsti, tačiau atrodo, kad dėl atnaujinimo kyla daugiau problemų, dėl kurių „Mac“ įrenginiai blokuojami. Norėdami sužinoti daugiau, perskaitykite šį straipsnį