Mašinų augimas: AI pritaikymas realiame pasaulyje

Dirbtinis intelektas nėra ateityje, jis čia, dabartyje Šiame tinklaraštyje Skaitykite, kaip dirbtinio intelekto programos paveikė įvairius sektorius.
Apache Hadoop is an open source Big Data processing tool, widely used in the IT industry.
Depending to the size, type, and scale of your data, you can deploy Hadoop in the stand-alone or cluster mode.
In this beginner-focused tutorial, we will install Hadoop in the stand-alone mode on a CentOS 7 server instance.
Log in as a sudo user, and then update the CentOS 7 system to the latest stable status:
sudo yum install epel-release -y
sudo yum update -y
sudo shutdown -r now
Once the server is online, log back in.
Hadoop is Java-based and OpenJDK 8 is the recommended version for the latest stable version.
Install OpenJDK 8 JRE using YUM:
sudo yum install -y java-1.8.0-openjdk
Verify the installation of OpenJDK 8 JRE:
java -version
The output should resemble:
openjdk version "1.8.0_111"
OpenJDK Runtime Environment (build 1.8.0_111-b15)
OpenJDK 64-Bit Server VM (build 25.111-b15, mixed mode)
You can always find the download URL of the latest version of Hadoop from the official Apache Hadoop release page. At the time of writing this article, the latest stable version of Hadoop is 2.7.3.
Download the binary archive of Hadoop 2.7.3:
cd
wget http://www-us.apache.org/dist/hadoop/common/hadoop-2.7.3/hadoop-2.7.3.tar.gz
Download the matching checksum file:
wget https://dist.apache.org/repos/dist/release/hadoop/common/hadoop-2.7.3/hadoop-2.7.3.tar.gz.mds
Install the checksum tool:
sudo yum install perl-Digest-SHA
Calculate the SHA256 value of the Hadoop archive:
shasum -a 256 hadoop-2.7.3.tar.gz
Display the content of the file hadoop-2.7.3.tar.gz.mds, and make sure the two SHA256 values are identical:
cat hadoop-2.7.3.tar.gz.mds
Unzip the archive to a designated location:
sudo tar -zxvf hadoop-2.7.3.tar.gz -C /opt
Before you can run Hadoop properly, you need to specify the Java home location for it.
Open the Hadoop environment config file /opt/hadoop-2.7.3/etc/hadoop/hadoop-env.sh using vi or your favorite text editor:
sudo vi /opt/hadoop-2.7.3/etc/hadoop/hadoop-env.sh
Find the line:
export JAVA_HOME=$
Replace it with:
export JAVA_HOME=$(readlink -f /usr/bin/java | sed "s:bin/java::")
This setting will make Hadoop always use the default install location of Java.
Save and quit:
:wq!
You can add the path of the Hadoop program to the PATH environment variable for your convenience:
echo "export PATH=/opt/hadoop-2.7.3/bin:$PATH" | sudo tee -a /etc/profile
source /etc/profile
Simply execute the command hadoop, and you will be prompted with the usage of the hadoop command and its various parameters.
Here, you can use a built-in example to test your Hadoop installation.
Prepare the data source:
mkdir ~/source
cp /opt/hadoop-2.7.3/etc/hadoop/*.xml ~/source
Use Hadoop along with grep to output the result:
hadoop jar /opt/hadoop-2.7.3/share/hadoop/mapreduce/hadoop-mapreduce-examples-2.7.3.jar grep ~/source ~/output 'principal[.]*'
The output should be:
    ...
    File System Counters
            FILE: Number of bytes read=1247812
            FILE: Number of bytes written=2336462
            FILE: Number of read operations=0
            FILE: Number of large read operations=0
            FILE: Number of write operations=0
    Map-Reduce Framework
            Map input records=2
            Map output records=2
            Map output bytes=37
            Map output materialized bytes=47
            Input split bytes=117
            Combine input records=0
            Combine output records=0
            Reduce input groups=2
            Reduce shuffle bytes=47
            Reduce input records=2
            Reduce output records=2
            Spilled Records=4
            Shuffled Maps =1
            Failed Shuffles=0
            Merged Map outputs=1
            GC time elapsed (ms)=24
            Total committed heap usage (bytes)=262758400
    Shuffle Errors
            BAD_ID=0
            CONNECTION=0
            IO_ERROR=0
            WRONG_LENGTH=0
            WRONG_MAP=0
            WRONG_REDUCE=0
    File Input Format Counters
            Bytes Read=151
    File Output Format Counters
            Bytes Written=37
Finally, you can view the content of the output files:
cat ~/output/*
The result should be:
6       principal
1       principal.
You are now ready to explore Hadoop.
Dirbtinis intelektas nėra ateityje, jis čia, dabartyje Šiame tinklaraštyje Skaitykite, kaip dirbtinio intelekto programos paveikė įvairius sektorius.
Ar taip pat esate DDOS atakų auka ir esate sumišęs dėl prevencijos metodų? Perskaitykite šį straipsnį, kad išspręstumėte savo užklausas.
Galbūt girdėjote, kad įsilaužėliai uždirba daug pinigų, bet ar kada susimąstėte, kaip jie uždirba tokius pinigus? padiskutuokime.
Ar norite pamatyti revoliucinius „Google“ išradimus ir kaip šie išradimai pakeitė kiekvieno žmogaus gyvenimą šiandien? Tada skaitykite tinklaraštį, kad pamatytumėte „Google“ išradimus.
Savavaledžių automobilių koncepcija, kuri išvažiuotų į kelius su dirbtinio intelekto pagalba, yra svajonė, kurią jau kurį laiką svajojame. Tačiau nepaisant kelių pažadų, jų niekur nematyti. Skaitykite šį tinklaraštį, kad sužinotumėte daugiau…
Kadangi mokslas sparčiai vystosi, perimdamas daug mūsų pastangų, taip pat didėja rizika, kad pateksime į nepaaiškinamą singuliarumą. Skaitykite, ką mums gali reikšti išskirtinumas.
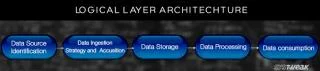
Skaitykite tinklaraštį, kad paprasčiausiai sužinotumėte apie skirtingus didžiųjų duomenų architektūros sluoksnius ir jų funkcijas.
Duomenų saugojimo metodai gali būti tobulinami nuo pat Duomenų gimimo. Šiame tinklaraštyje, remiantis infografika, aprašoma duomenų saugojimo raida.
Šiame skaitmeniniu būdu pagrįstame pasaulyje išmanieji namų įrenginiai tapo svarbia gyvenimo dalimi. Štai keletas nuostabių išmaniųjų namų įrenginių privalumų, kaip jie daro mūsų gyvenimą vertą gyventi ir paprastesnį.
Neseniai „Apple“ išleido „macOS Catalina 10.15.4“ priedą, skirtą problemoms išspręsti, tačiau atrodo, kad dėl atnaujinimo kyla daugiau problemų, dėl kurių „Mac“ įrenginiai blokuojami. Norėdami sužinoti daugiau, perskaitykite šį straipsnį