Þegar Windows 11 tilkynnti möguleikann á að setja upp og nota Android forrit voru allir yfir tunglinu. Fólk var spennt að keyra samfélagsmiðlaforrit, leiki og fleira beint úr tölvunni sinni. Því miður var þessi spenna stytt þegar Microsoft opinberaði að þeir myndu nota Amazon App Store í stað Google Play Store.
Til samanburðar má nefna að Amazon apps verslunin hefur aðeins um 460.000 á meðan Google valkosturinn hefur 3,48 milljónir öpp samtals. Þetta er ein af ástæðunum fyrir því að margir notendur hafa verið að leita að því að setja upp Google Play þjónustu og verslun handvirkt. Ertu á sama báti? Þá höfum við hinn fullkomna leiðarvísi fyrir þig!
Notaðu aðferðirnar hér að neðan til að fá og nota Google Play Store og Gapps á Windows 11 tölvunni þinni.
Tengt: Hvernig á að sundra táknum á Windows 11 verkefnastikunni með skráningarhakki
Innihald
Aðferð #1: Settu upp sérsniðna WSA með Gapps og Play Store fyrirfram uppsett
Einfaldari leið til að fá Google Apps og Google Play Store með WSA er með því að nota fyrirfram breytta WSA sem hefur Gapps foruppsett. Þessari WSA var deilt af Redditor sem heitir Rageman666 ( sjá hér ). Þegar þú hefur hlaðið niður geturðu notað modið sem gefið er upp hér að neðan til að skrá þig inn á Google Play Store með Google reikningnum þínum. (Hins vegar, ef þú vilt aðeins setja WSA upp opinberlega og taka síðan á þig flóknu aðferðina við að setja upp Gapps sjálfur, skoðaðu þá aðferð 2 hér að neðan.)
Hvað vantar þig
Skref fyrir skref leiðbeiningar
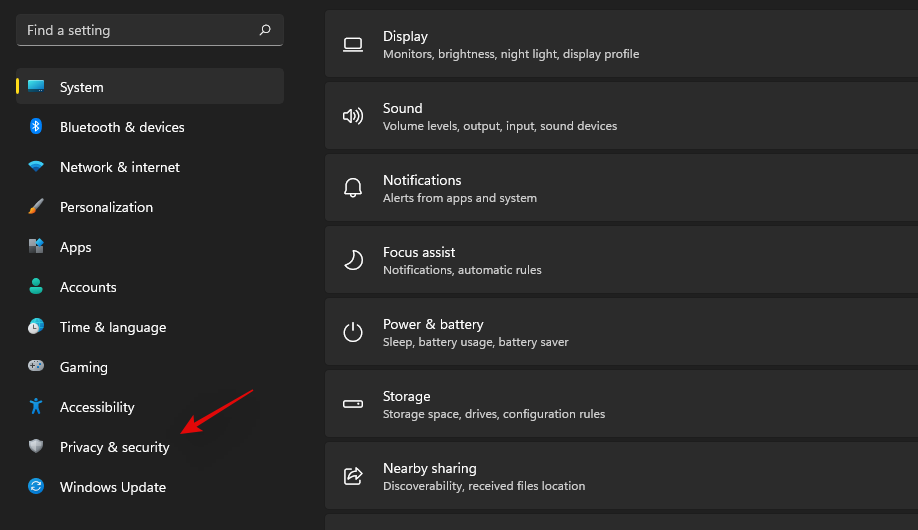
Við þurfum fyrst að virkja þróunarham á uppsetningu þinni á Windows 11. Ýttu Windows + iá lyklaborðið þitt og veldu 'Persónuvernd og öryggi' í vinstri hliðarstikunni.
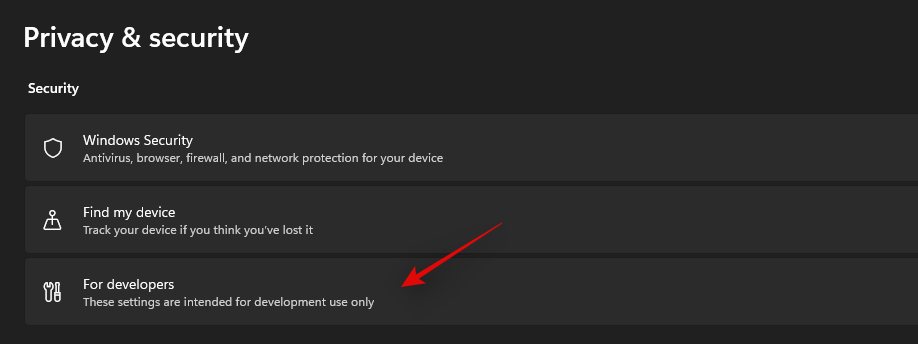
Smelltu á 'Fyrir forritara' hægra megin.
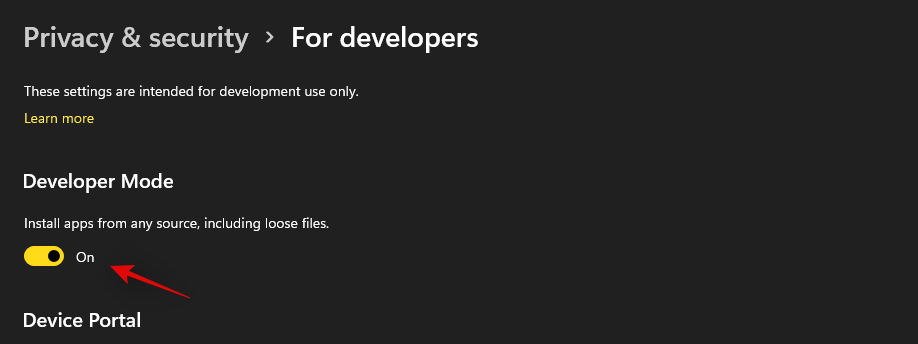
Smelltu og kveiktu á rofanum fyrir 'Developer Mode'. Smelltu á 'Já' til að staðfesta val þitt.
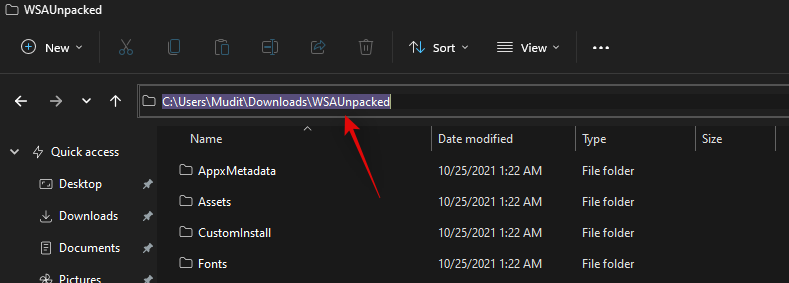
Sæktu nú WSA sem tengist hér að ofan á hentugan stað á staðbundinni geymslu. Taktu niður skrárnar í nýja möppu sem heitir 'WSAUnpacked'. Smelltu á heimilisfangastikuna í 'WSAUnpacked' möppunni og afritaðu slóðina á klemmuspjaldið þitt.
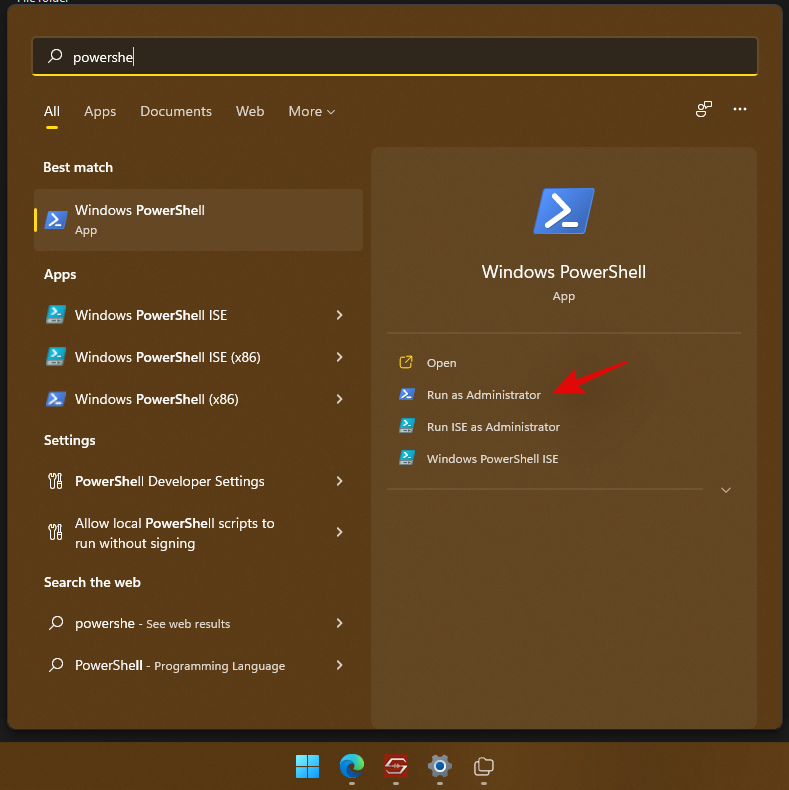
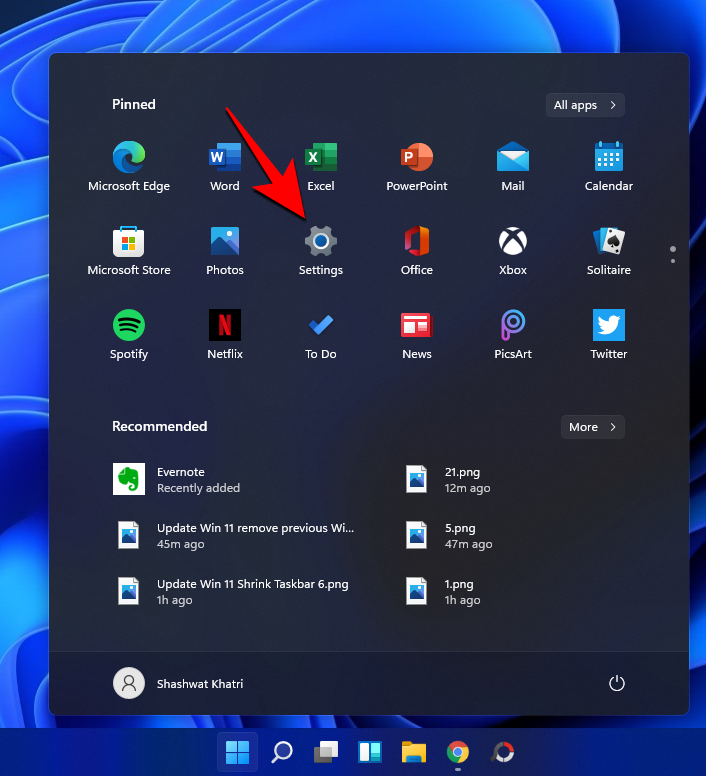
Ýttu Windows + Sá lyklaborðið þitt, leitaðu að 'Powershell' og smelltu á 'Run as administrator' þegar það birtist í leitarniðurstöðum þínum.
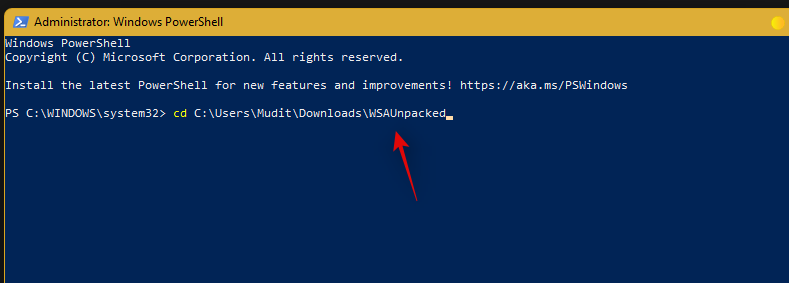
Sláðu inn eftirfarandi skipun og skiptu PATH út fyrir slóðina sem við afrituðum á klemmuspjaldið þitt. Gakktu úr skugga um að þú fjarlægir tilvitnanir af límdu slóðinni.
cd PATH
Sláðu nú inn og framkvæmdu eftirfarandi skipun.
Add-AppxPackage -Register .\AppxManifest.xml

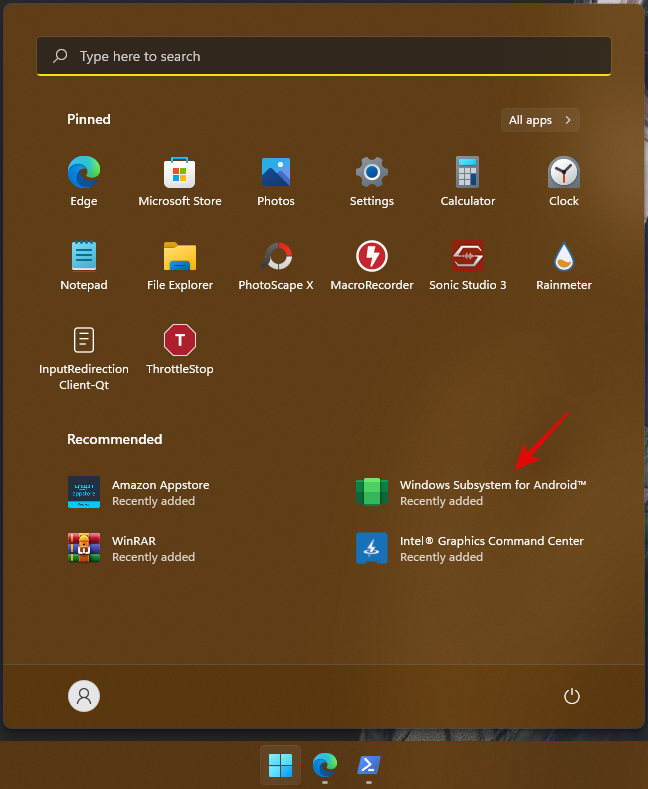
Breytt WSA verður nú sett upp á kerfinu þínu. Ýttu á Windows takkann og ræstu það sama í Start valmyndinni.
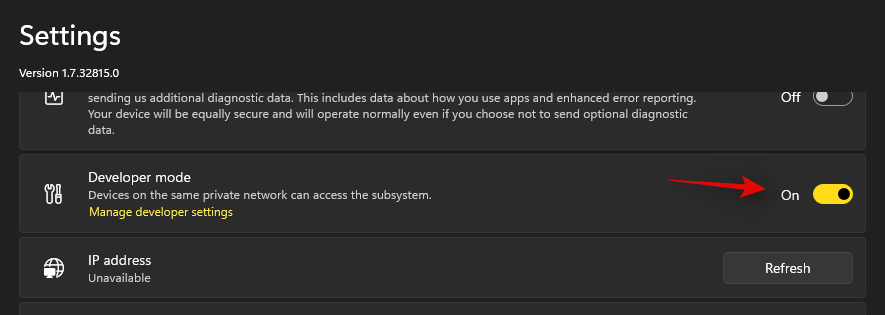
Þegar undirkerfið er ræst skaltu smella á og virkja 'Developer Mode'.
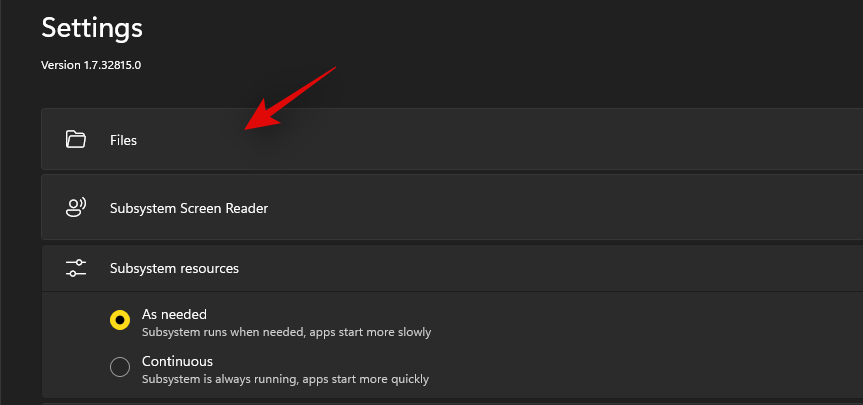
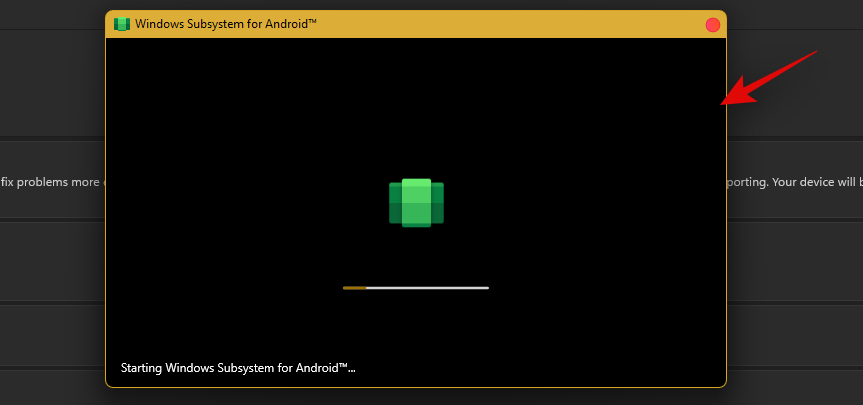
Smelltu nú á 'Skráar' efst svo að það ræsir Windows undirkerfi fyrir Android á vélinni þinni.
Lokaðu Files appinu. Við þurfum nú að nota lausn til að skrá okkur inn á Play Store.
Sæktu ADBToolkit sem er tengt hér að ofan og dragðu það út í nýja möppu á skjáborðinu þínu sem heitir 'ADBToolkit'. Þegar búið er að draga það út skaltu smella á veffangastikuna efst og afrita heimilisfangið á klemmuspjaldið þitt.
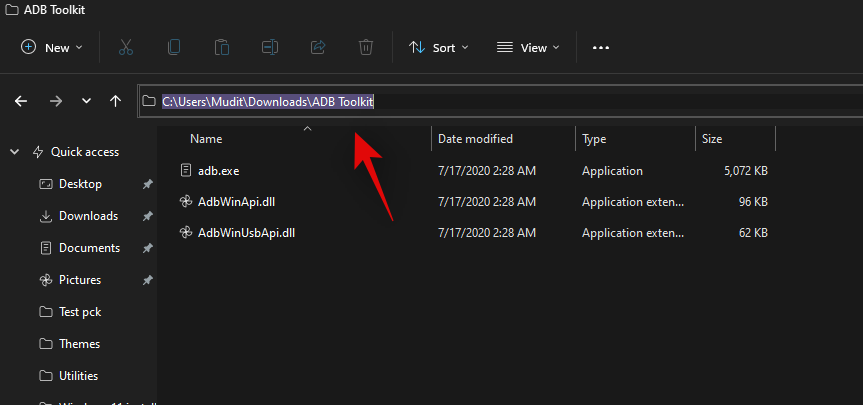
Ýttu Windows + Sá lyklaborðið og leitaðu að Powershell. Smelltu á 'Hlaupa sem stjórnandi' þegar Powershell birtist í leitarniðurstöðum þínum.

Sláðu inn eftirfarandi skipun og skiptu PATH út fyrir slóðina að ADBToolkit sem við afrituðum áðan.
cd PATH

Athugið: Gakktu úr skugga um að þú fjarlægir tilvitnanir úr límdu slóðinni í ADBToolkit.
Skiptu nú aftur í undirkerfisgluggann og afritaðu heimilisfangið sem gefið er upp fyrir neðan 'Developer Mode'.
Framkvæmdu skipunina sem gefin er hér að neðan til að ræsa og tengja ADB. Skiptu 'ADDRESS' út fyrir heimilisfangið sem afritað var á klemmuspjaldið þitt (að ofan).
.\adb.exe connect ADDRESS

Sláðu inn eftirfarandi skipun til að ræsa ADB skel.
.\adb.exe shell
Notaðu nú eftirfarandi skipun til að fá rótaraðgang.
su

Sláðu nú inn eftirfarandi skipun.
setenforce 0
Sláðu inn 'Hætta' til að hætta í PowerShell.

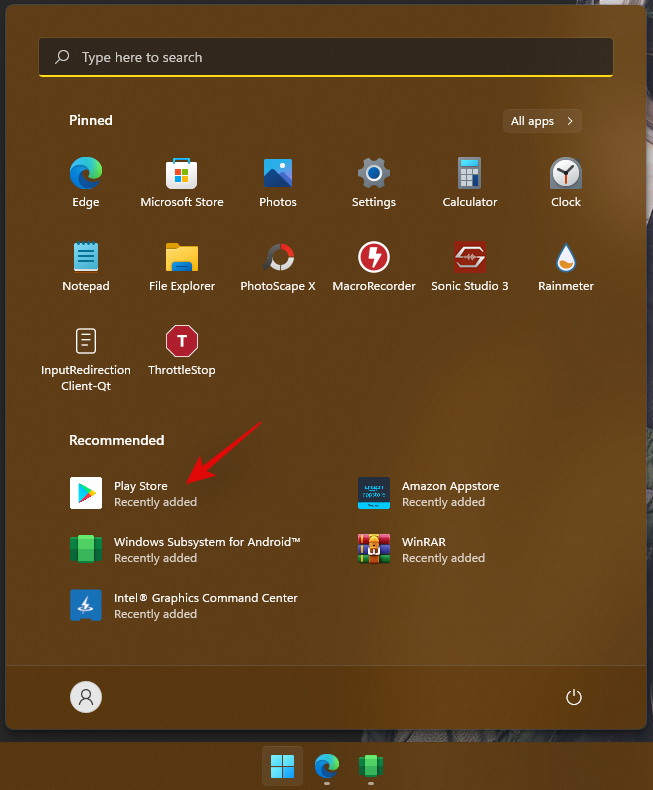
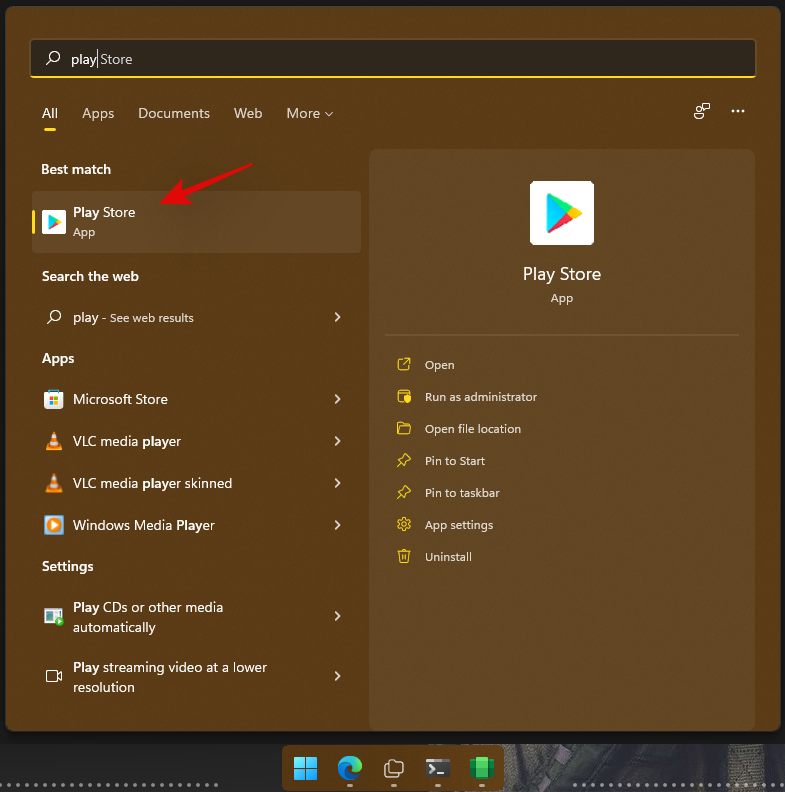
Þú getur nú lokað öllum opnum gluggum á skjáborðinu þínu. Ýttu á Windows + Sog leitaðu að 'Play Store' núna. Smelltu og ræstu forritið þegar það birtist í leitarniðurstöðum þínum.
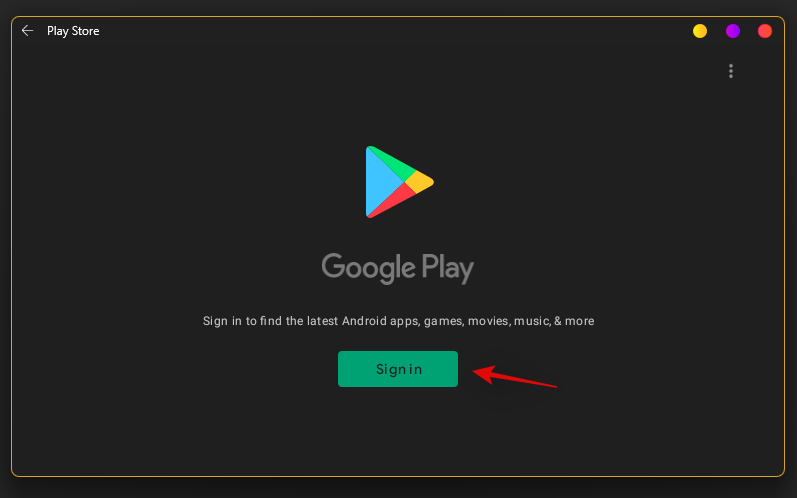
Smelltu nú á 'Skráðu þig inn' og skráðu þig inn með Google reikningnum þínum.
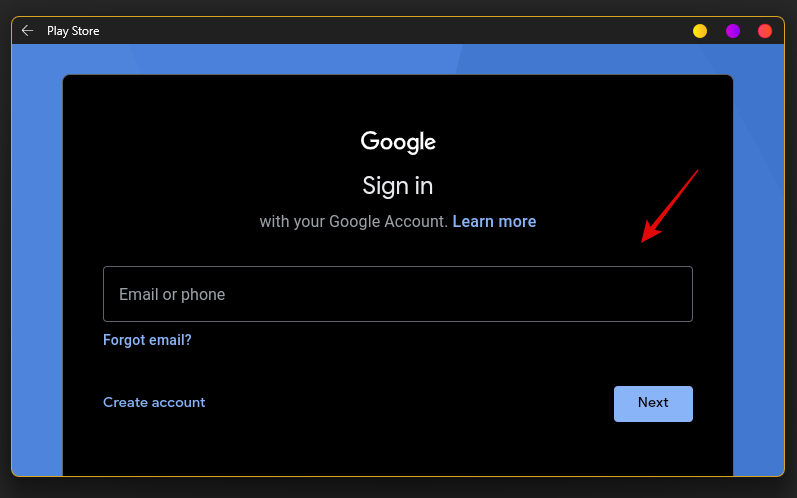
Þú verður nú skráður inn með Google reikningnum þínum og þú ættir nú að geta notað Google Play Store á Windows 11 tölvunni þinni.
Og þannig er það! Þú getur nú halað niður og sett upp viðeigandi Android öpp á vélinni þinni beint úr Google Play Store.
Svipað : Sideload APK á Windows 11 með ADB handvirkt | Sjálfkrafa með handriti
Aðferð #2: Settu upp WSA og settu síðan upp Gapps sjálfur
Aðferðin hér að ofan er miklu auðveldari og þar af leiðandi auðveld í notkun þó að það sé ekki beint mælt með því, þar sem þetta er fyrirfram breyttur (sérsniðinn) WSA pakki. En ef þú vilt hafa opinberan WSA pakka frá Microsoft og vilt setja upp Gapps sjálfur yfir þetta, þá er þetta aðferðin fyrir þig. Það er frekar flókið btw, svo það gæti oft verið að velta því fyrir sér hvort einfaldlega sé þess virði að setja upp sérsniðinn WSA pakka sem fylgir Gapps foruppsettum, sem við myndum segja.
Mælt er með því að fá Google Apps og Play Store á tölvuna þína á opinberu WSA með því að setja upp Gapps pakkann sjálfur þar sem þú þarft ekki fyrirfram breyttan WSA sem hjálpar ef þú hefur áhyggjur af öryggi sérsniðins WSA pakka samkvæmt aðferð 1.
Hvað vantar þig
- WSGA handrit | Niðurhalshlekkur (Gapps handrit fyrir Windows undirkerfi fyrir Android)
- Windows undirkerfi fyrir Android | Tengill
- Store Adguard | Tengill
- OpenGAps | Tengill
- ADBToolkit | Sækja hlekkur
- WinRAR | Sækja hlekkur
- WSL: Windows undirkerfi fyrir Linux
- Ubuntu: Sækja hlekkur
- Mikilvægt: Fjarlægðu upprunalega Windows undirkerfi fyrir Android ef þú ert nú þegar með það uppsett á tölvunni þinni áður en þú heldur áfram með þessa handbók.
Skref fyrir skref leiðbeiningar
Farðu á WSA hlekkinn hér að ofan og afritaðu og límdu eftirfarandi hlekk sem gefinn er fyrir neðan eða fyrir ofan í textareitinn.
Tengill

Smelltu nú á fellivalmyndina við hliðina á textareitnum og smelltu á 'Hægt'.
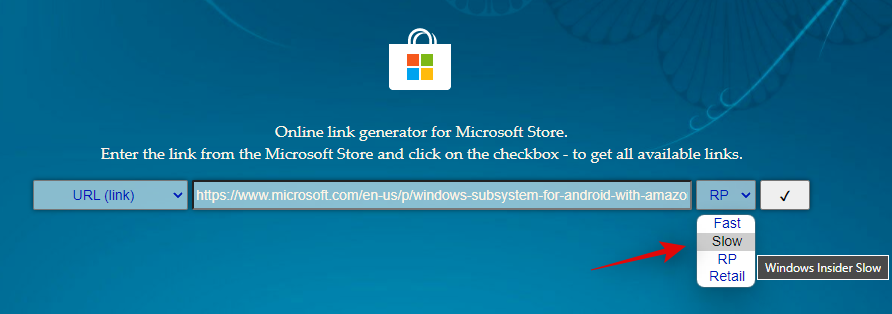
Smelltu á 'Check Mark' til að vinna úr tilteknum hlekk.
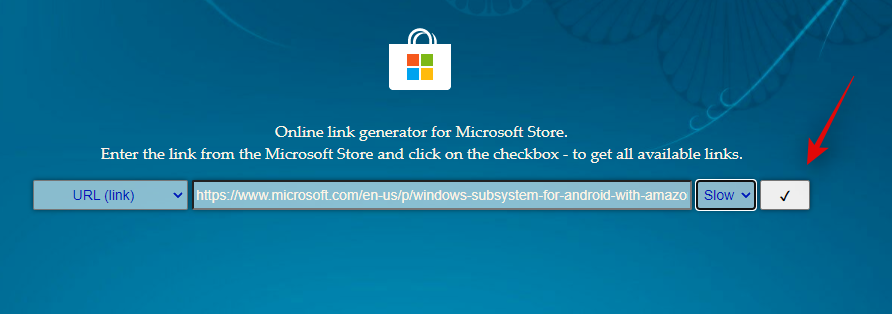
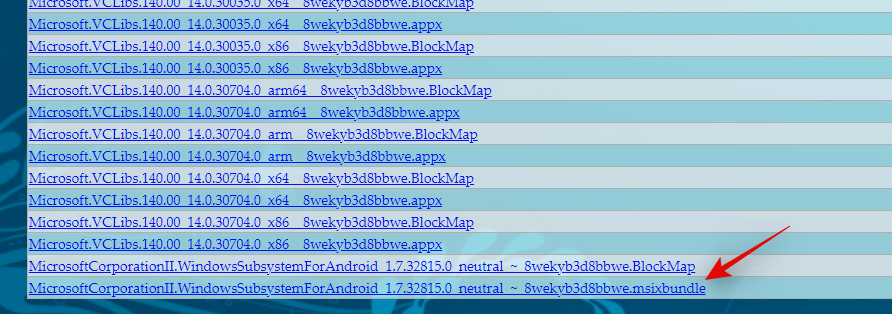
Þegar búið er að vinna úr þeim verða allar tengdu niðurhalsskrárnar nú aðgengilegar á skjánum þínum. Skrunaðu til botns og smelltu á .msix búntinn neðst og halaðu því niður á hentugan stað á staðbundinni geymslu.
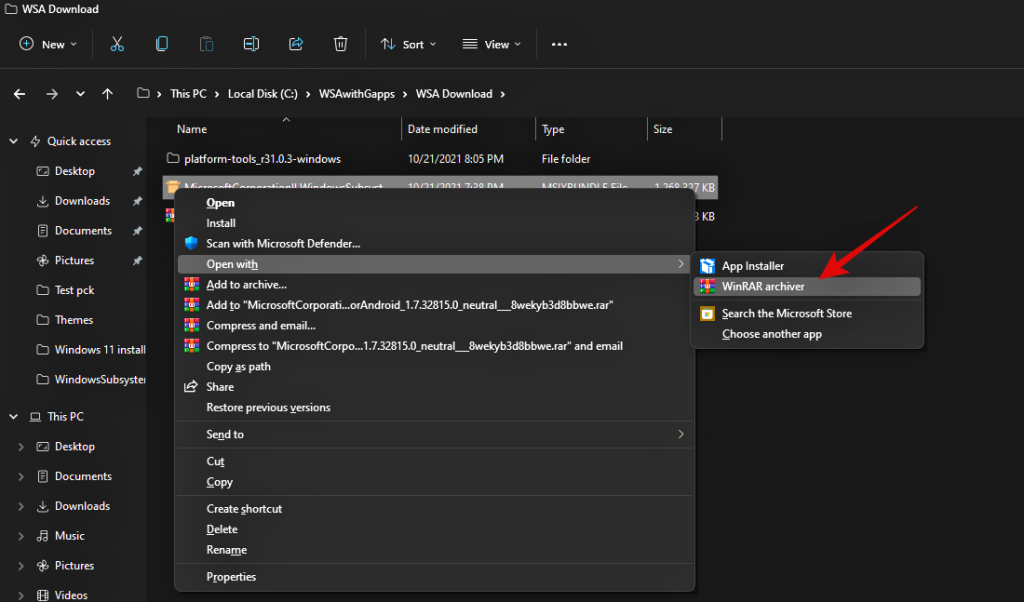
Farðu nú í niðurhalaða skrá, hægrismelltu á hana og opnaðu hana með WinRAR. Ef þú ert ekki með WinRAR á tölvunni þinni skaltu nota hlekkinn hér að ofan til að hlaða niður og setja upp það sama.
Þegar búnturinn er opinn í WinRAR skaltu skruna til botns og athuga arkitektúr .msix búntsins. Það ætti að passa við CPU arkitektúrinn þinn, ef ekki geturðu valið þá útgáfu sem þú vilt af listanum og haldið áfram með handbókina.

Tvísmelltu og opnaðu sama búnt í WinRAR. Þegar þú ert búinn skaltu fara í C/boot drifið þitt og búa til nýja möppu sem heitir 'WindowsSubsystemForAndroid'.

Skiptu aftur í Winrar og veldu allar skrárnar nema eftirfarandi möppur og skrár.
- AppxMetadata (folder)
- AppxBlockMap.xml (file)
- AppxSignature.p7x (file)
- [Content Types].xml (file)
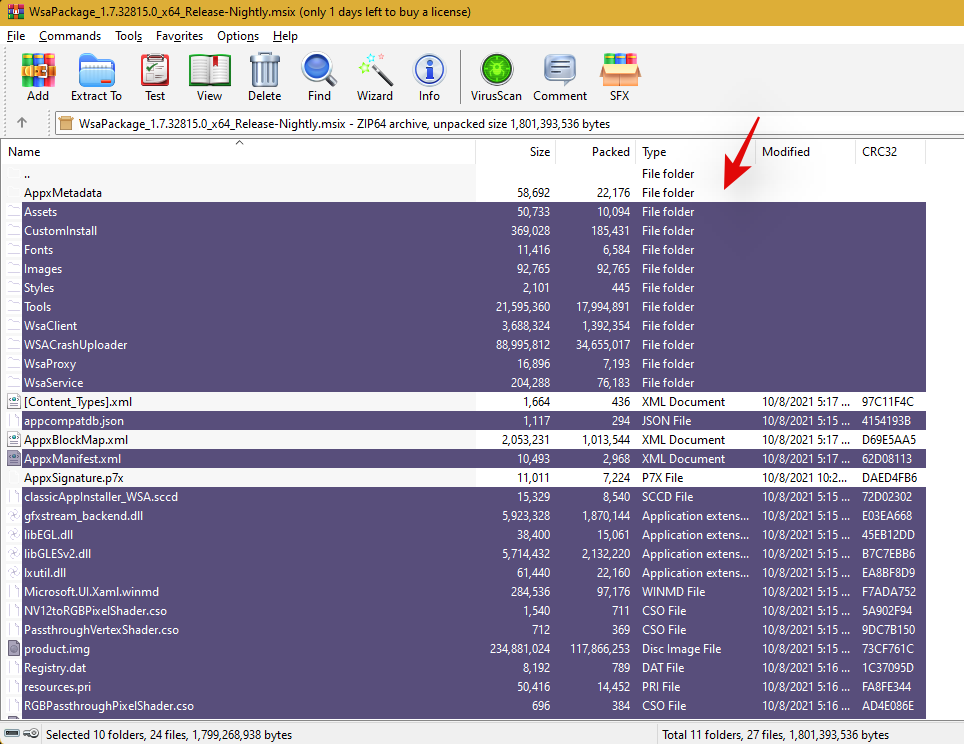
Copy all the selected files to the new ‘WindowsSubsystemForAndroid’ folder we created earlier.
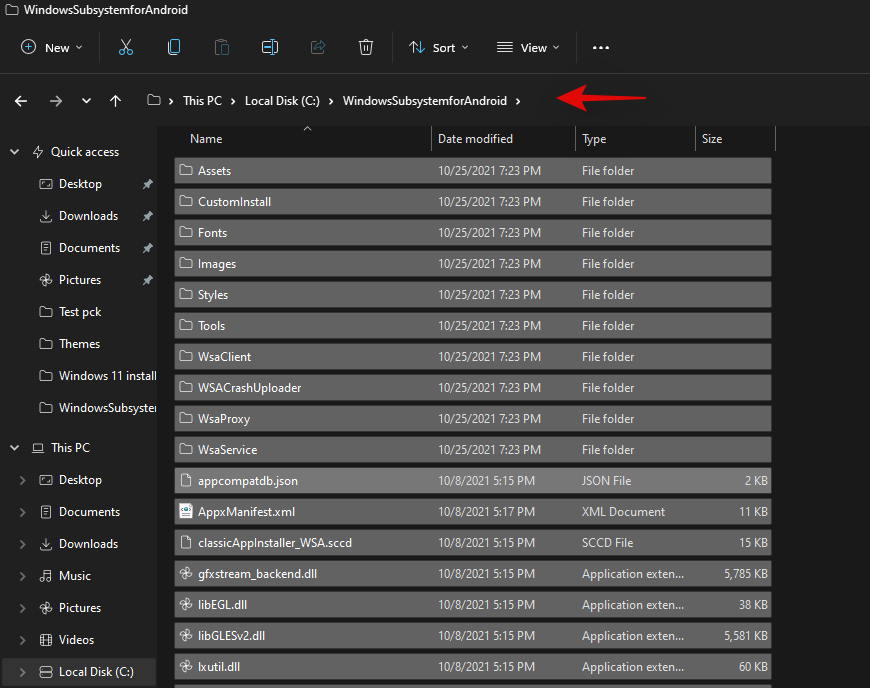
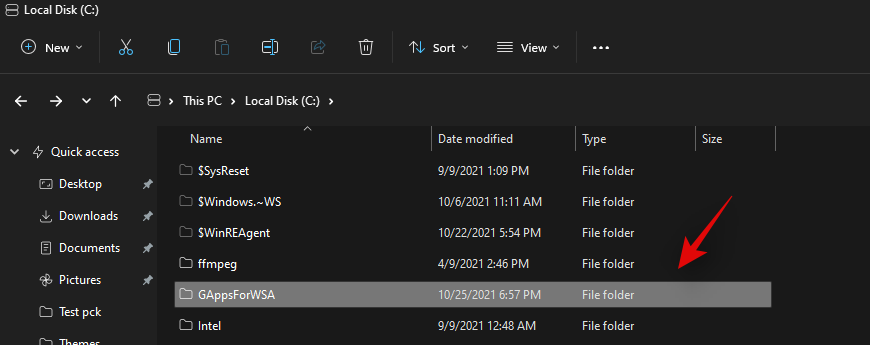
Once copied, create another new folder on your boot drive named ‘GAppsForWSA’.
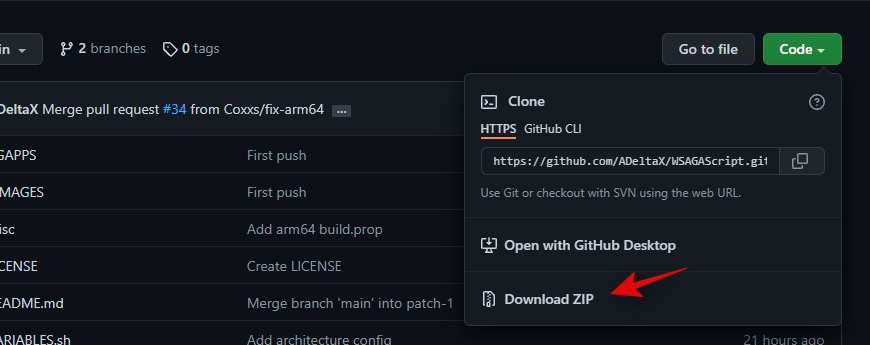
Open the link for the WSGA script at the top and download the same as a .zip to your local storage.
Extract the .zip to the new ‘GAppsForWSA’ folder that we created in your boot drive.
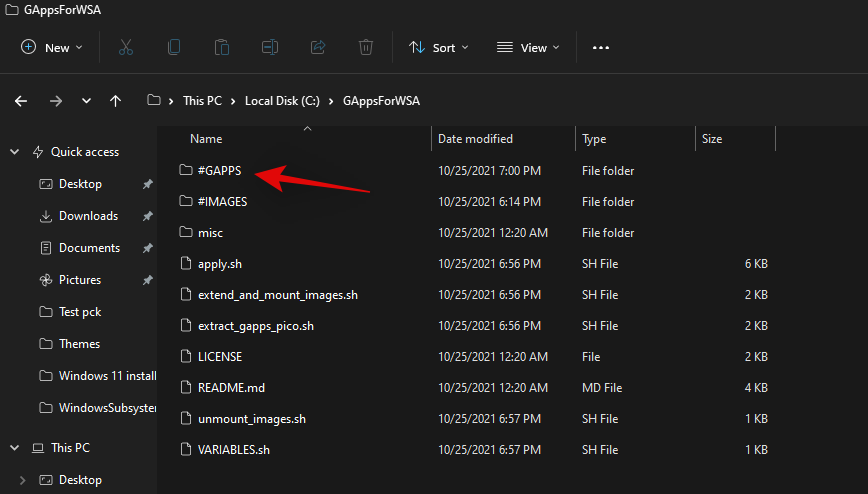
Note: Extract the contents of the ‘WSGAScript-main’ folder contents inside the archive.
With the contents archived, right-click on ‘VARIABLEs.sh’ and open it with Notepad.

Replace ‘GAppsWSA’ with ‘GAppsForWSA’.
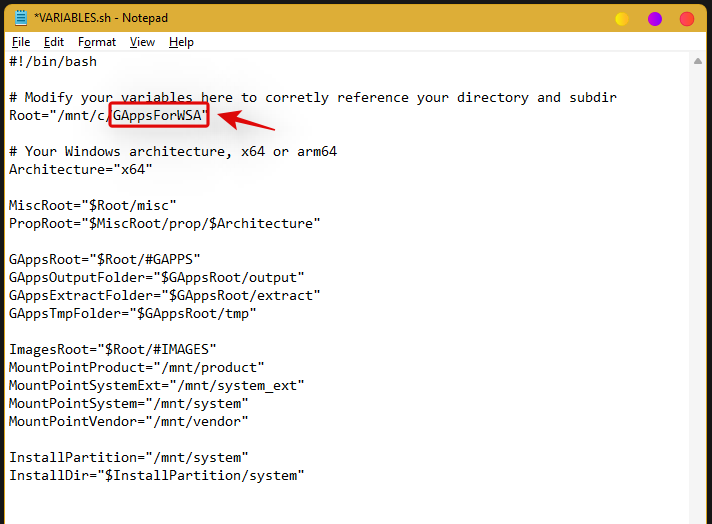
Press Ctrl + S on your keyboard to save the changes. We will now download GApps for your WSA installation. Visit the link for OpenGApps at the top and select the following options given below.
- Platform: x86_64
- Android: 11.0
- Variant: pico
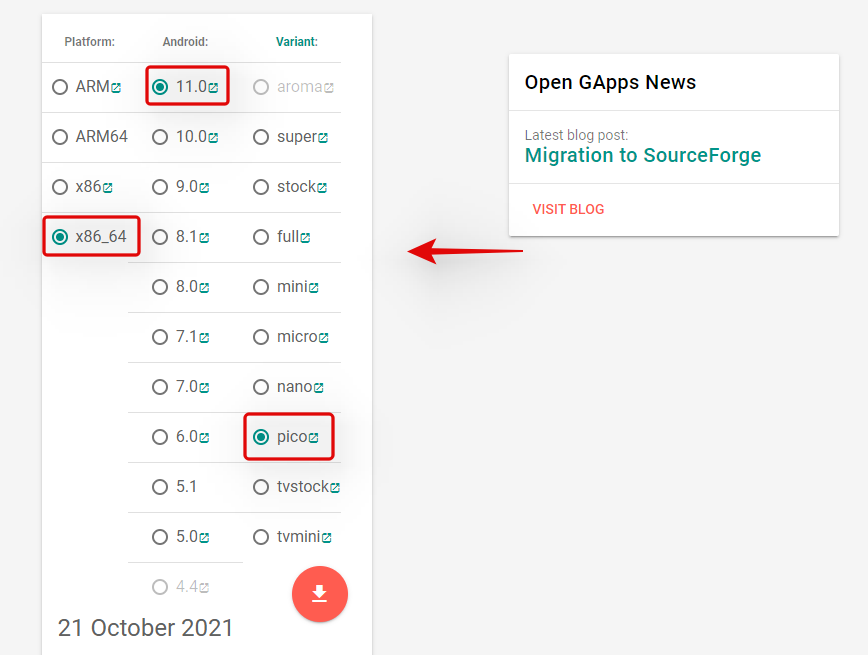
Click on the ‘Download icon’.
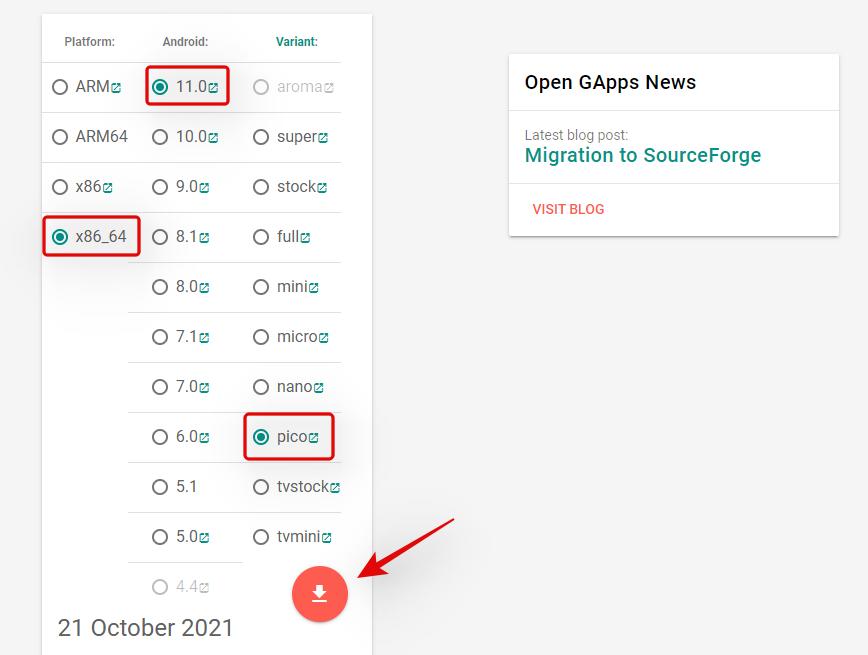
You will now be redirected to Sourceforge, wait a few seconds and the download should automatically be initiated for you.

Download and store the archive in the following location in the ‘GAppsForWSA’ folder on your boot drive.
Boot Drive\GAppsForWSA\#GAPPS
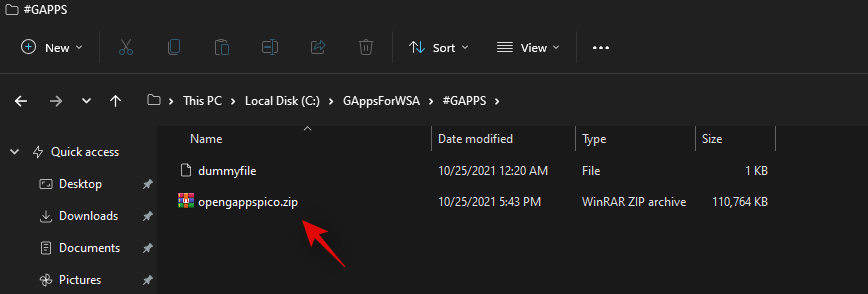
Now go back to your boot drive and open the ‘WindowsSubsystemForAndroid’. Copy the following 4 files.
- vendor.img
- system_ext.img
- system.img
- product.img
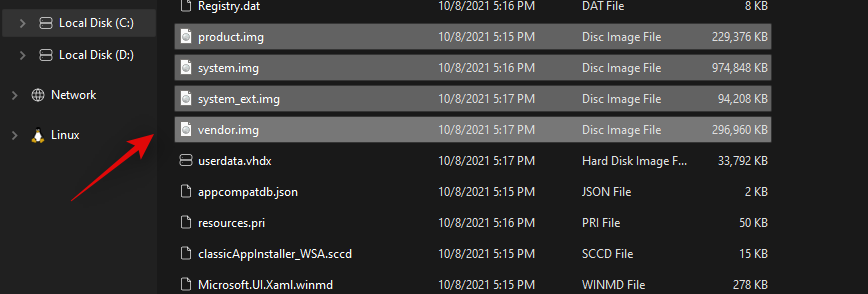
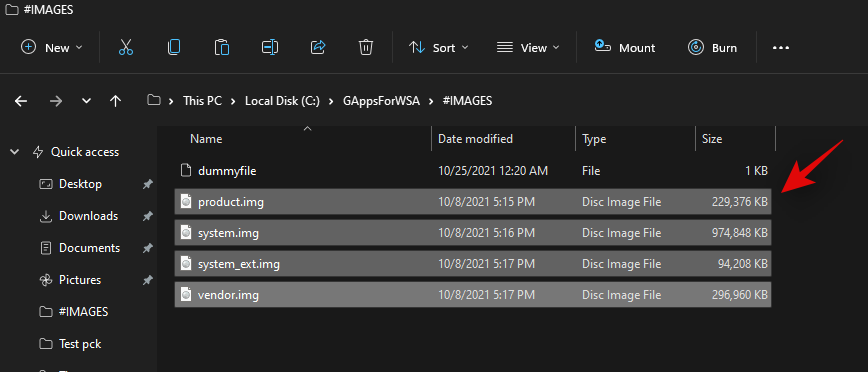
Navigate to the following location and paste all your copied files.
Boot Drive\GAppsForWSA\#IMAGES
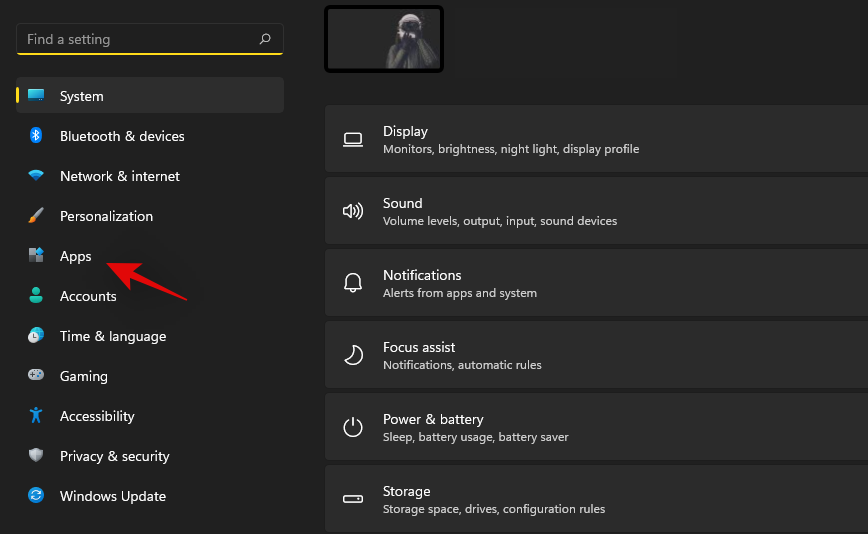
We will now install WSL for your system. WSL is a Linux Subsystem that will allow you to use executables and scripts developed for Linux. Press Windows + i on your keyboard to open the Settings app and then click on ‘Apps’ on your left.
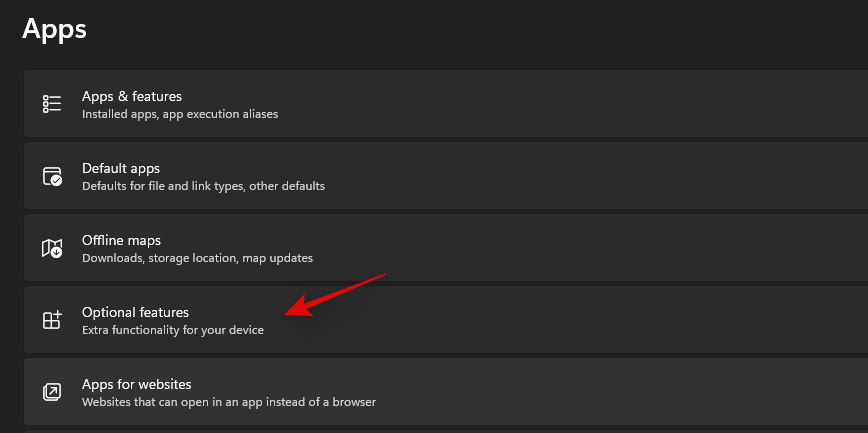
Now click on ‘Optional Features’.
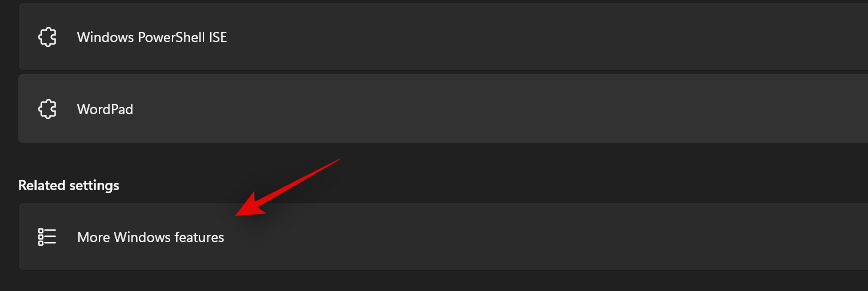
Scroll down and click on ‘More Windows features’.
A new window for available features will now open on your screen. Scroll to the bottom and check the box for ‘Windows Subsystem for Linux’.
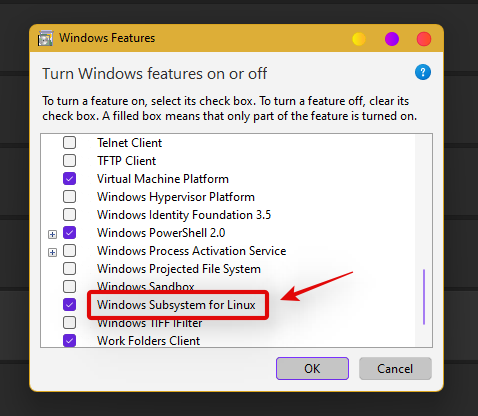
Click on ‘Ok’ once you are done. The Linux Subsystem will now be installed on your PC. You will now be prompted to restart your PC. We recommend you restart your PC at this point even if you are not prompted.
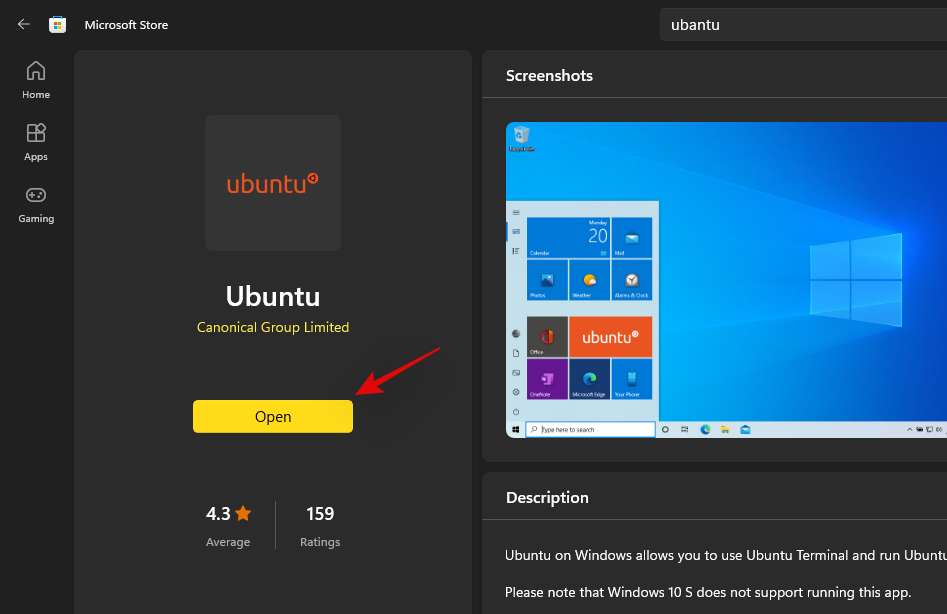
We will now install a distro that will help us during this setup. We recommend you use Ubuntu available on the Microsoft Store as it is easily downloaded and removed from your system. Use the link below to visit and download Ubuntu in the Microsoft Store.
Click on ‘Open’ once the app is installed to configure your installation. You can also launch the app from your Start menu depending on your preference.
Ubuntu will now be installed on your system. Once installed, proceed to set a Username to protect your installation. Subsequently, enter a password to protect root access on your system.
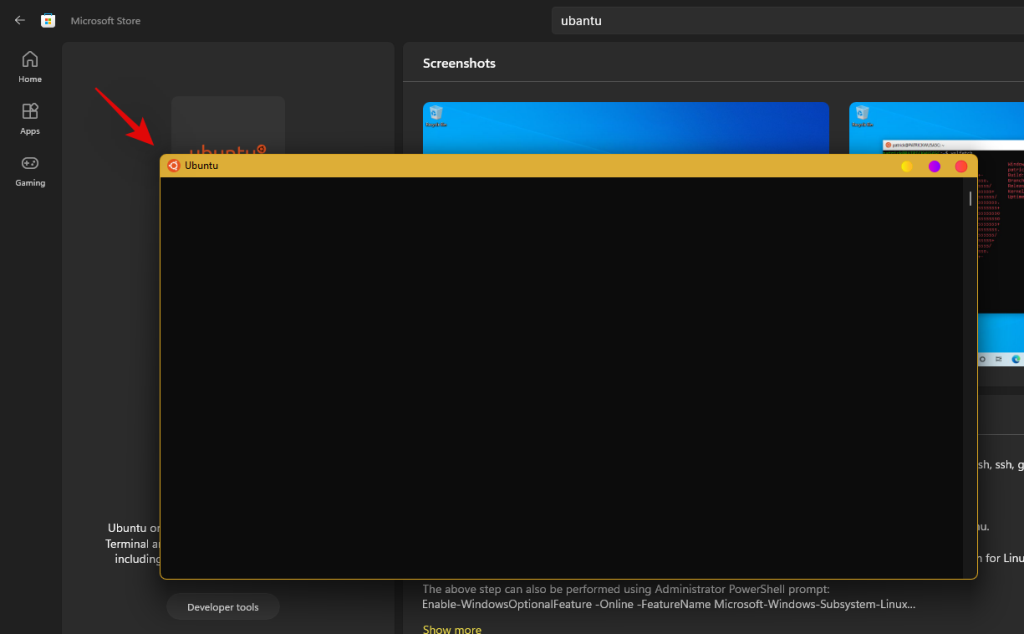
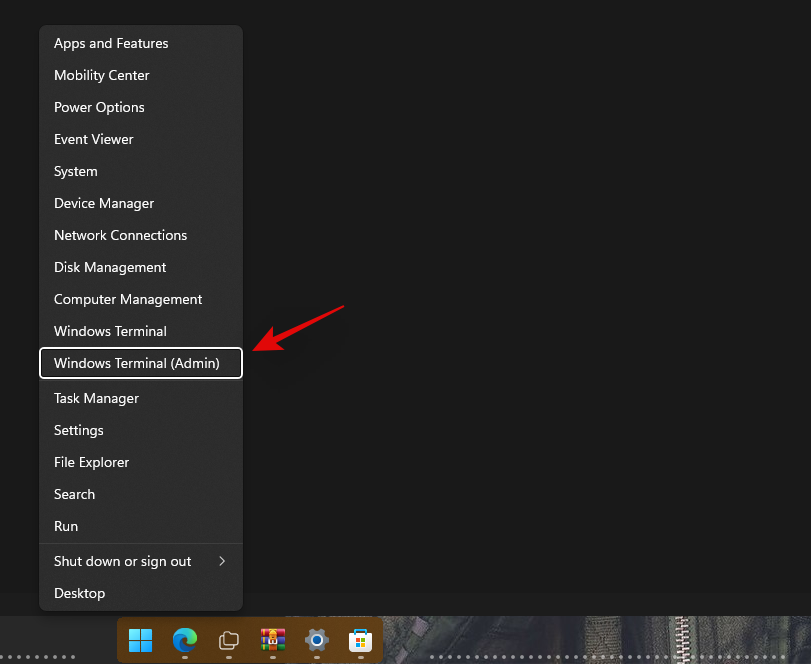
The Distro has now been setup on your system, you can close the current window and press Windows + X instead. Select ‘Windows Terminal (admin)’.
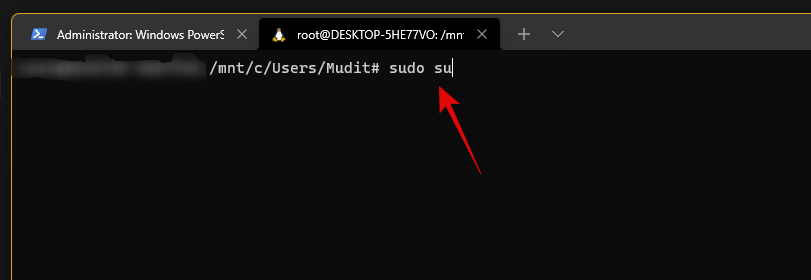
Click on the drop-down arrow at the top and select the same to launch a WSL terminal in the new tab. We’ll now need root access to modify your WSA with GApps. Type in the following command and press Enter on your keyboard. If you did not set a username or password then you should already have root access in the terminal. You can skip this step and move to the next one instead.
sudo su
Enter your password to grant root access (if applicable). Now type in the following commands one by one.
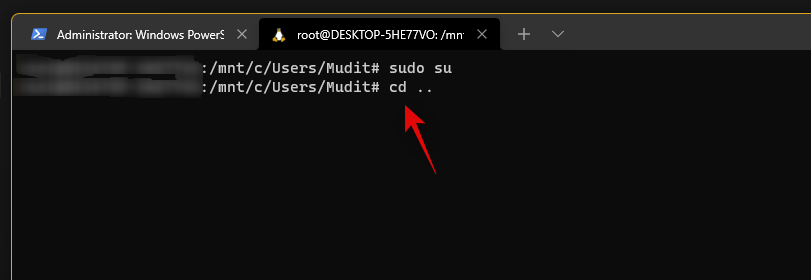
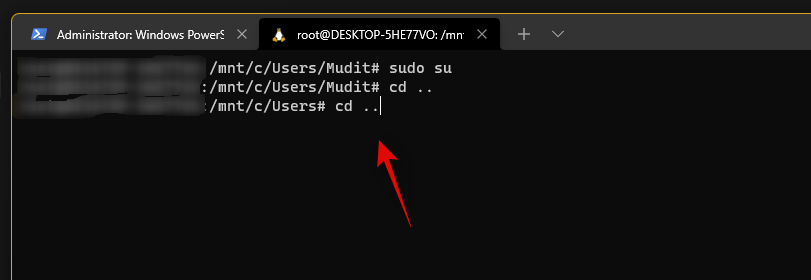
Finally use the command below to navigate to ‘GAppsForWSA’.
cd GAppsForWSA/
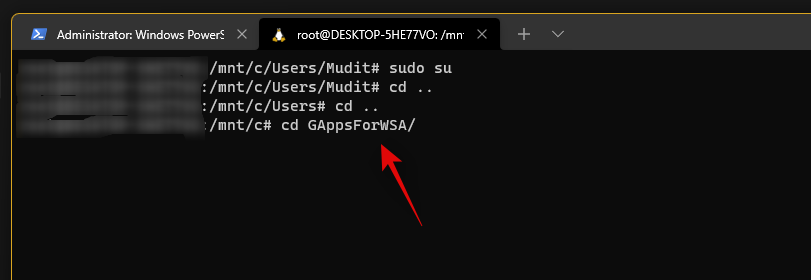
Now type in the following command to install ‘lzip’ and ‘unzip’ which will be needed for this process.
apt install lzip unzip
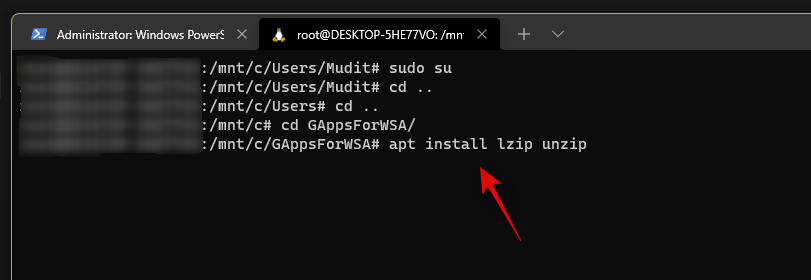
Note: If you are unable to get lzip or unzip setup, then run apt-get update -y to update your repositories and packages.
Confirm your choice by typing in ‘Y‘.
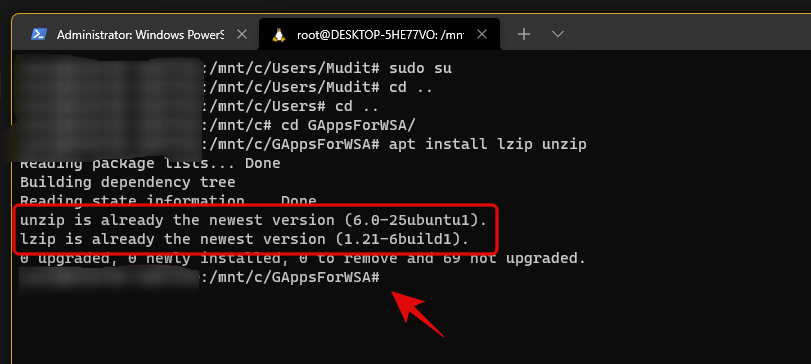
We will now install ‘dos2unix’ which will also be needed for this modification. Use the command below to install the same on your PC.
apt install dos2unix
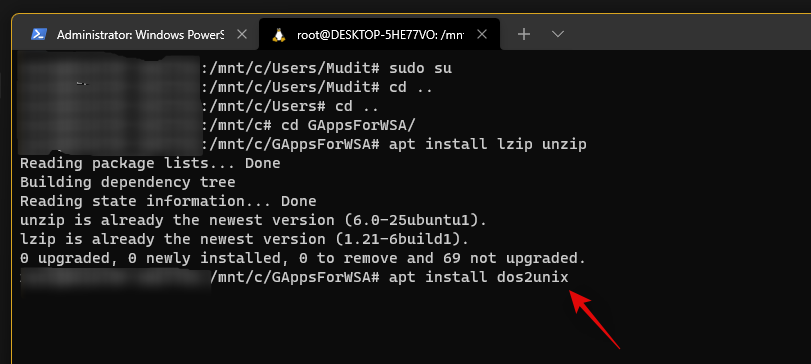
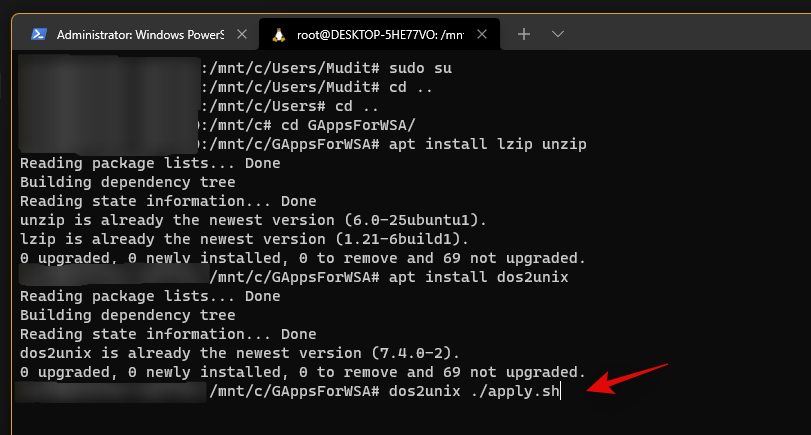
Now it’s time to modify your WSA image. Type in and execute the following commands in the terminal one by one in the same order.
- Command 1:
dos2unix ./apply.sh
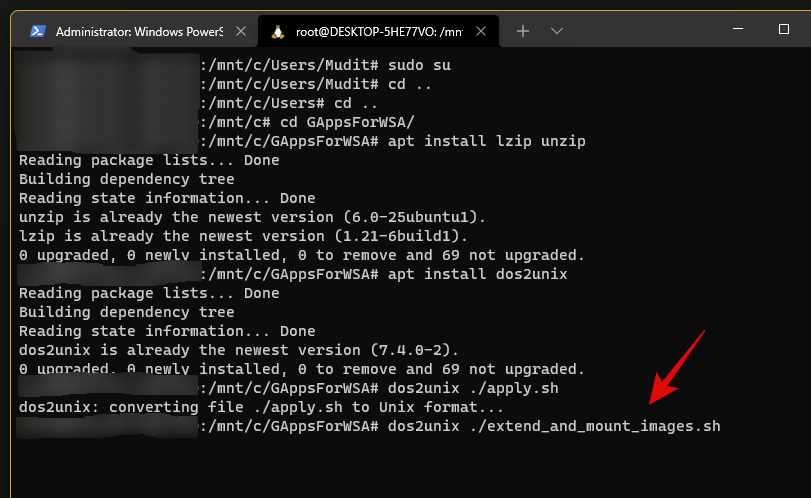
- Command 2:
dos2unix ./extend_and_mount_images.sh
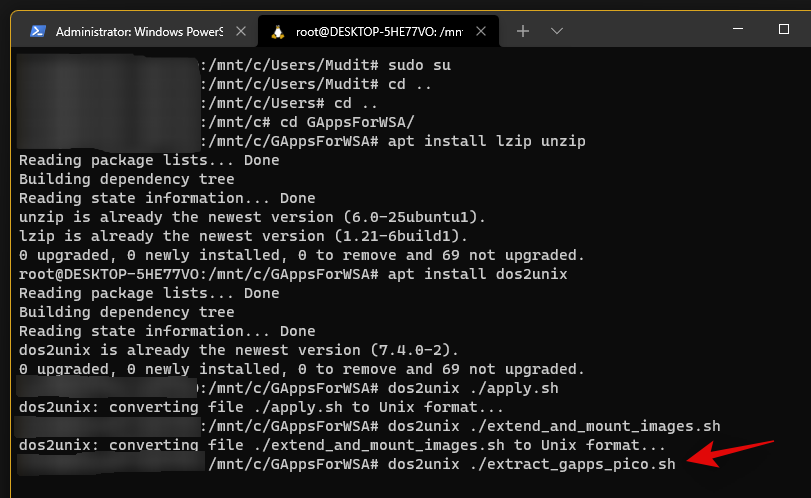
- Command 3:
dos2unix ./extract_gapps_pico.sh
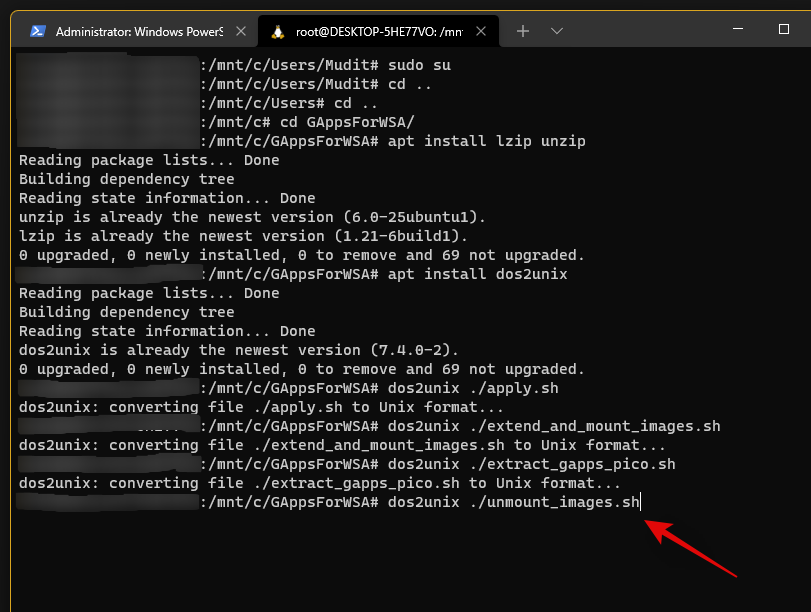
- Command 4:
dos2unix ./unmount_images.sh
- Command 5:
dos2unix ./VARIABLES.sh
Once the process completes, type in the following to clear up your terminal for better management.
clear
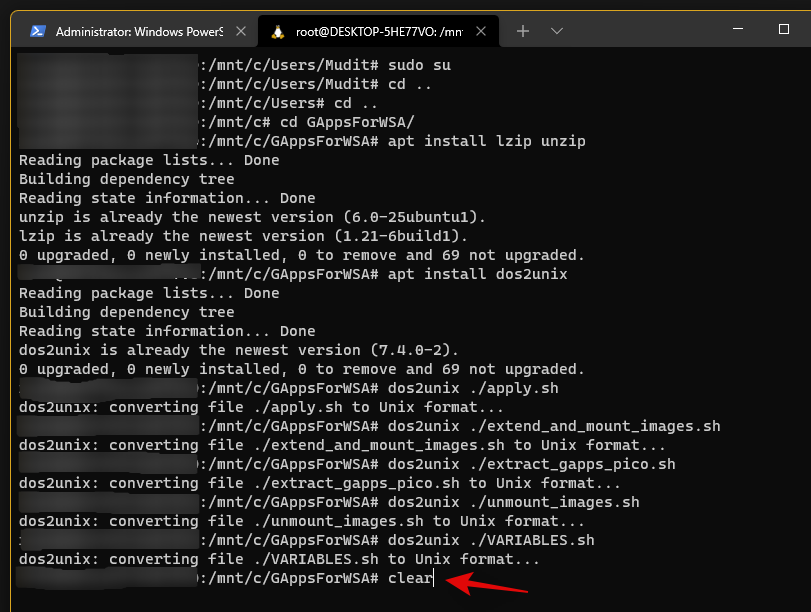
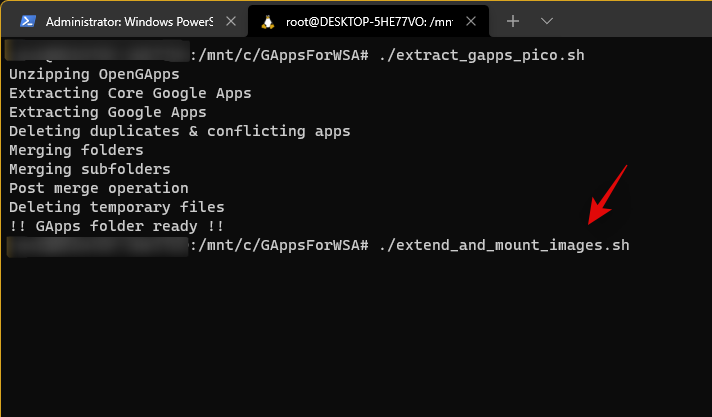
Now that we have our scripts, let’s execute them. Type in and execute the commands given below one by one in the same order.
- Command 1:
./extract_gapps_pico.sh

- Command 2:
./extend_and_mount_images.sh
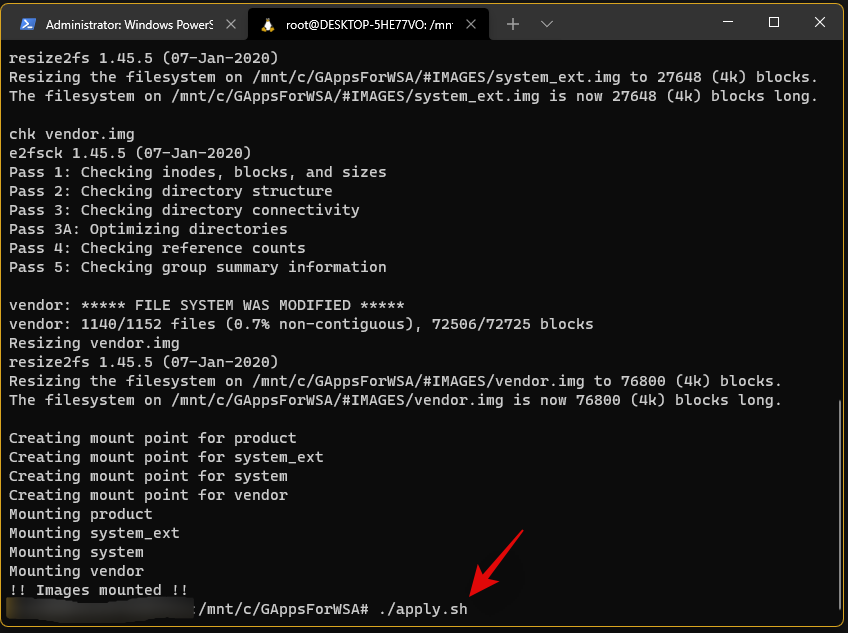
- Command 4:
./unmount_images.sh
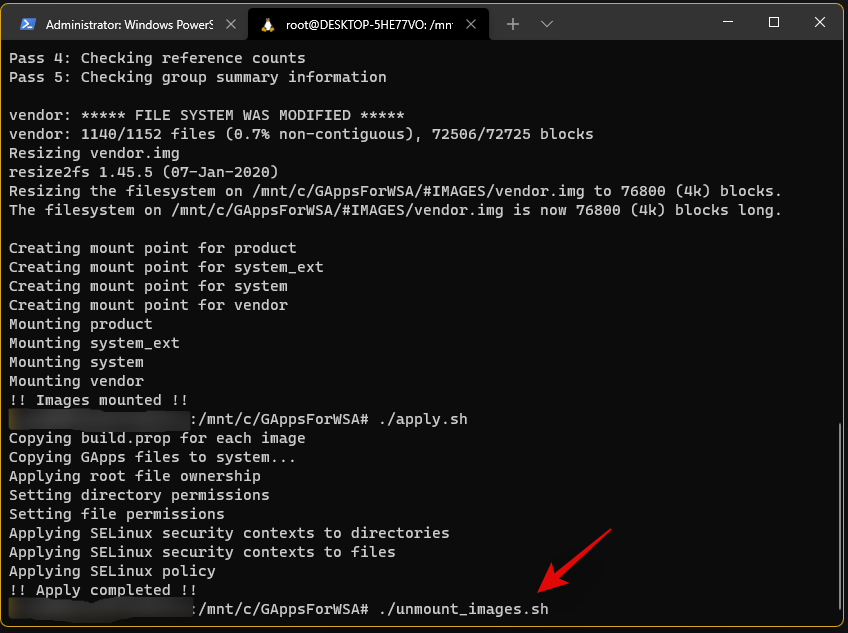
We are now done with the console, for now, you can close the same. Go to your boot drive and navigate to the following location.
\GAppsForWSA\#IMAGES
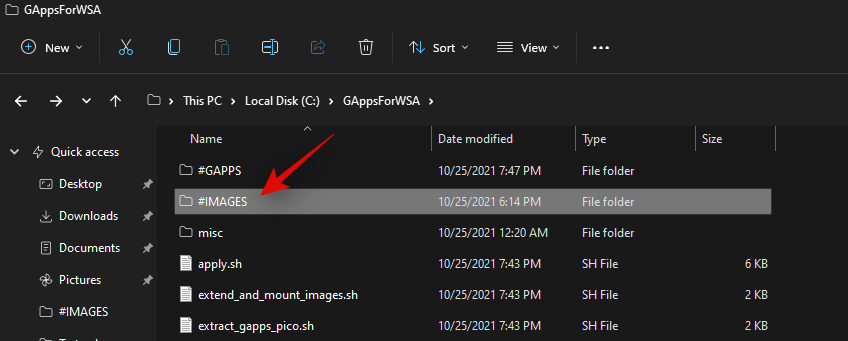
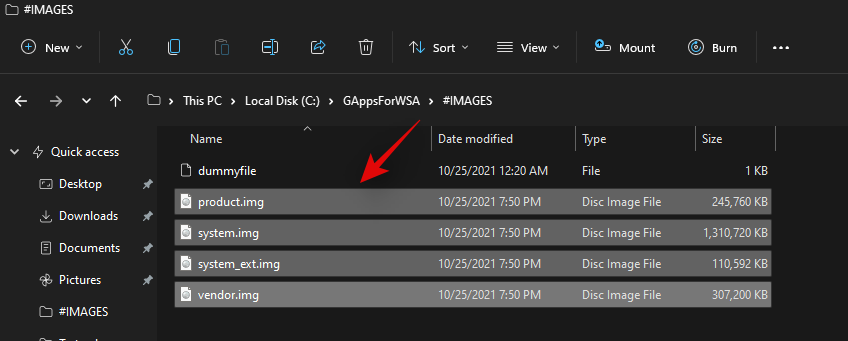
Copy the following files to your clipboard.
- product.img
- system.img
- system_ext.img
- vendor.img
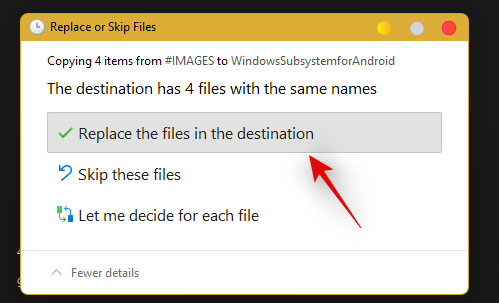
Now navigate to the ‘WindowsSubsystemForAndroid’ folder on your boot drive and paste all the copied images in the same location. Choose to replace the files when prompted.
We’re almost done with the modification now. Navigate to your ‘GAppsForWSA’ folder on your boot drive and double click and open the ‘misc’ folder.
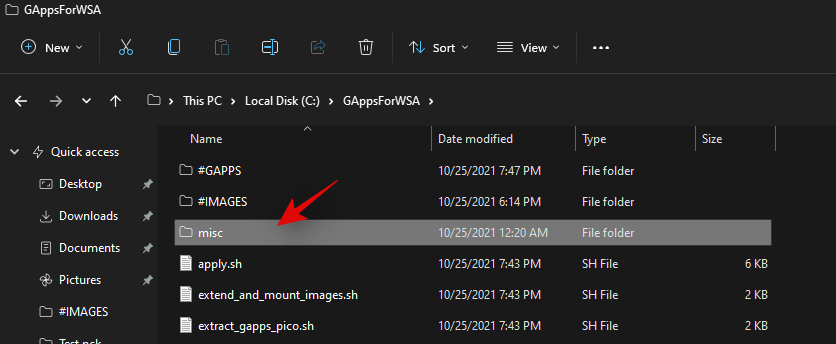
Copy ‘kernel’ to your clipboard.
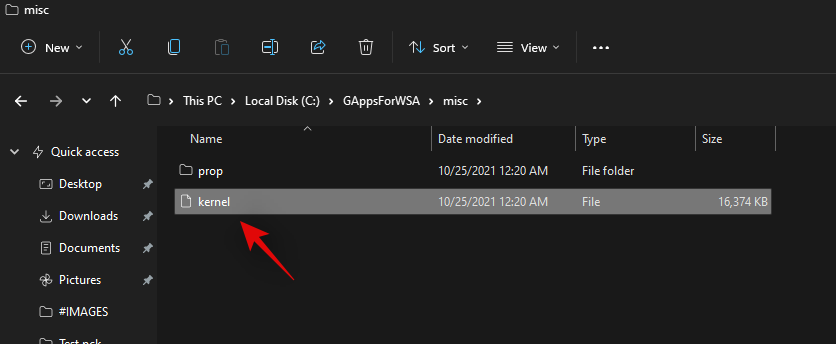
Navigate to the following location.
Boot drive\WindowsSubsystemForAndroid\Tools
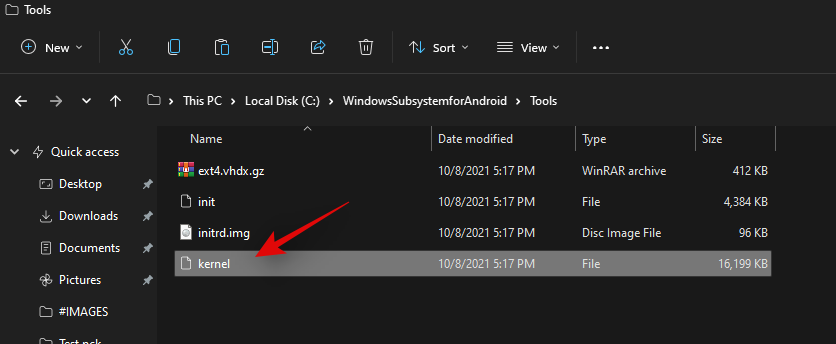
Rename ‘kernel’ to ‘kernel_backup’.
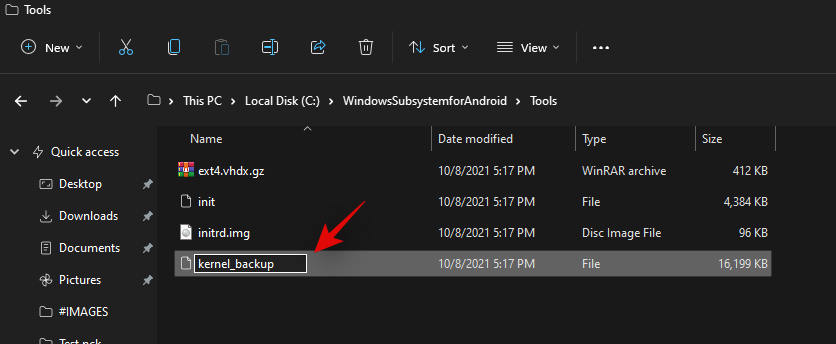
Now paste the kernel file we copied to your clipboard earlier in the same location.
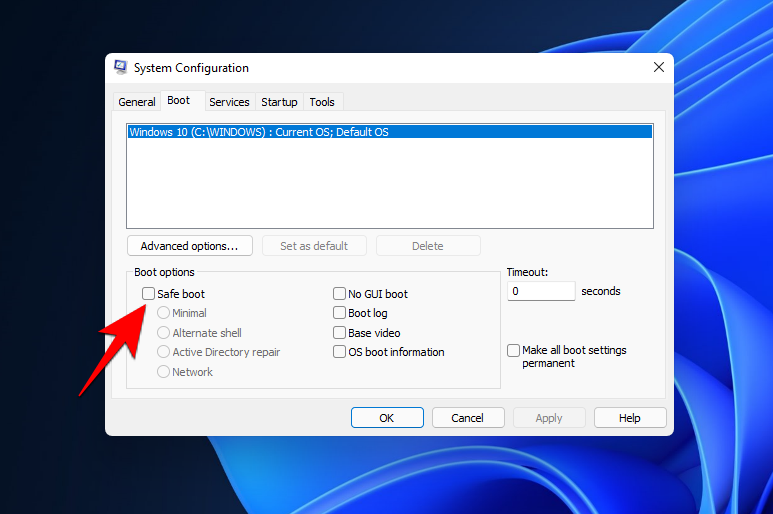
We will now need to enable developer mode for your installation of Windows 11. Press Windows + i to open the Settings app and then click on ‘Privacy and Security’ on your right.
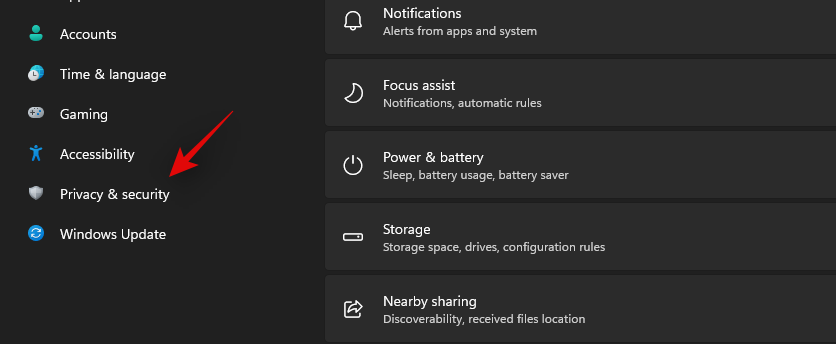
Click on ‘For developers’.
Enable the toggle for ‘Developer Mode’ at the top.
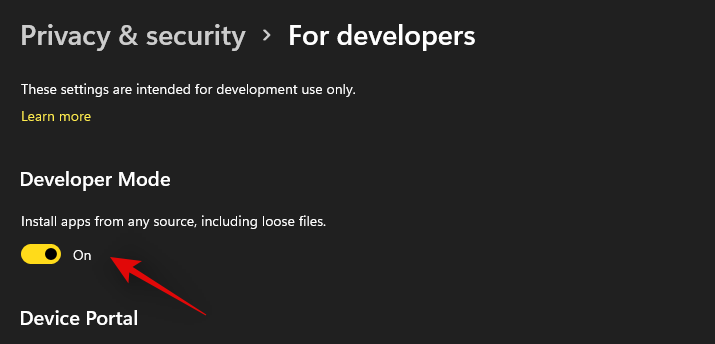
Click on ‘Yes’ to confirm your choice. Now press Windows + X and select ‘Windows Terminal (admin)’.
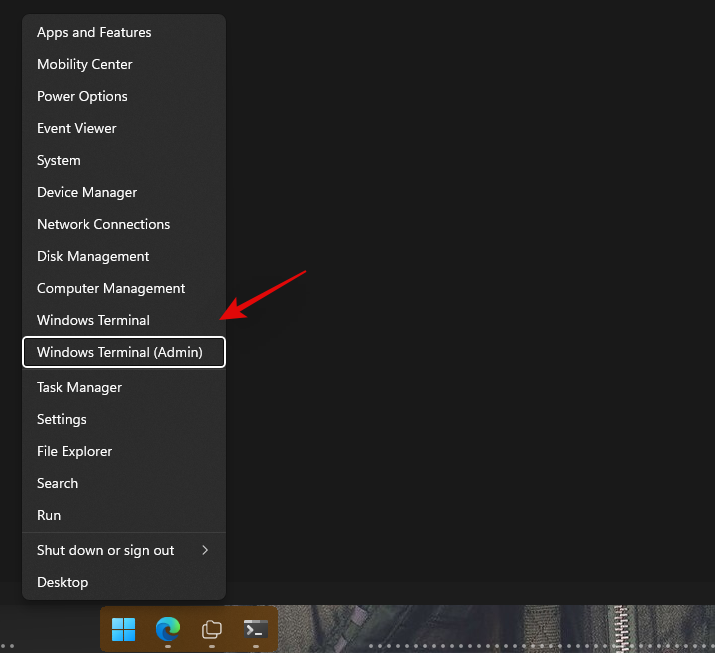
Click on the drop-down arrow at the top and select ‘Windows Powershell’.
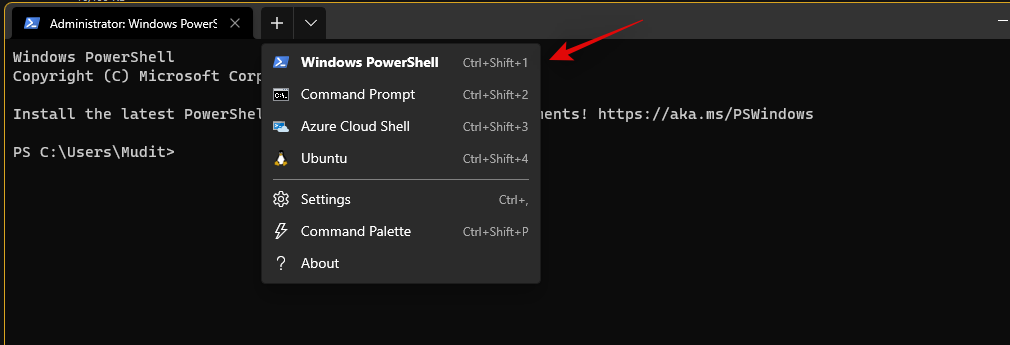
Note: Do not select ‘Powershell’, ensure that you select ‘Windows Powershell’.
Now run the following command.
Add-AppxPackage -Register C:\WindowsSubsystemForAndroid\AppxManifest.xml
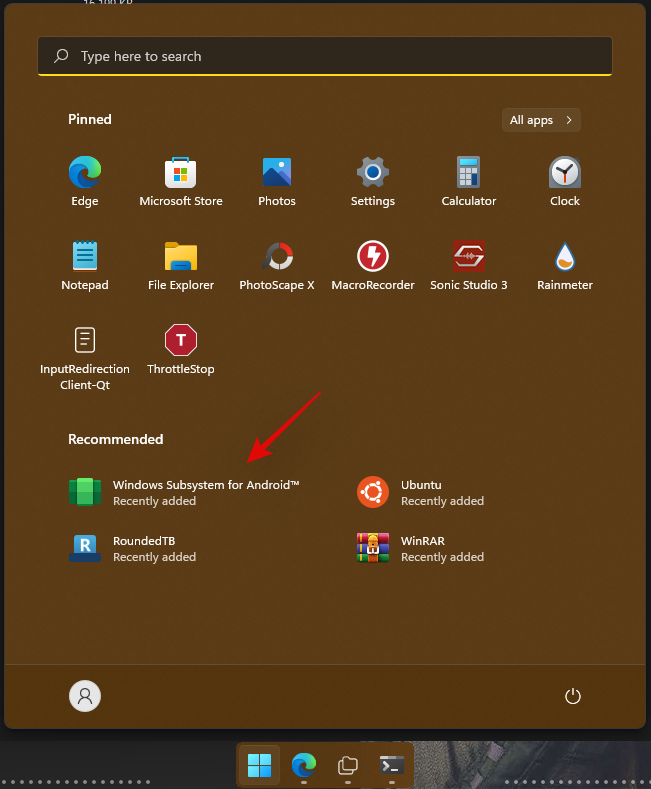
The modified subsystem will now be installed on your PC.

Press the Windows key and launch the same once the process completes.
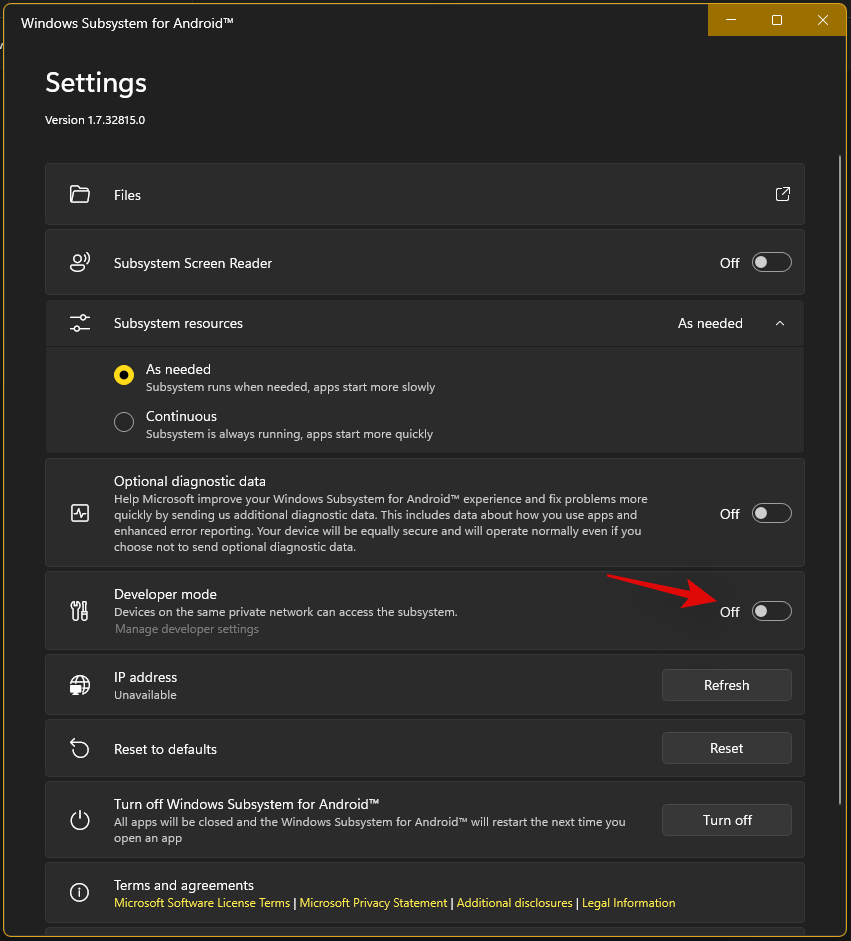
Enable the toggle for ‘Developer mode’ in the Android Subsystem.
Click on ‘Files’ at the top to launch the Subsystem on your PC. You might have to wait a few minutes now depending on your PC.
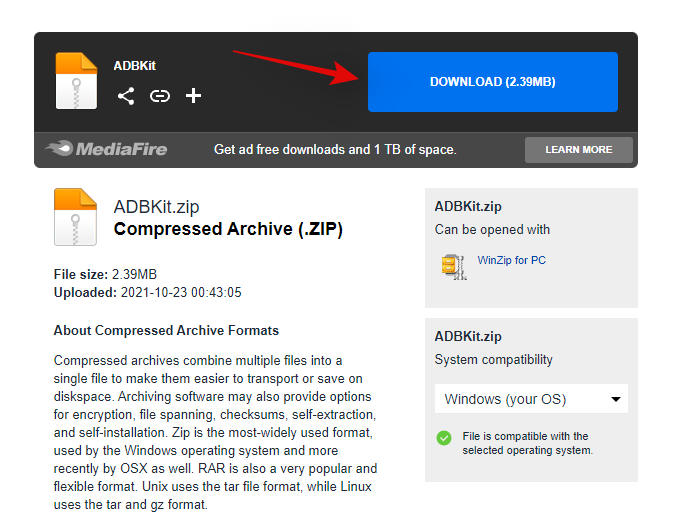
Close the Files app once it opens and download the ADBToolkit linked above.
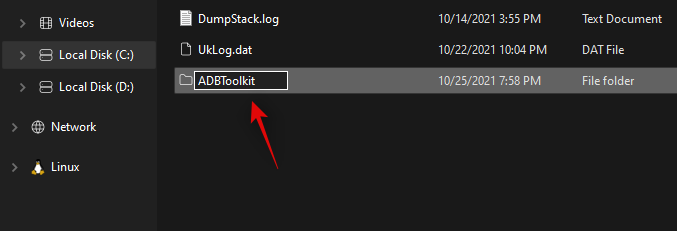
Now create a new folder on your boot drive and name it ‘ADBToolkit’.
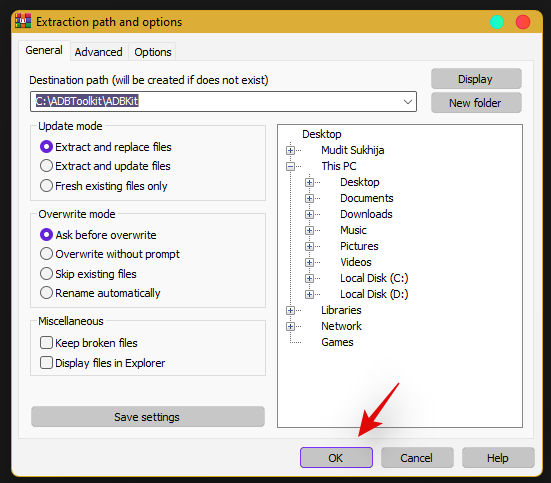
Extract the archive in the same location, and delete the archive and the original folder.
Press the Windows key, search for Play Store and launch it on your system. Do not click ‘Sign-in’ yet.
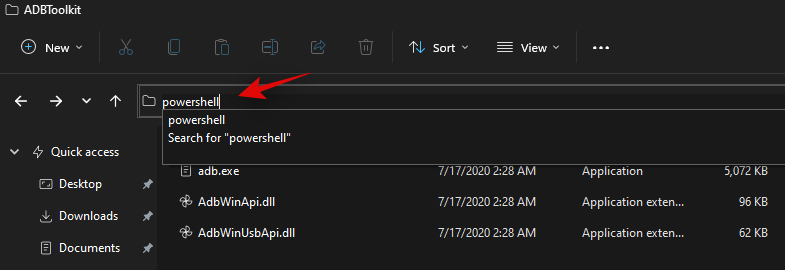
Go back to the ‘ADBToolkit’ folder and click on the address bar at the top, type in ‘Powershell’ and press Enter on your keyboard.
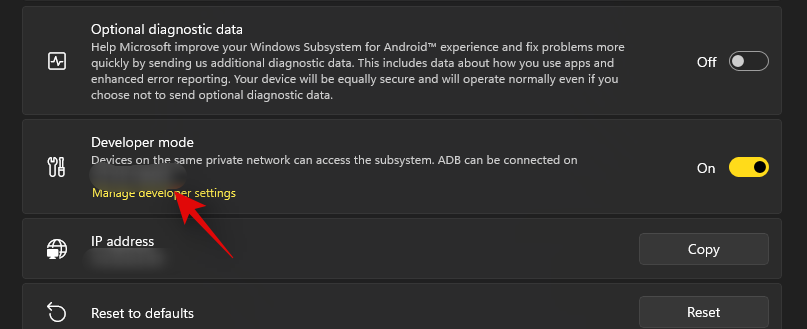
Go back to the Android Subsystem and note down the address shown below ‘Developer Mode’.
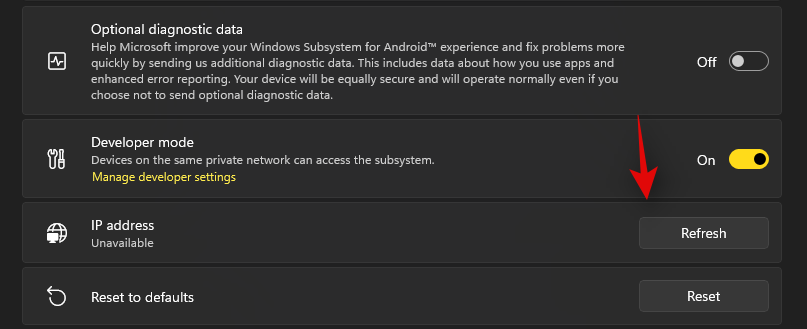
Note: If the address does not show up, simply click on ‘Refresh’ beside IP address.
Type in and execute the following command. Replace ADDRESS with the address shown in the ‘Developer Mode’ section in the Android Subsystem.
.\adb.exe connect ADDRESS
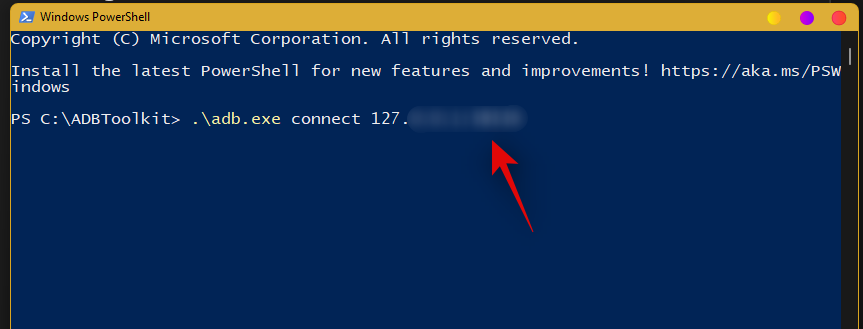
Once you are connected, execute the following command.
.\adb.exe shell
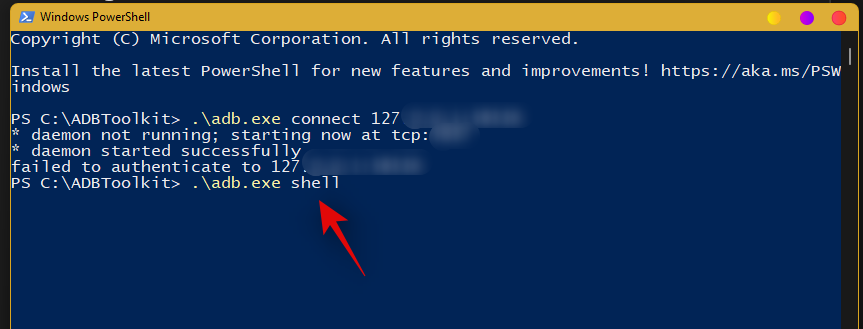
Type in the following command to gain root access.
su
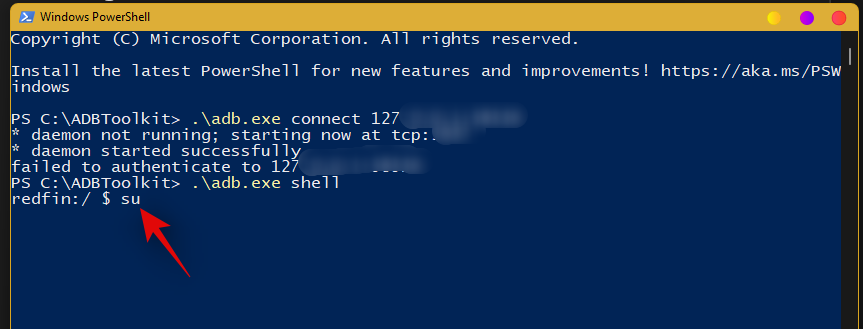
Execute the following command next.
setenforce 0
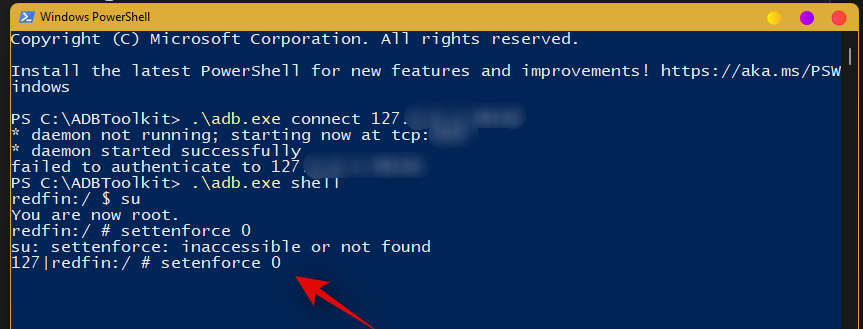
Now go back to the Play Store and click on ‘Sign-in’.
Sign in with your desired Google account now.
Note: This will also enable Google Sync, which by default will sync your Google data to Windows including things like Contacts, Calendar events, Browser history, and more.
Once you are signed in, close the Play Store. We now need to restore your original kernel. Open the Windows Subsystem for Android window and click on ‘Turn off’.

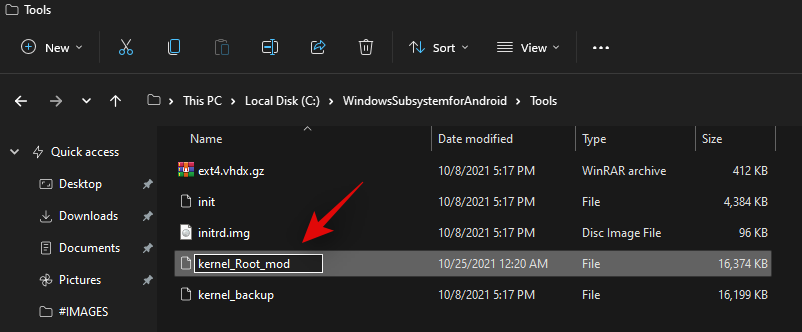
The Subsystem will now stop running in the background on your PC. Navigate to the ‘WindowsSubsystemForAndroid’ folder on your boot drive and open the ‘Tools’ folder.

Rename the ‘kernel’ file to ‘kernel_Root_mod’.
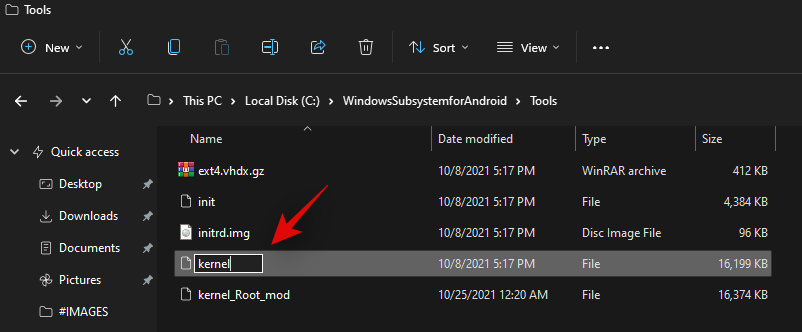
Similarly, rename ‘kernel_backup’ to ‘kernel’.
You can now close everything. We recommend you restart your system at this point. Once restarted, you should now be able to use the Play Store on your system while signed in with your Google account.
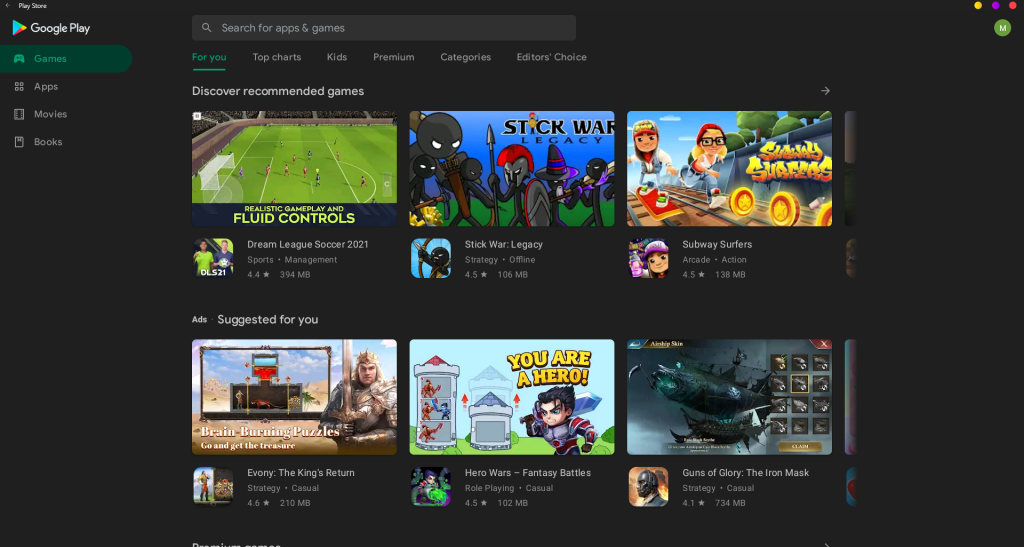
We hope you were able to easily set up and use GApps and Play Store on your PC using the guide above. If you face any issues or have any questions, feel free to reach out using the comments section below.
Related:


