The Rise of Machines: Real World Applications of AI
Gervigreind er ekki í framtíðinni, hún er hér í nútímanum Í þessu bloggi Lestu hvernig gervigreindarforrit hafa haft áhrif á ýmsa geira.
Í september 2017 var Caddy EULA breytt og öll Caddy tilvik rekin af fyrirtækjum og persónulegum vefsíðum sem stunda viðskipti þurfa viðskiptaleyfi fyrir Caddy niðurhalaða tvöfaldanum. Þessi kennsla hjálpar viðskiptavinum sem vilja setja upp Caddy vefþjóninn í samræmi við nýja ESBLA. Þegar þetta er skrifað, þegar þú safnar saman Caddy frá uppruna og býrð til þinn eigin tvöfalda, er ekki krafist greitt leyfis hvort sem þú ert fyrirtæki eða stundar viðskipti á persónulegu vefsíðunni þinni. Það er mikilvægt að skoða nýjustu ESBLA til að uppfylla kröfur áður en þú fylgir skrefunum í þessari kennslu.
Eiginleikar:
Skráðu þig inn sem venjulegur notandi sem hefur leyfi til að nota sudo skipunina. Uppfærðu kerfið sem hér segir.
sudo apt update && sudo apt upgrade -y && sudo apt autoremove -y
Sæktu nýjustu útgáfuna af frumkóða Caddy vefþjónsins. Þetta inniheldur engin viðbætur frá þriðja aðila fyrir Caddy.
go get -u github.com/mholt/caddy/caddy && go get -u github.com/caddyserver/builds && cd go/src/github.com/mholt/caddy/caddy
Valfrjálst: Ef þú þarfnast tls.dns.vultrdnsproviders viðbót frá þriðja aðila skaltu afrita eftirfarandi. Þetta mun hlaða niður bæði Caddy frumkóðann og tls.dns.vultrdnsproviders viðbótinni frá þriðja aðila ef þú vilt nota það.
go get -u github.com/mholt/caddy/caddy && go get -u github.com/caddyserver/builds && go get -u github.com/caddyserver/dnsproviders/vultr && cd go/src/github.com/mholt/caddy/caddy && sed -i '38i\\t_ "github.com/caddyserver/dnsproviders/vultr"' caddymain/run.go
Settu saman caddytvöfaldann. Þetta mun taka minna en eina mínútu að setja saman.
go run build.go
Athugaðu útgáfu og viðbótalistann fyrir caddytvöfaldann.
./caddy -version && ./caddy -plugins
Afritaðu geymslunni tvöfaldur staðsett í ~/go/src/github.com/mholt/caddy/caddy/að /usr/binskrá og breyta skrá aftur til rót skrá notanda þinni.
sudo cp caddy /usr/bin/ && cd
Búðu til caddy.servicesystemd skrána í /etc/systemd/system/möppunni með því að nota echoskipunina.
sudo su -c "echo -e '[Unit]\nAfter=network-online.target\nDescription=Caddy HTTP/2 web server\nDocumentation=https://caddyserver.com/docs\nWants=network.target\n\n[Service]\nAmbientCapabilities=CAP_NET_BIND_SERVICE\nCapabilityBoundingSet=CAP_NET_BIND_SERVICE\nEnvironment=CADDYPATH=/etc/ssl/caddy\n## Environment=VULTR_API_KEY=XXXXXXXX ##Uncomment and add your Vultr API (API tab on the Settings page) if using the Vultr DNS Manager to handle DNS for your VPS instance.\nExecReload=/bin/kill -USR1 $MAINPID\nExecStart=/usr/bin/caddy -agree=true -conf=/etc/caddy/caddy.conf -quic -root=/var/tmp\nGroup=www-data\nKillMode=mixed\nKillSignal=SIGQUIT\nLimitNOFILE=1048576\nLimitNPROC=512\nNoNewPrivileges=true\nPrivateDevices=true\nPrivateTmp=true\nProtectHome=true\nProtectSystem=full\nReadWriteDirectories=/etc/ssl/caddy\nRestart=on-abnormal\nTimeoutStopSec=5s\nUser=www-data\n\n[Install]\nWantedBy=multi-user.target' > /etc/systemd/system/caddy.service"
Búðu til /etc/caddy/möppuna sem mun innihalda stillingarskrá Caddy vefþjónsins; í /etc/ssl/caddy/skrá, sem mun innihalda Dulrita vottorð skulum; í /usr/share/caddy/skrá, sem mun innihalda sýnishorn html skrána; og /var/log/caddy/möppuna, sem mun innihalda Caddy vefþjónsskrárnar, með því að nota mkdirskipunina. Breyttu eignarhaldi hópsins í www-datahópinn með því að nota chownskipunina til /etc/ssl/caddy/og /var/log/caddy/möppur. Fjarlægðu heims keyranlegar, læsilegar og skrifanlegar heimildir með því að nota chmodskipunina til að tryggja /etc/ssl/caddy/möppuna.
sudo mkdir -p {/etc/{caddy/conf.d,ssl/caddy},/usr/share/caddy,/var/log/caddy} && sudo chown www-data /etc/ssl/caddy/ /var/log/caddy/ && sudo chmod 750 /etc/ssl/caddy/
Virkjaðu Caddy vefþjóninn.
sudo systemctl daemon-reload && sudo systemctl enable caddy
Hver hluti hér að neðan útskýrir hvernig á að stilla Caddy fyrir mismunandi aðstæður. Þú getur notað þetta til viðmiðunar og sleppt þeim hluta sem uppfyllir kröfur þínar.
Búðu til grunnstillingarsniðmátsskrá á rótarstigi sem heitir caddy.confí /etc/caddy/möppunni, sem notar innflutning fyrir raunverulega vhost stillingarskrá fyrir sýnishorn af kyrrstæðum HTML vef sem heitir example.com.confí /etc/caddy/conf.d/möppunni með því að nota echoskipunina.
sudo su -c 'echo -e "import conf.d/*.conf" > /etc/caddy/caddy.conf' && sudo su -c 'echo -e "example.com:80 {\n\tredir http://www.example.com{url}\n}\nwww.example.com:80 {\n\terrors /var/log/caddy/example.com-error.log\n\timport header.protection\n\tlog /var/log/caddy/example.com-access.log\n\troot /var/www/html/\n}" > /etc/caddy/conf.d/example.com.conf' && sudo su -c 'echo -e "header / {\n\tX-XSS-Protection \"1; mode=block\"\n\tX-Content-Type-Options \"nosniff\"\n\tX-Frame-Options \"SAMEORIGIN\"\n}" > /etc/caddy/conf.d/header.protection'
Búðu til /var/www/htmlmöppuna og búðu til einfalt index.htmlinni með því að nota echoskipunina.
sudo mkdir -p /var/www/html && sudo su -c 'echo -e "<!DOCTYPE html>"\\n"<head>"\\n\\t"<meta charset="utf-8">"\\n\\t"<meta http-equiv="X-UA-Compatible" content="IE=edge,chrome=1">"\\n\\t"<title>Static HTML Page"\\n\\t"</title>"\\n\\t"<meta name="description" content="">"\\n\\t"<meta name="viewport" content="width=device-width, initial-scale=1">"\\n"</head>"\\n"<body>"\\n\\t"<p>Caddy is working."\\n\\t"</p>"\\n"</body>"\\n"</html>" > /var/www/html/index.html'
Ræstu Caddy vefþjóninn.
sudo systemctl start caddy
Opnaðu vafrann þinn fyrir FQDN ( example.com) VPS tilviksins.
Búðu til grunnstillingarsniðmátsskrá fyrir rótarstig sem heitir caddy.confí /etc/caddy/möppunni sem notar innflutning fyrir raunverulega vhost stillingarskrá fyrir sýnishorn af kyrrstæðum HTML vef sem heitir example.com.confí /etc/caddy/conf.d/möppunni með því að nota echoskipunina.
sudo su -c 'echo -e "import conf.d/*.conf" > /etc/caddy/caddy.conf' && sudo su -c 'echo -e "example.com {\n\tredir https://www.example.com{url}\n}\nwww.example.com {\n\terrors /var/log/caddy/example.com-error.log\n\timport header.protection\n\tlog /var/log/caddy/example.com-access.log\n\troot /var/www/html/\n\ttls joe.q.public@example.com\n}" > /etc/caddy/conf.d/example.com.conf' && sudo su -c 'echo -e "header / {\n\tX-XSS-Protection \"1; mode=block\"\n\tX-Content-Type-Options \"nosniff\"\n\tX-Frame-Options \"SAMEORIGIN\"\n}" > /etc/caddy/conf.d/header.protection'
Búðu til /var/www/htmlmöppuna og búðu til einfalt index.htmlinni með því að nota echoskipunina.
sudo mkdir -p /var/www/html && sudo su -c 'echo -e "<!DOCTYPE html>"\\n"<head>"\\n\\t"<meta charset="utf-8">"\\n\\t"<meta http-equiv="X-UA-Compatible" content="IE=edge,chrome=1">"\\n\\t"<title>Static HTML Page"\\n\\t"</title>"\\n\\t"<meta name="description" content="">"\\n\\t"<meta name="viewport" content="width=device-width, initial-scale=1">"\\n"</head>"\\n"<body>"\\n\\t"<p>Caddy is working."\\n\\t"</p>"\\n"</body>"\\n"</html>" > /var/www/html/index.html'
Ræstu Caddy vefþjóninn.
sudo systemctl start caddy
Opnaðu vafrann þinn fyrir FQDN ( example.com) VPS tilviksins.
Búa til undirstöðu, rót stigi stillingar forsniðsskrá heitir caddy.confí /etc/caddy/skránni sem notar innflutning á raunverulegum vhost stillingaskránni fyrir sýnishorn PHPinfo síðu sem heitir example.com.confá /etc/caddy/conf.d/skrá með echostjórn.
sudo su -c 'echo -e "import conf.d/*.conf" > /etc/caddy/caddy.conf' && sudo su -c 'echo -e "example.com:80 {\n\tredir http://www.example.com{url}\n}\nwww.example.com:80 {\n\terrors /var/log/caddy/example.com-error.log\n\tfastcgi / /var/run/php/php7.0-fpm.sock php\n\timport header.protection\n\tlog /var/log/caddy/example.com-access.log\n\troot /var/www/html/\n}" > /etc/caddy/conf.d/example.com.conf' && sudo su -c 'echo -e "header / {\n\tX-XSS-Protection \"1; mode=block\"\n\tX-Content-Type-Options \"nosniff\"\n\tX-Frame-Options \"SAMEORIGIN\"\n}" > /etc/caddy/conf.d/header.protection'
Create a simple index.php in the /var/www/html directory using the echo command.
sudo su -c 'echo -e "<?php\nphpinfo();\n?>" > /var/www/html/index.php'
Install the PHP-FPM server to process PHP files.
sudo apt install php-fpm -y
Start the Caddy web server.
sudo systemctl start caddy
Open your web browser to the FQDN (example.com) of your VPS instance.
Create a basic, root level configuration template file named caddy.conf in the /etc/caddy/ directory which uses an import for the actual vhost configuration file for a sample dynamic test web site named example.com.conf in the /etc/caddy/conf.d/ directory using the echo command.
sudo su -c 'echo -e "import conf.d/*.conf" > /etc/caddy/caddy.conf' && sudo su -c 'echo -e "example.com {\n\tredir https://www.example.com{url}\n}\nwww.example.com {\n\terrors /var/log/caddy/example.com-error.log\n\tfastcgi / /var/run/php/php7.0-fpm.sock php\n\timport header.protection\n\tlog /var/log/caddy/example.com-access.log\n\troot /var/www/html/\n\ttls joe.q.public@example.com\n}" > /etc/caddy/conf.d/example.com.conf' && sudo su -c 'echo -e "header / {\n\tX-XSS-Protection \"1; mode=block\"\n\tX-Content-Type-Options \"nosniff\"\n\tX-Frame-Options \"SAMEORIGIN\"\n}" > /etc/caddy/conf.d/header.protection'
Create a simple index.php in the /var/www/html directory using the echo command.
sudo su -c 'echo -e "<?php\nphpinfo();\n?>" > /var/www/html/index.php'
Install the PHP-FPM server to process PHP files.
sudo apt install php-fpm -y
Start the Caddy web server.
sudo systemctl start caddy
Open your web browser to the FQDN (example.com) of your VPS instance.
Create a basic, root level configuration template file named caddy.conf in the /etc/caddy/ directory which uses an import for the actual vhost configuration file for a sample Wordpress test web site named example.com.conf in the /etc/caddy/conf.d/ directory using the echo command.
sudo su -c 'echo -e "import conf.d/*.conf" > /etc/caddy/caddy.conf' && sudo su -c 'echo -e "example.com:80 {\n\tredir http://www.example.com{url}\n}\nwww.example.com:80 {\n\terrors /var/log/caddy/example.com-error.log\n\tfastcgi / /var/run/php/php7.0-fpm.sock php\n\timport header.protection\n\tlog /var/log/caddy/example.com-access.log\n\trewrite {\n\t\tif {path} not_starts_with /wp-admin\n\t\tif {path} not_starts_with /wp-content\n\t\tif {path} not_starts_with /wp-includes\n\t\tto {path} {path}/ /index.php\n\t}\n\troot /var/www/html/\n}" > /etc/caddy/conf.d/example.com.conf' && sudo su -c 'echo -e "header / {\n\tX-XSS-Protection \"1; mode=block\"\n\tX-Content-Type-Options \"nosniff\"\n\tX-Frame-Options \"SAMEORIGIN\"\n}" > /etc/caddy/conf.d/header.protection'
Install the unzip program in order to extract the Wordpress tar-gzipped file (latest.tar.gz).
sudo apt install unzip
Download the latest.tar.gz file into the /tmp/ directory, change the user and group permissions of the /var/www/html directory to the user www-data and group www-data and extract the contents of the latest.tar.gz file into the /var/www/html/ directory.
sudo su - www-data -c "wget -N -P /tmp/ -q https://wordpress.org/latest.tar.gz" -s /bin/bash && sudo chown -R www-data.www-data /var/www/html && sudo su - www-data -c "tar -C /var/www/html/ -zxf /tmp/latest.tar.gz --strip-components=1" -s /bin/bash && sudo su - www-data -c "rm /tmp/latest.tar.gz" -s /bin/bash
Install the PHP-FPM server to process PHP files and the required PHP extensions required to interact with Wordpress.
sudo apt install php-curl php-fpm php-imagick php-mbstring php-mcrypt php-mysql php-pspell php-xmlrpc -y
Install the MariaDB database server to store data for Wordpress.
sudo apt install mariadb-server -y
Optional: Disable skip-name-resolve to avoid the DNS lookup penalty for client connections, turn off the database TCP/IP listener and use unix sockets only.
sudo sed -i '26iskip-name-resolve\nskip-networking' /etc/mysql/mariadb.conf.d/50-server.cnf
Restart the MariaDB database server to the new configuration changes.
sudo systemctl restart mysql
Secure the MariaDB database server. Replace the ******** holder below in the first command with a new root password.
sudo mysql -e "UPDATE mysql.user SET Password=PASSWORD('********') WHERE User='root'" && sudo mysql -e "DELETE FROM mysql.user WHERE User='root' AND Host NOT IN ('localhost', '127.0.0.1', '::1')" && sudo mysql -e "DELETE FROM mysql.user WHERE User=''" && sudo mysql -e "DELETE FROM mysql.db WHERE Db='test' OR Db='test\_%'" && sudo mysql -e "" && sudo mysql -e "FLUSH PRIVILEGES"
Create a database, wordpress_example_com, for Wordpress; a specific database user, wordpress_example_com_admin and the minimal database permissions necessary, (ALTER, CREATE, DELETE, DROP, INDEX, INSERT, SELECT, & UPDATE ), for Wordpress core and plugin installations' day to day functioning and core/plugin updates. Replace the example_com in wordpress_example_com with your actual domain name, example_com in wordpress_example_com_admin with your actual domain name and ******** with a new password specifically for the wordpress_example_com_admin user.
sudo mysql -e "CREATE DATABASE wordpress_example_com DEFAULT CHARACTER SET utf8mb4 COLLATE utf8mb4_unicode_ci" && sudo mysql -e "CREATE USER 'wordpress_example_com_admin'@'localhost' IDENTIFIED BY '********'; GRANT USAGE ON *.* TO 'wordpress_example_com_admin'@'localhost';" && sudo mysql -e "GRANT ALTER, CREATE, DELETE, DROP, INDEX, INSERT, SELECT, UPDATE ON wordpress_example_com.* TO 'wordpress_example_com_admin'@'localhost';" && sudo mysql -e "FLUSH PRIVILEGES"
Create the Wordpress configuration file, wp-config.php, in the /var/www/html directory. Replace the example_com in wordpress_example_com with your actual domain name, example_com in wordpress_example_com_admin with your actual domain name and ******** with a new password specifically for the wordpress_example_com_admin user.
sudo su - www-data -c 'echo -e "<?php\ndefine('\'DB_CHARSET''\'', '\'utf8''\'');\ndefine('\'DB_COLLATE''\'', '\'''\'');\ndefine('\'DB_HOST''\'', '\'localhost''\'');\ndefine('\'DB_NAME''\'', '\'wordpress_example_com''\'');\ndefine('\'DB_PASSWORD''\'', '\'********''\'');\ndefine('\'DB_USER''\'', '\'wordpress_example_com_admin''\'');\ndefine('\'FS_METHOD''\'', '\'direct''\'');\ndefine('\'WP_DEBUG''\'', false);" > /var/www/html/wp-config.php' -s /bin/bash && sudo su -c www-data -c "curl -s https://api.wordpress.org/secret-key/1.1/salt/ >> /var/www/html/wp-config.php" && sudo su - www-data -c 'echo -e "\$table_prefix = '\'wp_''\'';\nif ( !defined('\'ABSPATH''\'') )\n\tdefine('\'ABSPATH''\'', dirname(__FILE__) . '\'/''\'');\nrequire_once(ABSPATH . '\'wp-settings.php''\'');\nfunction _remove_script_version( \$src ){ if ( strpos( \$src, '\'ver=''\'' ) ) \$src = remove_query_arg( '\'ver''\'', \$src ); return \$src; }\nadd_filter( '\'script_loader_src''\'', '\'_remove_script_version''\'', 15, 1 );\nadd_filter( '\'style_loader_src''\'', '\'_remove_script_version''\'', 15, 1 );" >> /var/www/html/wp-config.php' -s /bin/bash
Start the Caddy web server.
sudo systemctl start caddy
Open your web browser to the FQDN (example.com) of your VPS instance. You will see a language selection page. After selecting the language, click the blue Continue button, on the bottom right, to go to the next step of the Wordpress installation.
On the next page, enter a title for your website in the Site Title field (1), an administrator's username in the Username field (2). Use the generated password or input your own password in the Password field (3). Enter a valid email address in the Your Email field (4) and enable or leave disabled the Search Engine Visibility option (5), depending on whether your site is in the building phase. When you are satisfied, click the gray Install Wordpress button (6) to complete the Wordpress setup.
You will arrive in the Wordpress administration area. The initial installation of Wordpress is now complete.
Create a basic, root level configuration template file named caddy.conf in the /etc/caddy/ directory which uses an import for the actual vhost configuration file for a sample Wordpress test web site named example.com.conf in the /etc/caddy/conf.d/ directory using the echo command.
sudo su -c 'echo -e "import conf.d/*.conf" > /etc/caddy/caddy.conf' && sudo su -c 'echo -e "example.com {\n\tredir https://www.example.com{url}\n}\nwww.example.com {\n\terrors /var/log/caddy/example.com-error.log\n\tfastcgi / /var/run/php/php7.0-fpm.sock php\n\timport header.protection\n\tlog /var/log/caddy/example.com-access.log\n\trewrite {\n\t\tif {path} not_starts_with /wp-admin\n\t\tif {path} not_starts_with /wp-content\n\t\tif {path} not_starts_with /wp-includes\n\t\tto {path} {path}/ /index.php\n\t}\n\troot /var/www/html/\n\ttls joe.q.public@example.com\n}" > /etc/caddy/conf.d/example.com.conf' && sudo su -c 'echo -e "header / {\n\tX-XSS-Protection \"1; mode=block\"\n\tX-Content-Type-Options \"nosniff\"\n\tX-Frame-Options \"SAMEORIGIN\"\n}" > /etc/caddy/conf.d/header.protection'
Install the unzip program in order to extract the Wordpress tar-gzipped file, (latest.tar.gz).
sudo apt install unzip
Download the latest.tar.gz file into the /tmp/ directory, change the user and group permissions of the /var/www/html directory to the user www-data and group www-data and extract the contents of the latest.tar.gz file into the /var/www/html/ directory.
sudo su - www-data -c "wget -N -P /tmp/ -q https://wordpress.org/latest.tar.gz" -s /bin/bash && sudo chown -R www-data.www-data /var/www/html && sudo su - www-data -c "tar -C /var/www/html/ -zxf /tmp/latest.tar.gz --strip-components=1" -s /bin/bash && sudo su - www-data -c "rm /tmp/latest.tar.gz" -s /bin/bash
Install the PHP-FPM server to process PHP files and the required PHP extensions required to interact with Wordpress.
sudo apt install php-curl php-fpm php-imagick php-mbstring php-mcrypt php-mysql php-pspell php-xmlrpc -y
Install the MariaDB database server to store data for Wordpress.
sudo apt install mariadb-server -y
Optional: Disable skip-name-resolve to avoid the DNS lookup penalty for client connections, turn off the database TCP/IP listener and use unix sockets only.
sudo sed -i '26iskip-name-resolve\nskip-networking' /etc/mysql/mariadb.conf.d/50-server.cnf
Restart the MariaDB database server to the new configuration changes.
sudo systemctl restart mysql
Secure the MariaDB database server. Replace the ******** holder below in the first command with a new root password.
sudo mysql -e "UPDATE mysql.user SET Password=PASSWORD('********') WHERE User='root'" && sudo mysql -e "DELETE FROM mysql.user WHERE User='root' AND Host NOT IN ('localhost', '127.0.0.1', '::1')" && sudo mysql -e "DELETE FROM mysql.user WHERE User=''" && sudo mysql -e "DELETE FROM mysql.db WHERE Db='test' OR Db='test\_%'" && sudo mysql -e "" && sudo mysql -e "FLUSH PRIVILEGES"
Create a database, wordpress_example_com, for Wordpress; a specific database user, wordpress_example_com_admin and the minimal database permissions necessary (ALTER, CREATE, DELETE, DROP, INDEX, INSERT, SELECT, & UPDATE )for Wordpress core and plugin installations' day to day functioning and core/plugin updates. Replace the example_com in wordpress_example_com with your actual domain name, example_com in wordpress_example_com_admin with your actual domain name and ******** with a new password specifically for the wordpress_example_com_admin user.
sudo mysql -e "CREATE DATABASE wordpress_example_com DEFAULT CHARACTER SET utf8mb4 COLLATE utf8mb4_unicode_ci" && sudo mysql -e "CREATE USER 'wordpress_example_com_admin'@'localhost' IDENTIFIED BY '********'; GRANT USAGE ON *.* TO 'wordpress_example_com_admin'@'localhost';" && sudo mysql -e "GRANT ALTER, CREATE, DELETE, DROP, INDEX, INSERT, SELECT, UPDATE ON wordpress_example_com.* TO 'wordpress_example_com_admin'@'localhost';" && sudo mysql -e "FLUSH PRIVILEGES"
Create the Wordpress configuration file, wp-config.php, in the /var/www/html directory. Replace the example_com in wordpress_example_com with your actual domain name, example_com in wordpress_example_com_admin with your actual domain name and ******** with a new password specifically for the wordpress_example_com_admin user.
sudo su - www-data -c 'echo -e "<?php\ndefine('\'DB_CHARSET''\'', '\'utf8''\'');\ndefine('\'DB_COLLATE''\'', '\'''\'');\ndefine('\'DB_HOST''\'', '\'localhost''\'');\ndefine('\'DB_NAME''\'', '\'wordpress_example_com''\'');\ndefine('\'DB_PASSWORD''\'', '\'********''\'');\ndefine('\'DB_USER''\'', '\'wordpress_example_com_admin''\'');\ndefine('\'FS_METHOD''\'', '\'direct''\'');\ndefine('\'WP_DEBUG''\'', false);" > /var/www/html/wp-config.php' -s /bin/bash && sudo su -c www-data -c "curl -s https://api.wordpress.org/secret-key/1.1/salt/ >> /var/www/html/wp-config.php" && sudo su - www-data -c 'echo -e "\$table_prefix = '\'wp_''\'';\nif ( !defined('\'ABSPATH''\'') )\n\tdefine('\'ABSPATH''\'', dirname(__FILE__) . '\'/''\'');\nrequire_once(ABSPATH . '\'wp-settings.php''\'');\nfunction _remove_script_version( \$src ){ if ( strpos( \$src, '\'ver=''\'' ) ) \$src = remove_query_arg( '\'ver''\'', \$src ); return \$src; }\nadd_filter( '\'script_loader_src''\'', '\'_remove_script_version''\'', 15, 1 );\nadd_filter( '\'style_loader_src''\'', '\'_remove_script_version''\'', 15, 1 );" >> /var/www/html/wp-config.php' -s /bin/bash
Start the Caddy web server.
sudo systemctl start caddy
Open your web browser to the FQDN (example.com) of your VPS instance. After selecting the language, click the blue Continue button, on the bottom right, to go to the next step of the Wordpress installation.
On the next page, enter a title for your website in the Site Title field (1), an administrator's username in the Username field (2). Use the generated password or input your own password in the Password field (3). Enter a valid email address in the Your Email field (4) and enable or leave disabled the Search Engine Visibility option (5), depending on whether your site is in the building phase. When you are satisfied, click the gray Install Wordpress button (6) to complete the Wordpress setup.
You will arrive in the Wordpress administration area. The initial installation of Wordpress is now complete.
Gervigreind er ekki í framtíðinni, hún er hér í nútímanum Í þessu bloggi Lestu hvernig gervigreindarforrit hafa haft áhrif á ýmsa geira.
Ertu líka fórnarlamb DDOS árása og ruglaður með forvarnaraðferðirnar? Lestu þessa grein til að leysa spurningar þínar.
Þú gætir hafa heyrt að tölvuþrjótar græða mikið af peningum, en hefur þú einhvern tíma velt því fyrir þér hvernig þeir vinna sér inn svona peninga? við skulum ræða.
Viltu sjá byltingarkenndar uppfinningar frá Google og hvernig þessar uppfinningar breyttu lífi hvers manns í dag? Lestu síðan til að blogga til að sjá uppfinningar frá Google.
Hugmyndin um að sjálfkeyrandi bílar fari á göturnar með hjálp gervigreindar er draumur sem við höfum átt um tíma núna. En þrátt fyrir nokkur loforð eru þau hvergi sjáanleg. Lestu þetta blogg til að læra meira…
Þar sem vísindin þróast hratt og taka yfir mikið af viðleitni okkar, eykst hættan á því að verða fyrir óútskýranlegri einstæðu. Lestu, hvað sérkenni gæti þýtt fyrir okkur.
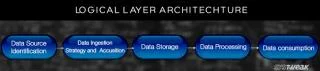
Lestu bloggið til að þekkja mismunandi lög í Big Data Architecture og virkni þeirra á einfaldasta hátt.
Geymsluaðferðir gagna hafa verið að þróast gæti verið frá fæðingu gagna. Þetta blogg fjallar um þróun gagnageymslu á grundvelli upplýsingamynda.
Í þessum stafræna heimi hafa snjallheimilistæki orðið afgerandi hluti af lífi. Hér eru nokkrir ótrúlegir kostir snjallheimatækja um hvernig þau gera líf okkar þess virði að lifa því og einfaldara.
Nýlega gaf Apple út macOS Catalina 10.15.4 viðbótaruppfærslu til að laga vandamál en svo virðist sem uppfærslan sé að valda fleiri vandamálum sem leiða til múrsteins á Mac vélum. Lestu þessa grein til að læra meira