The Dock is one of the essential features of Apple’s Mac OS X operating system. It makes using the Mac a whole lot easier and simpler. The latest versions of the OS have seen changes in your Dock’s behavior when multiple displays are connected to the computer.

In this article, we’ll investigate how to move it to another monitor. We’ll also brush up on the basics of multi-monitor setups.
Mac and Multiple Monitors
Mac laptops have had multiple monitor support for a long time now. However, Apple has changed the way you can set them up and what you can do with them throughout the years. Some features were introduced only to be dropped after a version or two, while others stuck and got refined over time.

For example, the Menu bar used to only be displayed on the primary monitor. Nonetheless, with the introduction of OS X 10.9 Mavericks, your Mac would start displaying it on every monitor you’ve plugged in. The bar would only be active on the currently active monitor, while it would be grayed out on other monitors.
With the introduction of OS X El Capitan, you can now move the Dock to a secondary display without changing the primary display settings. All subsequent versions, including Sierra, High Sierra, and Mojave support this function.
How to Move the Dock
Moving the Dock to a non-primary display on a Mac laptop is a breeze. The method is identical for Mavericks, El Capitan, and all later versions. If you’re running Mountain Lion, Lion, or any previous version of OS X, you’re out of luck when it comes to this neat little feature.
Here is how you can use it:
- Move your mouse or trackpad to a non-primary monitor. If you have three, four, or more displays connected, move the cursor to any of them.
- Move the cursor to the bottom of the display, approximately to the position where the Dock should appear on a Mac display.
- Wait for a few seconds until the Dock appears below your cursor.
- The Dock is now active and ready to use on this monitor.
Have in mind that you can use this method to move the Dock to any monitor of your choosing just by repeating these steps.
There’s been a lot of speculation as to why the Dock doesn’t automatically appear when you move the mouse or trackpad cursor to a non-primary display. Our take on this is that Apple ruled that one out in a bid to make the user experience smoother and with fewer visual distractions.
This way, you can always summon the Dock when and where you need it in a matter of seconds. You don’t have to think about where the Dock is or what your primary display is anymore. Likewise, the Dock doesn’t jump at you as you move to another display. Instead, it waits patiently in the background until it’s needed.
How to Change the Primary Display
While we’re at it, we might as well brush up on how to set and change the primary display on a Mac. Have in mind that the actual steps and available options might have changed slightly over time and between all the different OS X versions released over the years. However, the process remains largely the same. Here’s how to change the primary display on Mac OS X:
- Click on the Apple menu.
- Go to System Preferences.
- Now, click on Displays.
- When the Displays section opens, you should click on the Arrangement tab.
- Click on the white bar at the top of the primary display’s icon and drag it to the display you’d like to set as primary.
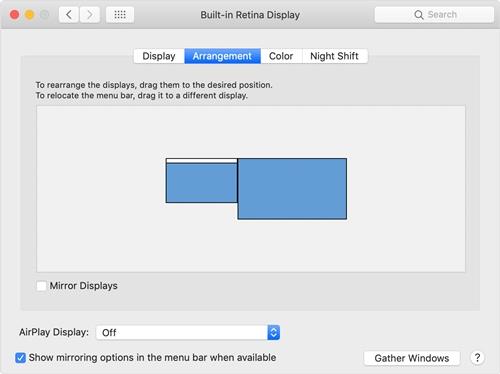
If you’d like to arrange displays, you can drag the display icons around until they match the left-to-right arrangement of your physical monitors. When you select a display and start moving it, a red border will appear around the icon and the display of the actual monitor.
Another thing to have in mind is that, since the introduction of the Mavericks version, all monitors display the Menu bar. However, it is used to designate the primary display in the Display settings.
Extend Your Primary Display
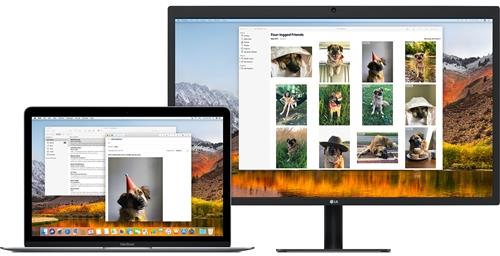
Mac OS X also allows you to extend your primary display to the external monitor. Here’s how it works:
- Click on the Apple menu.
- Select System Preferences.
- Click on Displays.
- If it is checked, un-check the Mirror Displays checkbox.
The Free Dock
Some people think that Apple’s decision to make the Dock appear seamlessly when it’s needed greatly improves the user experience. Some users, on the other hand, find it confusing.
Which side are you on? Is this a good feature that Apple should keep for future versions or something that needs to be discarded? What’s your take on this? Make sure to give us your two cents in the comments section below.
