Amikor a Windows 11 bejelentette az Android-alkalmazások telepítésének és használatának lehetőségét, mindenki a holdon volt. Az emberek izgatottak voltak, hogy közvetlenül a számítógépükről futtassák a közösségi média alkalmazásokat, játékokat és még sok mást. Sajnos ez az izgalom véget ért, amikor a Microsoft felfedte, hogy a Google Play Áruház helyett az Amazon App Store-t fogják használni.
Összehasonlításképpen: az Amazon alkalmazásboltjában csak körülbelül 460 000, míg a Google alternatívájában összesen 3,48 millió alkalmazás található. Ez az egyik oka annak, hogy sok felhasználó saját kezűleg szeretné telepíteni a Google Play Szolgáltatásokat és Áruházat. Egy csónakban vagy? Akkor mi a tökéletes útmutató az Ön számára!
Használja az alábbi módszereket a Google Play Áruház és a Gapps letöltéséhez és használatához Windows 11 rendszerű számítógépén.
Kapcsolódó: Az ikonok csoportosítása a Windows 11 tálcán rendszerleíró adatbázis feltörésével
Tartalom
1. módszer: Telepítse az egyéni WSA-t előre telepített Gapps és Play Áruházzal
A Google Apps és a Google Play Áruház WSA-val való beszerzésének egyszerűbb módja egy előre módosított WSA használata, amelyre előre telepítve van a Gapps. Ezt a WSA-t egy Rageman666 nevű Redditor osztotta meg ( lásd itt ). A letöltés után az alábbi mod segítségével bejelentkezhet a Google Play Áruházba Google-fiókjával. (Ha azonban csak hivatalosan szeretné telepíteni a WSA-t, majd saját maga szeretné átvenni a Gapps telepítésének összetett módszerét, akkor nézze meg az alábbi 2. módszert.)
Mire van szükséged
Lépésről lépésre útmutató
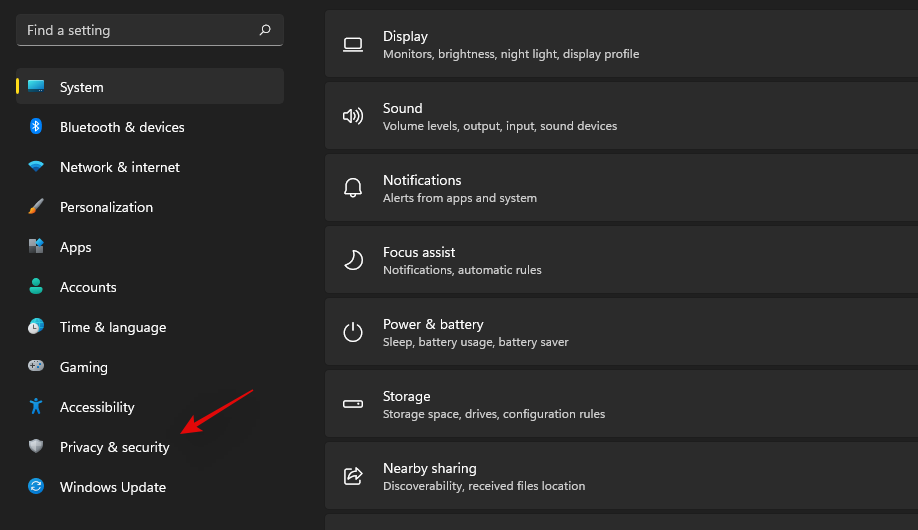
Először engedélyeznünk kell a fejlesztői módot a Windows 11 telepítésekor. Nyomja Windows + imeg a gombot a billentyűzeten, és válassza az „Adatvédelem és biztonság” lehetőséget a bal oldalsávon.
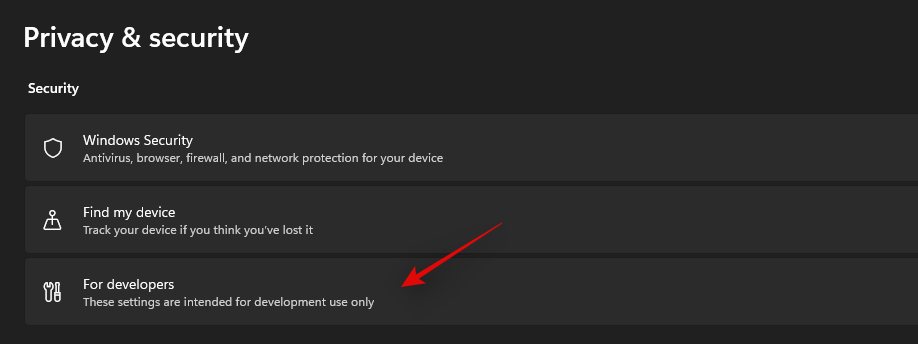
Kattintson a "Fejlesztőknek" lehetőségre a jobb oldalon.
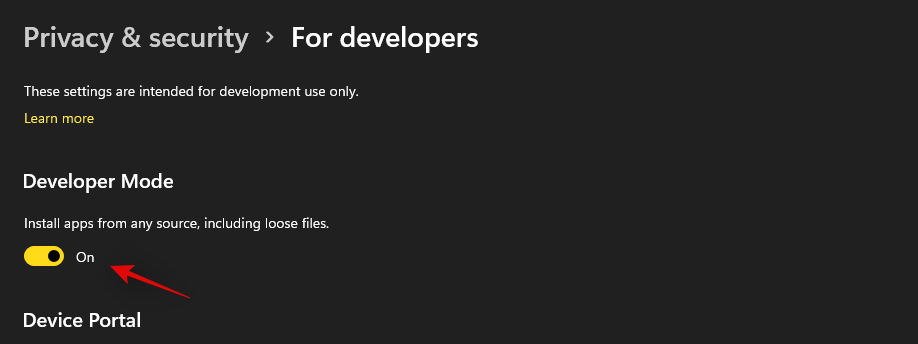
Kattintson és kapcsolja be a „Fejlesztői mód” kapcsolót. A választás megerősítéséhez kattintson az „Igen” gombra.
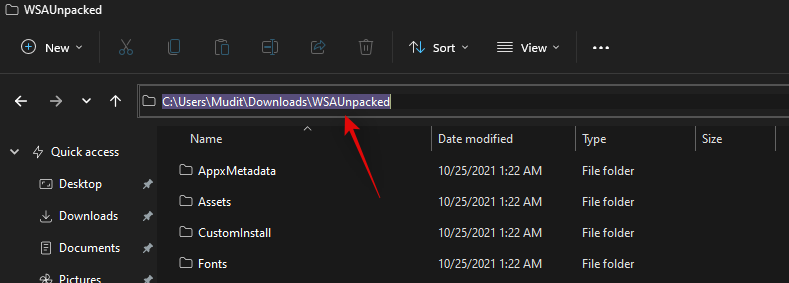
Most töltse le a fent hivatkozott WSA-t egy kényelmes helyre a helyi tárhelyen. Csomagolja ki a fájlokat egy új „WSAUnpacked” nevű mappába. Kattintson a címsorra a „WSAUnpacked” mappában, és másolja az elérési utat a vágólapra.
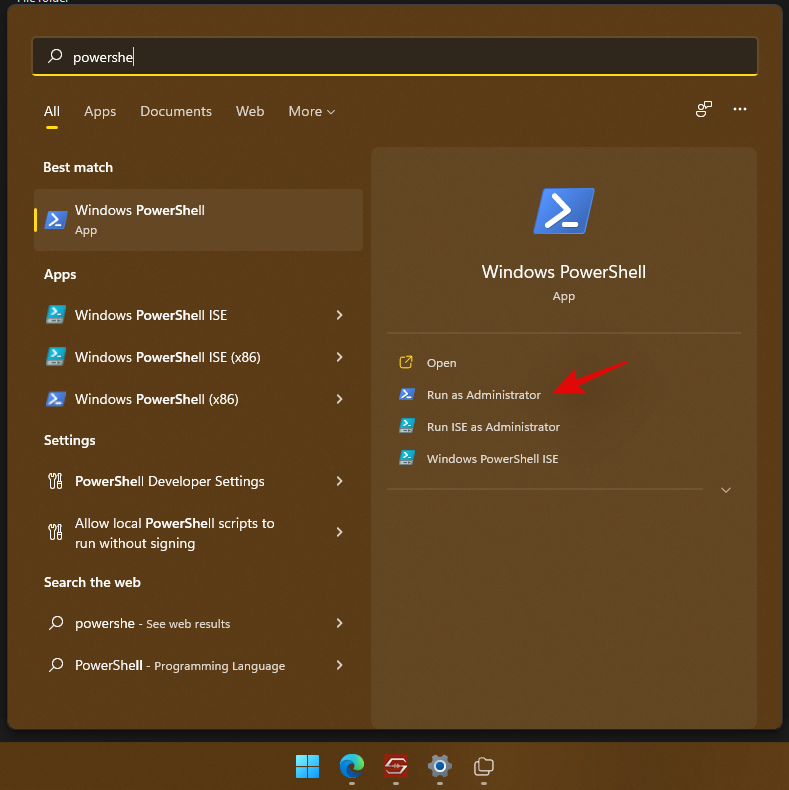
Nyomja Windows + Smeg a billentyűzetet, keressen rá a „Powershell” kifejezésre, majd kattintson a „Futtatás rendszergazdaként” lehetőségre, amint az megjelenik a keresési eredmények között.
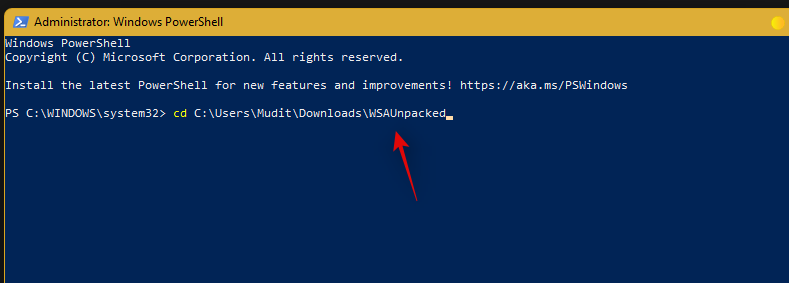
Írja be a következő parancsot, és cserélje ki a PATH-ot a vágólapra másolt elérési útra. Győződjön meg arról, hogy eltávolította az idézőjeleket a beillesztett útvonalból.
cd PATH
Most írja be és hajtsa végre a következő parancsot.
Add-AppxPackage -Register .\AppxManifest.xml

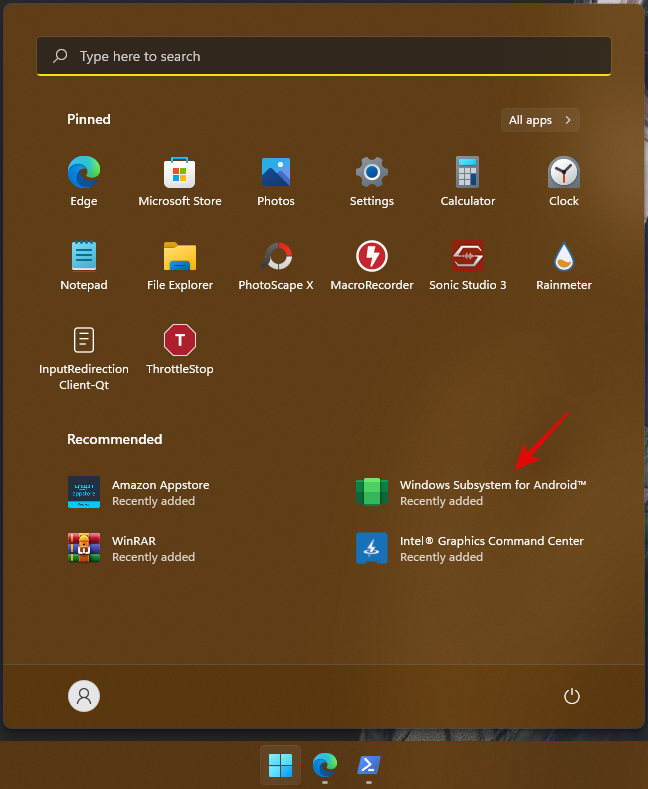
A módosított WSA most telepítve lesz a rendszerére. Nyomja meg a Windows billentyűt, és indítsa el ugyanezt a Start menüből.
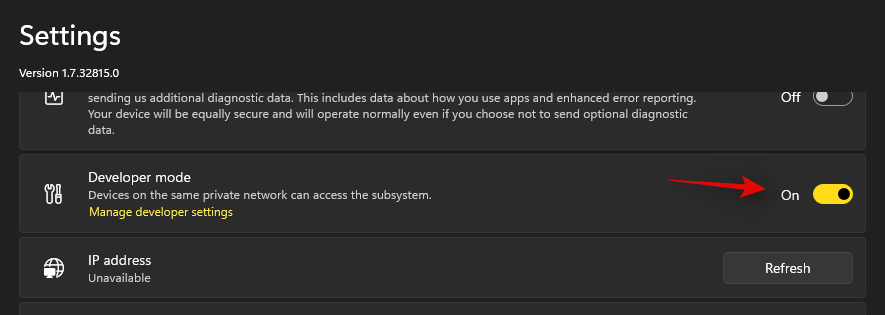
Az alrendszer elindítása után kattintson a „Fejlesztői mód” lehetőségre, és engedélyezze.
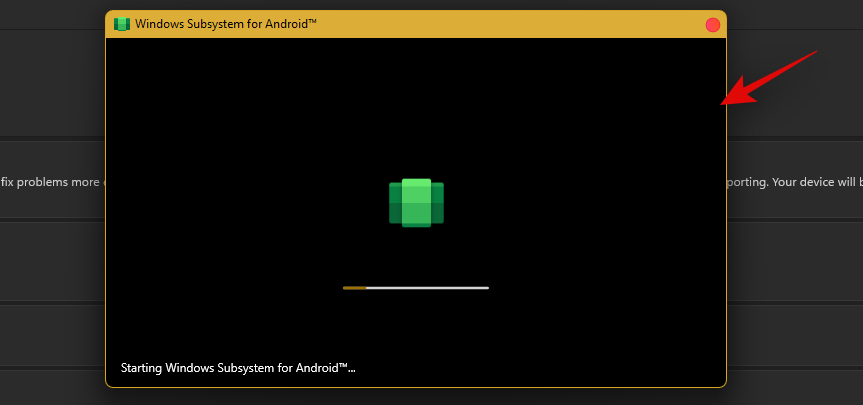
Most kattintson a "Fájlok" elemre a tetején, hogy elindítsa a Windows alrendszert Androidhoz a rendszerén.
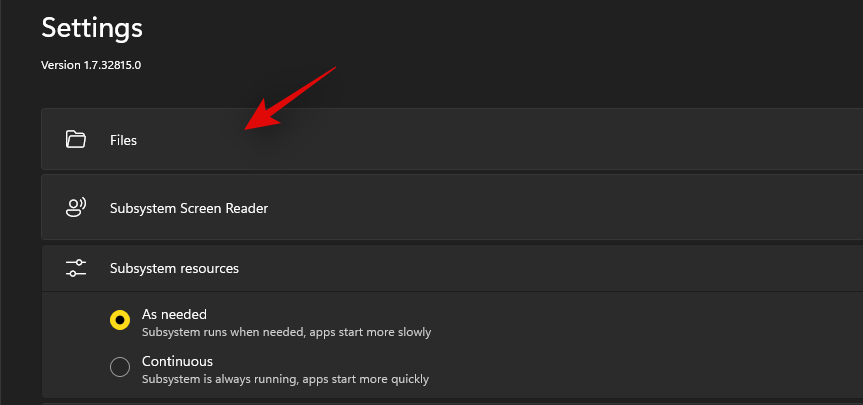
Zárja be a Fájlok alkalmazást. Most egy kerülő megoldást kell használnunk a Play Áruházba való bejelentkezéshez.
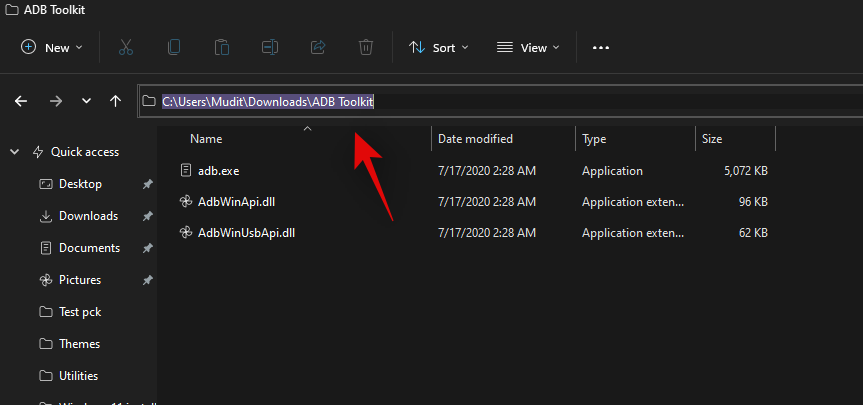
Töltse le a fent hivatkozott ADBToolkit-et, és bontsa ki egy új mappába az asztalon, melynek neve "ADBToolkit". A kibontás után kattintson a tetején lévő címsávra, és másolja a címet a vágólapra.
Nyomja Windows + Smeg a billentyűzetet, és keresse meg a Powershell kifejezést. Kattintson a "Futtatás rendszergazdaként" lehetőségre, ha a Powershell megjelenik a keresési eredmények között.

Írja be a következő parancsot, és cserélje ki a PATH-ot az ADBToolkit korábban másolt elérési útjára.
cd PATH

Megjegyzés: Győződjön meg arról, hogy eltávolította az idézőjeleket az ADBToolkit beillesztett elérési útjából.
Most váltson vissza az alrendszer ablakába, és másolja ki a „Fejlesztői mód” alatt megadott címet.

Hajtsa végre az alábbi parancsot az ADB elindításához és csatlakoztatásához. Cserélje ki a „CÍM” szót a vágólapra másolt címre (fentről).
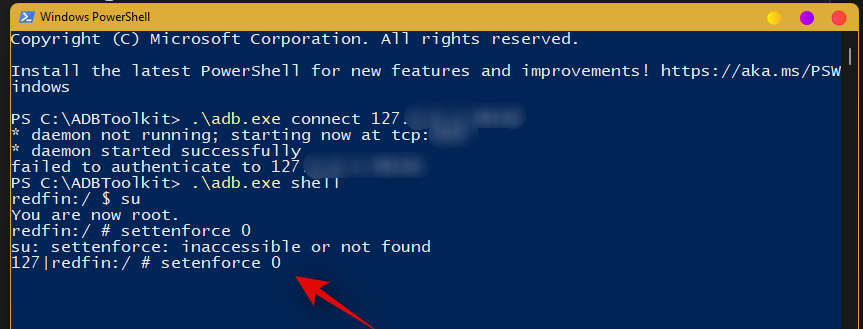
.\adb.exe connect ADDRESS

Írja be a következő parancsot az ADB shell elindításához.
.\adb.exe shell
Most használja a következő parancsot a root hozzáféréshez.
su

Most írja be a következő parancsot.
setenforce 0
A PowerShellből való kilépéshez írja be az „Exit” parancsot.

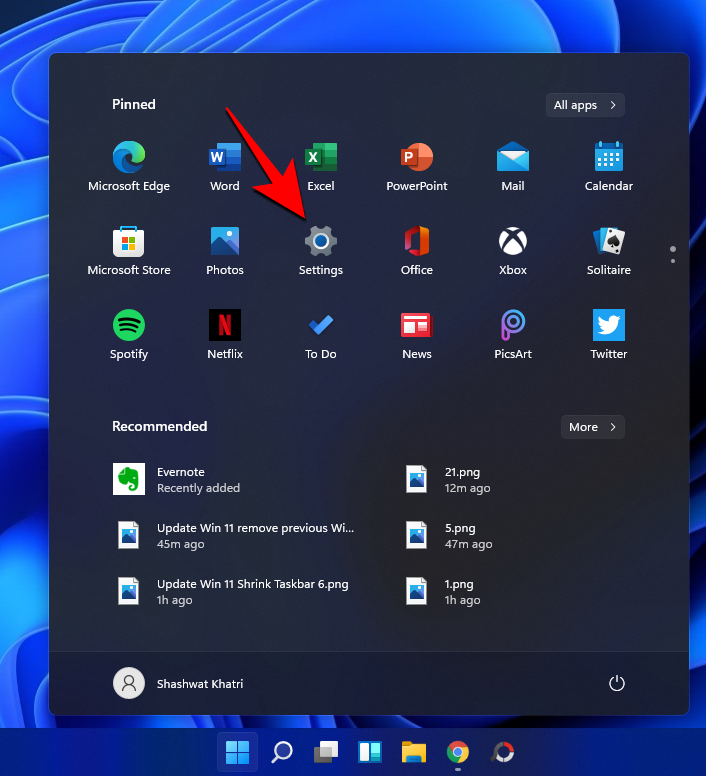
Most bezárhatja az asztalon lévő összes ablakot. Nyomja meg a gombot, Windows + Sés keressen rá a „Play Store” kifejezésre. Kattintson és indítsa el az alkalmazást, amint megjelenik a keresési eredmények között.
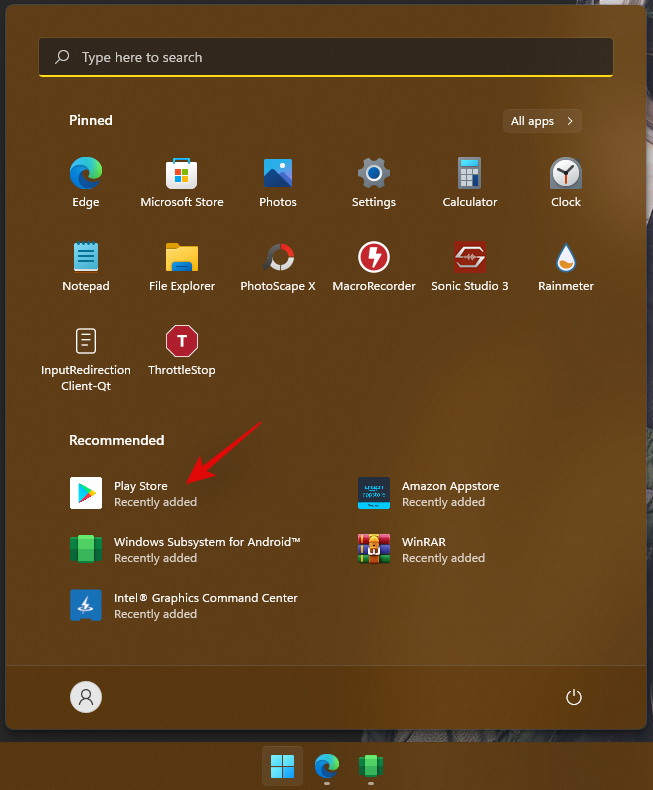
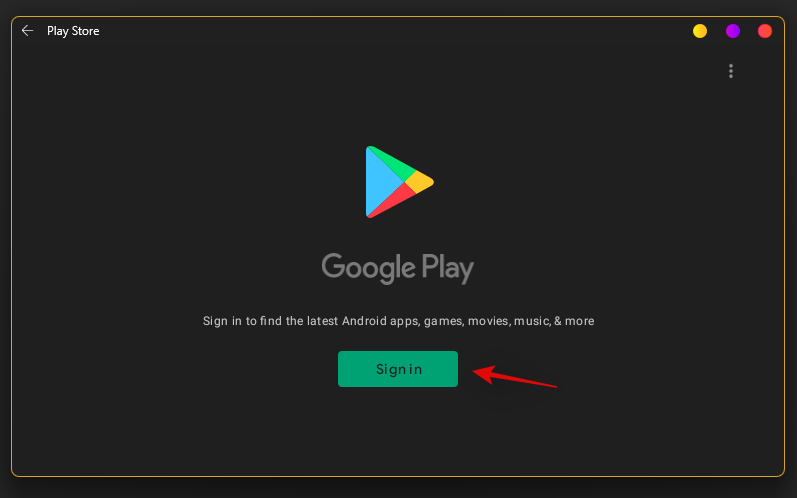
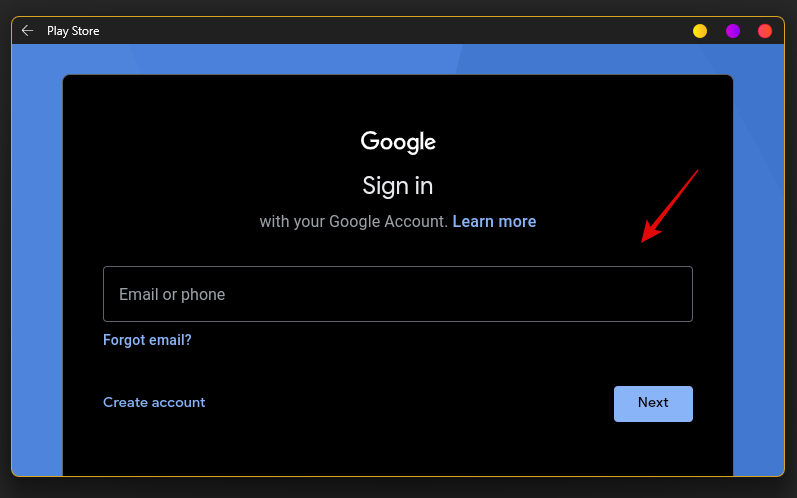
Most kattintson a "Bejelentkezés" gombra, és jelentkezzen be Google-fiókjával.
Mostantól Google Fiókjával lesz bejelentkezve, és most már használhatja a Google Play Áruházat Windows 11 rendszerű számítógépén.
És ez az! Most már közvetlenül a Google Play Áruházból letöltheti és telepítheti a kívánt Android-alkalmazásokat a rendszerére.
Kapcsolódó: Sideload APK Windows 11 rendszeren az ADB manuális használatával | Automatikusan scripttel
2. módszer: Telepítse a WSA-t, majd saját maga telepítse a Gapps-t
A fenti módszer sokkal egyszerűbb és így könnyen használható, bár nem éppen ajánlott, mivel ez egy előre módosított (egyedi) WSA-csomag. De ha hivatalos WSA-csomagot szeretne a Microsofttól, és ezen keresztül saját maga szeretné telepíteni a Gapps-t, akkor ez a módszer az Ön számára. Ez meglehetősen összetett dolog, ezért gyakran felmerülhet a kérdés, hogy megéri-e egyszerűen telepíteni egy egyedi WSA-csomagot, amely előre telepítve van a Gapps-szal, amiről azt mondanánk, hogy igen.
Javasoljuk, hogy a Google Apps és a Play Áruház beszerzése a számítógépen a hivatalos WSA- n a Gapps csomag saját telepítésével, mivel nincs szüksége előre módosított WSA-ra, amely segít, ha aggódik egy egyéni WSA-csomag biztonsága miatt az 1. módszer szerint.
Mire van szükséged
- WSGA szkript | Letöltési hivatkozás (Gapps szkript a Windows alrendszerhez Androidhoz)
- Windows-alrendszer Androidhoz | Link
- Store Adguard | Link
- OpenGApps | Link
- ADBToolkit | Letöltési link
- WinRAR | Letöltési link
- WSL: Windows alrendszer Linuxhoz
- Ubuntu: Letöltési hivatkozás
- Fontos: Távolítsa el az eredeti Windows-alrendszert Androidhoz, ha már telepítette a számítógépére, mielőtt folytatná ezt az útmutatót.
Lépésről lépésre útmutató
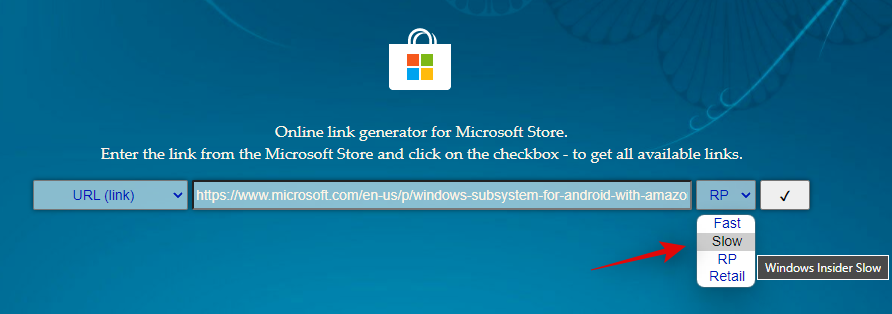
Látogassa meg a fenti WSA hivatkozást, és másolja ki és illessze be a lent vagy a fenti linket a szövegmezőbe.
Link

Most kattintson a szövegmező melletti legördülő menüre, és kattintson a "Lassú" gombra.
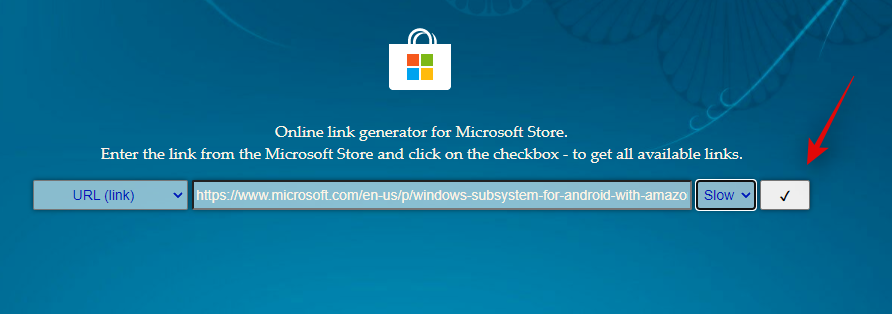
Kattintson a „Pihe” gombra az adott hivatkozás feldolgozásához.
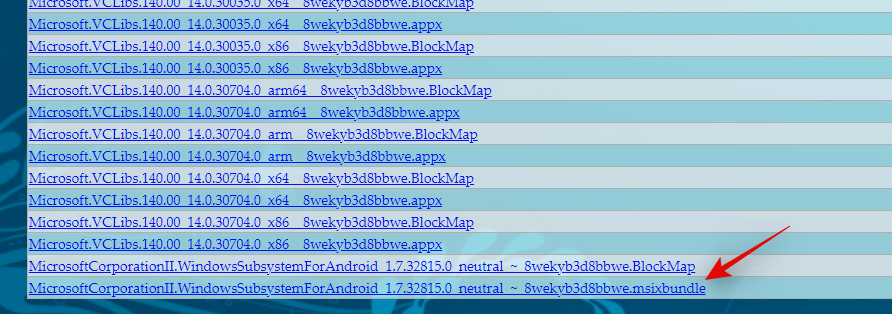
A feldolgozás után az összes csatolt letöltési fájl elérhető lesz a képernyőn. Görgessen le, és kattintson az alján található .msix csomagra, és töltse le egy kényelmes helyre a helyi tárhelyén.
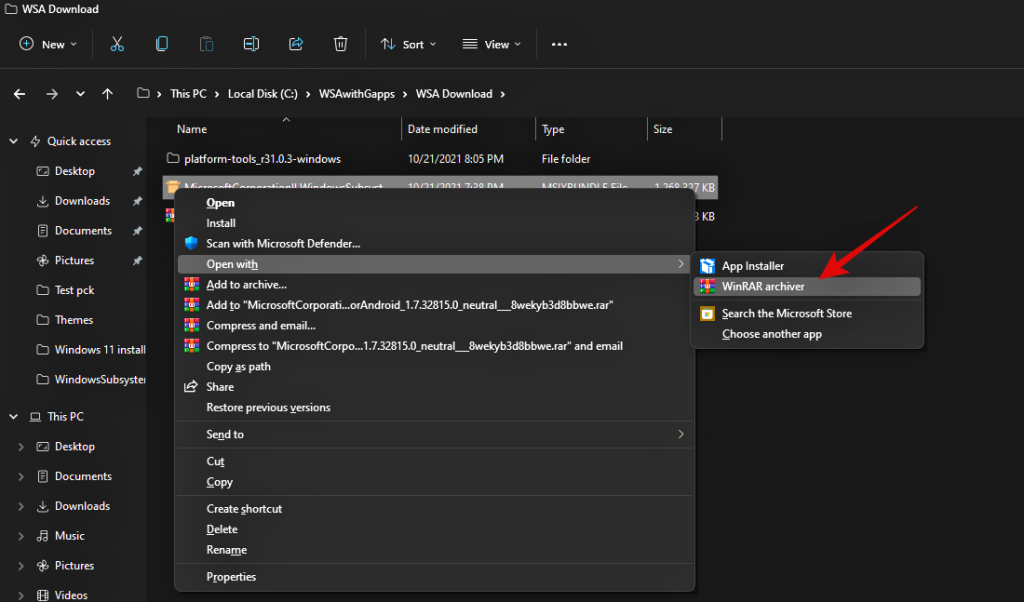
Most lépjen a letöltött fájlra, kattintson rá jobb gombbal, és nyissa meg a WinRAR segítségével. Ha nincs WinRAR a számítógépén, használja a fenti hivatkozást a letöltéshez és telepítéshez.
Miután a csomag megnyílt a WinRAR-ban, görgessen le, és ellenőrizze az .msix-csomag architektúráját. Meg kell egyeznie a CPU architektúrájával, ha nem, akkor válassza ki a kívánt verziót a listából, és folytassa az útmutatóval.

Kattintson duplán, és nyissa meg ugyanazt a csomagot a WinRAR-ban. Ha végzett, lépjen a C/boot meghajtóra, és hozzon létre egy új mappát „WindowsSubsystemForAndroid” néven.

Váltson vissza a Winrar-ra, és válassza ki az összes fájlt, kivéve a következő mappákat és fájlokat.
- AppxMetadata (mappa)
- AppxBlockMap.xml (fájl)
- AppxSignature.p7x (fájl)
- [Tartalomtípusok].xml (fájl)
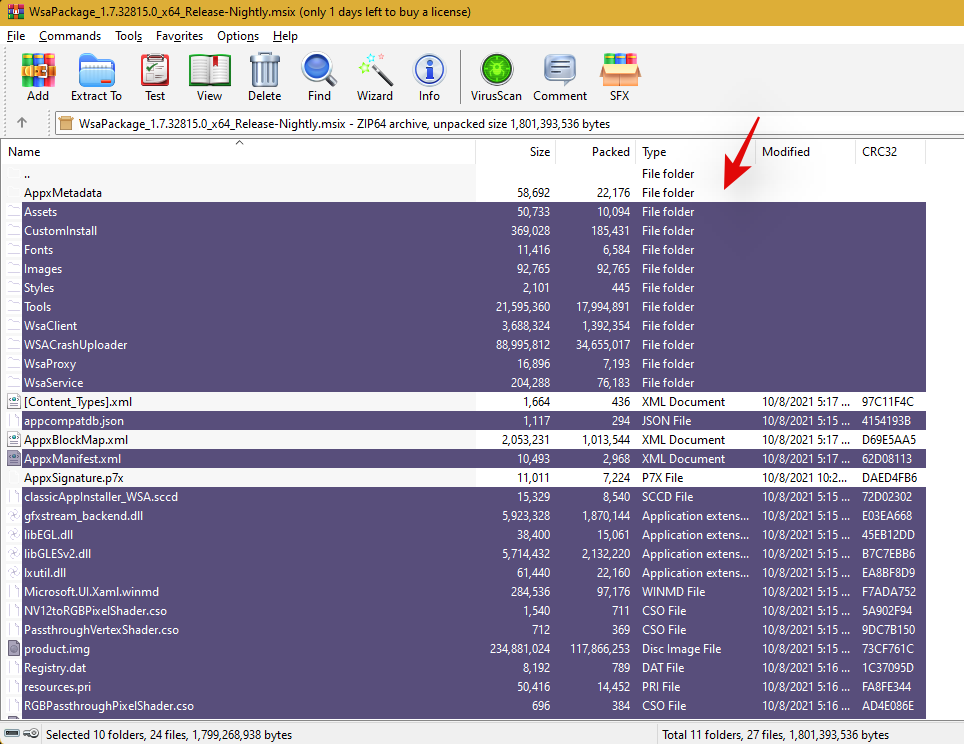
Másolja át az összes kiválasztott fájlt a korábban létrehozott új „WindowsSubsystemForAndroid” mappába.
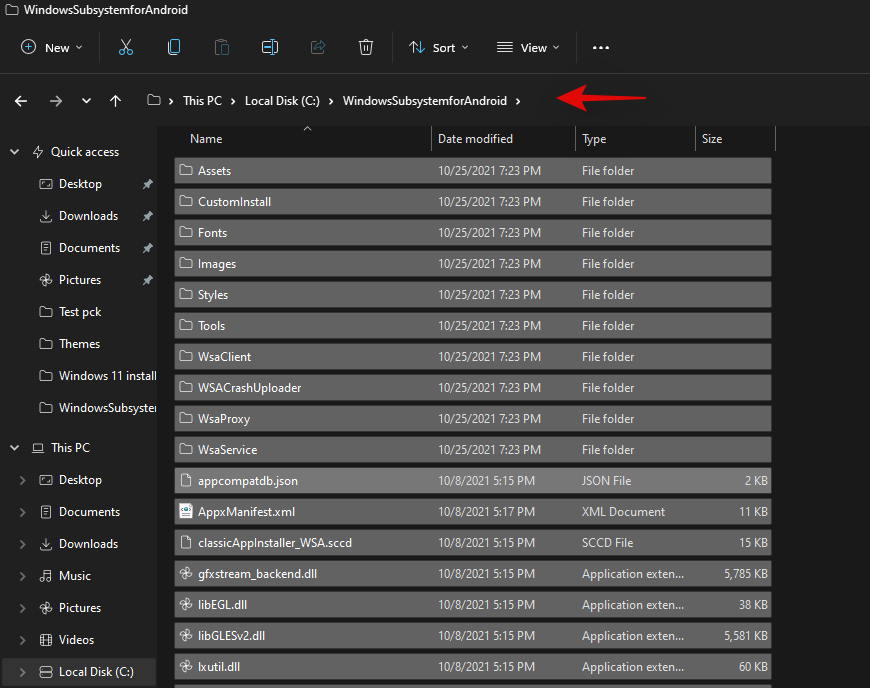
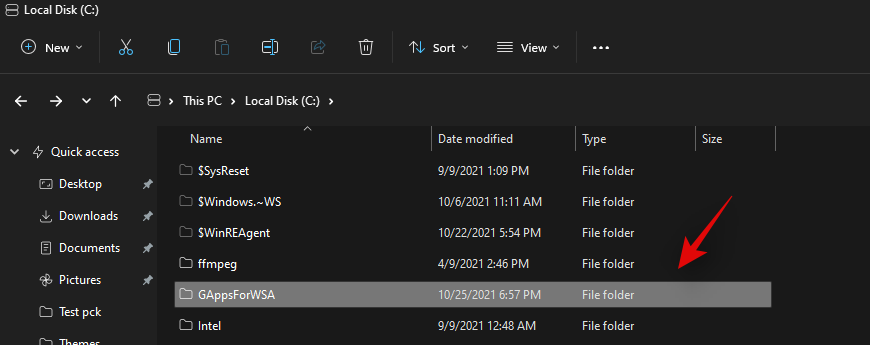
A másolás után hozzon létre egy másik új mappát a rendszerindító meghajtón 'GAppsForWSA' néven.
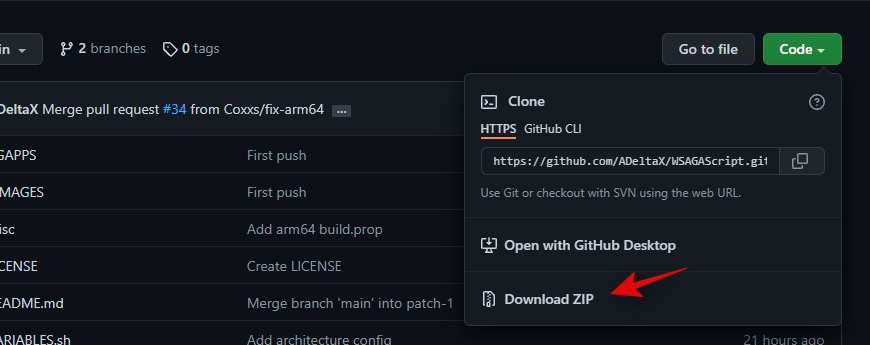
Nyissa meg felül a WSGA-szkript hivatkozását, és töltse le ugyanazt .zip-fájlként a helyi tárhelyére.
Bontsa ki a .zip fájlt az új „GAppsForWSA” mappába, amelyet a rendszerindító meghajtón hoztunk létre.
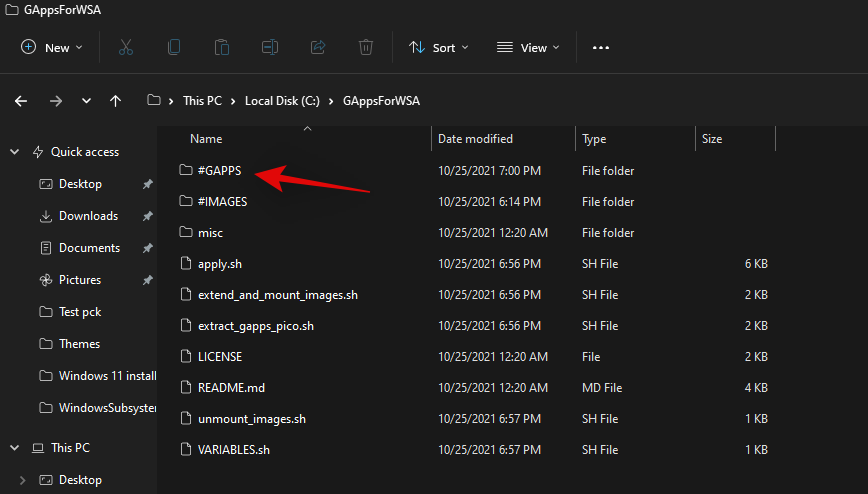
Megjegyzés: Bontsa ki a „WSGAScript-main” mappa tartalmát az archívumból.
Az archivált tartalom után kattintson jobb gombbal a 'VARIABLEs.sh' fájlra, és nyissa meg a Jegyzettömb segítségével.

Cserélje ki a „GAppsWSA” szót „GAppsForWSA”-ra.
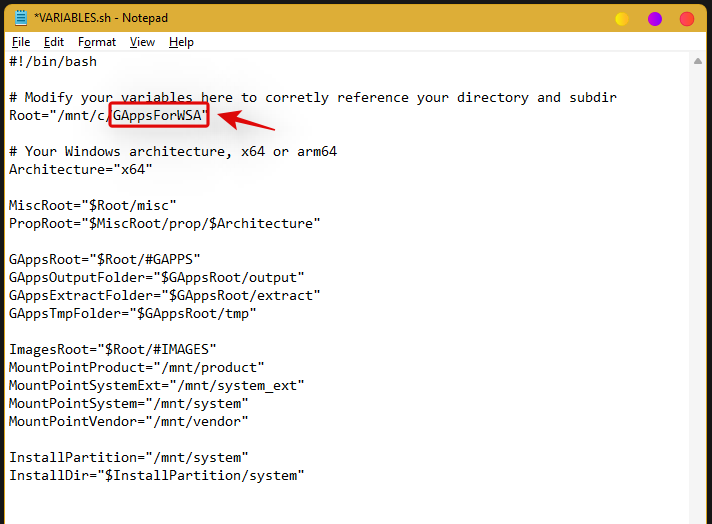
Press Ctrl + S on your keyboard to save the changes. We will now download GApps for your WSA installation. Visit the link for OpenGApps at the top and select the following options given below.
- Platform: x86_64
- Android: 11.0
- Variant: pico
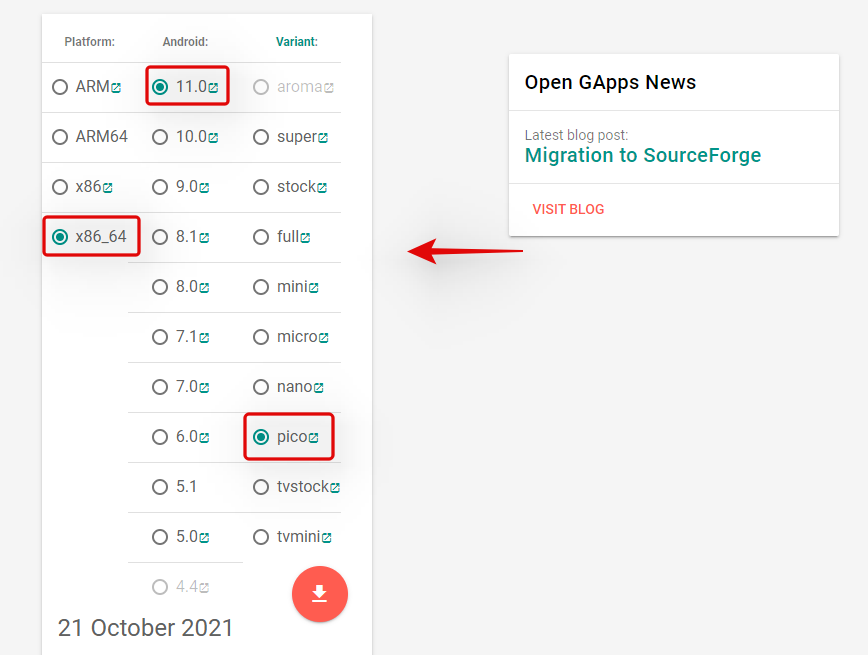
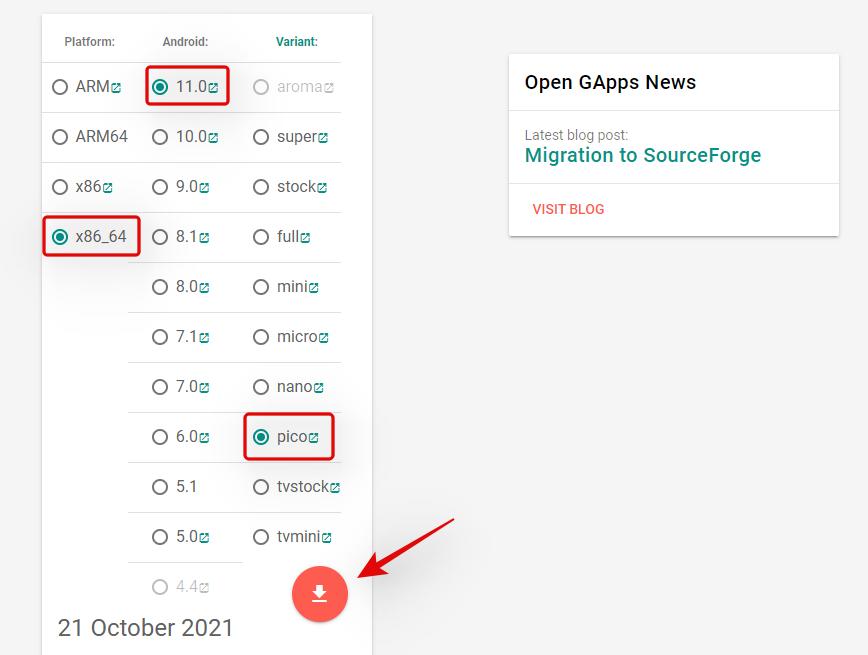
Click on the ‘Download icon’.
You will now be redirected to Sourceforge, wait a few seconds and the download should automatically be initiated for you.

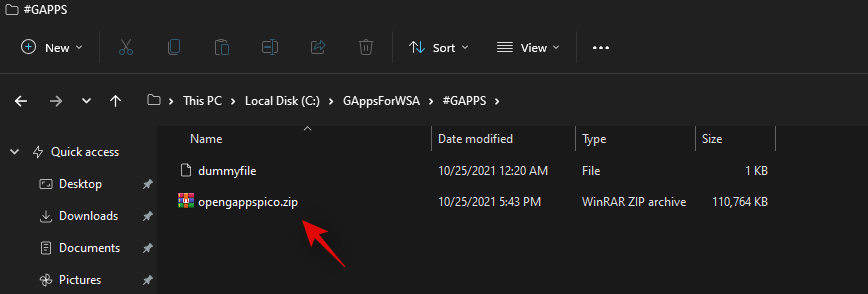
Download and store the archive in the following location in the ‘GAppsForWSA’ folder on your boot drive.
Boot Drive\GAppsForWSA\#GAPPS
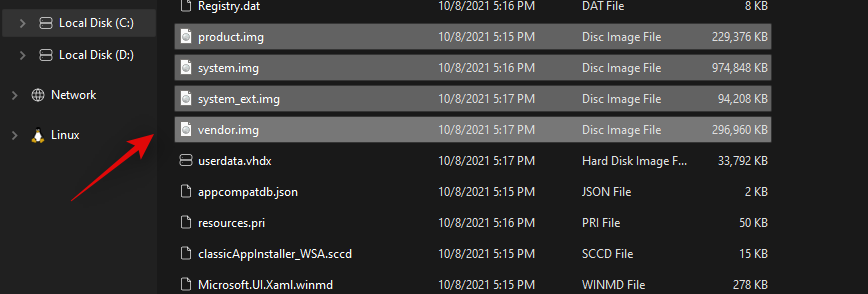
Now go back to your boot drive and open the ‘WindowsSubsystemForAndroid’. Copy the following 4 files.
- vendor.img
- system_ext.img
- system.img
- product.img
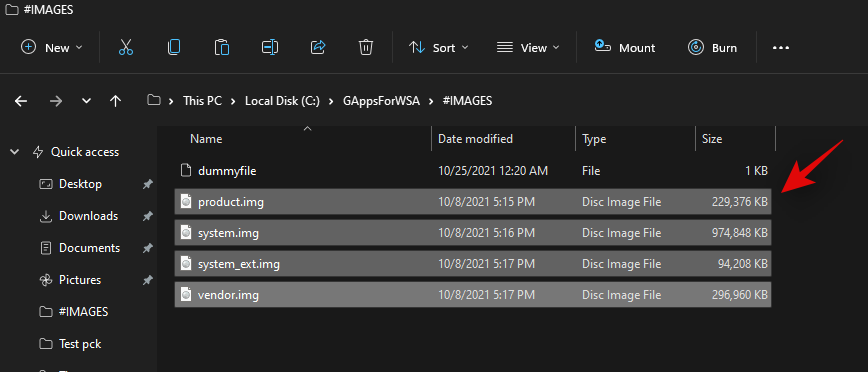
Navigate to the following location and paste all your copied files.
Boot Drive\GAppsForWSA\#IMAGES
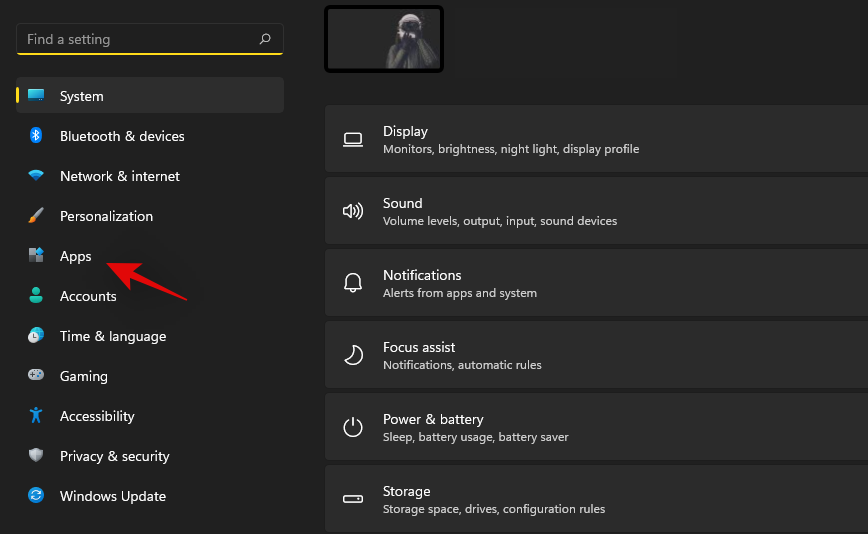
We will now install WSL for your system. WSL is a Linux Subsystem that will allow you to use executables and scripts developed for Linux. Press Windows + i on your keyboard to open the Settings app and then click on ‘Apps’ on your left.
Now click on ‘Optional Features’.
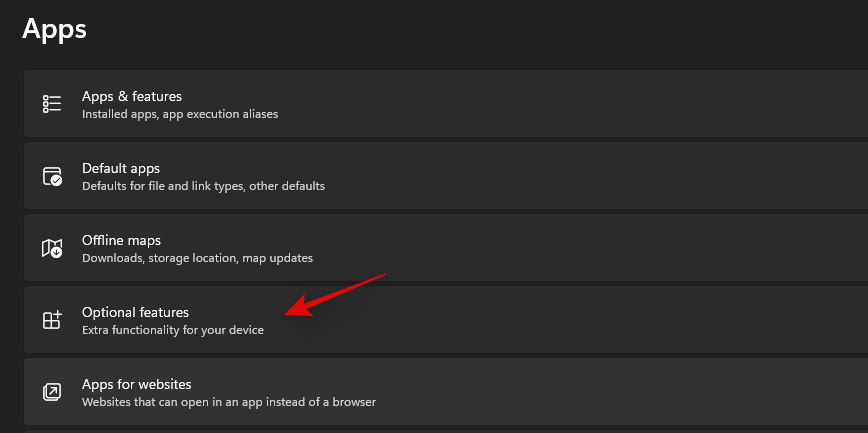
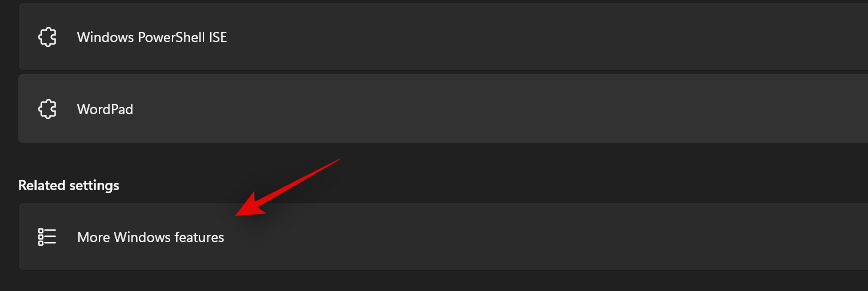
Scroll down and click on ‘More Windows features’.
A new window for available features will now open on your screen. Scroll to the bottom and check the box for ‘Windows Subsystem for Linux’.
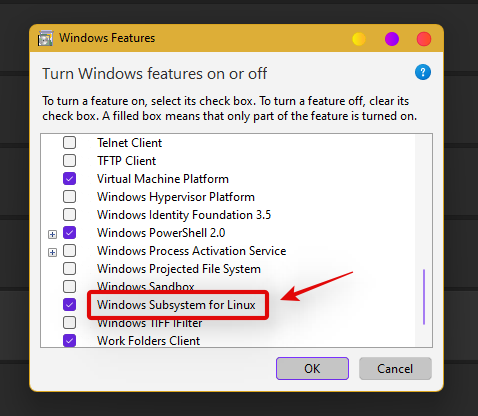
Click on ‘Ok’ once you are done. The Linux Subsystem will now be installed on your PC. You will now be prompted to restart your PC. We recommend you restart your PC at this point even if you are not prompted.
We will now install a distro that will help us during this setup. We recommend you use Ubuntu available on the Microsoft Store as it is easily downloaded and removed from your system. Use the link below to visit and download Ubuntu in the Microsoft Store.
Click on ‘Open’ once the app is installed to configure your installation. You can also launch the app from your Start menu depending on your preference.
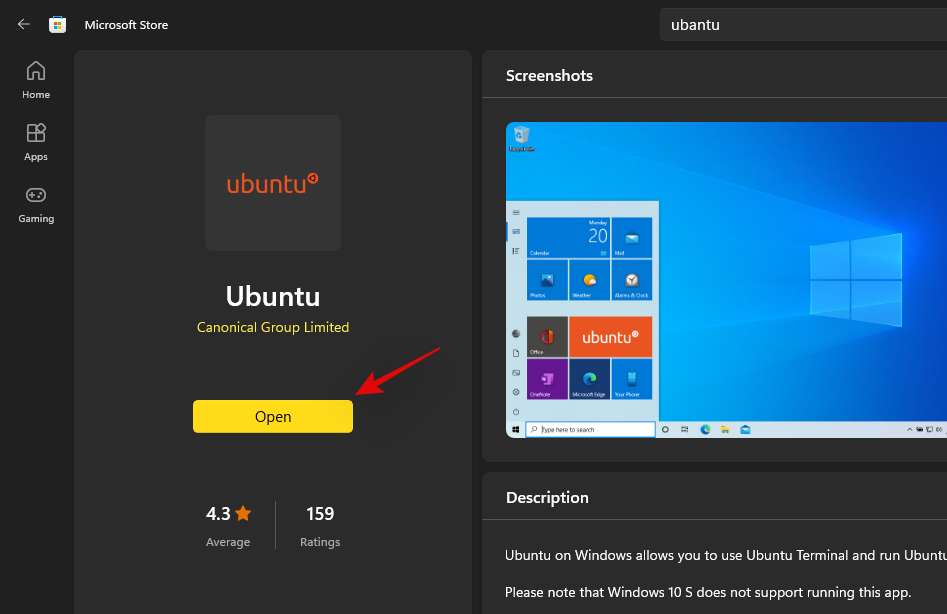
Ubuntu will now be installed on your system. Once installed, proceed to set a Username to protect your installation. Subsequently, enter a password to protect root access on your system.
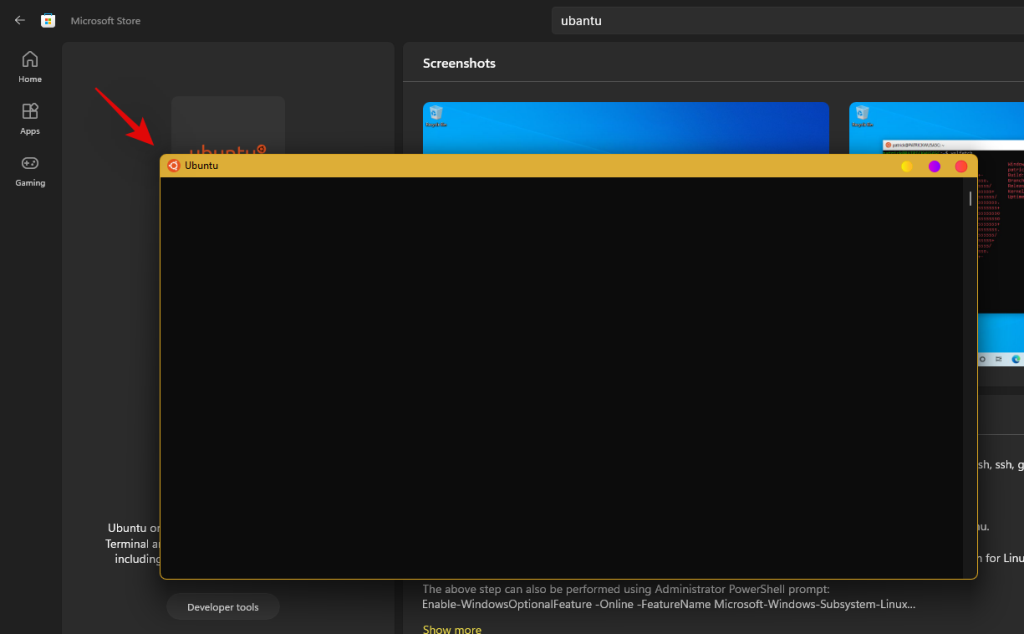
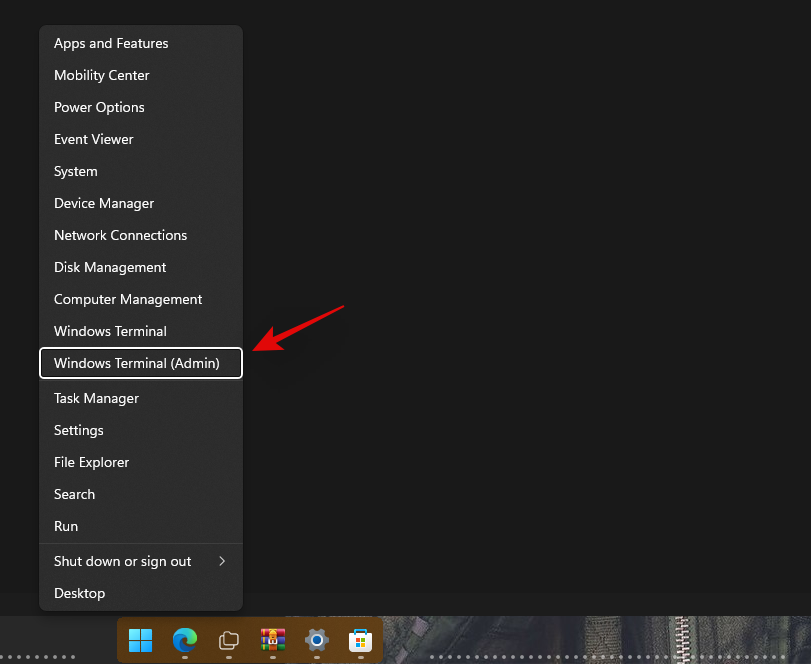
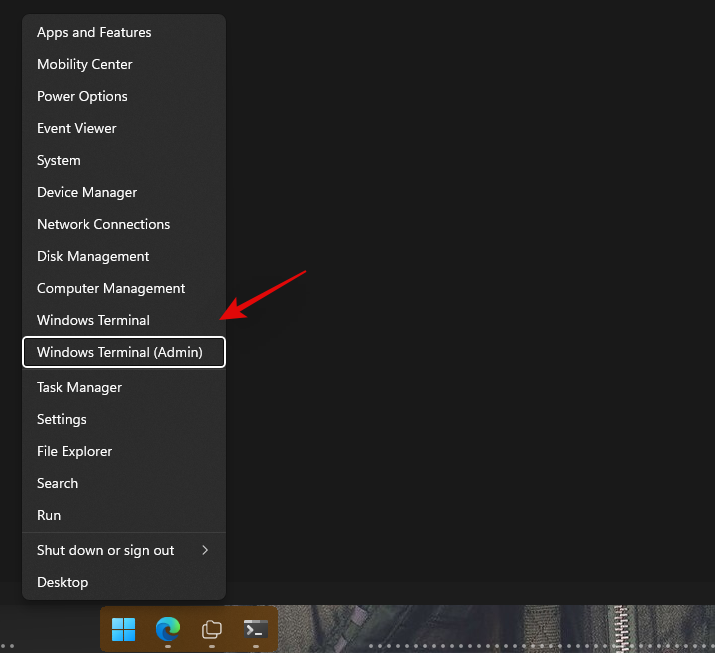
The Distro has now been setup on your system, you can close the current window and press Windows + X instead. Select ‘Windows Terminal (admin)’.
Click on the drop-down arrow at the top and select the same to launch a WSL terminal in the new tab. We’ll now need root access to modify your WSA with GApps. Type in the following command and press Enter on your keyboard. If you did not set a username or password then you should already have root access in the terminal. You can skip this step and move to the next one instead.
sudo su
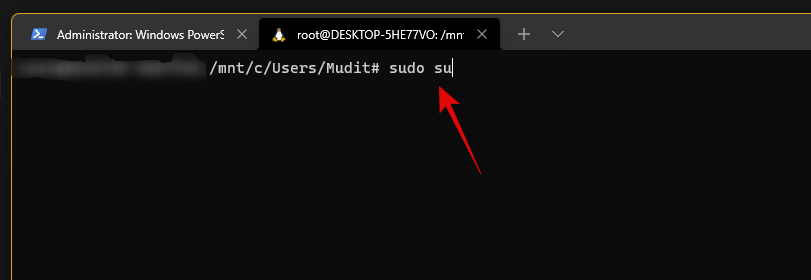
Enter your password to grant root access (if applicable). Now type in the following commands one by one.
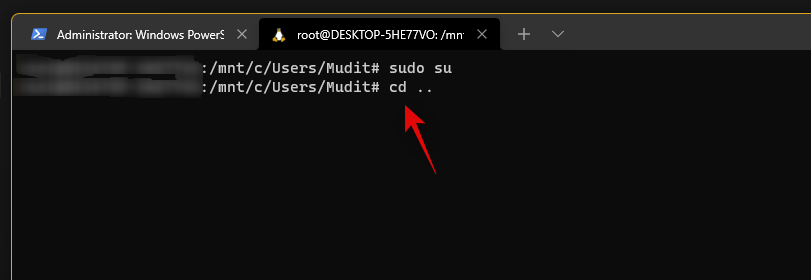
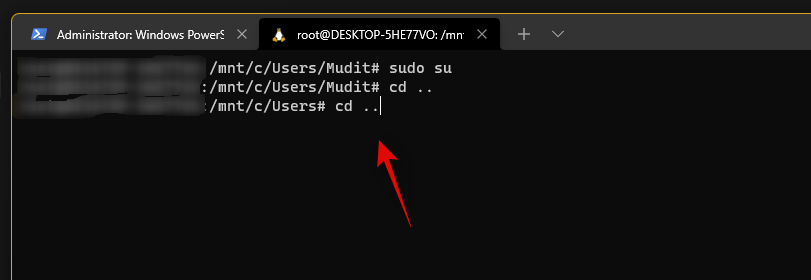
Finally use the command below to navigate to ‘GAppsForWSA’.
cd GAppsForWSA/
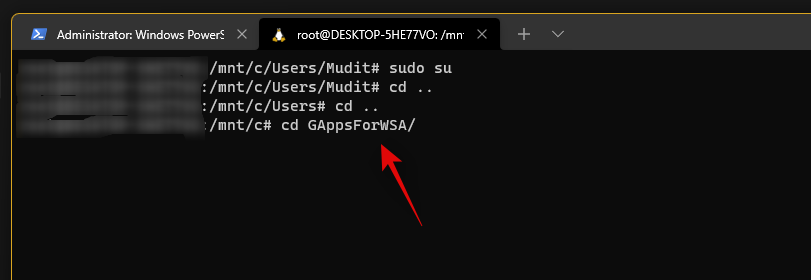
Now type in the following command to install ‘lzip’ and ‘unzip’ which will be needed for this process.
apt install lzip unzip
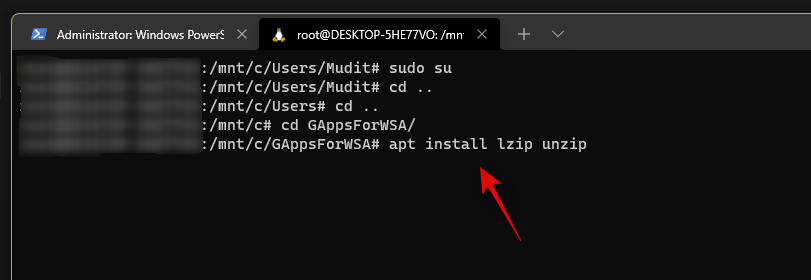
Note: If you are unable to get lzip or unzip setup, then run apt-get update -y to update your repositories and packages.
Confirm your choice by typing in ‘Y‘.
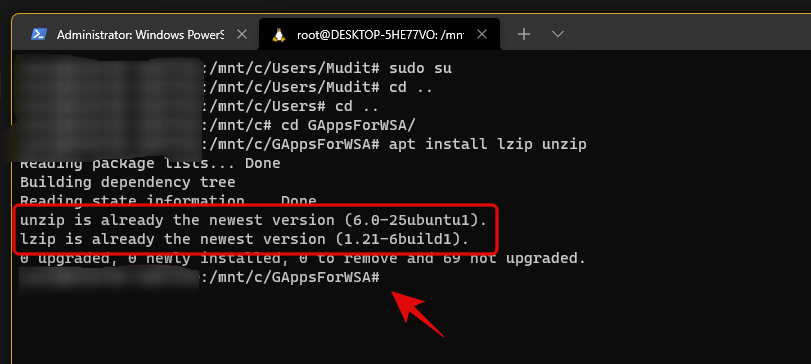
We will now install ‘dos2unix’ which will also be needed for this modification. Use the command below to install the same on your PC.
apt install dos2unix
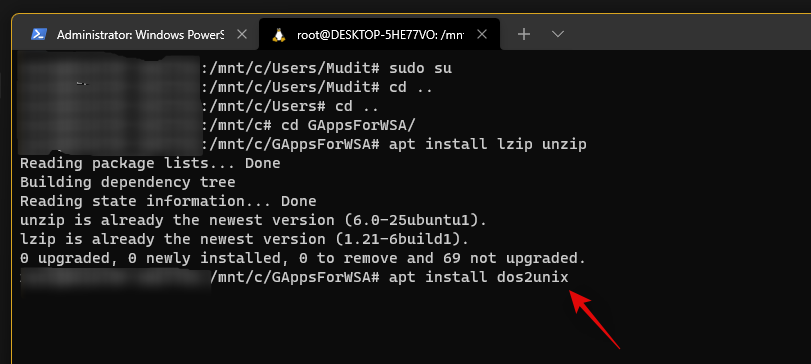
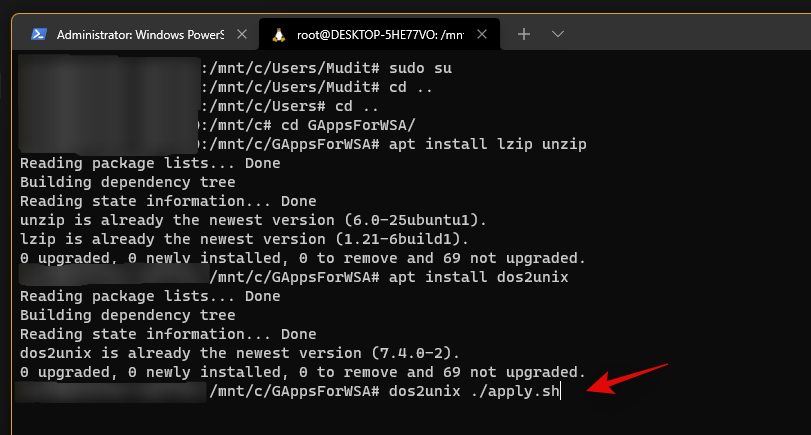
Now it’s time to modify your WSA image. Type in and execute the following commands in the terminal one by one in the same order.
- Command 1:
dos2unix ./apply.sh
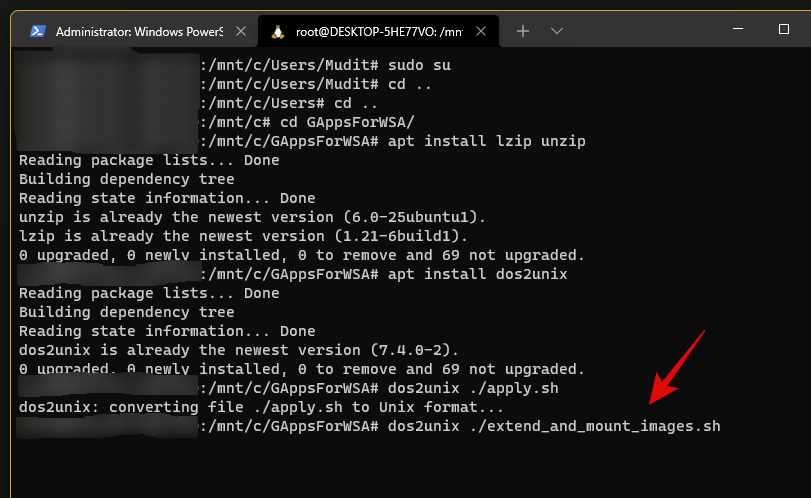
- Command 2:
dos2unix ./extend_and_mount_images.sh
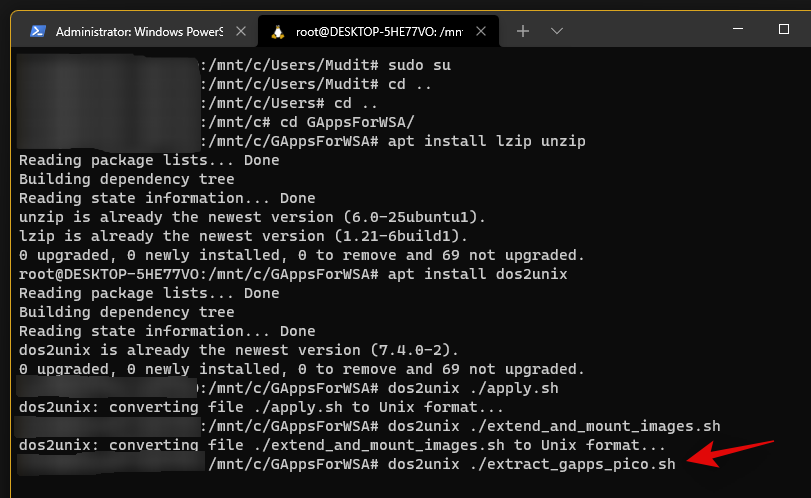
- Command 3:
dos2unix ./extract_gapps_pico.sh
- Command 4:
dos2unix ./unmount_images.sh
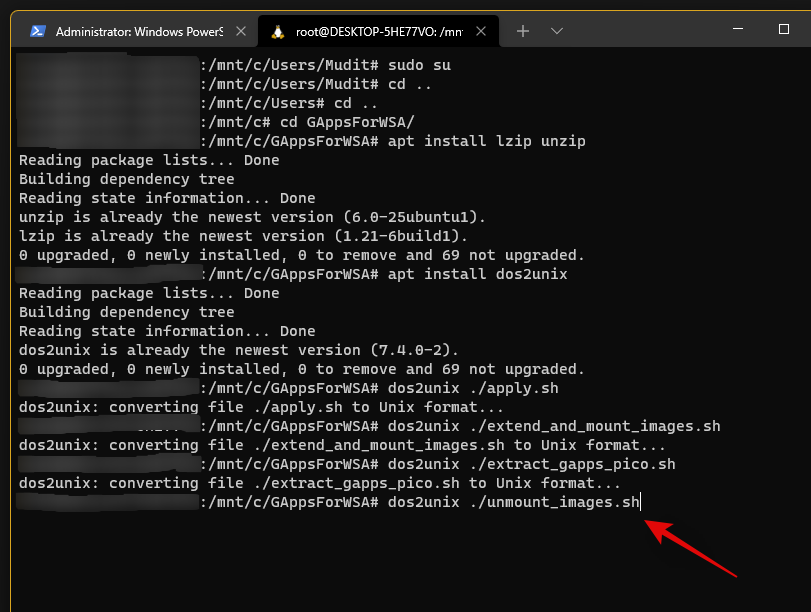
- Command 5:
dos2unix ./VARIABLES.sh
Once the process completes, type in the following to clear up your terminal for better management.
clear
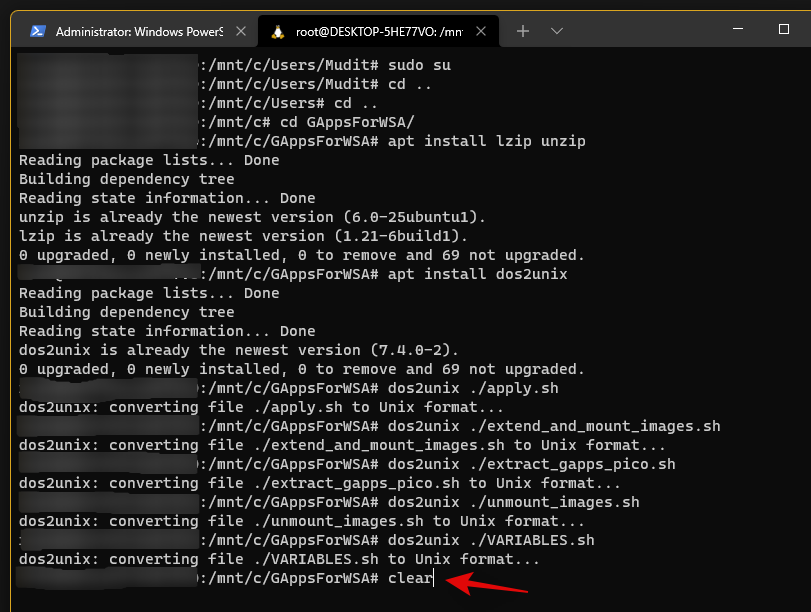
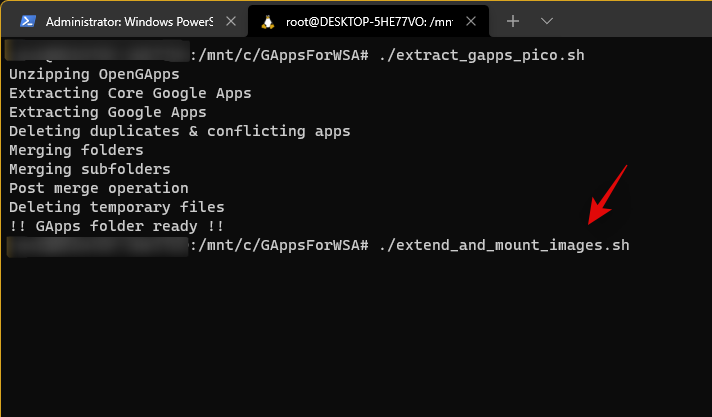
Now that we have our scripts, let’s execute them. Type in and execute the commands given below one by one in the same order.
- Command 1:
./extract_gapps_pico.sh

- Command 2:
./extend_and_mount_images.sh
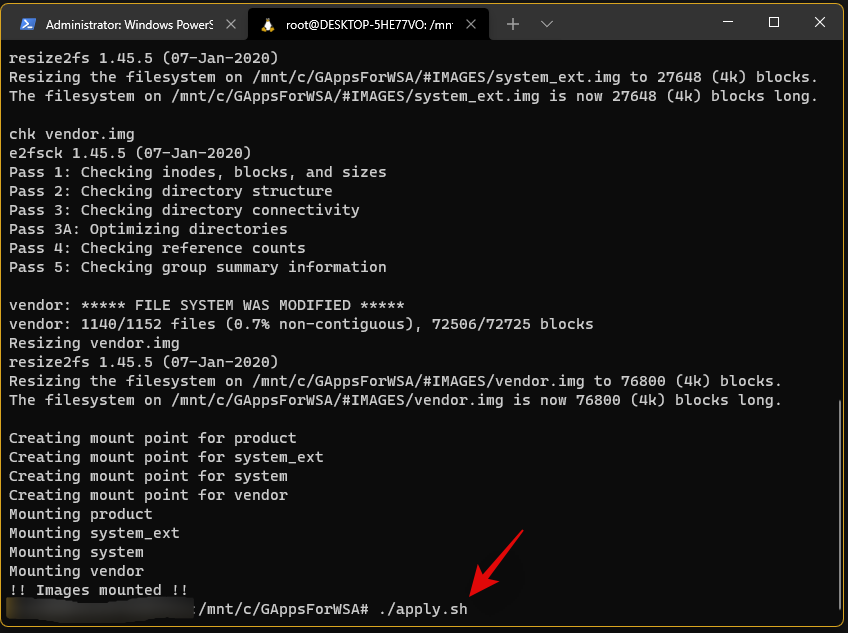
- Command 4:
./unmount_images.sh
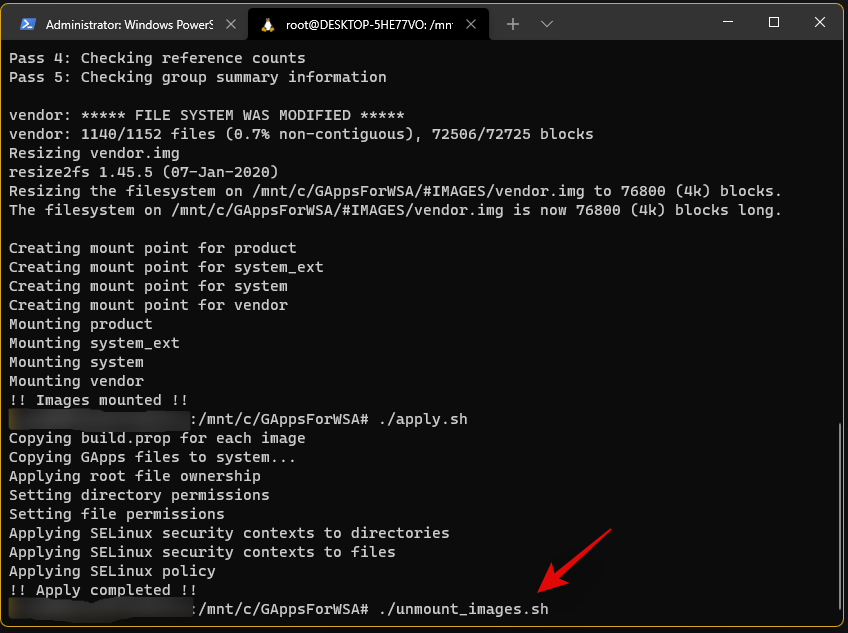
We are now done with the console, for now, you can close the same. Go to your boot drive and navigate to the following location.
\GAppsForWSA\#IMAGES
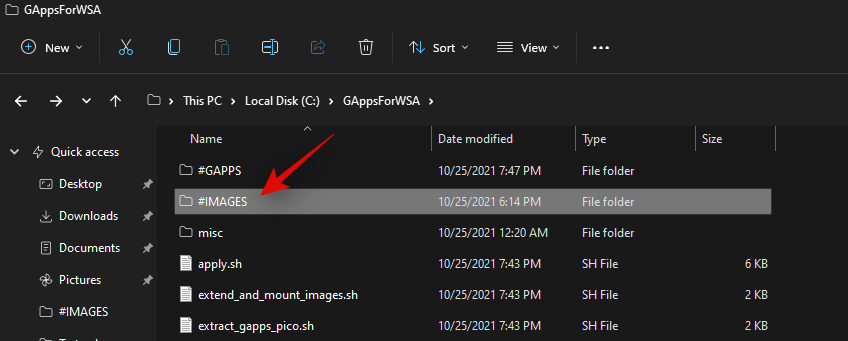
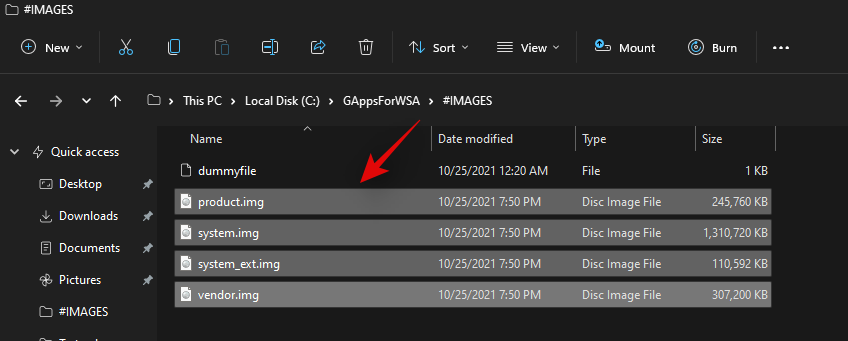
Copy the following files to your clipboard.
- product.img
- system.img
- system_ext.img
- vendor.img
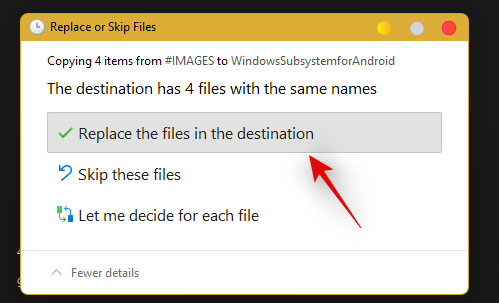
Now navigate to the ‘WindowsSubsystemForAndroid’ folder on your boot drive and paste all the copied images in the same location. Choose to replace the files when prompted.
We’re almost done with the modification now. Navigate to your ‘GAppsForWSA’ folder on your boot drive and double click and open the ‘misc’ folder.
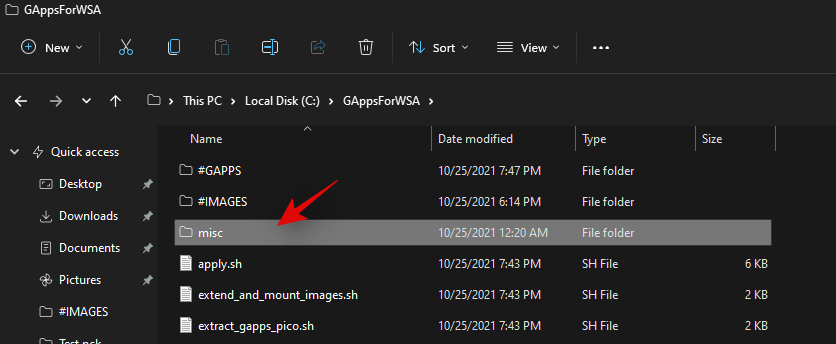
Copy ‘kernel’ to your clipboard.
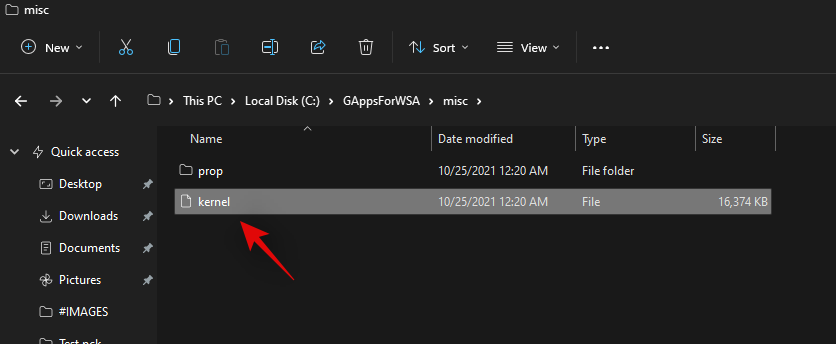
Navigate to the following location.
Boot drive\WindowsSubsystemForAndroid\Tools
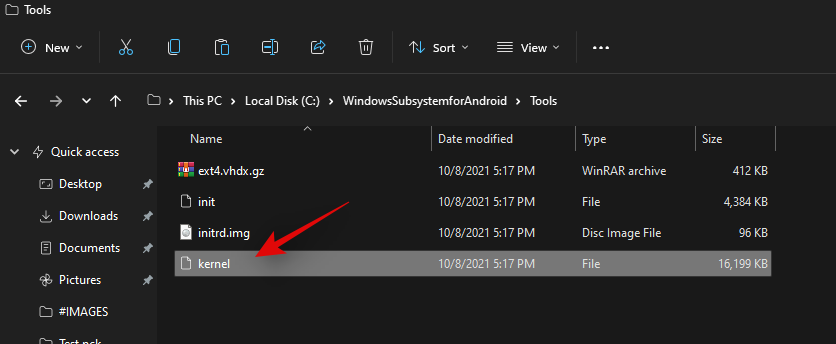
Rename ‘kernel’ to ‘kernel_backup’.
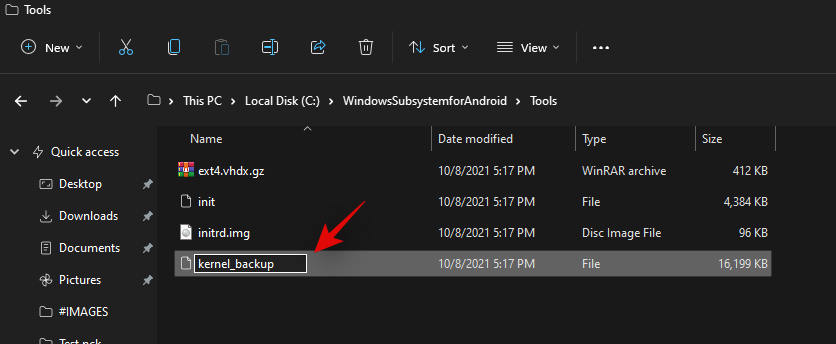
Now paste the kernel file we copied to your clipboard earlier in the same location.
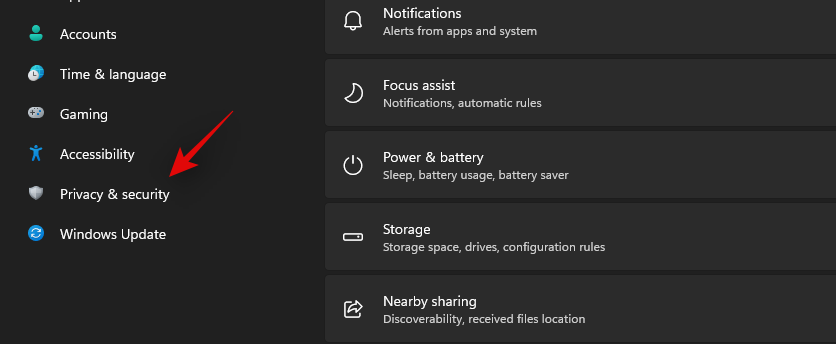
We will now need to enable developer mode for your installation of Windows 11. Press Windows + i to open the Settings app and then click on ‘Privacy and Security’ on your right.
Click on ‘For developers’.
Enable the toggle for ‘Developer Mode’ at the top.
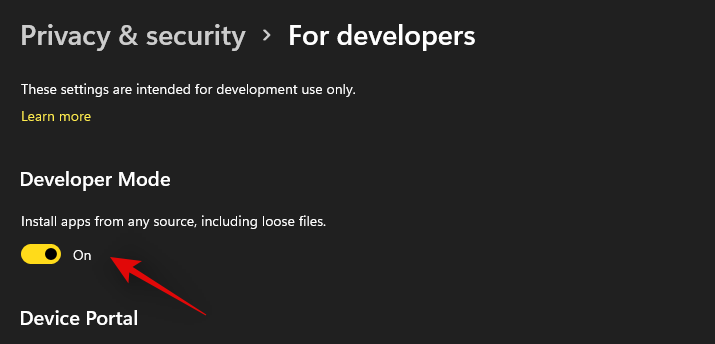
Click on ‘Yes’ to confirm your choice. Now press Windows + X and select ‘Windows Terminal (admin)’.
Click on the drop-down arrow at the top and select ‘Windows Powershell’.
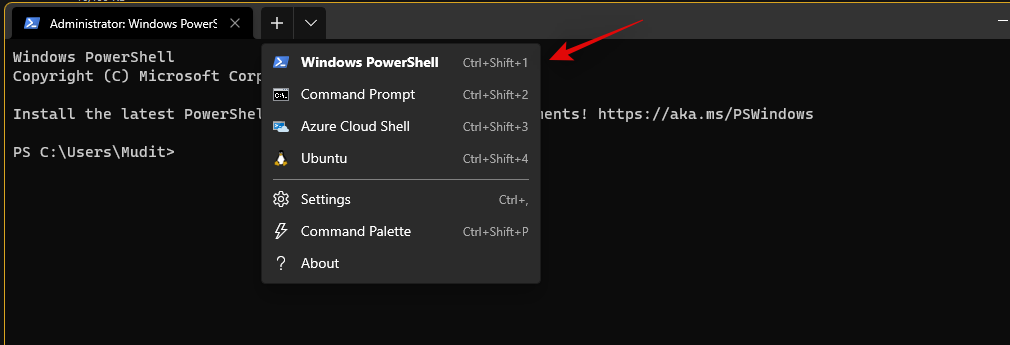
Note: Do not select ‘Powershell’, ensure that you select ‘Windows Powershell’.
Now run the following command.
Add-AppxPackage -Register C:\WindowsSubsystemForAndroid\AppxManifest.xml
The modified subsystem will now be installed on your PC.

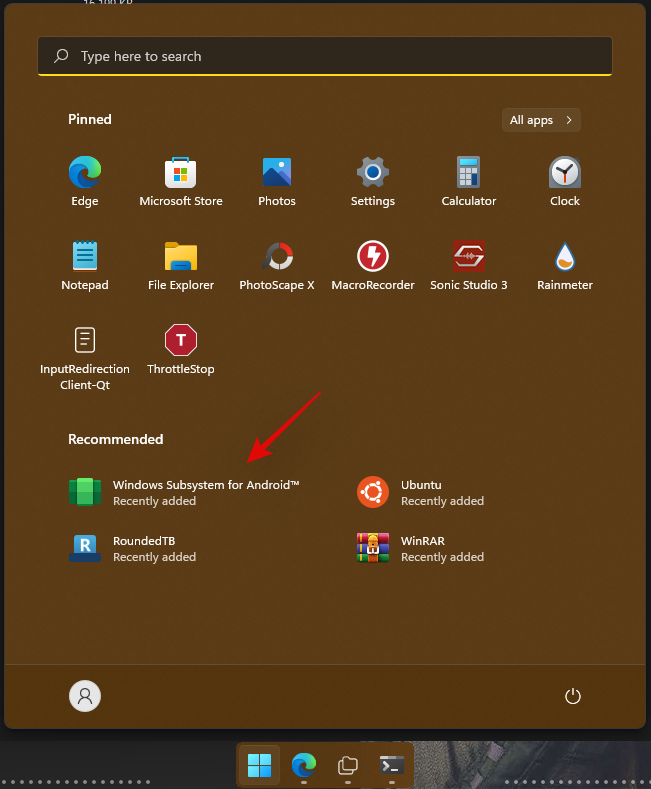
Press the Windows key and launch the same once the process completes.
Enable the toggle for ‘Developer mode’ in the Android Subsystem.
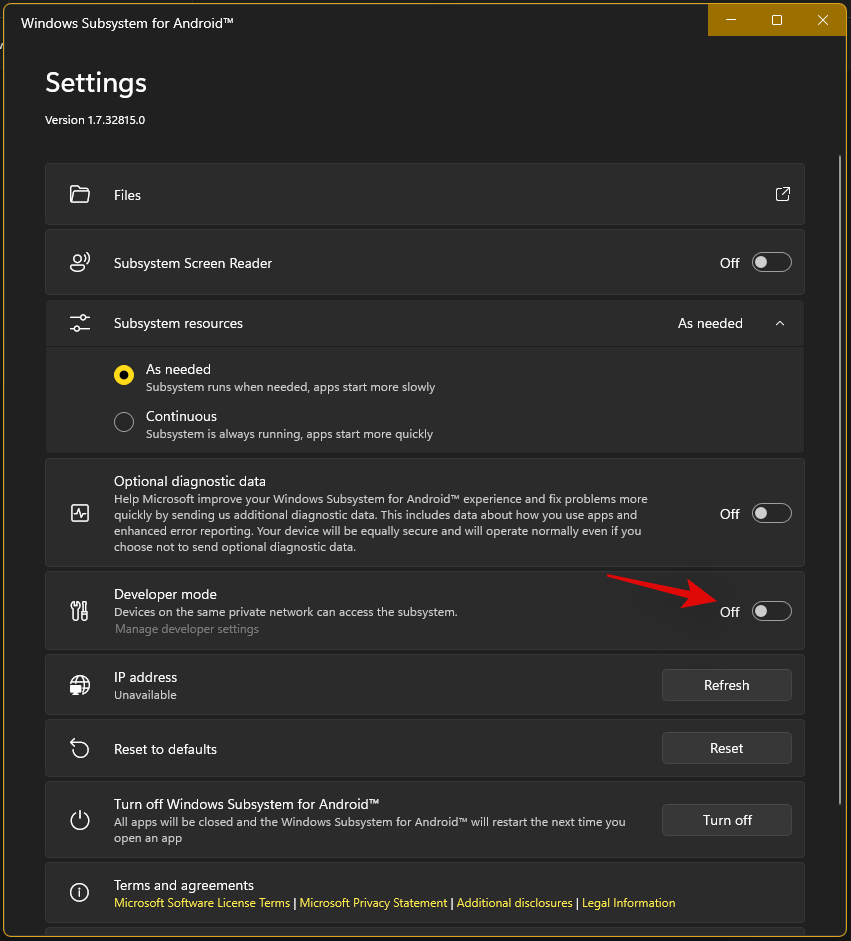
Click on ‘Files’ at the top to launch the Subsystem on your PC. You might have to wait a few minutes now depending on your PC.
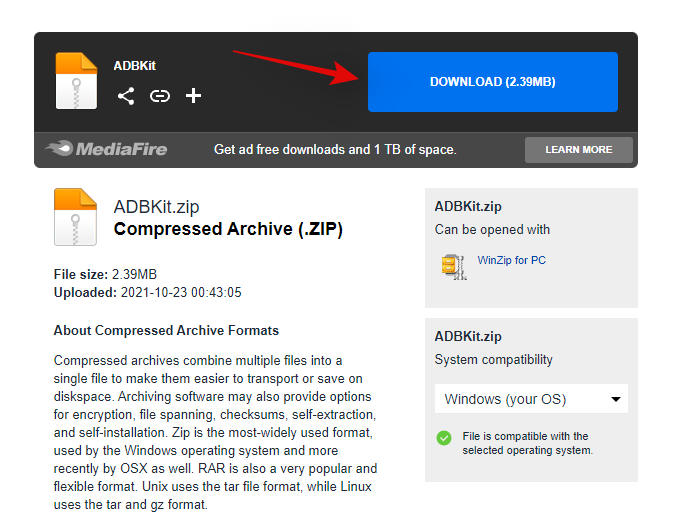
Close the Files app once it opens and download the ADBToolkit linked above.
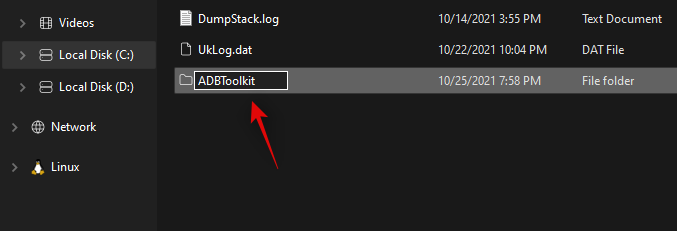
Now create a new folder on your boot drive and name it ‘ADBToolkit’.
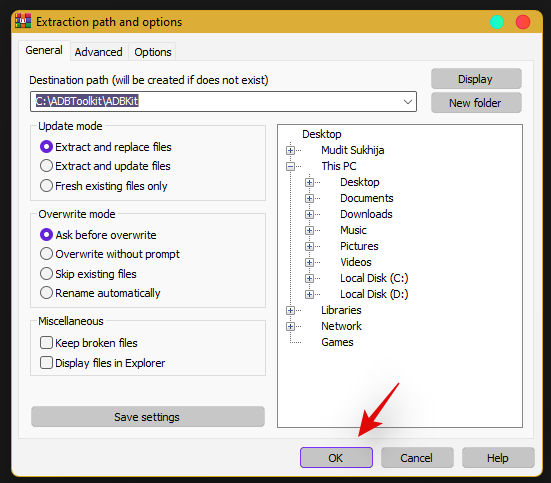
Extract the archive in the same location, and delete the archive and the original folder.
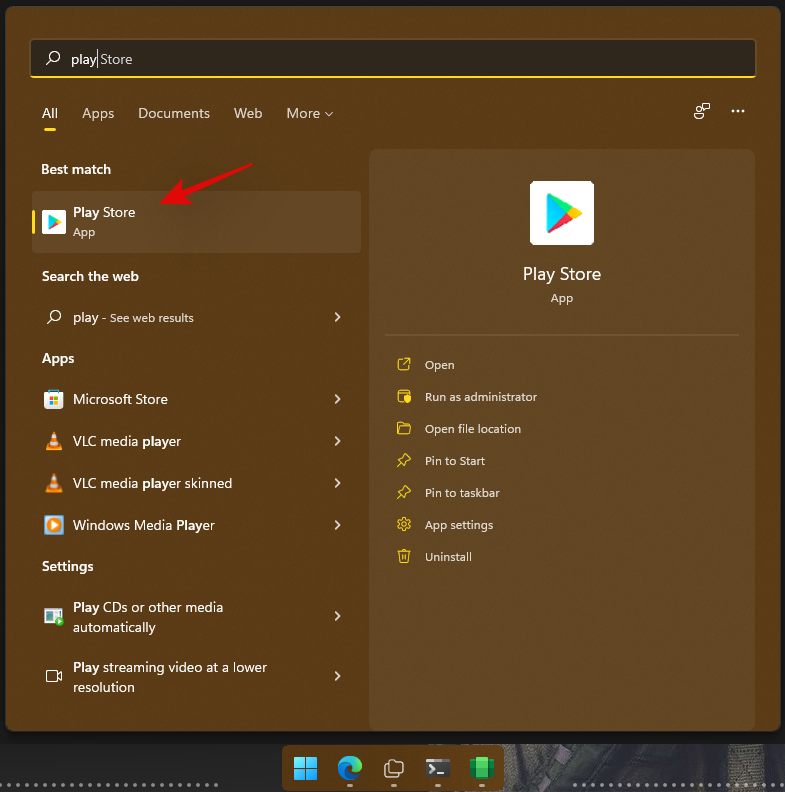
Press the Windows key, search for Play Store and launch it on your system. Do not click ‘Sign-in’ yet.
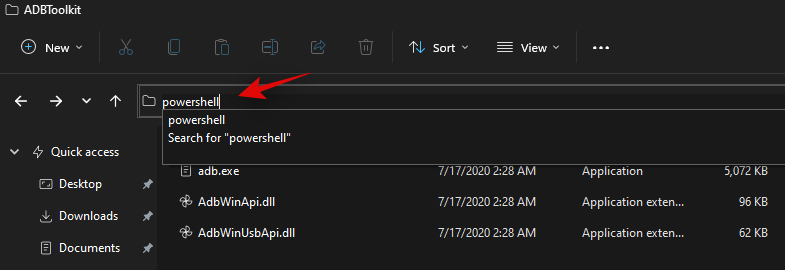
Go back to the ‘ADBToolkit’ folder and click on the address bar at the top, type in ‘Powershell’ and press Enter on your keyboard.
Go back to the Android Subsystem and note down the address shown below ‘Developer Mode’.
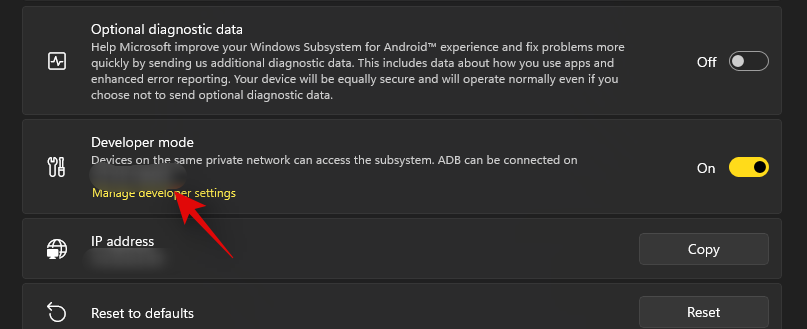
Note: If the address does not show up, simply click on ‘Refresh’ beside IP address.
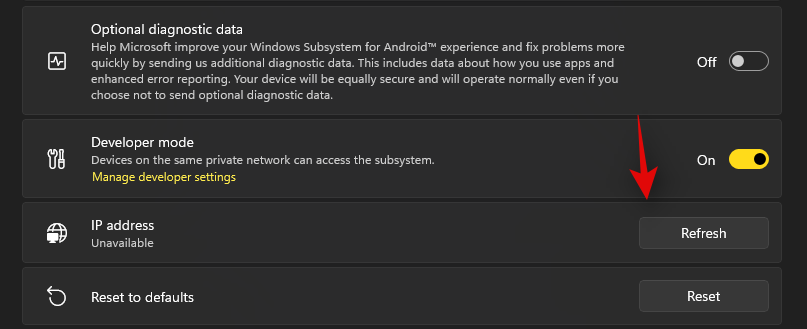
Type in and execute the following command. Replace ADDRESS with the address shown in the ‘Developer Mode’ section in the Android Subsystem.
.\adb.exe connect ADDRESS
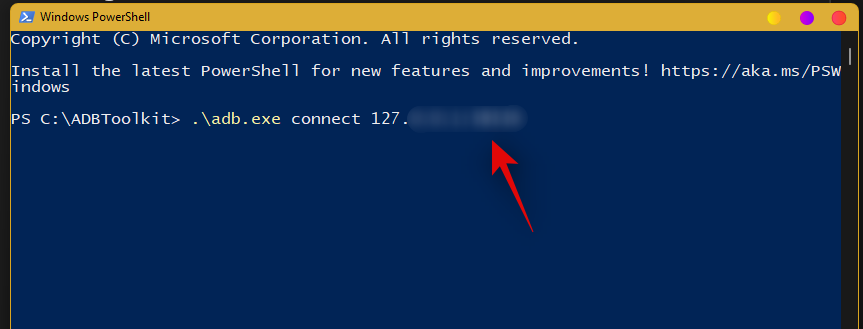
Once you are connected, execute the following command.
.\adb.exe shell
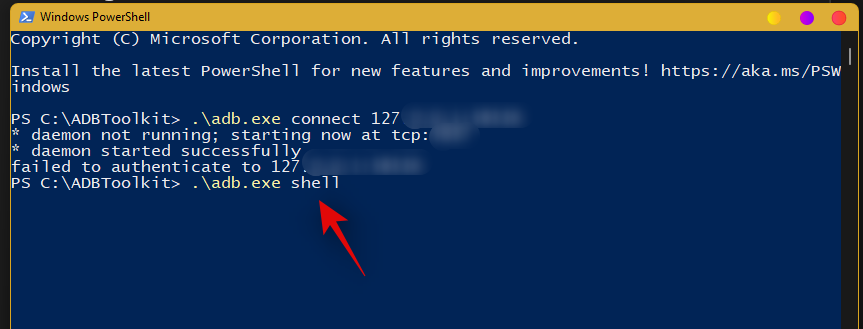
Type in the following command to gain root access.
su
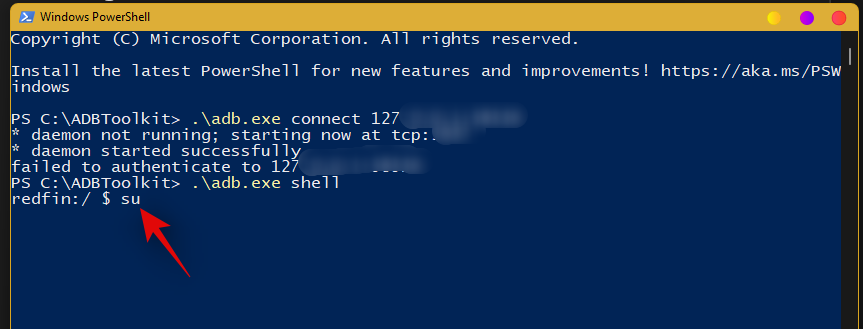
Execute the following command next.
setenforce 0
Now go back to the Play Store and click on ‘Sign-in’.
Sign in with your desired Google account now.
Note: This will also enable Google Sync, which by default will sync your Google data to Windows including things like Contacts, Calendar events, Browser history, and more.
Once you are signed in, close the Play Store. We now need to restore your original kernel. Open the Windows Subsystem for Android window and click on ‘Turn off’.

The Subsystem will now stop running in the background on your PC. Navigate to the ‘WindowsSubsystemForAndroid’ folder on your boot drive and open the ‘Tools’ folder.

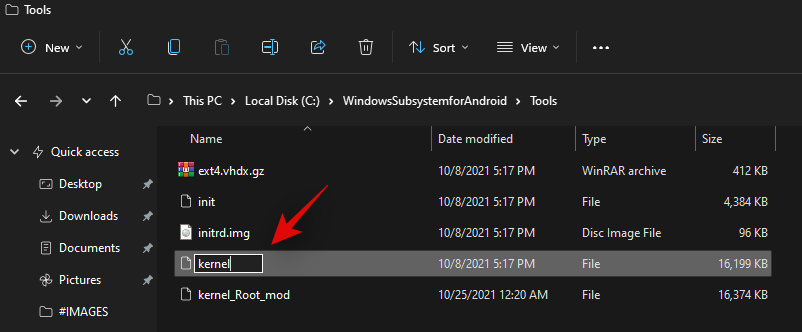
Rename the ‘kernel’ file to ‘kernel_Root_mod’.
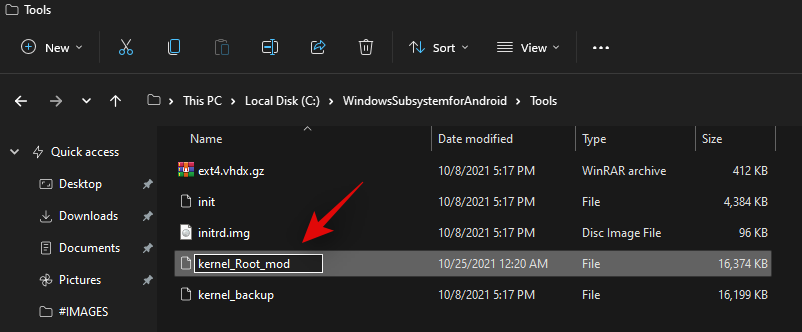
Similarly, rename ‘kernel_backup’ to ‘kernel’.
You can now close everything. We recommend you restart your system at this point. Once restarted, you should now be able to use the Play Store on your system while signed in with your Google account.
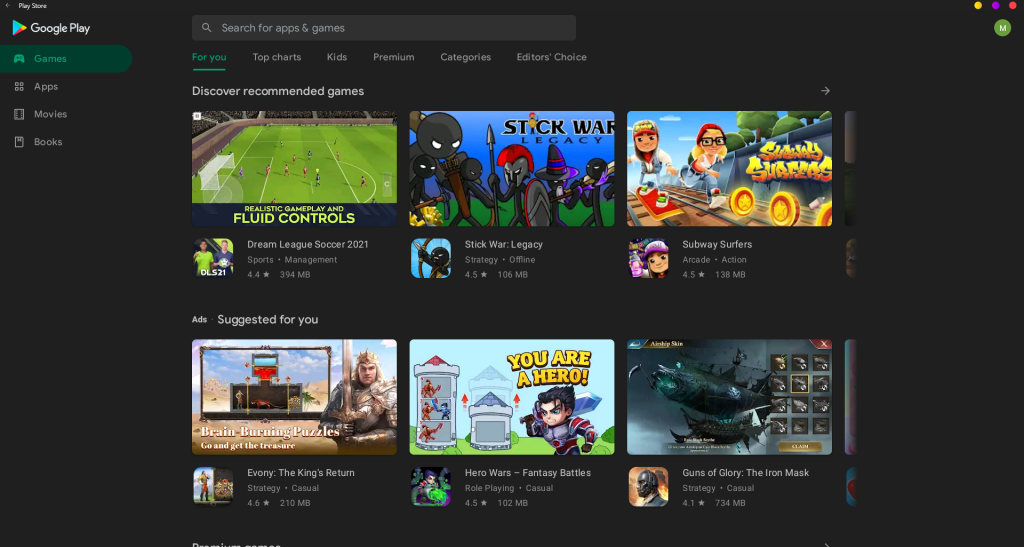
We hope you were able to easily set up and use GApps and Play Store on your PC using the guide above. If you face any issues or have any questions, feel free to reach out using the comments section below.
Related:


