Bežným problémom, s ktorým sa stretávajú používatelia systému Windows 10, podobne ako v prípade iných systémov, je chyba sieťového pripojenia. Často sa snažíme získať prístup k online obsahu, ale nedarí sa nám to. Namiesto toho sa na obrazovke zobrazuje nasledujúca správa – Windows 10 sa nemôže pripojiť k tejto sieti. Chyba internetového pripojenia sa môže vyskytnúť v dôsledku rôznych faktorov vrátane problémov s ovládačmi zariadení alebo problémov s aktualizáciou. Nech už je príčina akákoľvek, problém s pripojením môže byť frustrujúci pre každého používateľa.
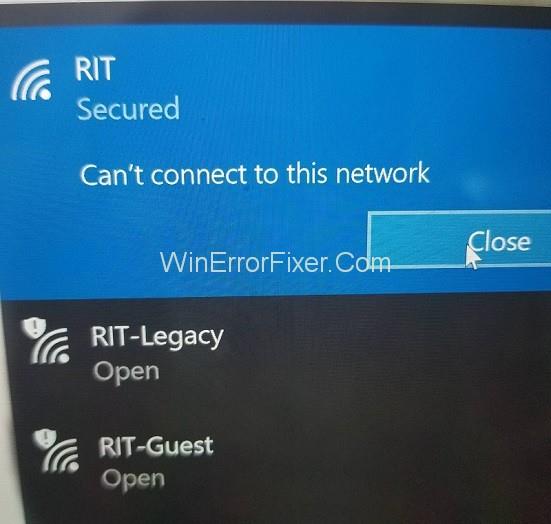
Tento článok je o rôznych spôsoboch, ako vyriešiť problém, keď sa Windows 10 nedokáže pripojiť k sieti. Tento článok sa zaoberá hlavne problémami s pripojením v bezdrôtovej sieti. Problém sa však môže vyskytnúť v rôznych scenároch a podľa toho boli spomenuté aj riešenia.
Obsah
Ako opraviť nemožnosť pripojenia k bezdrôtovej sieti Windows 10
Ak sa váš počítač nemôže pripojiť k sieti Wi-Fi, vyskúšajte nasledujúce metódy.
Riešenie 1: Aktualizácia ovládačov sieťového adaptéra
Problém s pripojením môže byť spôsobený zastaranými ovládačmi sieťového adaptéra. Aktualizácia ovládačov teda môže problém vyriešiť. Pri aktualizácii ovládačov sieťového adaptéra postupujte podľa nasledujúcich krokov:
Krok 1: Otvorte Správcu zariadení ako v predchádzajúcej metóde
Krok 2: Vyberte a rozbaľte položku Sieťový adaptér
Krok 3: Dvakrát kliknite na adaptér pre vašu bezdrôtovú sieť a vyberte Aktualizovať ovládače
Krok 4: Ďalej vyberte možnosť „ Automaticky vyhľadať aktualizovaný softvér ovládača . Systém Windows potom vyhľadá aktualizácie ovládačov online alebo v počítači. Ak sa to podarí, postupujte podľa zobrazených pokynov na inštaláciu a skontrolujte, či je chyba opravená.
Ak systém Windows nedokáže vyhľadať žiadnu aktualizáciu ovládača, môžete ovládače aktualizovať manuálne. Za týmto účelom postupujte nasledovne:
Krok 1: Prihláste sa do iného počítača s funkčným internetom. Na webovej lokalite výrobcu vyhľadajte aktualizácie ovládačov. Poznačte si názov modelu a číslo dotknutého počítača a vyhľadajte kompatibilnú aktualizáciu ovládača.
Krok 2: Stiahnite si spustiteľný súbor softvéru na aktualizáciu ovládača a skopírujte ho na USB flash disk.
Krok 3: Pripojte jednotku USB k príslušnému počítaču a uložte do nej súbor aktualizácie.
Krok 4: Prejdite do Správcu zariadení → Sieťové adaptéry a dvakrát kliknite na svoj bezdrôtový sieťový adaptér a vyberte Aktualizovať ovládač.
Krok 5: Vyberte možnosť „Vyhľadať softvér ovládača v mojom počítači“ . Potom prejdite na aktualizačný súbor, ktorý ste preniesli z USB, vyberte ho a kliknite na tlačidlo OK.
Krok 6: Dokončite inštaláciu aktualizácie podľa nasledujúcich zobrazených pokynov. Potom reštartujte počítač a skontrolujte, či je chyba vyriešená.
Manuálny proces aktualizácie ovládačov je nielen zdĺhavý, ale aj riskantný. Akákoľvek chyba pri výbere vhodnej aktualizácie ovládača na stiahnutie môže viesť k vážnym problémom. Preto je lepšie použiť nástroj na aktualizáciu ovládačov. Automaticky sa nainštalujú správne ovládače. Môžete si bezplatne nainštalovať vhodný nástroj na aktualizáciu ovládačov online.
Riešenie 2: Odinštalovanie sieťového adaptéra
Problém sieťového pripojenia môže byť spôsobený niektorými problémami so sieťovým adaptérom. V takom prípade môže problém vyriešiť odinštalovanie a opätovná inštalácia. Nasledujú kroky v tejto metóde:
Krok 1: Otvorte Správcu zariadení tak, že ho vyhľadáte vo vyhľadávacom paneli systému Windows alebo stlačením klávesov Windows + X a výberom z ponuky
Krok 2: Nájdite možnosť sieťového adaptéra v zozname zariadení a potom ju rozbaľte dvojitým kliknutím
Krok 3: V časti „Sieťové adaptéry“ nájdite adaptér vašej bezdrôtovej siete, kliknite naň pravým tlačidlom myši a vyberte možnosť Odinštalovať
Krok 4: V malom okne, ktoré sa otvorí, začiarknite možnosť „Odstrániť softvér ovládača pre toto zariadenie“ a kliknite na tlačidlo Odinštalovať
Krok 5: Reštartujte počítač a počkajte, kým sa adaptér automaticky preinštaluje. Teraz skontrolujte, či je problém Nedá sa pripojiť k tejto sieti vyriešený.
Riešenie 3: Zmena šírky kanála pre váš sieťový adaptér
Chyba pripojenia môže nastať v dôsledku nesprávneho nastavenia šírky kanála. Zmena šírky kanála sieťového adaptéra tak môže problém vyriešiť. Ak chcete vykonať túto zmenu, postupujte podľa nasledujúcich krokov:
Krok 1: Otvorte Ovládací panel.
Krok 2: Vyberte „ Sieť a internet “ po „ Centrum sietí a zdieľania “.
Krok 3: Kliknite na možnosť „ Zmeniť nastavenia adaptéra “.
Krok 4: Kliknite pravým tlačidlom myši na bezdrôtový adaptér a vyberte Vlastnosti.
Krok 5: V okne Vlastnosti kliknite na tlačidlo Konfigurovať.
Krok 6: V novom okne prejdite na kartu Rozšírené.
Krok 7: Vyberte šírku kanála 802.11 a zmeňte jej hodnotu. Nastavenie 20MHz ako novej hodnoty je údajne pohodlnejšie. Po vykonaní zmien kliknite na tlačidlo OK.
Riešenie 4: Zakázanie IPv6 na vašom počítači a smerovači
Zakázanie IPv6 pre vašu bezdrôtovú sieť môže pomôcť vyriešiť chybu Nedá sa pripojiť k tejto sieti. Nasledujú kroky tejto metódy:
Krok 1: Prejdite na Ovládací panel → Sieť a internet → Centrum sietí a zdieľania ako v predchádzajúcom procese.
Krok 2: Kliknite na svoju sieť WiFi a vyberte položku Vlastnosti. Prípadne prejdite na „Zmeniť nastavenia adaptéra“ a kliknite pravým tlačidlom myši na svoju sieť WiFi a vyberte položku Vlastnosti.
Krok 3: V zozname položiek nájdite možnosť „Internet Protocol Version 6 (TCP/IPv6)“ a zrušte začiarknutie políčka vedľa nej. Kliknutím na tlačidlo OK uložte zmeny.
Krok 4: Reštartujte počítač a skontrolujte, či bol problém odstránený.
V prípade, že táto metóda neprinesie výsledky, možno budete musieť zmeniť IPv6 na svojom WiFi routeri. Je to však zložitý postup a môže sa líšiť v závislosti od výrobcu a modelu smerovača. Riaďte sa pokynmi v návode alebo požiadajte o pomoc svojho operátora.
Riešenie 5: Uistite sa, že váš adaptér a smerovač používajú rovnaký typ zabezpečenia
WiFi routers use security features to safeguard the user’s data. Such features come under various types, such as WPA-PSK (AES) or WPA2-PSK (AES). The network connection can occur if the computer and router have different security types. Follow the steps mentioned below:
Step 1: Go to Control Panel → Network and Internet → Network and Sharing Center → Manage wireless networks
Step 2: Right-click your wireless network, and select Properties
Step 3: Enter the Security tab, and check if the security type matches that of the router. You may have to conduct a trial and error to identify the correct type. Once you have set the compatible security type, click OK.
Solution 6: Adding the Connection Manually
Manually adding your wireless network to the computer may rectify the problem. To do so, proceed as follows:
Step 1: Go to Control panel → Network and Internet → Network and Sharing Center.
Step 2: Select the option “Set up a new connection or network.”
Step 3: Click “Manually connect to a wireless network,” then click Next.
Step 4: Enter the details of the wireless network, such as network name, security type, and anything else requested. Finally, click Next.
Solution 7: Changing the Wireless Network Mode
The connection error may because due to different network modes of the network adapter and the router. To rectify this issue, the network mode of both must be set to the same one. To change the network mode of the router, follow the device manually. However, the router’s network mode need not be changed normally. To change the network mode for the adapter, follow the steps below:
Step 1: Go to Control Panel → Network and Internet → Network and Sharing Center → Change adapter settings.
Step 2: Right-click your wireless network and select Properties.
Step 3: In the Properties window, click Configure.
Step 4: In the new window, enter the Advanced tab, and select Wireless Mode in the items list
Step 5: Change the value to match with that of the router. Usually, selecting 802.11b or 802.11g yields results. In case they don’t work, try other available values on a trial and error basis until one works.
Solution 8: Forget the Wireless Connection
Choosing to “forget” the WiFi network and then reconnecting to it may rectify the connection error. To do so, proceed as follows:
Step 1: Open Settings in the Start menu or by pressing Windows + I.
Step 2: Select “Network and Internet“.
Step 3: Select “WiFi” in the left panel, and in the WiFi section, click the option “Manage known networks.”
Step 4: Select your WiFi network, and choose to Forget.
Step 5: Reconnect to the WiFi afresh, and see if the Can’t connect to this network is solved.
Solution 9: Disabling and Enable Your Wireless Connection
Another simple hack that may fix the problem is to disable the WiFi connection, followed by enabling it again. To do so, proceed as follows:
Step 1: Go to Control Panel → Network and Internet → Network and Sharing Center → Change adapter settings.
Step 2: Right-click your WiFi network and select Disable.
Step 3: Next, right-click it again and select Enable.
Solution 10: Install the Driver Manually
Often, the connection problem is due to a faulty driver, which needs to be updated manually. For this, you need to have updated versions of driver software stored on your computer. If you do, follow the steps below:
Step 1: Go to Device Manager → Network adapters, and double-click your wireless network adapter, and select Update Driver.
Step 2: Select the option “Browse my PC for driver software.”
Step 3: Next, select the option “Let me pick from a list of device drivers on my computer.”
Step 4: If the option “Show compatible hardware” is checked, uncheck it.
Step 5: Locate and select your network adapter’s manufacturer and model, and click Next. Then choose the driver you want to install.
Step 6: Once the installation is complete, restart the system and check if the issue is resolved.
Ideally, updating drivers manually is not a recommended step, as any mistake can lead to further complications. However, if no other solution works, then faulty drivers may very well be the cause of the problem, and they need to be changed.
Solution 11: Use IPConfig/Release Command
The connection error can be fixed by running Command Prompt to reconfigure the IP address. For this purpose, follow the steps below:
Step 1: Open Command Prompt as an administrator, by searching “cmd” in the Windows search bar and then selecting the “Run as administrator” option below the search result
Step 2: In Command Prompt, type the following commands and press Enter:
ipconfig /release ipconfig /renew
Execute the commands, and check whether the error is solved.
Solution 12: Change your Network Adapter
The problem may be caused due to incompatibility between the network adapter and Windows OS. This is particularly the case regarding many USB adapters of WiFi. In such case, replacing the adapter with another one may help solve the issue.
How to Fix Can’t Connect to This Network After Upgrade in Windows 10
In case the connection error occurs after a recent upgrade, there are certain solutions that may work, which are discussed below.
Solution 1: Use Command Prompt
Running certain commands may fix the error in the given scenario. Proceed as follows:
Step 1: Firstly, open Command Prompt as administrator.
Step 2: Secondly, enter the following two commands and press Enter after each one:
reg delete HKCRCLSID{988248f3-a1ad-49bf-9170-676cbbc36ba3} /va /f netcfg -v -u dni_dne
Step 3: Lastly, restart the computer and check whether the error is rectified.
Solution 2: Uninstall Antivirus Software
The connection error, like many other problems, are often caused by the antivirus or antimalware software. Temporarily disable or uninstall the antivirus and check if the error persists. The way to disable any or all features of your antivirus depends on which antivirus you are using. To completely uninstall it, proceed as follows:
Step 1: Open Settings.
Step 2: Enter the Apps section, and select your antivirus, then click Uninstall.
If the problem persists after disabling or uninstalling the antivirus, it wasn’t the cause. In such a case, restore the antivirus. If the problem gets solved, the antivirus was indeed the cause, in which case seek help on the manufacturer’s website, or install a new antivirus. In either case, do not leave your computer without antivirus for long.
Solution 3: Check If IPv4 and IPv6 Protocols Are Enabled
Often, the IPv4 and IPv6 protocols may get turned off after an upgrade, thus causing the connection error. To ensure this is not the case, and rectify it if it is, proceed as follows:
Step 1: Go to Control Panel → Network and Internet → Network and Sharing Center → Change adapter settings.
Step 2: Right-click on your network and select Properties
Step 3: In the Properties window, check whether the IPv4 and IPv6 options are enabled. If not, enable them, and click OK.
Step 4: If the problem is still not resolved, go through these steps again and enable all the options in the Properties window.
How to Fix Can’t Connect to This Network, Enter an APN and Try Again
The following solution is applicable in the case of mobile phones using Windows 10. The Access Point Name (APN) of a mobile phone is crucial to its internet connection, and it is normally set automatically. However, in case of a connection problem on your phone, entering the APN may fix the problem. For this, you may have to contact your mobile’s manufacturer or check online on another device to obtain your APN information.
Solution 1: Enter new Internet APN
Following are the steps to add APN to your phone:
Step 1: Firstly, go to Mobile networks → SIM settings.
Step 2: Secondly, select the “Add Internet APN” option.
Step 3: Lastly, enter the APN information you obtained and click Save.
How to Fix Can’t Connect to This Network After Waking From Sleep Mode in Windows 10
Try the following solutions in case the connection error occurs after the computer wakes from sleep mode.
Solution 1: Disable IPv6/Change Power Management Settings
Disabling the IPv6 protocol may help fix the error, and the way to do so has been discussed in solution 4 under the wireless network category. Also, changing the Power Management settings may help. Proceed as follows to implement this method:
Step 1: Open Device Manager and locate the Network Adapters option, then double-click it to expand it
Step 2: Right-click your wireless adapter and select Properties.
Step 3: In the Properties window, go to the Power Management tab.
Step 4: Uncheck the box next to the option “Allow the computer to turn off this device to save power,” and click OK.
In case you are using a USB network adapter, implement these steps for all the USB devices.
Solution 2: Change Power Options
Step 1: Firstly, open Control Panel, and enter the “Hardware and Sound” section.
Step 2: Secondly, select Power Options.
Step 3: Find the power plan currently in use, and click the “Change plan settings” option next to it.
Step 4: In the next window, select the option “Change advanced power settings.”
Step 5: In the Advanced Settings window, scroll down the list and choose Wireless Adapter Settings. Expand it and select Power Saving Mode.
Step 6: At last, set it to Maximum Performance, then click Apply and OK.
This method should help fix the problem. In case it does not yield results, you can set the power plan to High Performance. To do this, go to the Power Options section and select the High-Performance power plan.
Solution 3: Turn off Connect to WiFi Hotspots
Reportedly, turning off the “Connect to WiFi Hotspots” feature helps fix the connection error after the computer wakes from sleep mode. To disable Hotspots connection, proceed as follows:
Step 1: Open Settings and enter Network and Internet section.
Step 2: Select “WiFi” in the left panel.
Step 3: In the WiFi section, ensure that the options “Connect to WiFi Hotspots” and “Send information about WiFi connections to help discover nearby WiFi” are disabled.
Solution 4: Disable and Enable your Network Connection/Turn On and Off Airplane Mode
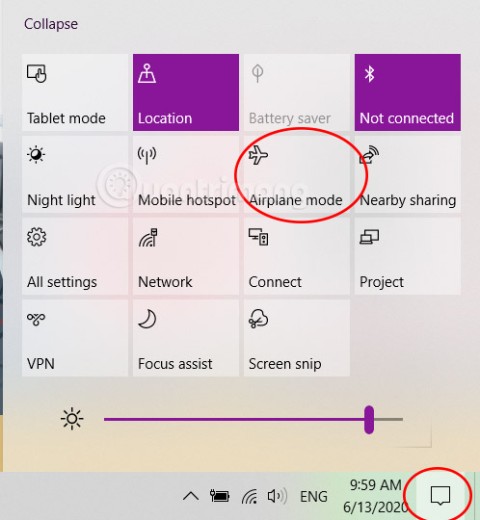
A simple hack that often solves a connection error is to turn off the network connection and then turn it back on. An easy way to do this is to enable Airplane mode, as it disables all connections. Turn on Airplane mode, then turn it off after a short moment. It may fix the error.
How to Fix Can’t Connect to This Network After Password Change in Windows 10
Solution 1: Forget your Network, Delete your Network from Preferred Networks List, Check Your Security Type
In case the connection error is taking place after a recent change to the WiFi password, one option is to “forget” the network. Another option is to check the security type and change it. Both of these techniques have been discussed above.
Yet another option is to remove the network from the Preferred Networks list. To do this, proceed as follows:
Step 1: Go to Control Panel → Network and Internet → Network and Sharing Center → Change adapter settings.
Step 2: Right-click on your wireless network and select Properties
Step 3: In the Properties window click Configure
Step 4: Enter the Wireless Networks tab, and remove the network from the Preferred Networks list, and click OK.
How to Fix Windows 10 Can’t Connect to This Network and WEP Problems
WEP is not the best or safest security type. It is best to shift to a safer alternative like WPA2, but then it has to be changed for the router as well, which is a complicated process. Thus, the following solution is given in case your network has WEP security type.
Solution 1: Create Connection By Yourself
As described in solution 6 under the wireless network category, connect to your network manually. In the section where network details have to be entered, enter the security type as WEP. This should fix the connection error.
Read Next:
Záver
Nakoniec sa diskutovalo o niekoľkých technikách na opravu chyby „Windows 10 sa nemôže pripojiť k tejto sieti“ . V závislosti od presnej príčiny problému by každé z uvedených riešení malo priniesť pozitívny výsledok.
