Všetci máme chvíle, kedy by sme si priali, aby sme sa mohli vrátiť do predchádzajúceho okamihu a obnoviť to, ako to vtedy bolo. Aj keď je to v reálnom živote nepravdepodobné, je to jednoduchá realita v systéme Windows 11 (rovnako ako v predchádzajúcich iteráciách systému Windows), pretože nám dáva možnosť vrátiť sa k systému v predchádzajúcom okamihu.
Na to je však potrebné vytvoriť bod obnovenia manuálne alebo aspoň nakonfigurovať systém Windows tak, aby sa tieto body vytvárali automaticky. Tu je všetko, čo potrebujete vedieť na vytvorenie bodov obnovenia v systéme Windows 11 a na čo sú dobré.
Obsah
Ako manuálne vytvoriť bod obnovenia v systéme Windows 11
Z akéhokoľvek dôvodu, ak chcete vytvoriť bod obnovenia sami, existuje niekoľko spôsobov, ako to urobiť. Poďme sa na ne pozrieť a vytvoriť obnovenie ručne.
Metóda #01: Použitie vlastností systému
Stlačte tlačidlo Štart, napíšte „Vytvoriť bod obnovenia“ a vyberte možnosť, ako je uvedené nižšie.
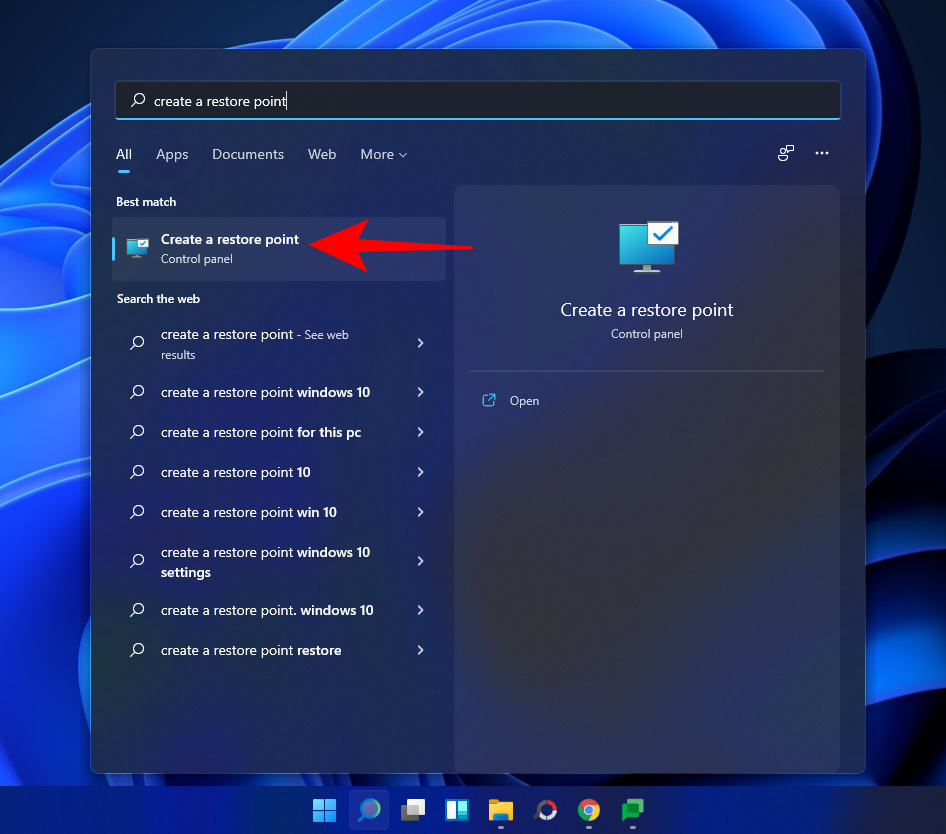
Tým sa otvorí okno Vlastnosti systému. Kliknite na tlačidlo Vytvoriť v spodnej časti.

Ak je táto položka sivá, musíte najskôr zapnúť ochranu systému (pozrite si predchádzajúcu časť).
Pomenujte tento bod obnovenia a kliknite na Vytvoriť .
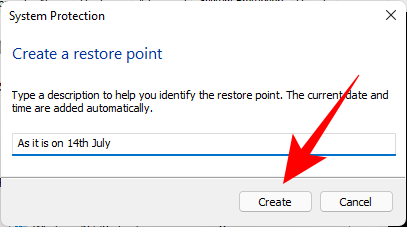
Vytvorenie tohto bodu obnovenia môže chvíľu trvať, takže buďte trpezliví.
Metóda #02: Použitie príkazového riadka
Ďalším spôsobom, ako vytvoriť bod obnovenia, je urobiť to z príkazového riadka. Postup:
Stlačte Štart, zadajte cmd a kliknite na Spustiť ako správca .

Teraz zadajte nasledujúci príkaz a stlačte kláves Enter:
wmic.exe /Namespace:\\root\default Path SystemRestore Call CreateRestorePoint "Restore Point Name", 100, 7

Nahraďte Restore Point Namevyššie uvedený príkaz čímkoľvek, čo chcete nazvať bod obnovenia. Váš bod obnovenia systému sa úspešne vytvorí, keď dostanete správy 'Spustenie metódy úspešné' a 'ReturnValue=0'.

Metóda #03: Použitie prostredia PowerShell
Pokročilí používatelia môžu vytvárať body obnovenia aj pomocou PowerShell. Postup:
Stlačte Štart, napíšte PowerShell a vyberte Spustiť ako správca .

Teraz zadajte nasledujúci príkaz a stlačte kláves Enter:
powershell.exe -ExecutionPolicy Bypass -NoExit -Command "Checkpoint-Computer -Description 'Restore Point Name' -RestorePointType 'MODIFY_SETTINGS'"

Nahraďte Restore Point Namevyššie uvedený príkaz čímkoľvek, čo chcete nazvať bod obnovenia. Mali by ste vidieť správu o priebehu vytvárania bodu obnovenia.

Ak PowerShell zobrazí správu (ako je uvedené nižšie), že nemôžete vytvoriť viac ako jeden bod obnovenia systému za 24 hodín, budete musieť upraviť register.
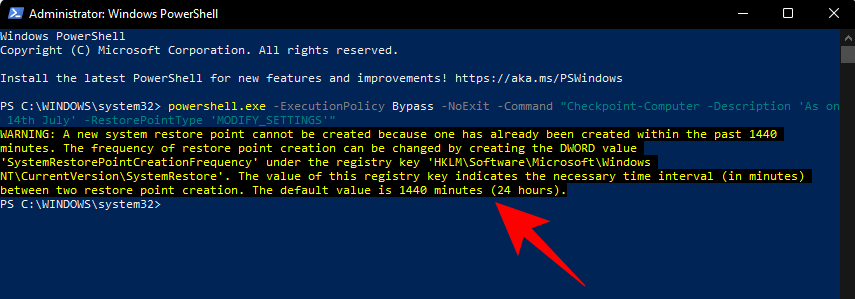
Ak to chcete obísť, pozrite si opravy uvedené neskôr.
Ako automaticky vytvoriť bod obnovenia
Systém Windows v niektorých prípadoch vytvára body obnovenia sám automaticky, ale môžete ich tiež nastaviť tak, aby sa vytvorili pri každom reštarte. Pozrime sa najprv na obe tieto témy.
Pozrite si už automaticky vytvorené body obnovenia podľa systému
Ak sú konfigurácie bodov obnovenia systému nastavené správne, Windows 11 automaticky vytvorí body obnovenia, ku ktorým sa môžete vrátiť. Tu je návod, ako zabezpečiť, aby sa systém Windows postaral o časovú kapsulu vášho počítača za vás:
Stlačte Štart, napíšte „Vytvoriť bod obnovenia“ a vyberte možnosť, ako je uvedené nižšie.
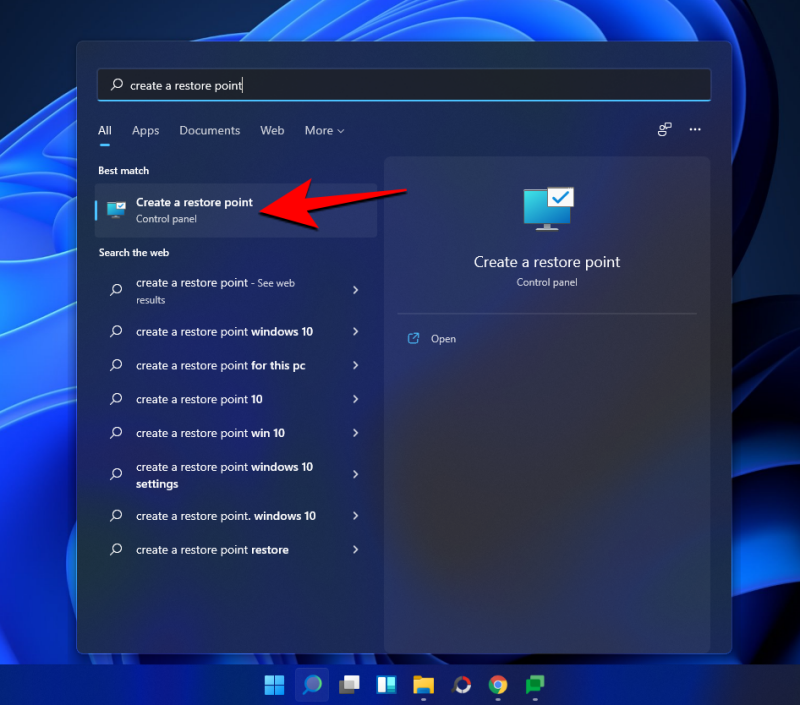
Tým sa otvorí okno Vlastnosti systému. Vyberte systémový disk a kliknite na Konfigurovať .
Teraz vyberte Zapnúť ochranu systému .

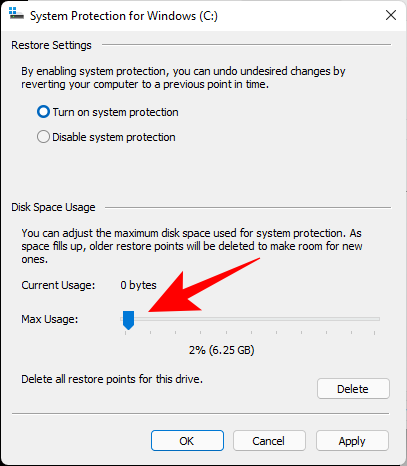
Systém Windows sám automaticky pridelí miesto na disku bodom obnovenia systému. Môžete však zmeniť, koľko miesta na disku môže použiť systémová ochrana. Ak to chcete urobiť, posuňte posúvač pod 'Využitie miesta na disku' a prideľte si miesto na disku sami.
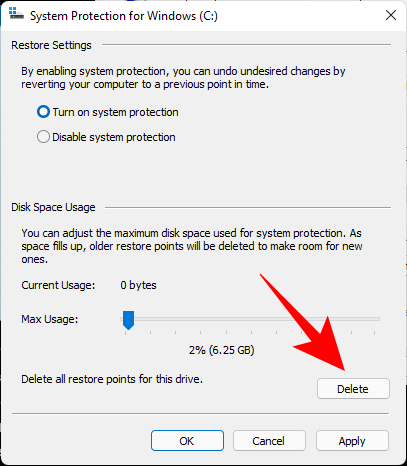
K dispozícii je tiež tlačidlo Odstrániť na odstránenie predchádzajúcich bodov obnovenia. Po dokončení kliknite na „Použiť“.
Windows 11 vytvorí body obnovenia systému vždy, keď sa vykonajú veľké zmeny, napríklad keď sa použijú nové aktualizácie.
Ako automaticky vytvoriť bod obnovenia systému pri spustení
Ak sa nechcete trápiť s vytváraním bodov obnovenia systému zakaždým, keď vykonáte zmenu, ktorá by mohla potenciálne narušiť fungovanie vášho systému, môžete nastaviť, aby sa body obnovenia vytvárali automaticky pri spustení. Postup:
Prvá vec, ktorú musíte urobiť, je zmeniť frekvenciu vytvárania bodu obnovenia. V predvolenom nastavení systém Windows nevytvorí bod obnovenia, ak bol vytvorený za posledných 24 hodín. Ak to chcete zmeniť, postupujte podľa nasledujúcich krokov:
Stlačením Win + Rotvorte pole RUN, zadajte príkaz regedit a stlačte Enter.

Teraz prejdite na nasledujúcu adresu (alebo ju skopírujte a prilepte do panela s adresou registra):
Computer\HKEY_LOCAL_MACHINE\SOFTWARE\Microsoft\Windows NT\CurrentVersion\SystemRestore

Kliknite pravým tlačidlom myši na prázdne miesto napravo a vyberte položku Nový , potom Hodnota DWORD (32-bitová) .
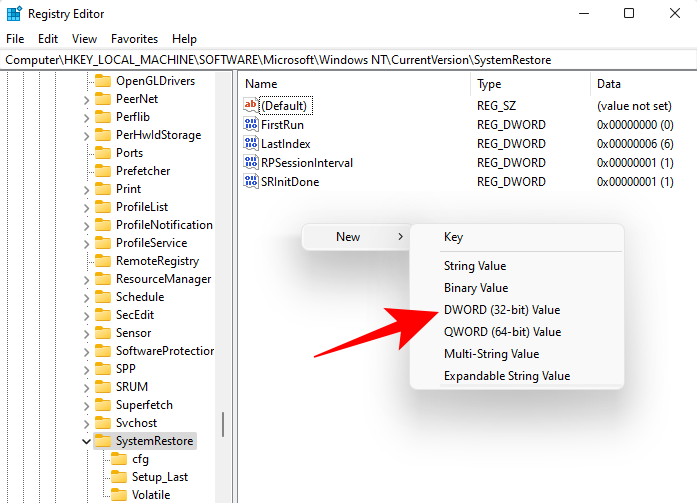
Pomenujte ho SystemRestorePointCreationFrequency .
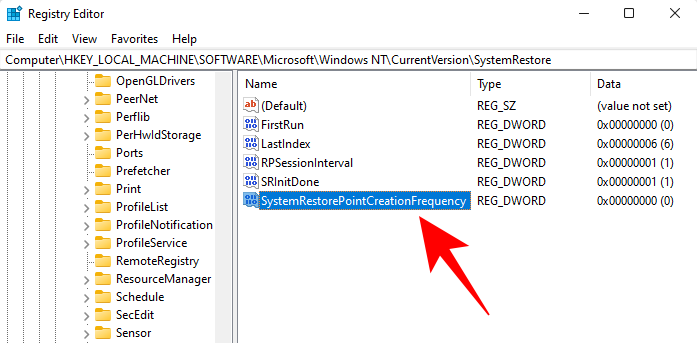
Štandardne je jeho hodnota nastavená na 0. Nechajte to tak a zatvorte editor registra.
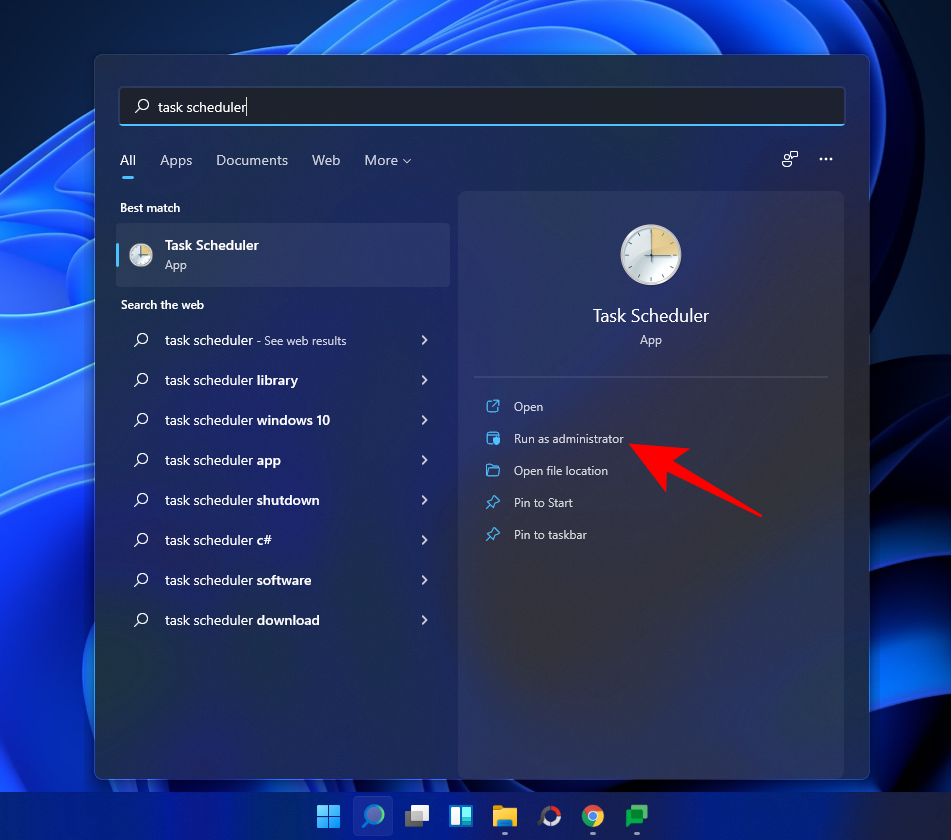
Teraz je ďalším krokom vytvorenie úlohy v Plánovači úloh systému Windows, aby sa pri každom spustení systému Windows vytvoril bod obnovenia. Ak to chcete urobiť, stlačte tlačidlo Štart, napíšte Plánovač úloh a stlačte Enter.
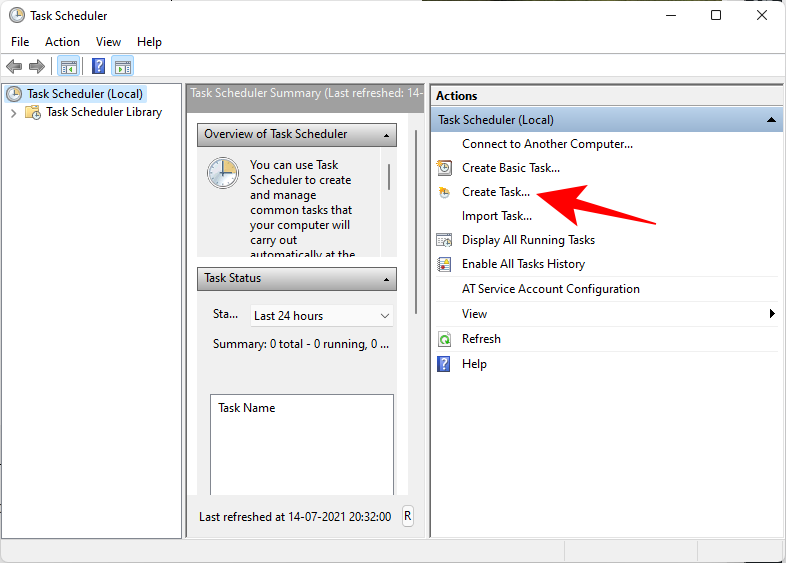
V pravom paneli kliknite na Vytvoriť úlohu .
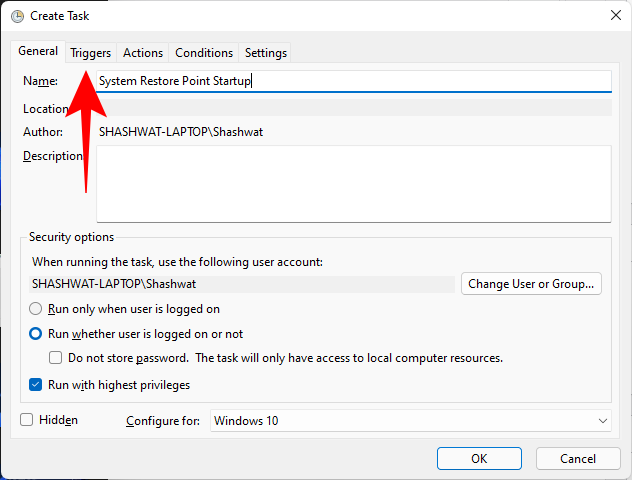
Teraz na karte „Všeobecné“ pomenujte túto úlohu a vyberte možnosť Spustiť bez ohľadu na to , či je používateľ prihlásený alebo nie , a možnosť Spustiť s najvyššími oprávneniami .
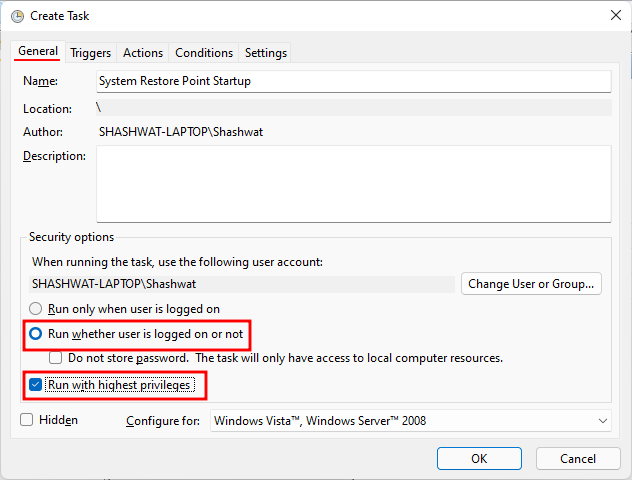
V spodnej časti tiež kliknite na prepínač vedľa položky „Konfigurovať pre“ a vyberte Windows 10 .

Nerobte si starosti, ak Windows 11 nie je medzi možnosťami. Keďže zatiaľ neexistuje stabilná zostava pre Windows 11, možno Windows 11 ešte neuvidíte. Buďte si však istí, že možnosť Windows 10 bude stále fungovať.
Teraz kliknite na kartu „Spúšťače“ a prepnite na ňu.
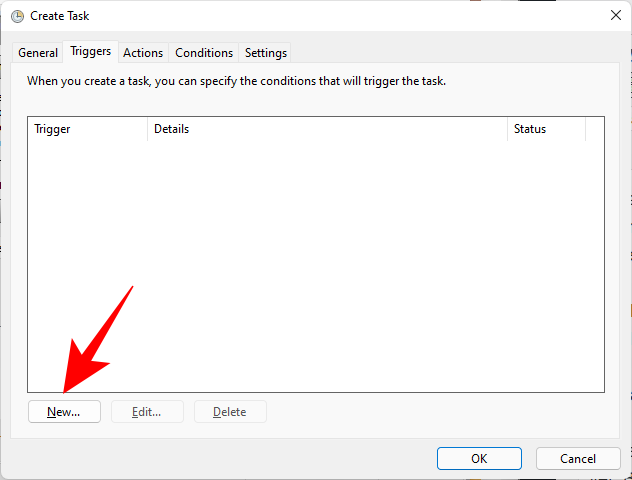
Potom kliknite na Nový v dolnej časti.
Teraz kliknite na rozbaľovaciu ponuku vedľa položky „Začať túto úlohu“ a vyberte možnosť Pri spustení .
Potom kliknite na tlačidlo OK

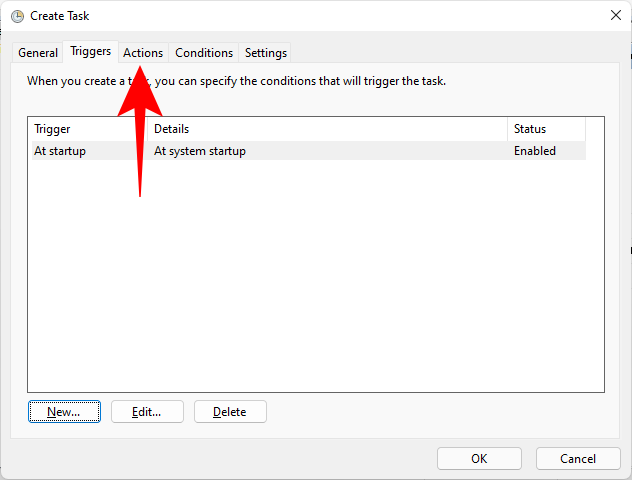
Potom kliknite na kartu „Akcie“ a prepnite sa na ňu.
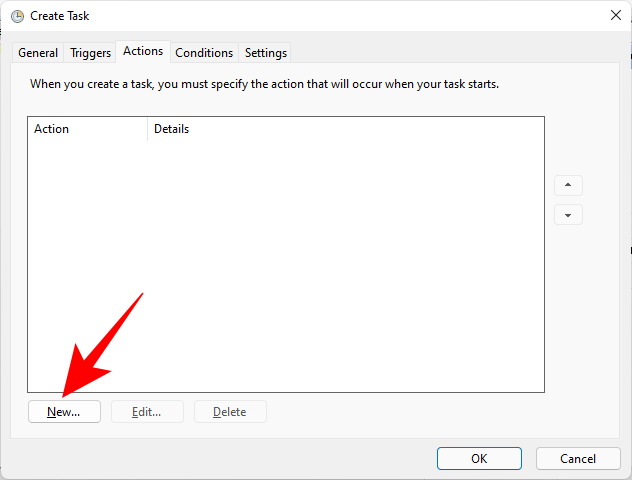
V spodnej časti kliknite na Nový .
Here, we will use a few arguments to run Windows Management Instrumentation Control Program and to let it know which action needs to be taken. In the “New Action” window, ensure that the Action is to “Start a program” (default).
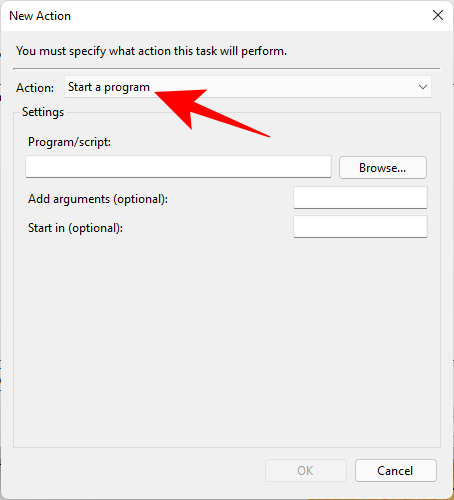
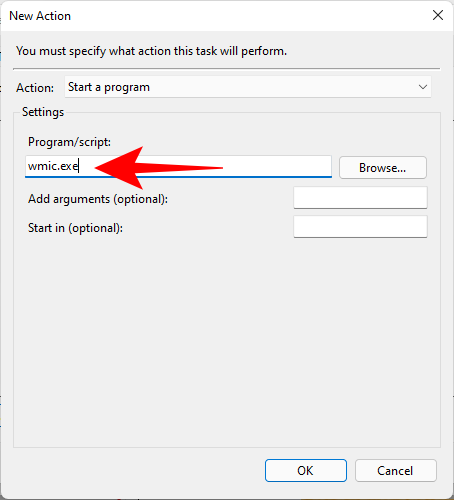
In the Program/script field, type wmic.exe.
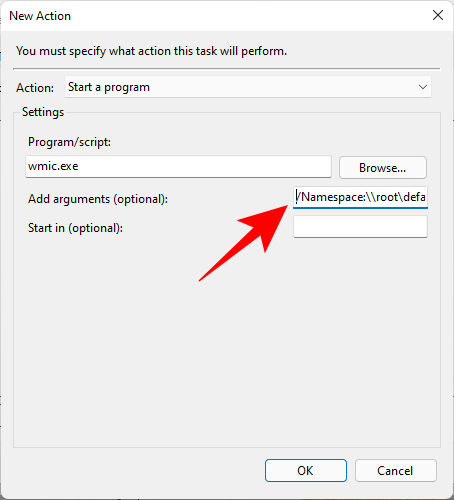
Then, next to “Add arguments (optional)”, type the following command:
/Namespace:\\root\default Path SystemRestore Call CreateRestorePoint "Startup Restore Point", 100, 7
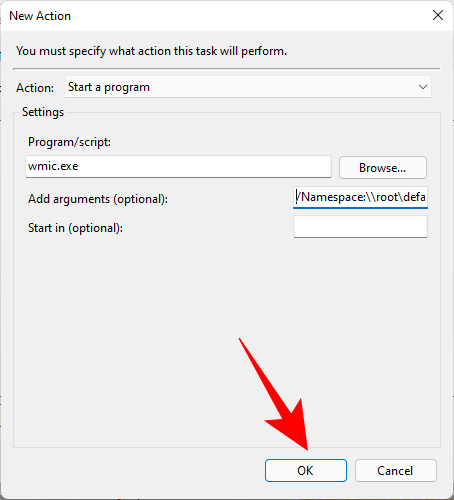
Then click OK.
Now, switch to the “Conditions tab”.
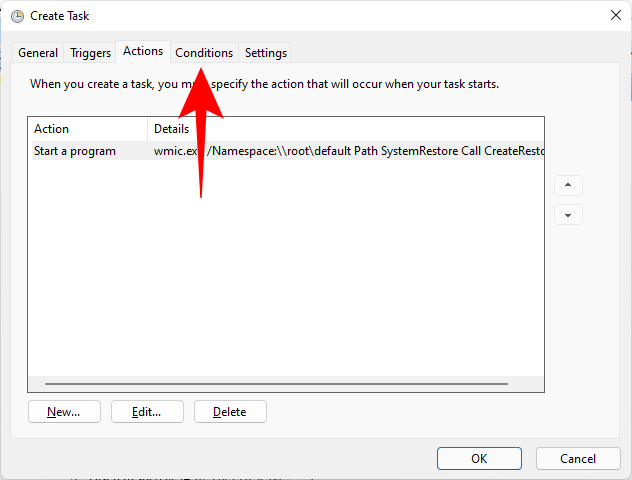
If you’re using a laptop, uncheck the option under “Power” that says Start the task only if the computer is on AC power. Then click OK.
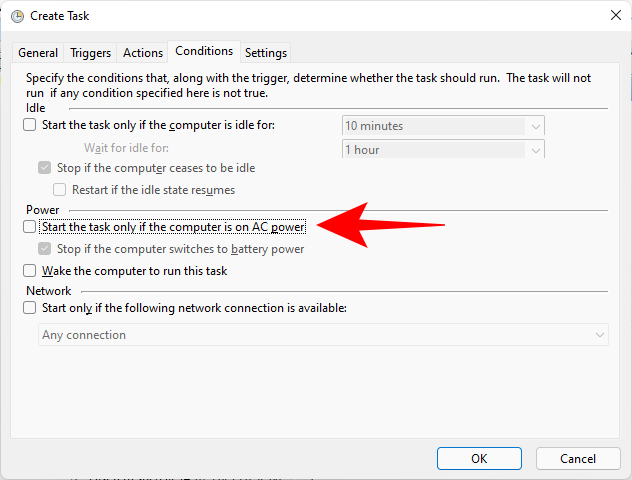
Task Scheduler will prompt you to enter your password to complete setting up the task. Do so and click OK.
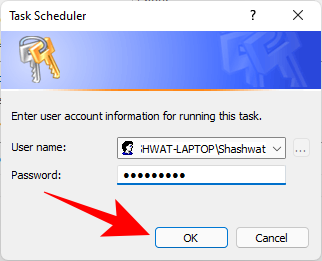
And that’s it. Now, every time you start your computer, a system restore point will be created.
How to restore Windows 11 back to a restore point
If your system runs into any trouble, you can use your restore points, whether they be created automatically or manually, to get your system back to how it was before.
There are a few ways you can restore your system. Depending on how bad a trouble your system has run into, you can use a different way to restore it.
Method #01: Using System Properties
This is the simplest way to restore your system, but it also requires you to be able to at least access the desktop and the start menu.
Press Start, type ‘Create a restore point’, and choose the option as shown below.
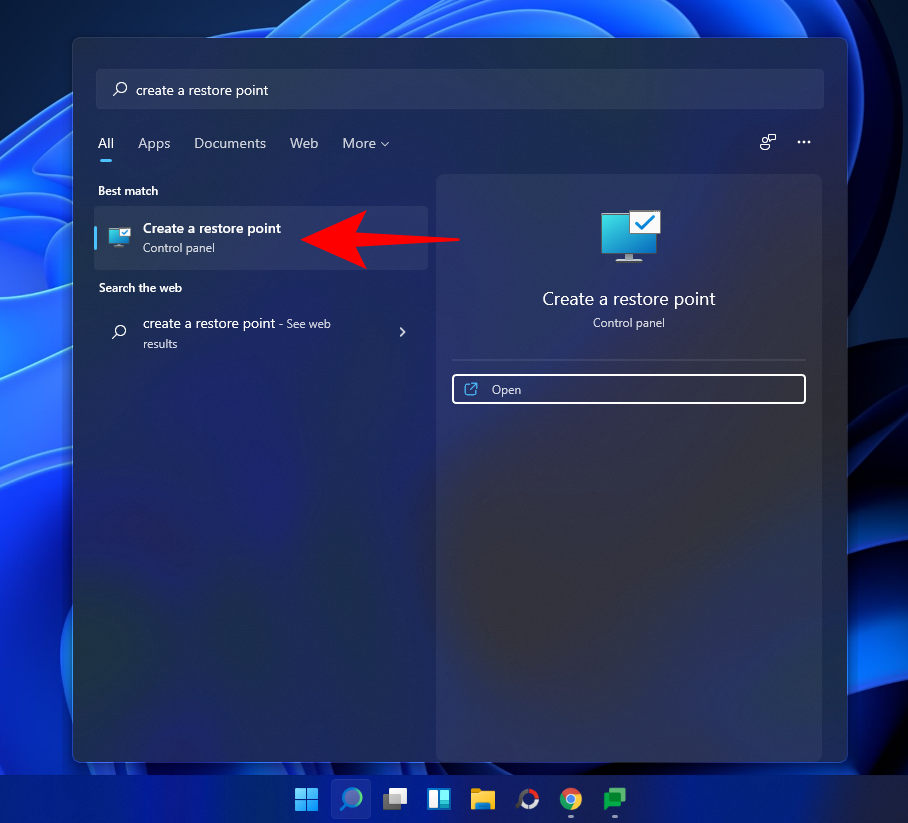
This will open up the System Properties window. Here, click on System Restore.
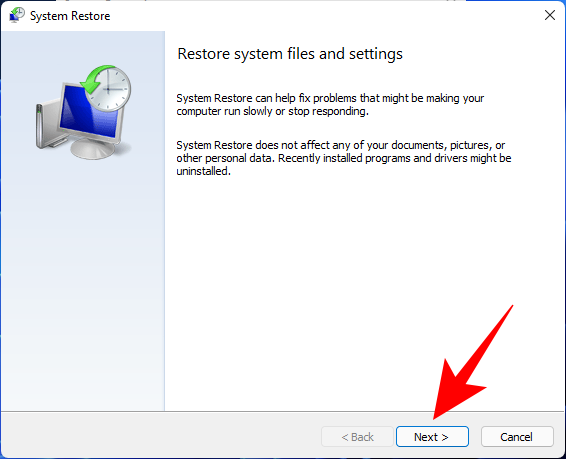
This will lead you to the System Restore window. Click Next.
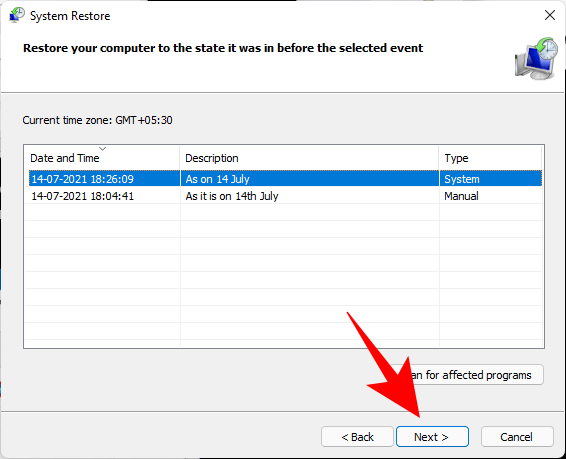
Select a system restore point and click Next.
Click Finish.
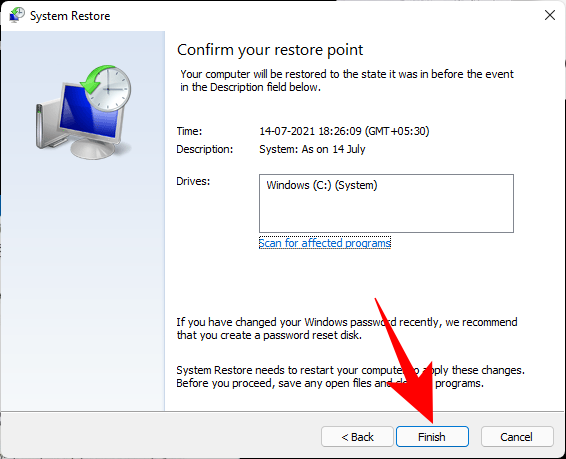
Your system will now be restored.
Method #02: Using Advanced Startup
If you are not able to boot up your system, you may have to access the Advanced Startup settings and restore your system through it. There are a couple of ways you can access the Advanced Startup screen.
The first way is to turn off the device and pressing F8 before you see the Windows logo. This will boot your PC into recovery.
An alternate way is to access recovery using Windows installation media. In the Windows Setup, click Next…
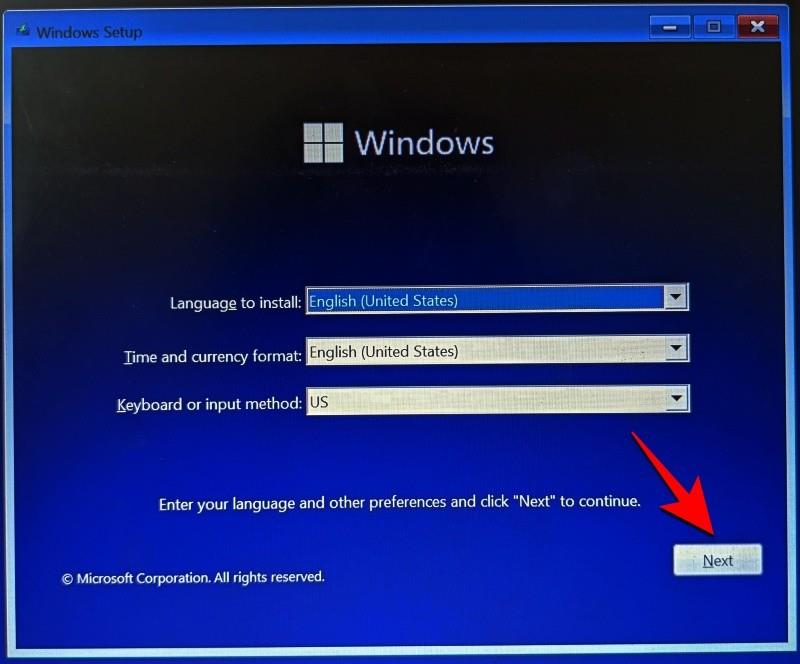
and then click on Repair your computer in the bottom left corner.
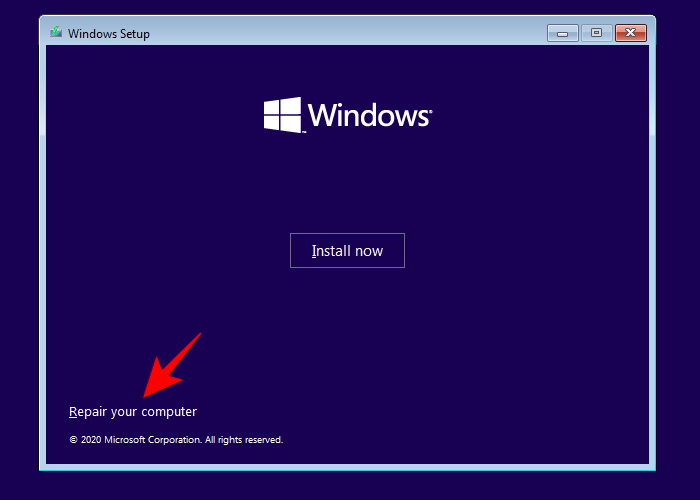
Both these ways will get you to Advanced Startup.
Select Troubleshoot.
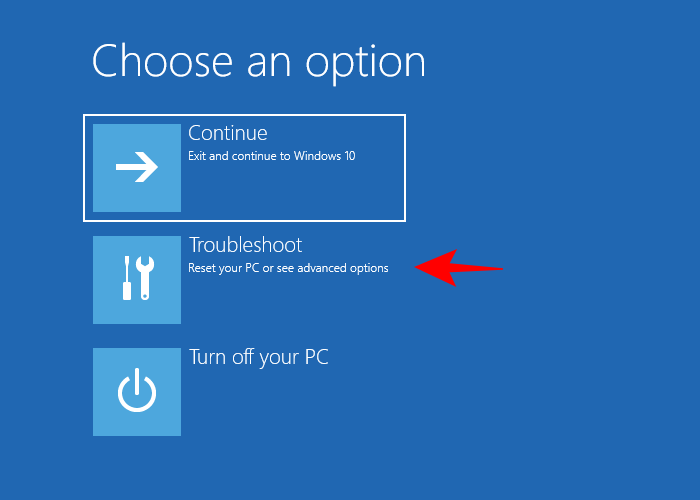
Then Advanced options.
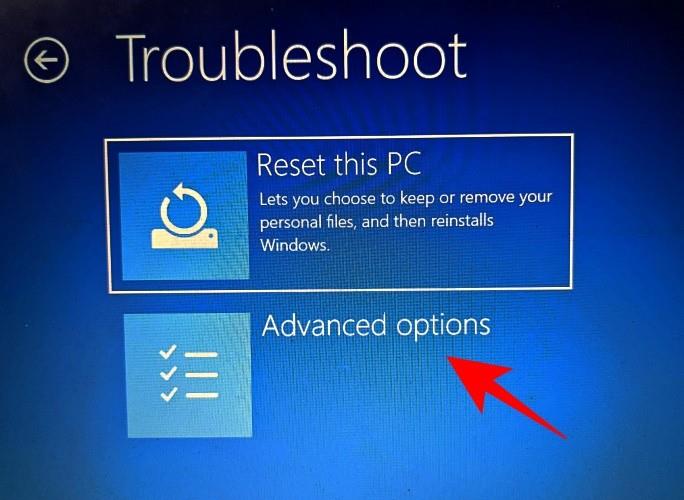
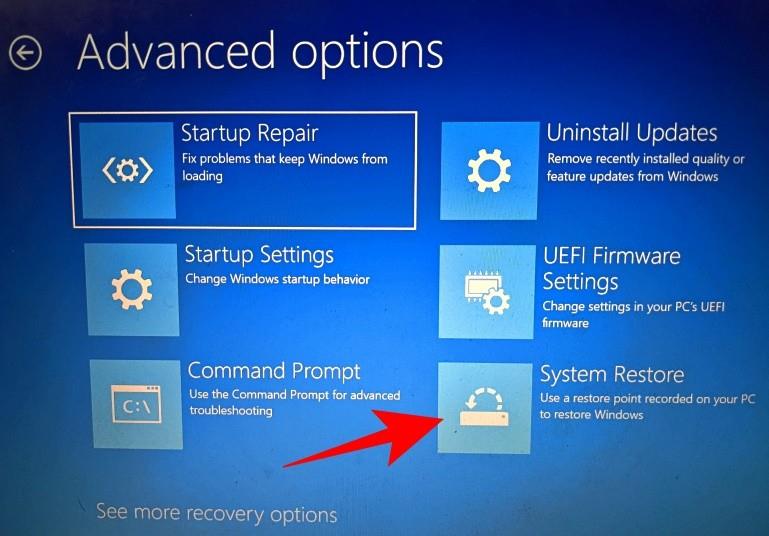
Now click on System Restore.
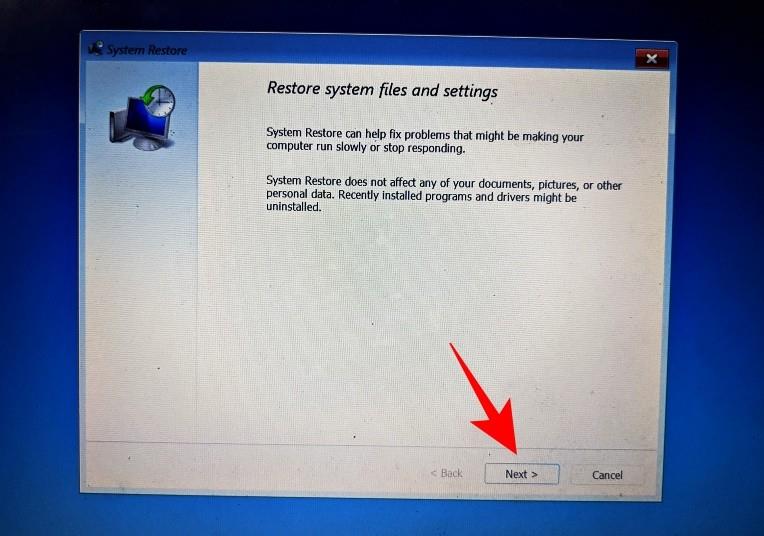
Click Next.
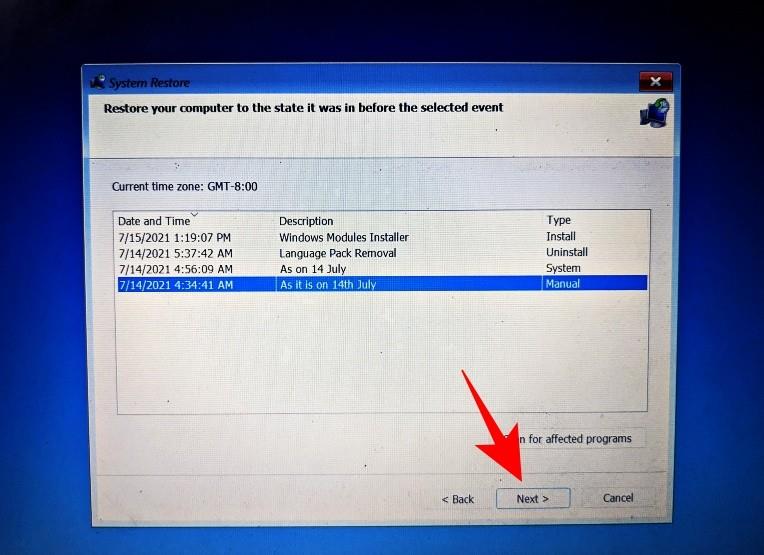
Choose your system restore point and hit Continue.
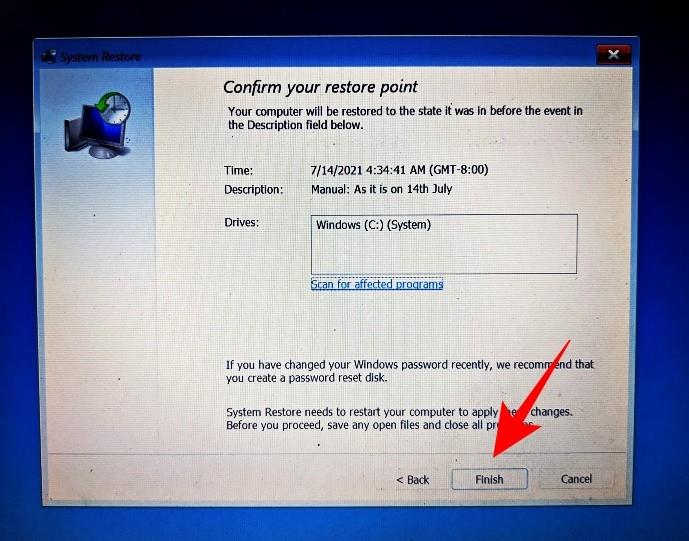
Click Finish to have your system restored.
Can’t create a system restore point? How to fix
There can be times when, for one reason or another, you may not be able to create a system restore point. But there are a few easy fixes that you can implement to get around the issue.
Method #01: Change system restore frequency using Registry Editor
As mentioned before, by default, Windows only lets you create one system restore point if one has already been created in the last 24 hours. This can be problematic, especially if you’re looking to edit the registry or other system settings but want to ensure that there’s a restore point in case things go south. To allow the creation of system restore points at any time, you will have to change the frequency of system restore points.
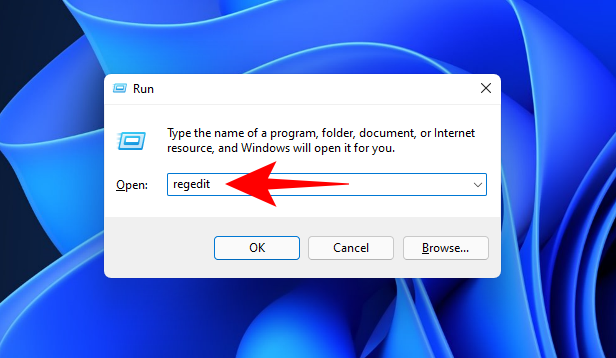
Press Win + R to open the RUN box, type regedit, and hit Enter.
Now, navigate to the following address (or copy and paste it in the registry address bar):
Computer\HKEY_LOCAL_MACHINE\SOFTWARE\Microsoft\Windows NT\CurrentVersion\SystemRestore

Right-click in the empty space to the right and select New, then DWORD (32-bit) Value.

Name it SystemRestorePointCreationFrequency.

By default, its value is set to 0. Let it be that way and close the registry editor. You should now be able to create a system restore point manually without having to worry about any frequency limitations.
Method #02: Enable system restore via Group Policy Editor
Press Win + R to open the RUN box, type gpedit.msc and hit Enter.

This will open up the Group Policy Editor. In the left panel, navigate to Administrative Templated > System > System Restore.

On the right, check the state of the two Settings. They should both be set to Not configured.
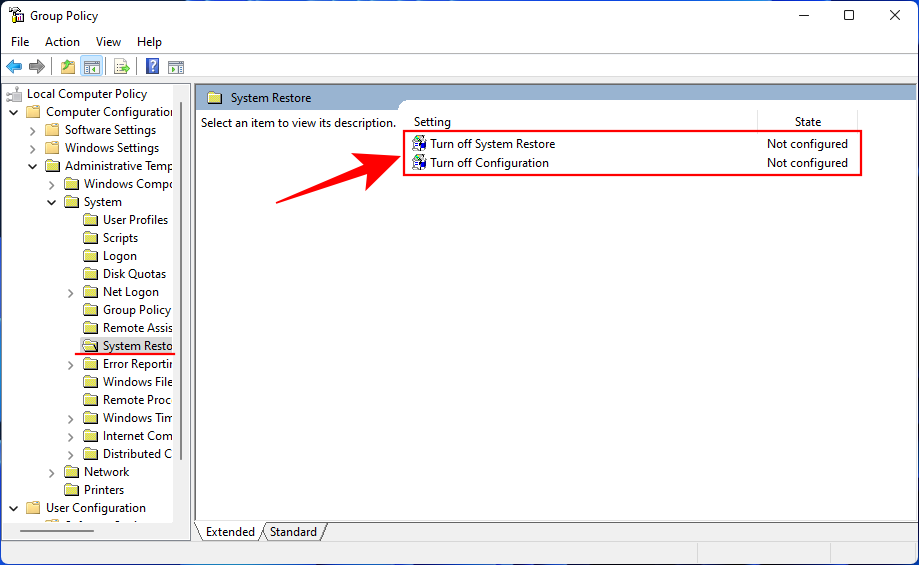
If either of them is enabled, double-click on it and set it to Not configured.
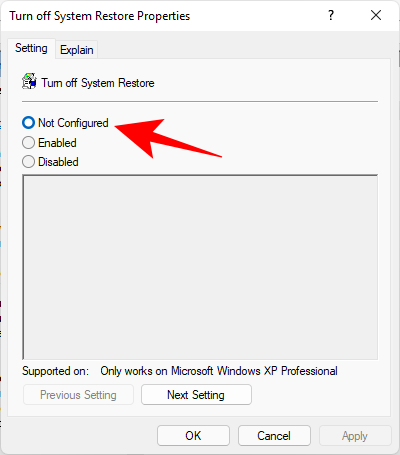
You should be able to create a system restore point as shown before.
Method #03: Turn on Volume Shadow Copy service
When you’re not able to create a system restore point, another fix that you may want to implement is to turn or (or reset) the Volume Shadow Copy service. Here’s how to do so:
Press Win + R to open the RUN box, type services.msc and hit Enter.

Scroll down and look for Volume Shadow Copy. Double-click on it.
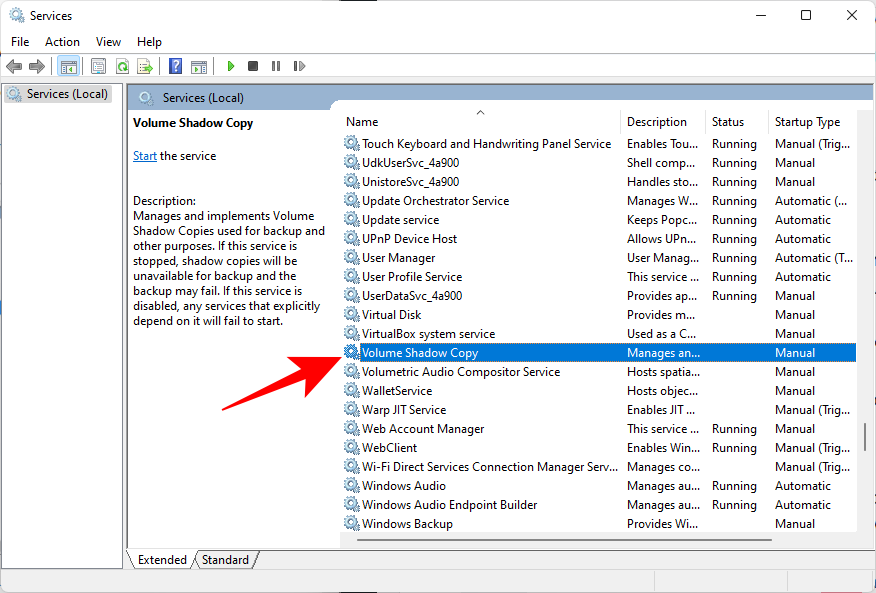
Click on Start if the service isn’t already running.
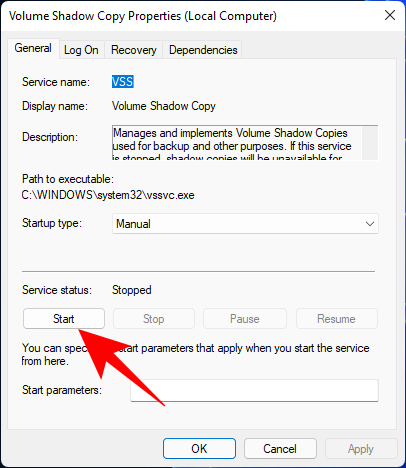
If it running, restart it by clicking on Stop…
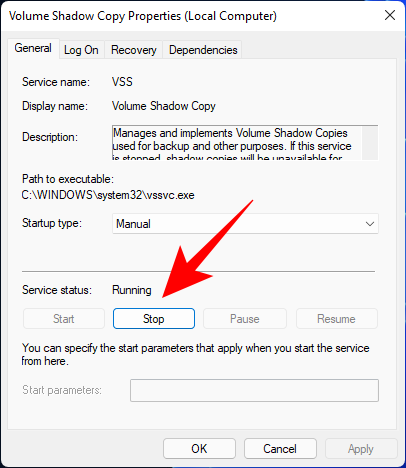
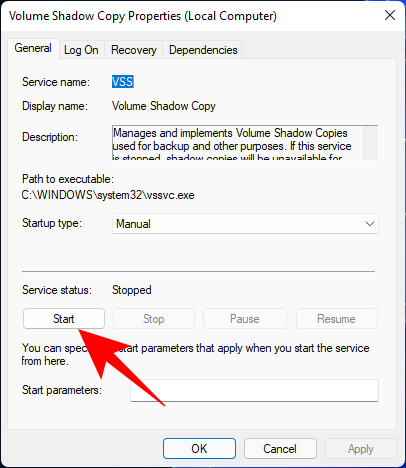
And then on Start again.
Creating a restore point in Windows 11: FAQs
So these were all the ways that you can create a restore point and some fixes if you’re not able to create one. Now, let’s consider the most commonly asked questions about system restore points and why it’s crucial that you create them from time to time, or at least have your system set up to create them automatically.
Are restore points created automatically on Windows 11?
Yes, Windows 11 by default has its System Properties set to create system restore points automatically from time to time, such as when you apply an update or make important changes to your system.
Why should you manually create a restore point?
As mentioned earlier, by default, Windows 11 will create restore points for your system to revert to should it run into a problem. But there can be instances when, for one reason or another, Windows might not be able to do so itself.
Although there are fixes that can resolve this issue (mentioned earlier), you should look to manually create a system restore point in case they don’t work out. It is even more crucial that you do so if you’re messing around with the registry or making other drastic changes to your system. You never know when they might come in to save your system from becoming unusable.
What happens when you create a restore point?
When a system restore point is created, Windows takes a snapshot of your system data as it is at a particular time. The state of the operating system is thus saved so that you can revert back to it in case things go wrong.
How long does it take to create a restore point?
V závislosti od toho, koľko údajov je potrebné uložiť, môže vytvorenie bodu obnovenia trvať od niekoľkých minút až po niekoľko hodín. Ak však po štyroch až piatich hodinách zistíte, že sa stále vytvára bod obnovenia, je pravdepodobné, že systém Windows narazil na nejaké problémy. V takom prípade možno budete chcieť celý proces zrušiť a začať odznova.
Dúfame, že sa vám pomocou tejto príručky podarilo vytvoriť body obnovenia systému.


