Krātuves vieta ir viena no būtiskām jūsu sistēmas sastāvdaļām, un jums tas patīk vai nē, visticamāk, nākotnē tā beigsies. Labs veids, kā atbrīvot vietu krātuvē, ir lielāko failu pārvaldība. Varat tos pārvietot uz citu disku , mākoņkrātuvi vai pat izdzēst, ja tie vairs nav nepieciešami.
Dažos gadījumos jūs pat varat saspiest failus, ja nevēlaties tos izmantot tuvākajā laikā. Bet kā atrast lielus failus? Manuāla katras mapes pārlūkošana var būt nogurdinoša, un tīrītāja izmantošana vienkārši nav pietiekami efektīva. Par laimi, ir daži glīti veidi, kā sistēmā Windows 11 atrast lielus failus. Lai sāktu darbu, izmantojiet tālāk sniegtos norādījumus.
Saturs
Lielu failu atrašana operētājsistēmā Windows 11: padomi
Lielus failus var kārtot, pamatojoties uz veidu, veidu, datumu un citiem. Labākais veids, kā to izdarīt, ir failu pārlūkā izmantot Windows meklēšanu. Varat izmantot īpašus terminus, lai definētu meklētos failus un filtrētu tos, pamatojoties uz to lielumu. Pēc tam varat izmantot failu pārlūka kārtošanas opcijas, lai meklēšanas rezultātos atrastu lielākās.
Līdz ar to, ja tas neatbilst jūsu kritērijiem vai nevarat atrast meklētos failus, varat izmantot kādu no citām šajā rokasgrāmatā minētajām metodēm.
Saistīts: Kā mainīt uzdevumjoslas krāsu operētājsistēmā Windows 11
01. metode: Meklēšanas izmantošana pārlūkprogrammā (ieteicams)
Tagad mēs meklēsim lielus failus, pamatojoties uz jūsu kritērijiem.
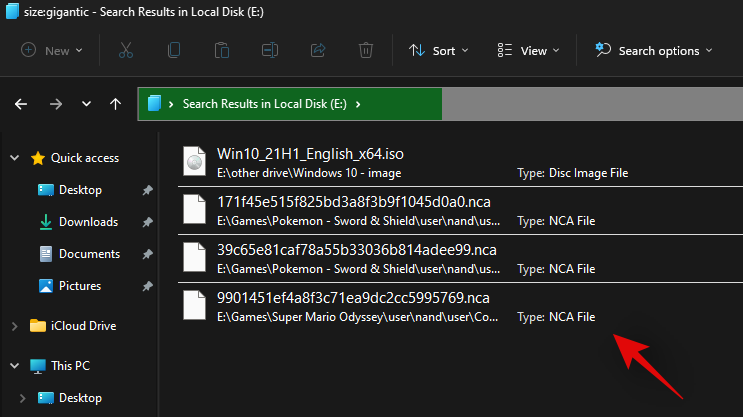
Nospiediet Windows + Etastatūru, lai atvērtu failu pārlūku, un noklikšķiniet uz meklēšanas lodziņa augšējā labajā stūrī. Meklējiet šādu terminu.
size:gigantic
Rezultāti tagad tiks filtrēti, un faili, kas lielāki par 4 GB, tagad tiks parādīti jūsu ekrānā. Atlasiet datorā nevajadzīgos failus, kas jums nav nepieciešami, un vienkārši izdzēsiet tos, lai atbrīvotu vietu. Ja vēlaties izmantot mazāku minimālo faila izmēru, aizstājiet “gigantic” ar kādu no tālāk norādītajiem terminiem atkarībā no vēlamā izmēra.
- Liels: faili no 128 MB līdz 1 GB
- Milzīgs: faili no 1 GB līdz 4 GB
- Vidējs: faili no 1 MB līdz 128 MB
Un tas arī viss! Varat izmantot Windows meklēšanu, lai filtrētu failus pēc to lieluma un atrastu lielākos, kas pašlaik atrodas jūsu datorā.
Piezīme. Ja jūsu dators indeksē un parāda arī sistēmas failus, mēs iesakām vēlreiz pārbaudīt failus pirms to dzēšanas, lai izvairītos no svarīgu sistēmas failu dzēšanas no sistēmas.
Tagad, izmantojot Windows meklēšanu, datorā būsit atradis lielus failus.
1.1. Kā rīkoties, ja meklēšana jums nedarbojas: padomi, ko izmēģināt
Ja ierakstīšana “size:gigantic” jums neder, jums būs jāpārslēdzas uz veco failu pārlūku no operētājsistēmas Windows 10. Izmantojiet tālāk sniegto rokasgrāmatu, lai sāktu darbu.
Kad esat pārslēdzies atpakaļ uz veco failu pārlūku, izmantojiet iepriekš sniegto ceļvedi, lai meklētu lielus failus. Kad tas ir atrasts, izmantojiet turpmāko ceļvedi, lai atjaunotu jauno Windows 11 failu pārlūku savā sistēmā.
1.1.1. Pārslēdzieties uz veco failu pārlūku
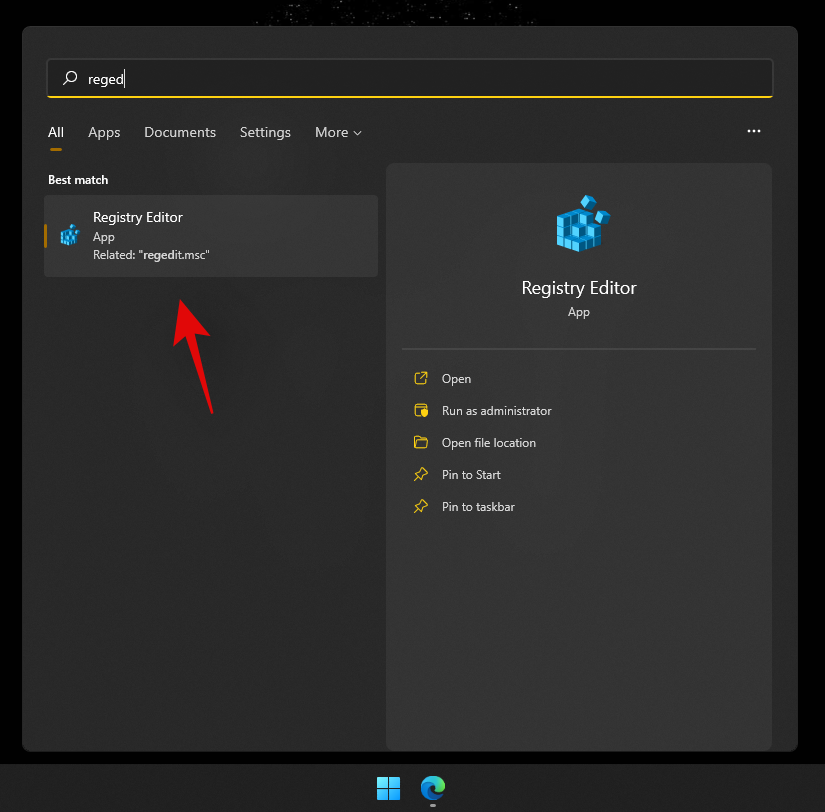
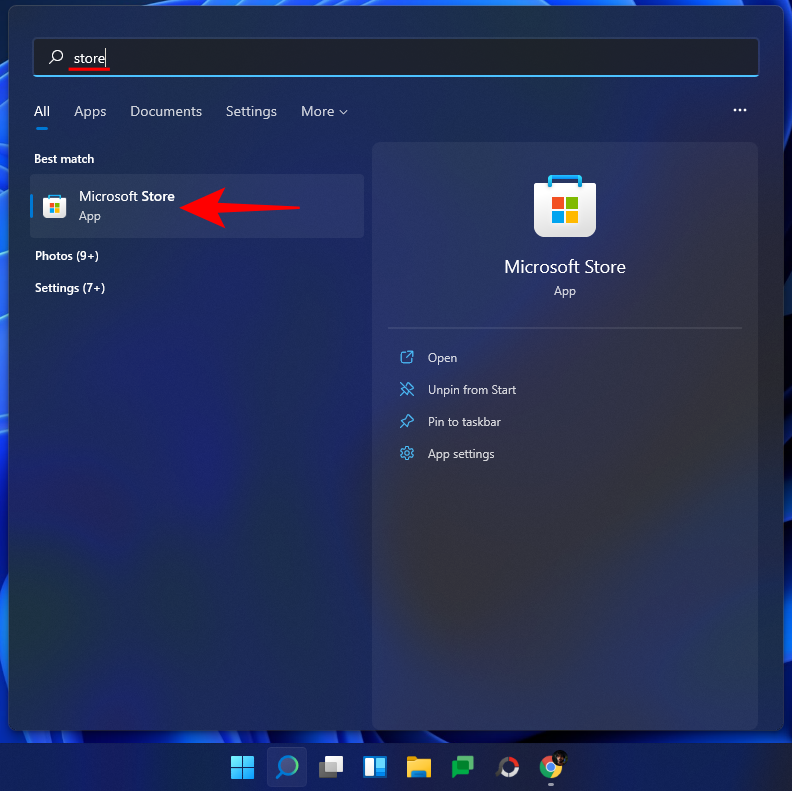
Nospiediet Windows + Suz tastatūras un meklējiet “Regedit”. Noklikšķiniet un palaidiet lietotni savos meklēšanas rezultātos.
Dodieties uz šo direktoriju vai kopējiet un ielīmējiet tālāk norādīto adresi adreses joslā.
HKEY_LOCAL_MACHINE\SOFTWARE\Microsoft\Windows\CurrentVersion\Shell Extensions
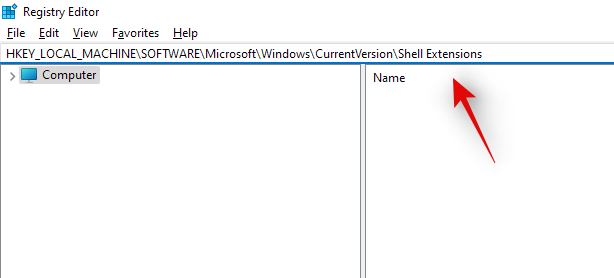
Noklikšķiniet uz mapes ar nosaukumu "Bloķēts".
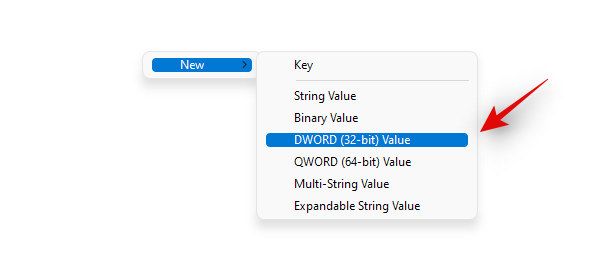
Ar peles labo pogu noklikšķiniet uz tukšā apgabala labajā pusē, atlasiet "Jauns" un pēc tam noklikšķiniet uz "DWORD (32 bitu) vērtība".
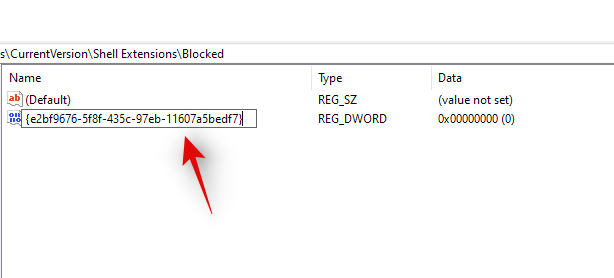
Ievadiet tālāk norādīto nosaukumu un nospiediet tastatūras taustiņu Enter. Mēs iesakām kopēt un ielīmēt to pašu, lai izvairītos no nosaukšanas kļūdām.
{e2bf9676-5f8f-435c-97eb-11607a5bedf7}
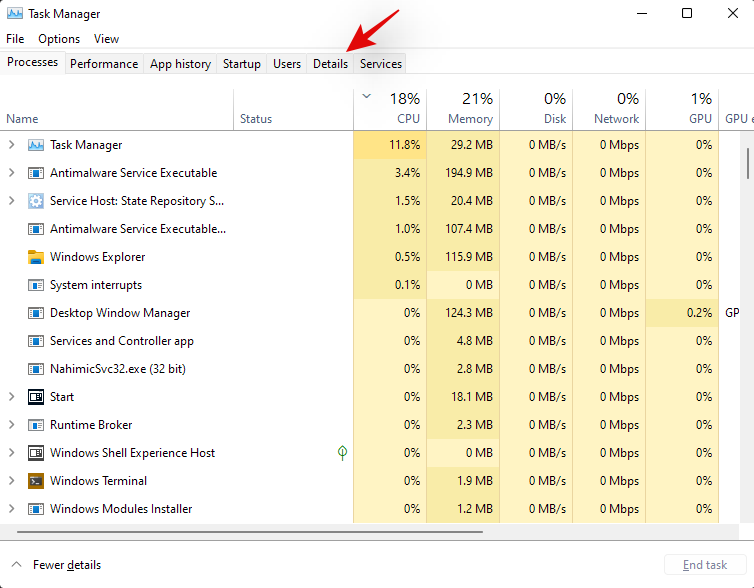
Aizveriet reģistra redaktoru un nospiediet Ctrl + Shift + Esc, lai atvērtu uzdevumu pārvaldnieku. Pārslēdzieties uz cilni “Detaļas”.
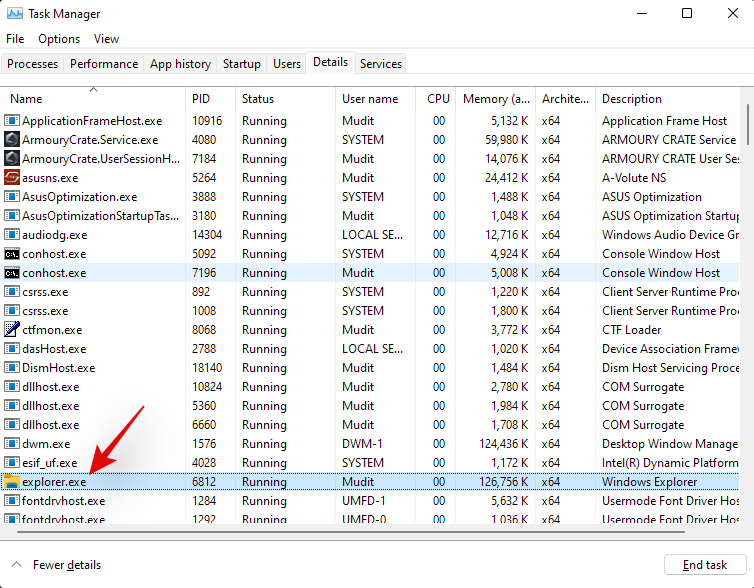
Noklikšķiniet uz “Explorer.exe” un nospiediet tastatūras taustiņu Del.
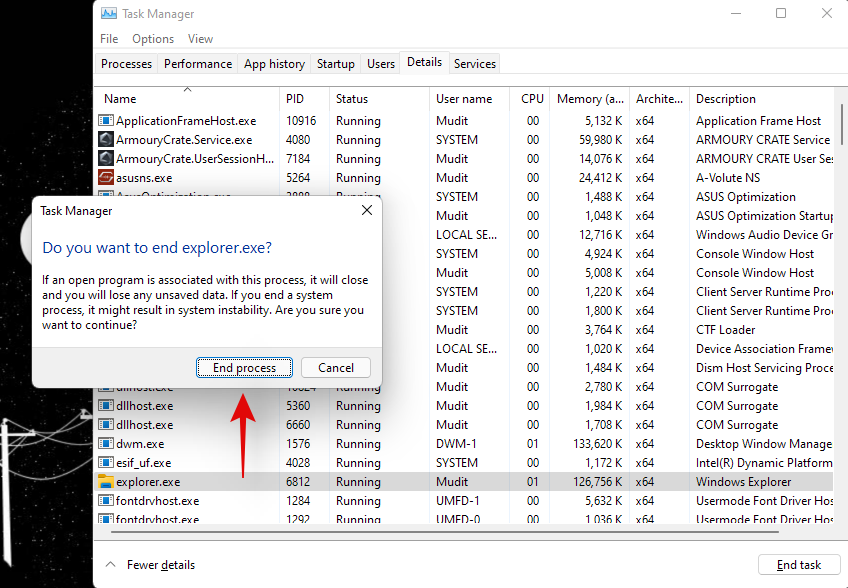
Noklikšķiniet uz "Beigt procesu", lai apstiprinātu savu izvēli.
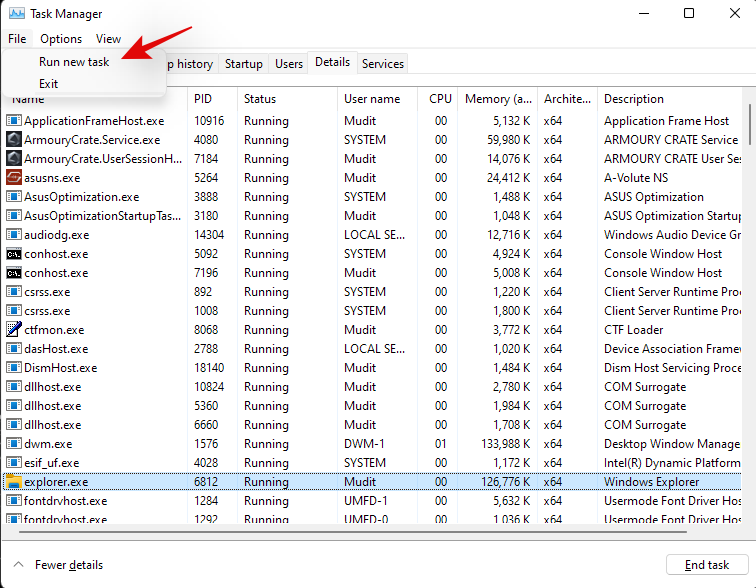
Noklikšķiniet uz "Fails" un atlasiet "Palaist jaunu uzdevumu".
Tekstlodziņā ievadiet tālāk norādīto un noklikšķiniet uz "Labi".
explorer.exe
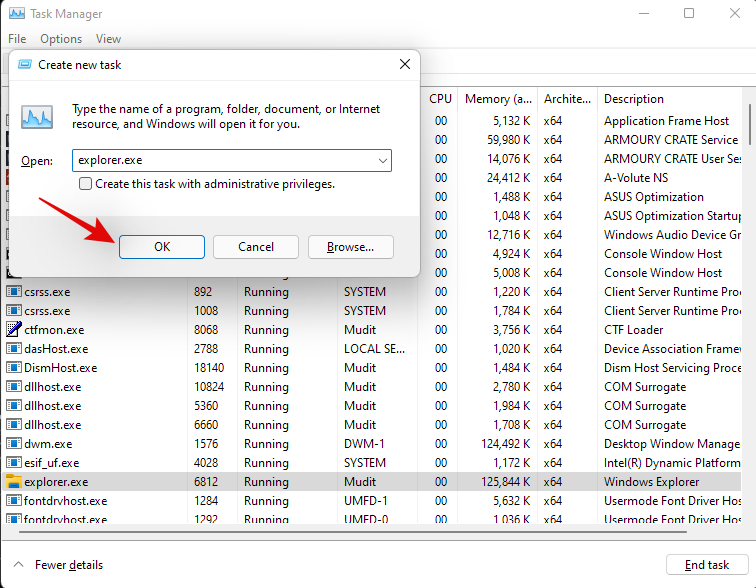
Windows File Explorer tagad tiks restartēts jūsu sistēmā, un tas ir jāatjauno uz Windows 10 File Explorer. Varat atvērt nejaušu mapi, lai pārbaudītu to pašu. Apstipriniet, ka esat atgriezies pie vecā failu pārlūka, un izmantojiet iepriekš minēto ceļvedi, lai sistēmā atrastu lielus failus.
1.1.2. Pārslēdzieties atpakaļ uz jauno failu pārlūku
Tagad mēs varam atgriezties pie vecā failu pārlūka. Izpildiet tālāk sniegtos norādījumus, lai sāktu darbu.
Nospiediet Windows + Stastatūru un meklējiet Regedit. Noklikšķiniet un palaidiet lietotni, kad tā tiek parādīta jūsu meklēšanas rezultātos.

Dodieties uz tālāk norādīto ceļu vai kopējiet un ielīmējiet to savā adreses joslā.
HKEY_LOCAL_MACHINE\SOFTWARE\Microsoft\Windows\CurrentVersion\Shell Extensions

Vienkārši noklikšķiniet uz iepriekš izveidotās DWORD (32 bitu) vērtības un nospiediet tastatūras taustiņu Del. Noklikšķiniet uz "Jā", lai apstiprinātu savu izvēli.

Nospiediet tastatūras taustiņu kombināciju Ctrl+Shift+Esc un pārslēdzieties uz cilni “Detaļas”.

Noklikšķiniet uz “explorer.exe” un nospiediet tastatūras taustiņu Del.

Noklikšķiniet uz "Beigt procesu".

Noklikšķiniet uz "Fails" un atlasiet "Palaist jaunu uzdevumu".

Ierakstiet “explorer.exe” un nospiediet tastatūras taustiņu Enter.

Tagad datorā varat aizvērt uzdevumu pārvaldnieku un reģistra redaktoru.
Un tas arī viss! Tagad būsiet atgriezies pie jaunā File Explorer operētājsistēmā Windows 11. Papildus lieluma parametram varat izmantot arī tālāk norādītās komandas, lai datorā meklētu dažādus failus un kārtotu tos pēc lieluma. Tādā veidā jūs varat atrast lielākos savā sistēmā.
1.2 Atrast pēc failu tipiem
Līdzīgi kā iepriekš minētajā komandā, varat izmantot parametru "kind:", lai pašreizējā direktorijā atrastu noteiktus failus. Parametrs “veida” ļaus jums meklēt kalendāra failus, teksta dokumentus, attēlus, videospēles un daudz ko citu.
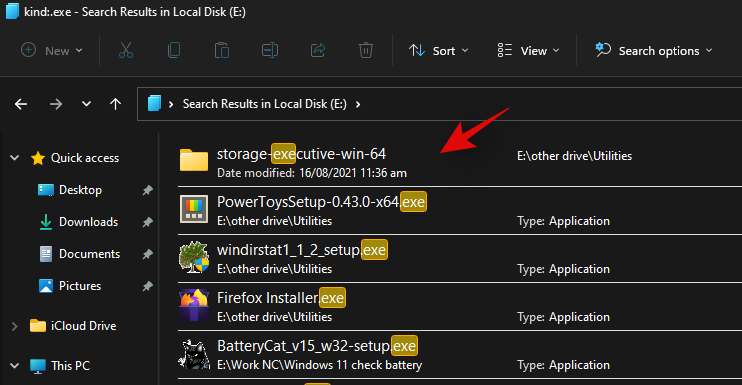
Izmantojot veida parametru šādā veidā, jūs neaprobežojaties ar Windows iepriekš definētajām kategorijām, tā vietā varat definēt arī konkrētus failu paplašinājumus, lai tos atrastu savā datorā, kā parādīts tālāk.
kind:.exe
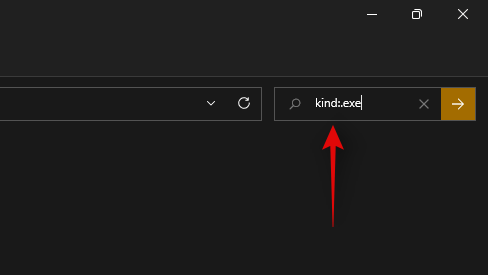
Iepriekš minētā komanda palīdzēs jums meklēt izpildāmos failus pašreizējā direktorijā.
Līdzīgi tālāk norādītās komandas izmantošana palīdzēs atlasītajā direktorijā atrast PDF failus.
kind:.pdf
Un tas arī viss! Varat izmantot šīs komandas, lai datorā atrastu noteiktus failus, izmantojot Windows meklēšanu.
1.3. Atrast failus pēc datuma
Varat arī izmantot parametru "date:", lai meklētu failus, kas izveidoti noteiktā datumā. Turklāt šo komandu var izmantot kopā ar zemāk esošajiem Būla filtriem, lai datorā atrastu failus, kas izveidoti vai pārveidoti pirms vai pēc noteikta datuma. Piemēram, ja meklējat failu, kas izveidots 2020. gada 1. janvārī, varat izmantot tālāk norādīto komandu.
date: 1/1/2020
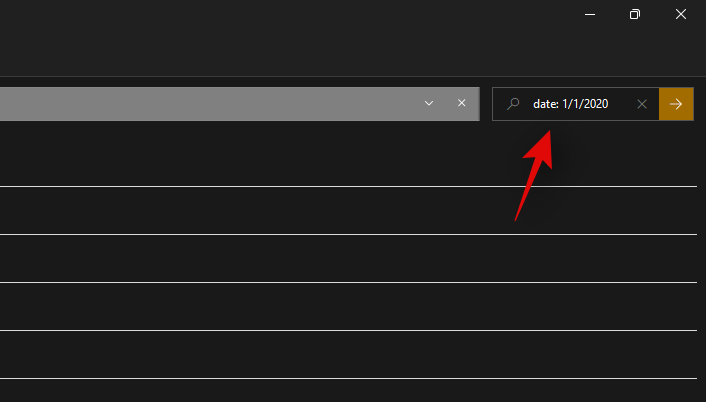
Līdzīgi, ja meklējat failu, kas izveidots 2021. gada 1. janvārī, varat izmantot šo komandu.
date: 1/1/2021
1.4. Izmantojiet Būla filtrus
Būla filtri var palīdzēt meklēt vairākus vienumus vienlaikus vai kopā. Izmantojiet tālāk norādītos filtrus, kas vislabāk atbilst jūsu pašreizējām prasībām.
1.4.1. Parametrs UN
Varat izmantot parametru UN, lai kopā meklētu divus meklēšanas vienumus. Tādā veidā jūs varat meklēt failu, kurā ir ietverti abi termini, nevis kāds no tiem, kas palīdzēs jums filtrēt nevēlamos rezultātus, kas satur kādu no šiem terminiem.
Piemēram, ja meklējat failu, kura nosaukumā ir vārdi “Samsung un galaxy”, es varu izmantot šādu terminu, lai meklētu jūsu failu.
Samsung AND galaxy
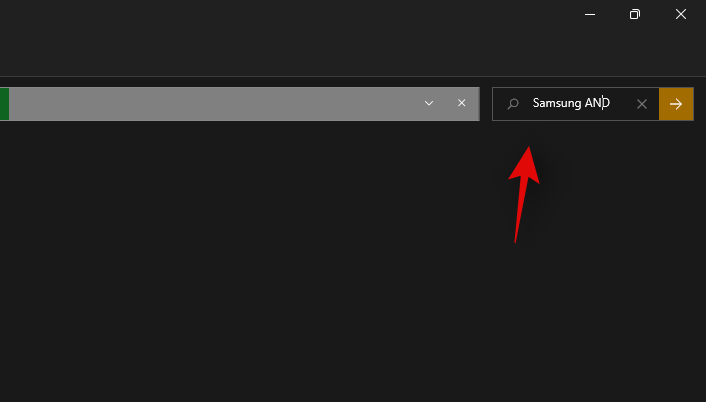
Tādējādi tiks filtrēti faili, kuru nosaukumā ir tikai “Samsung” un “Galaxy”. Faili ar vienu no šiem vārdiem tiks filtrēti.
Parametrs VAI
Parametrs VAI ir pretējs parametram UN un ļauj meklēt failus, kas satur kādu no meklēšanas vienumā esošajiem terminiem. Piemēram, ja es vēlos meklēt failus, kuru nosaukumā ir “Apple” vai “Airpods”, es varu izmantot šādu meklēšanas vienumu.
apple OR airpods
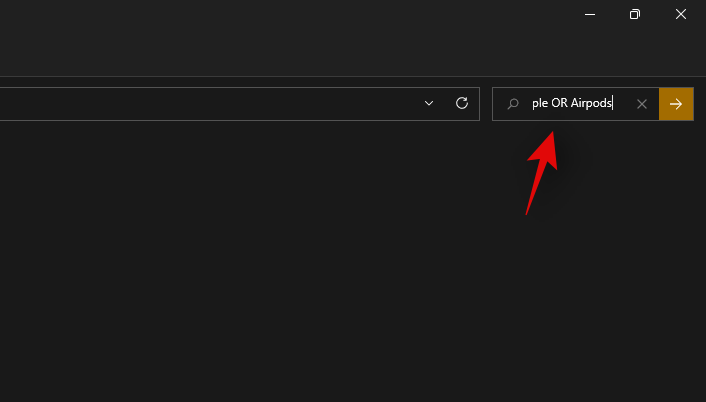
Tāpat, ja es meklēju PDF un EXE failus noteiktā direktorijā, varu izmantot tālāk norādīto komandu.
kind:.exe OR .pdf
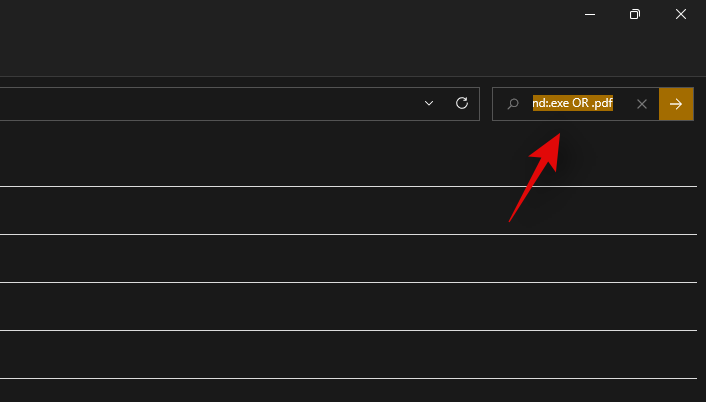
Un tā varat izmantot parametru VAI, lai vienā faila nosaukumā meklētu vairākus meklēšanas vienumus.
1.4.2. Parametrs NAV
Ja vēlaties filtrēt noteiktu meklēšanas vienumu vai faila veidu, varat izmantot parametru NOT. Parametrs NOT izslēgs vēlamo faila veidu, veidu, lielumu vai nosaukumu atkarībā no jūsu izvēles.
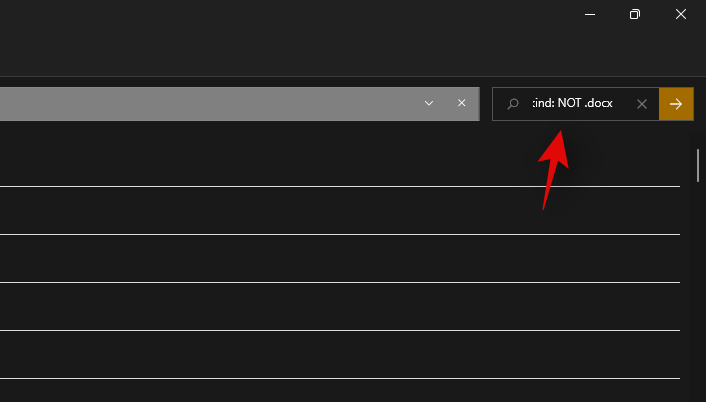
Piemēram, ja mapē, kas ir pilna ar .docx failiem, meklējat citus failu tipus un vēlaties tos visus filtrēt, varat izmantot šo komandu.
kind: NOT .docx
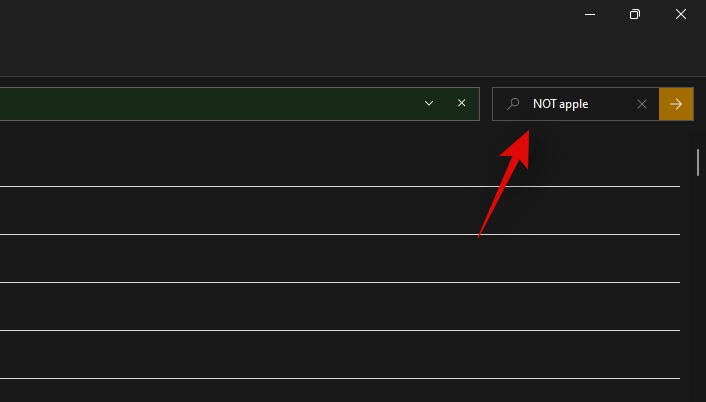
Tāpat, ja es meklēju failu, kura nosaukumā nav “Apple”, es varu izmantot šādu meklēšanas vienumu.
NOT apple
1.4.3. Iekavas
Parentheses is a Boolean filter that is usually used when you are searching file contents as well. Anything included between the parentheses () is searched for and files with either or all of the terms are displayed on your screen.
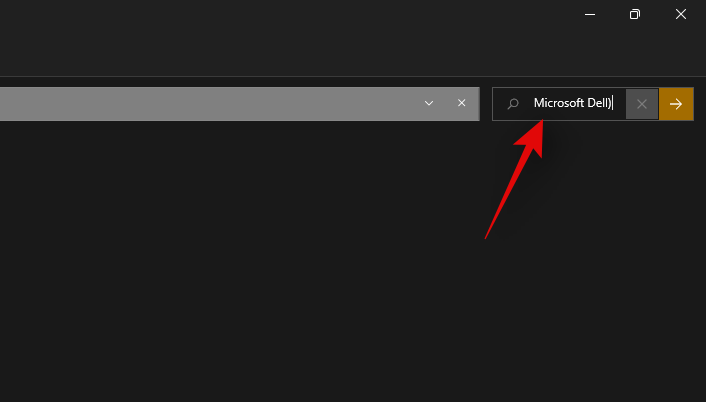
For example, if looking for a file containing either ‘Apple, Samsung, Mi, Microsoft, and Dell’ or all of these terms, then you can use the following term.
(Apple Samsung Mi Microsoft Dell)
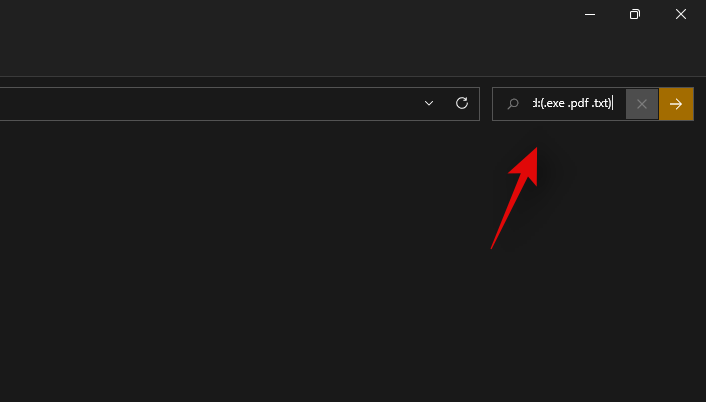
Similarly, you can use the following command if looking for multiple file types.
kind:(.exe .pdf .txt)
And that’s it! You will now have used parentheses to your advantage to look for multiple search terms in a particular file.
1.4.4 ‘>’ and ‘<‘>
These two Boolean filters are usually used when looking for file types or when sorting your results based on a parameter.
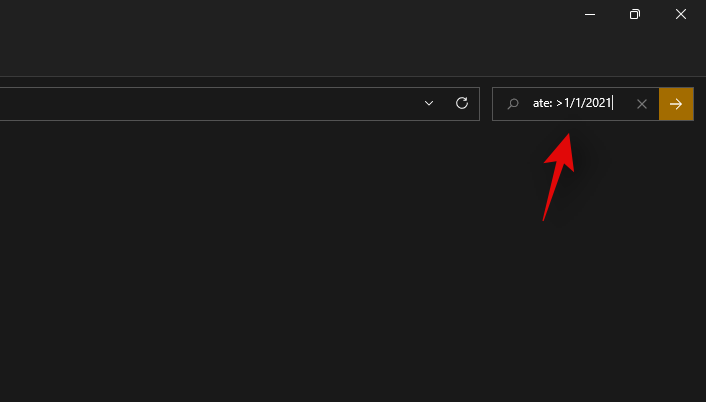
The greater than and less than parameters can be used to filter your results based on a number. For example, if looking for files dated after 1st January 2021 then you can use the following command.
date: >1/1/2021
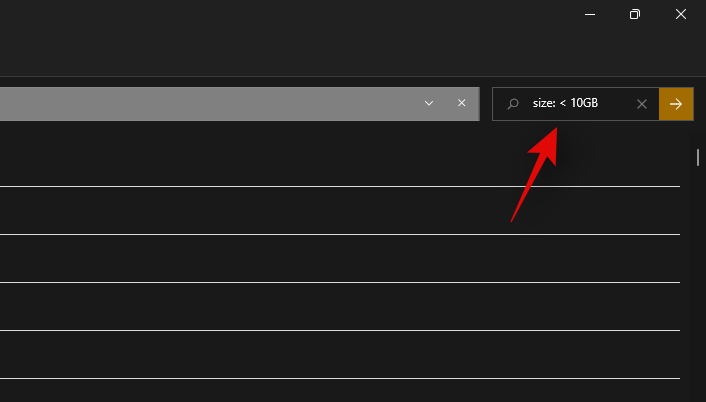
Similarly, if looking for files less than 10GB then you can use the following command.
size: <>
You can use the greater than and less than parameters to your advantage this way and find the desired files on your system.
Advanced methods to find large files on Windows
Some other ways in which you can find large files on your system have been listed below. Follow the guides to get you started.
Method #02: Using CMD
CMD can also help you find large files on your system. Use the guide below to get you started.
Press Windows + E on your keyboard and navigate to a location where you wish to search for large files and click on the address bar at the top.
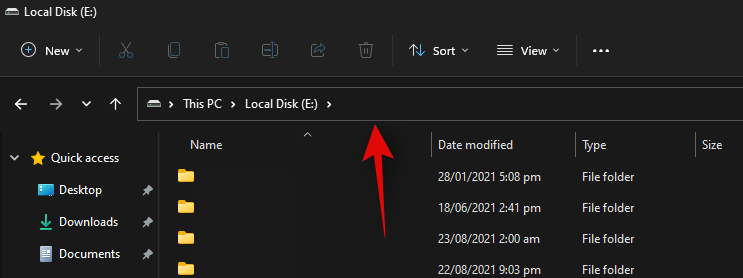
Type in CMD and press Enter on your keyboard.
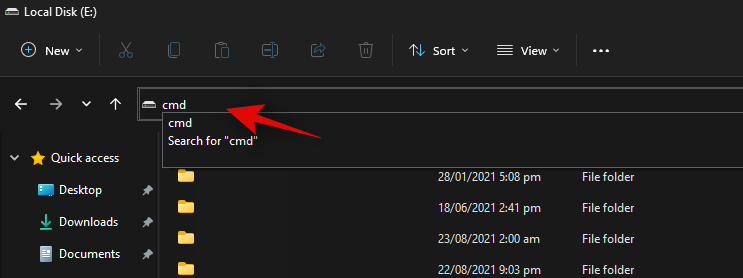
CMD will now be launched in the particular folder. Type in the following command and replace ‘PATH’ with the path we copied to your clipboard.
forfiles /S /M * /C “cmd /c if @fsize GEQ 1073741824 echo @path > largefiles.txt
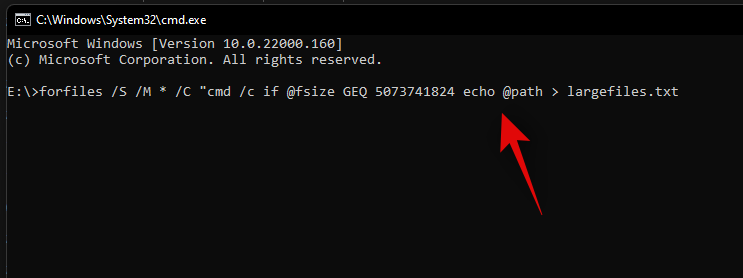
The above command will look for files larger than 1GB on your PC. If you wish to define a larger minimum size, then replace ‘1073741824’ with one of the following options below.
- 2GB: 2147483648
- 5GB: 5368709120
- 10GB: 10737418240
Execute the command with your desired variables and a text file will be created in the same location with a list of all the large files found on your system based on your criteria. You will also find the path for each file on your local storage in the text file.
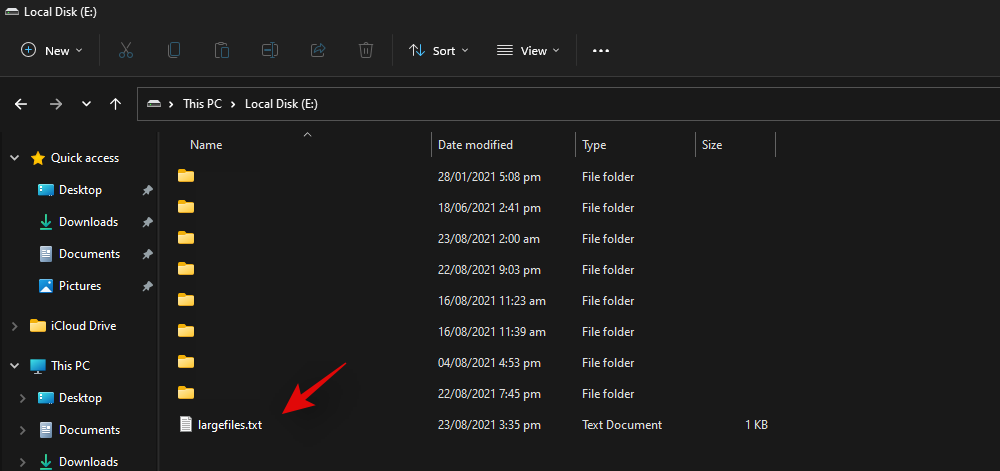
You can use this list to identify the largest files in the current location and then delete them at your discretion to free up some disk space on your system.
Method #03: Using PowerShell
You can also find large files on your system using PowerShell. Just like the command for CMD, PowerShell will scour your local files based on a minimum size and display all the files larger than it. Use the guide below to get you started.
Press Windows + E on your keyboard and navigate to the location where you wish to look for large files. Click on the address bar at the top and type in ‘PowerShell’. Press Enter on your keyboard once you are done.
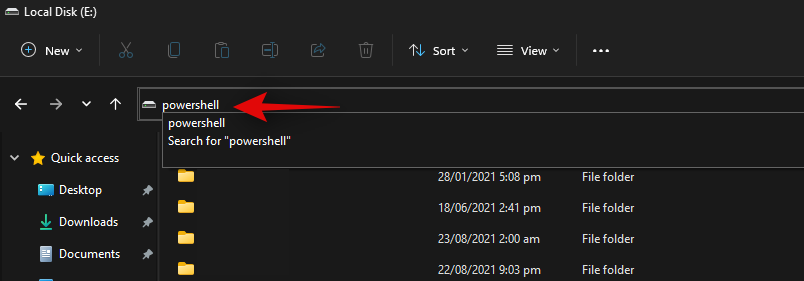
Copy-paste the command below in the PowerShell window and press Enter on your keyboard.
gci -r| sort -descending -property length | select -first 10 name, length

You will now get a list of the top 10 largest files currently taking the most disk space on your system. If you wish to view the top 20 files, then replace ‘select-first 10’ with ‘select-first 20’.
PowerShell will now find and display the 20 largest files on your system along with their size. The file size will be in bytes which can make it a bit difficult to judge the size of files in terms of gigabytes.
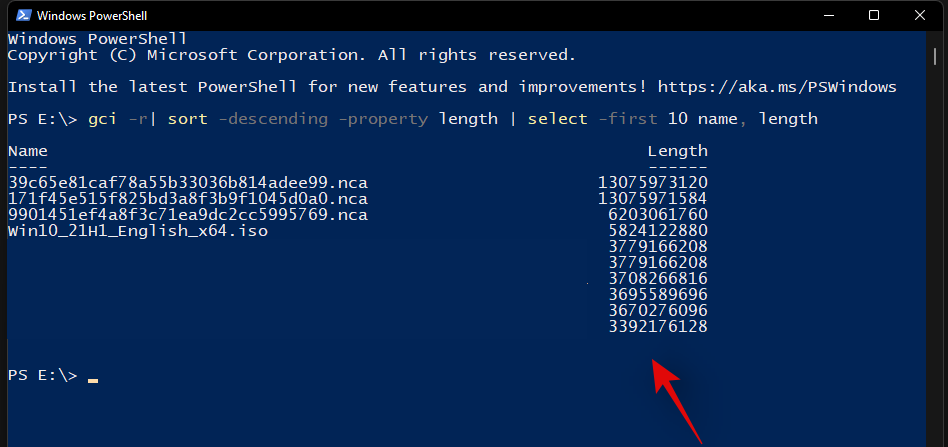
And that’s it! You will now have found the largest files on your PC using PowerShell in Windows 11.
2 Best apps to find large files on Windows
Many third-party tools allow you to view a visual representation of your PC’s disk usage.
This makes it much easier for you to identify large chunks of files taking significant space on your hard drive. Our recommended tools would be SpaceSniffer and WinDirStat. Use one of the guides below depending on the tool that you wish to use.
Method #04: Using SpaceSniffer
Space Sniffer is another popular third-party utility used to analyze disk space usage on Windows 11. SpaceSniffer can help you identify large files using huge amounts of space on your system. You can also find hidden files taking huge disk space on your PC using the SpaceSniffer. Use the guide below to get you started.
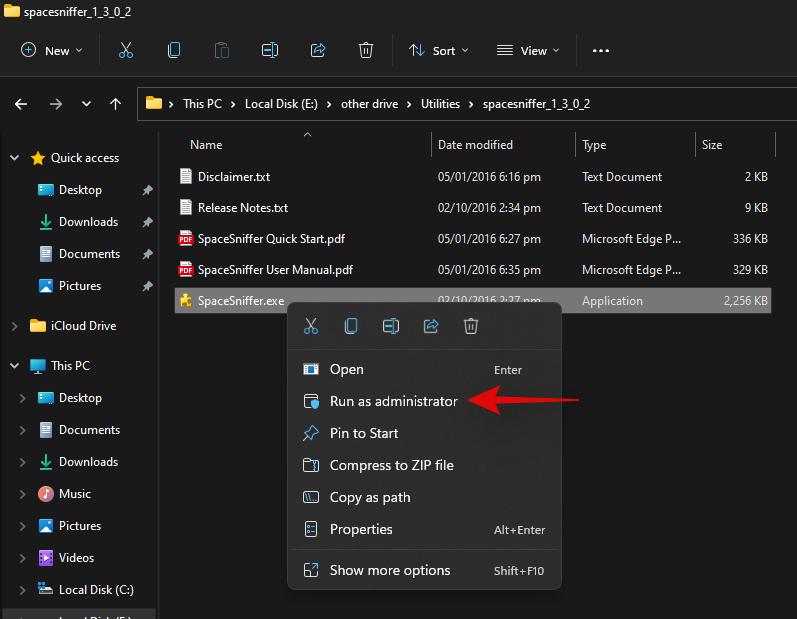
Download SpaceSniffer to your PC using the link above. A portable .exe will be downloaded to your system. Extract the archive and right-click on the .exe file.
Select ‘Run as administrator’.
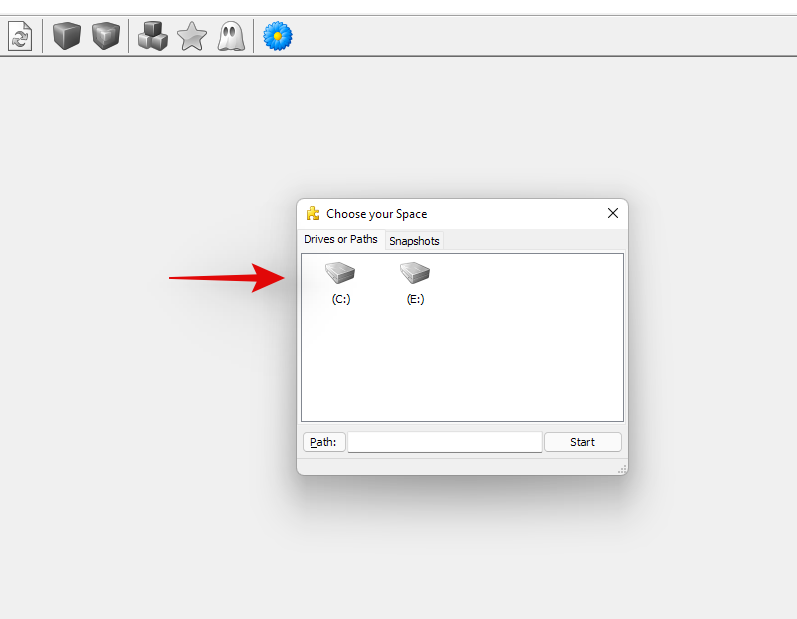
Now select the drive you wish to scan. If you wish to analyze and find large files in a particular directory, then you can enter its path in the text box below.
You will now be shown a graphical representation of your disk space usage on your screen. Simply hover over the largest chunk and you will be shown the name of the folder or file occupying that space.
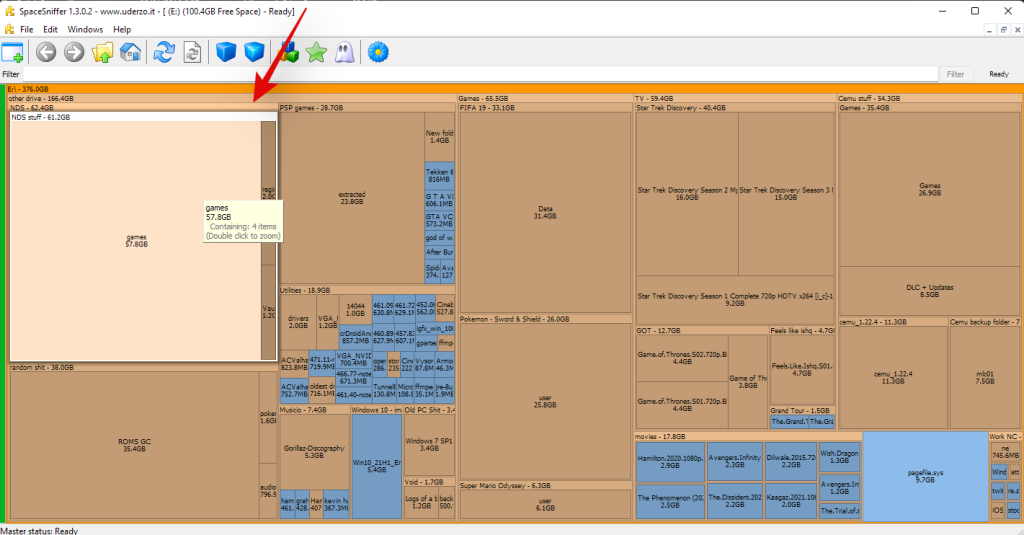
And that’s it! You can use SpaceSniffer this way to identify the largest files on your system by simply looking at the largest chunks on your screen.
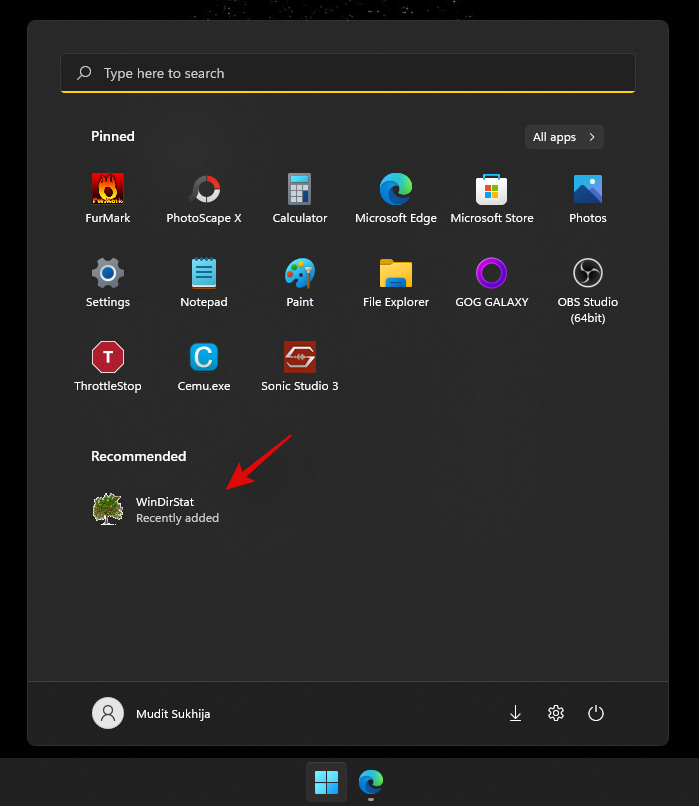
Method #05: Using WinDirStat
WinDirStat is a popular open-source utility often used to generate a graphical representation of your local storage space in a user-friendly manner. This makes it easier to identify large chunks of your disk space occupied by a single file, folder, or archive, which in turn will make it easier for you to free up some space on your PC. Use the guide below to identify what is taking up space on your Windows 11 PC.
Download and install WinDirStat on your PC using the link above. Once installed, launch the app.
Now select one of the options that best suit your needs. If you only have a single drive installed on your system with a single partition, then you can skip this step. Click on ‘Ok’ once you are done.
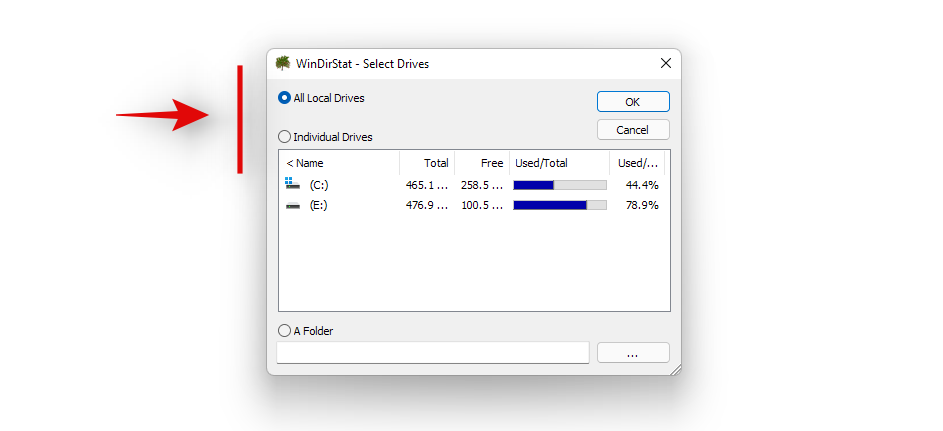
- All Local Drives: This will make WinDirStat analyze all your disks and display their data graphically.
- Individual Drives: Select one of your installed drives to be analyzed for disk space usage. You can select this option and then select the drive you wish to use.
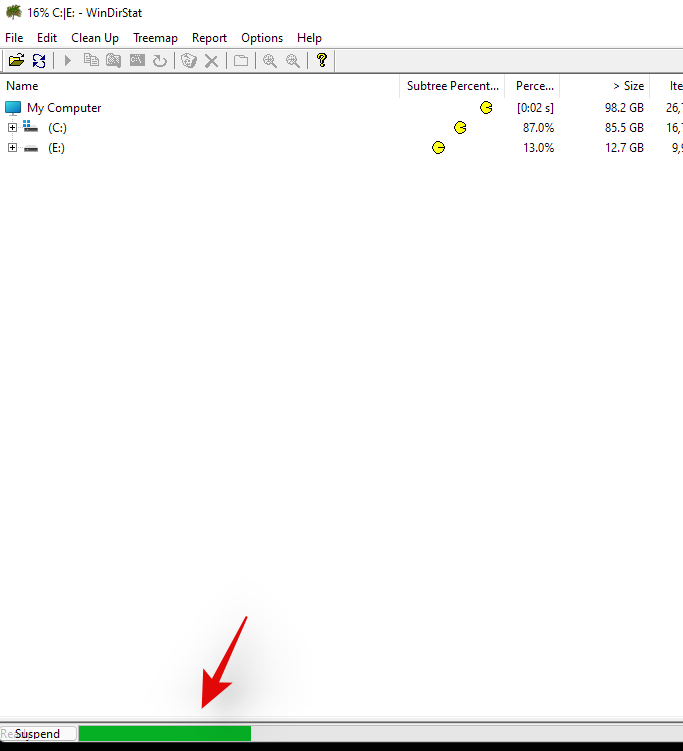
Your drives will now be analyzed and you can track the progress for the same at the bottom of the window.
Once analyzed, a color-coded graphical representation of the disk space usage on the selected drive(s) will be shown on your screen. Simply click on the largest chunks to identify the largest files.
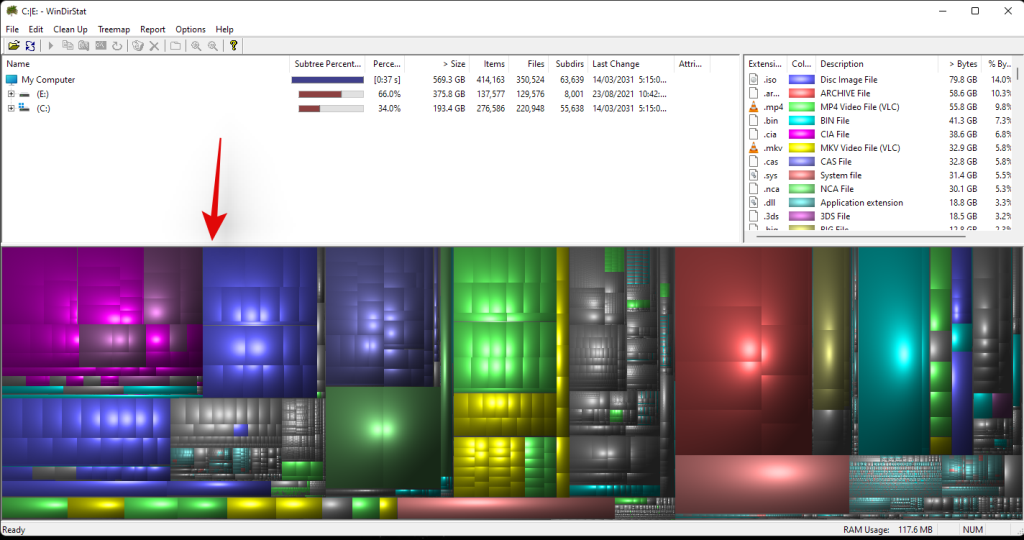
Press Del on your keyboard to delete the file. This will send it to your recycle bin and you can decide its fate when reviewing your recycle bin items. Alternatively, you can use Shift + Del to permanently delete the item from your system.
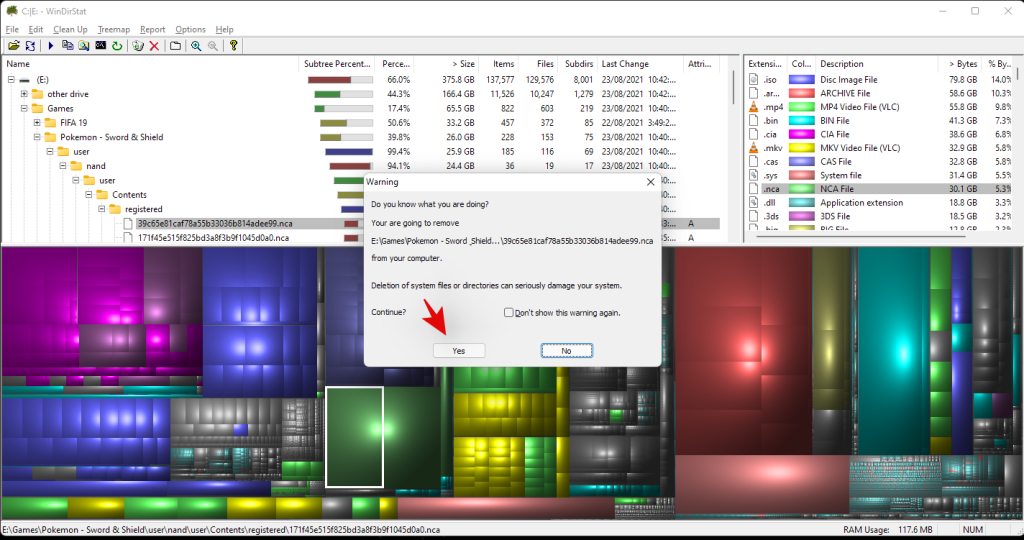
And that’s it! You can repeat the last steps to delete more of the largest files from your system.
Other Third-Party apps as alternative
The world of third-party alternatives is a huge one and thus, the above-mentioned tools are not the only ones that you can use to analyze your disk usage. Here are some alternatives with unique features that might be more suited for your current needs and requirements.
More ways to clear storage on Windows 11
If you’re looking to reclaim your storage space then there are tons of more things that you can do besides clearing or moving your largest files. You can clear caches, stop programs, reduce dedicated storage space, clear temporary files, remove leftover files, and much more. Refer to this dedicated guide by us that should help you clear space on Windows 11 in every way possible.
Should you use disk space analyzers?
Disk Space Analyzers have long been the ultimate utility to identify where exactly your disk space is being used. Most of them stem from long-standing communities while others have over decades of experience. If you’re divided on using disk space analyzers, then your best bet would be to opt for something that is open source.
The modern world of the internet is centered around data collection and like it or not, every service is gathering and collecting some type of data from your usage of their tool. Hence most disk analyzers nowadays, also have the option to share your usage data and more. Additionally, if you decide to opt for something new and untested then the risks are even higher.
Hence, we recommend you use disk space analyzers but do verify their origin and reputation before running them on your system. If you do not wish to go through the hassle of reading reviews, we recommend you simply try an open-source alternative from a trusted source.
We hope this guide helped you easily find the largest files using disk space on your system. If you face any issues or errors during the process, feel free to reach out to us using the comments section below.


