How to enable new Auto Color Management (ACM) feature on Windows 11

On Windows 11 build 25309, you can enable an early preview of the new Auto Color Management (ACM) feature, and in this guide, you will learn how.

Microsoft is expanding (via @PhantomOcean3) the hardware-accelerated system-level color management (Auto Color Management) feature to all SDR displays. (Previously, it was only available for select qualifying and specially provisioned SDR displays.) When you enable the feature, it will allow you to have all colors across all apps, whether or not they are color-managed, appear accurately and consistently on every supported display.

The requirements to use the Auto Color Management feature, include WDDM driver version 3.0 or greater, AMD RX 400 Series or later, or AMD Ryzen processors with Radeon Graphics. Intel integrated 12th Gen (Alder Lake) or later, or discrete DG1 or later. Or NVIDIA GTX 10xx or later (Pascal+).

The new feature has been officially announced and it should enable by default on build 25309, but if it’s not, there’s a quick way to enable it. If you want to get hands-on with the new feature, you can use a third-party tool called “ViveTool” created by Rafael Rivera and Lucas on GitHub, to enable the option on your computer.

This guide will teach you the steps to turn on this new feature on Windows 11.

Enable new Auto Color Management feature on Windows 11

To enable the new vAuto Color Management (ACM) feature on Windows 11, use these steps:

  1. Open GitHub website.

  2. Download the ViveTool-vx.x.x.zip file to enable the new Auto Color Management feature.

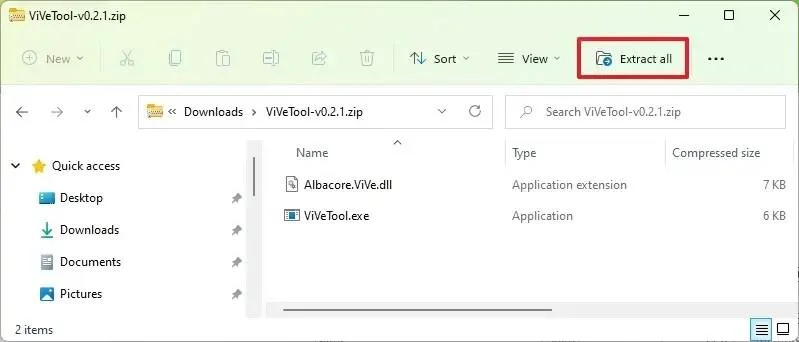
  3. Double-click the zip folder to open it with File Explorer.

  4. Click the Extract all button.

    How to enable new Auto Color Management (ACM) feature on Windows 11

  5. Click the Extract button.

  6. Copy the path to the folder.

  7. Open Start.

  8. Search for Command Prompt, right-click the top result, and select the Run as administrator option.

  9. Type the following command to navigate to the ViveTool folder and press Enter:

    cd c:\folder\path\ViveTool-v0.x.x

    In the command, remember to change the path to the folder with your path.

  10. Type the following command to enable the new Auto Color Management (ACM) on Windows 11 and press Enter:

    vivetool /enable /id:36371531

  11. Restart the computer.

Once you complete the steps, the “Advanced display” settings page (on Settings > Display) will include a new “Automatically manage color for apps” option to enable the Auto Color Management (ACM) feature on Windows 11.

Microsoft notes that this feature doesn’t have specific requirements for display or connection, but it recommends panels with a wider-than-sRGB gamut, and optionally 10-bit per color channel or greater. Also, even if your hardware supports the feature and you enable the option, it may take some time to appear since the company is gradually rolling it out.

If you change your mind, you can revert the changes with the same instructions, but on step 10, make sure to run the same commands but use the /disable switch instead of /enable.

Оставете коментар

Следващият Xbox ще бъде ли компютър с Windows 11? Какво разкрива Project Helix за плановете на Microsoft за Xbox PC

Следващият Xbox ще бъде ли компютър с Windows 11? Какво разкрива Project Helix за плановете на Microsoft за Xbox PC

Проектът Helix може да трансформира Xbox в гейминг платформа за Windows, комбинирайки простотата на конзолата с огромната екосистема от компютърни игри и приложения.

Как да покажете процента на батерията в лентата на задачите на Windows 11

Как да покажете процента на батерията в лентата на задачите на Windows 11

За да активирате процента на батерията в лентата на задачите на Windows 11, отворете Настройки > Система > Захранване и батерия и включете превключвателя „Процент на батерията“.

Tiny11 ISO е актуализиран до Windows 11 24H2

Tiny11 ISO е актуализиран до Windows 11 24H2

Вече можете да изтеглите Windows 11 24H2 Tiny11 ISO, за да извършите чиста инсталация или надстройка на място без bloatware или ненужни функции.

Как да проверите дали Windows 11 25H2 е инсталиран на вашия компютър

Как да проверите дали Windows 11 25H2 е инсталиран на вашия компютър

За да проверите дали е инсталиран Windows 11 25H2, отворете Настройки > Система > Относно и потвърдете номера на версията. Или използвайте командата winver.

Как да възстановите класическия син PowerShell в Windows Terminal на Windows 11

Как да възстановите класическия син PowerShell в Windows Terminal на Windows 11

Можете да използвате PowerShell със стария син фон в Windows Terminal – ето как да използвате потребителския интерфейс за настройки и settings.json.

Как да се извърши чиста инсталация на Windows 11 25H2

Как да се извърши чиста инсталация на Windows 11 25H2

За да инсталирате Windows 11 25H2 почистете системата, изтеглете ISO файла, създайте стартиращо USB устройство, стартирайте инсталацията, изберете „Инсталиране на Windows 11“ и завършете OOBE (първо стартиране след стартиране).

Компилация 26200.5722 (KB5062669) за издания на Windows 11 25H2 с нови функции (Dev)

Компилация 26200.5722 (KB5062669) за издания на Windows 11 25H2 с нови функции (Dev)

Компилация 26200.5722 (KB5062669) за Windows 11 25H2 в Dev Channel с нови функции, промени и корекции. Версия 24H2 получава компилация 26120.5722.

Компилация 19045.6216 (KB5063709) за Windows 10 отпада като актуализация от август 2025 г.

Компилация 19045.6216 (KB5063709) за Windows 10 отпада като актуализация от август 2025 г.

Microsoft пуска актуализацията Patch Tuesday от август 2025 г. с промени и корекции за Windows 10.

Как да проверите (точно) защо вашият компютър не може да стартира Windows 11

Как да проверите (точно) защо вашият компютър не може да стартира Windows 11

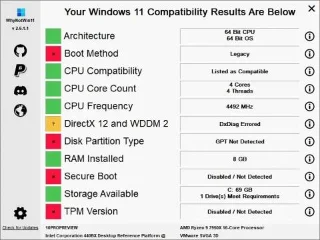
WhyNotWin11 е по-добър от приложението Microsoft PC Health Check, за да ви каже защо вашият компютър не може да стартира Windows 11, включително поддръжката на TPM 2.0 и процесора.

Как да намерите ключа за възстановяване на BitLocker в Windows 11

Как да намерите ключа за възстановяване на BitLocker в Windows 11

За да намерите ключа за възстановяване на BitLocker на вашия компютър в Windows 11 (или 10), отворете онлайн акаунта си в Microsoft и потвърдете възстановяването на страницата „Устройства“.